

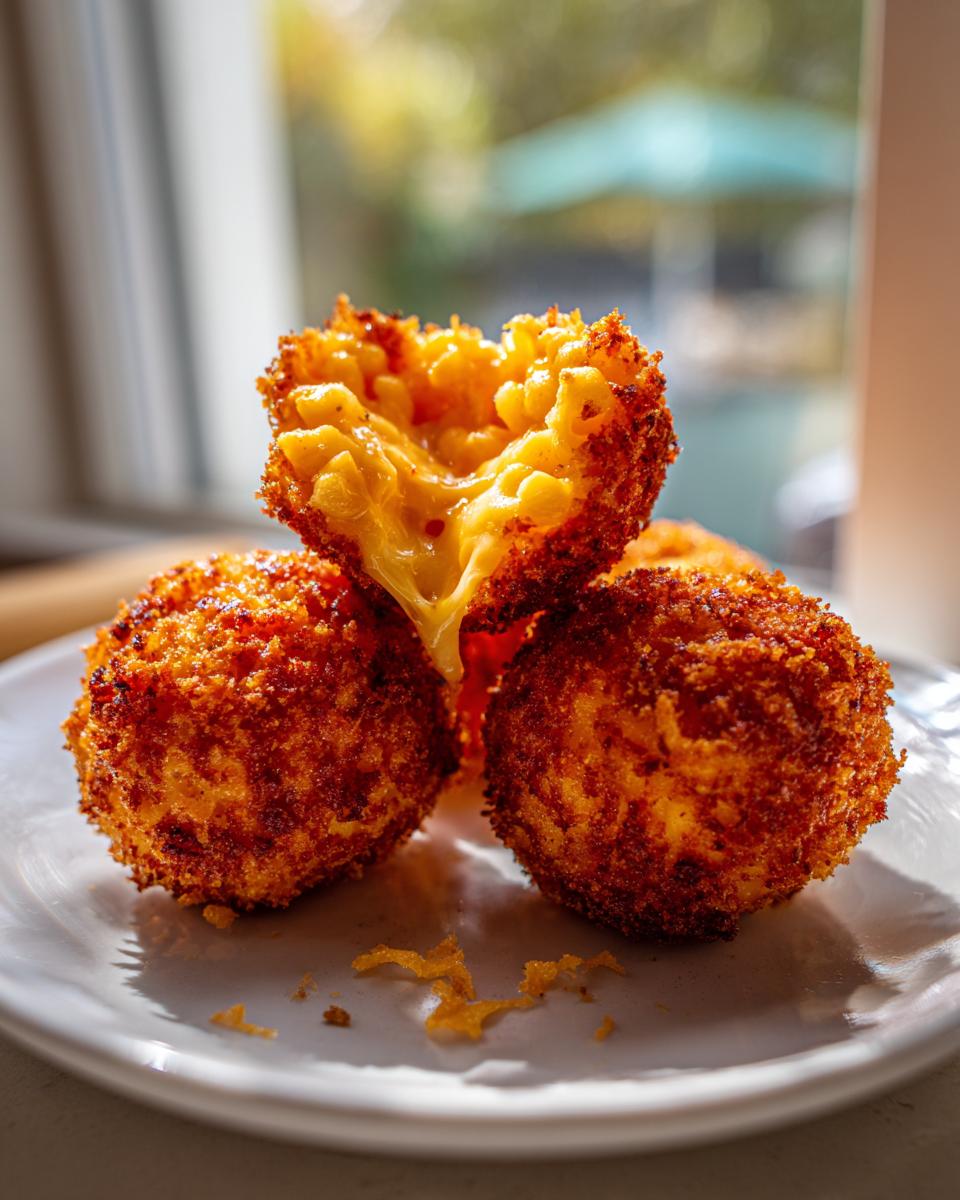
Oh, friends, let’s talk about those deep, primal comfort food cravings that hit you right when you need a snack the most! When I started Bliss Batter, my whole goal, just like my grandmother showed me, was to make sure everyone felt confident whipping up something totally spectacular without needing a fancy culinary degree. And trust me, these fried mac and cheese balls are the pinnacle of spectacular, easy snacking. They are genuinely addictive: shatteringly crispy on the outside, and then that warm, gooey, cheesy center just melts in your mouth. This recipe is one of my most tested—it’s designed to be foolproof so you can focus on the fun part!
If you’re hosting a party or just planning on watching a big game, you absolutely need these in your life. You can find a ton of other crowd-pleasing appetizers right over here at our appetizer collection, but this one is seriously special.
- Why These Are the Best fried mac and cheese balls for Your Next Gathering
- Ingredients Needed for Crispy fried mac and cheese balls
- Step-by-Step Instructions to Make Perfect fried mac and cheese balls
- Expert Tips for Unbeatable fried mac and cheese balls
- Make-Ahead and Storage for Your fried mac and cheese balls
- Serving Suggestions for fried mac and cheese balls
- Frequently Asked Questions About fried mac and cheese balls
- Nutritional Estimate for fried mac and cheese balls
- Share Your Cheesy Creations
Why These Are the Best fried mac and cheese balls for Your Next Gathering
What makes my recipe for fried mac and cheese balls better than the rest? It really comes down to honoring simplicity while perfecting the technique. As Claire Sterling promised, we test these until they are absolutely flawless every time. Here are the two big reasons folks always ask for the recipe:
-
Perfect Texture: Crispy Outside, Gooey Inside
You’ve got to chill it down! Those mandatory chilling and freezing steps aren’t just suggestions, they are the difference between a perfect crispy ball and a melted, oily mess. This careful temperature control locks everything in place so the cheese stays super gooey while the outside gets that incredible crunch.
-
Uses Leftover Mac and Cheese for Quick Prep
I love a recipe that helps manage the kitchen without feeling overwhelming. Seriously, this is the greatest way to repurpose your leftovers! If you made a huge batch of mac and cheese last night, you’re already halfway to having the best party snack ready for game day.
You definitely need to check out my dedicated guide on all things mac and cheese bites if you want even more inspiration!
Ingredients Needed for Crispy fried mac and cheese balls
Gathering your ingredients is the easiest part, especially if you have leftover gooey mac and cheese from the night before! For these amazing fried mac and cheese balls, we’re keeping things straightforward because the technique is where the real magic happens. Before you start measuring anything, seriously, make sure that mac and cheese we use for the base is nice and cold. This is non-negotiable for getting the right shape later on!
If you need a refresher on making the base, I cover all my secrets in my staple mac and cheese recipe.
For the Macaroni and Cheese Base
- Four whole cups of cooked macaroni and cheese. And listen closely: it must be chilled! If it’s warm, it will just turn into mush when you try to roll it.
For the Triple Breading Station
This breading gets them super crispy! We need three shallow dishes set up and ready to go for dredging:
- One cup of all-purpose flour.
- Two large eggs, all beaten up nicely.
- One and a half cups of Panko breadcrumbs—I insist on Panko, they give you way better crunch than standard crumbs!
- One teaspoon of garlic powder.
- Half a teaspoon of salt and just a pinch of black pepper to season that crust beautifully.
Oh, and don’t forget the vegetable oil! You’ll need enough to fill your pot about two inches deep for frying.
Step-by-Step Instructions to Make Perfect fried mac and cheese balls
This is where the fun really starts! We need to make sure everything is cold and ready before hot oil comes anywhere near your counter. Remember, we’re aiming for maximum gooeyness inside, so patience during the chilling stages is key to perfect fried mac and cheese balls.
Chilling and Forming the fried mac and cheese balls
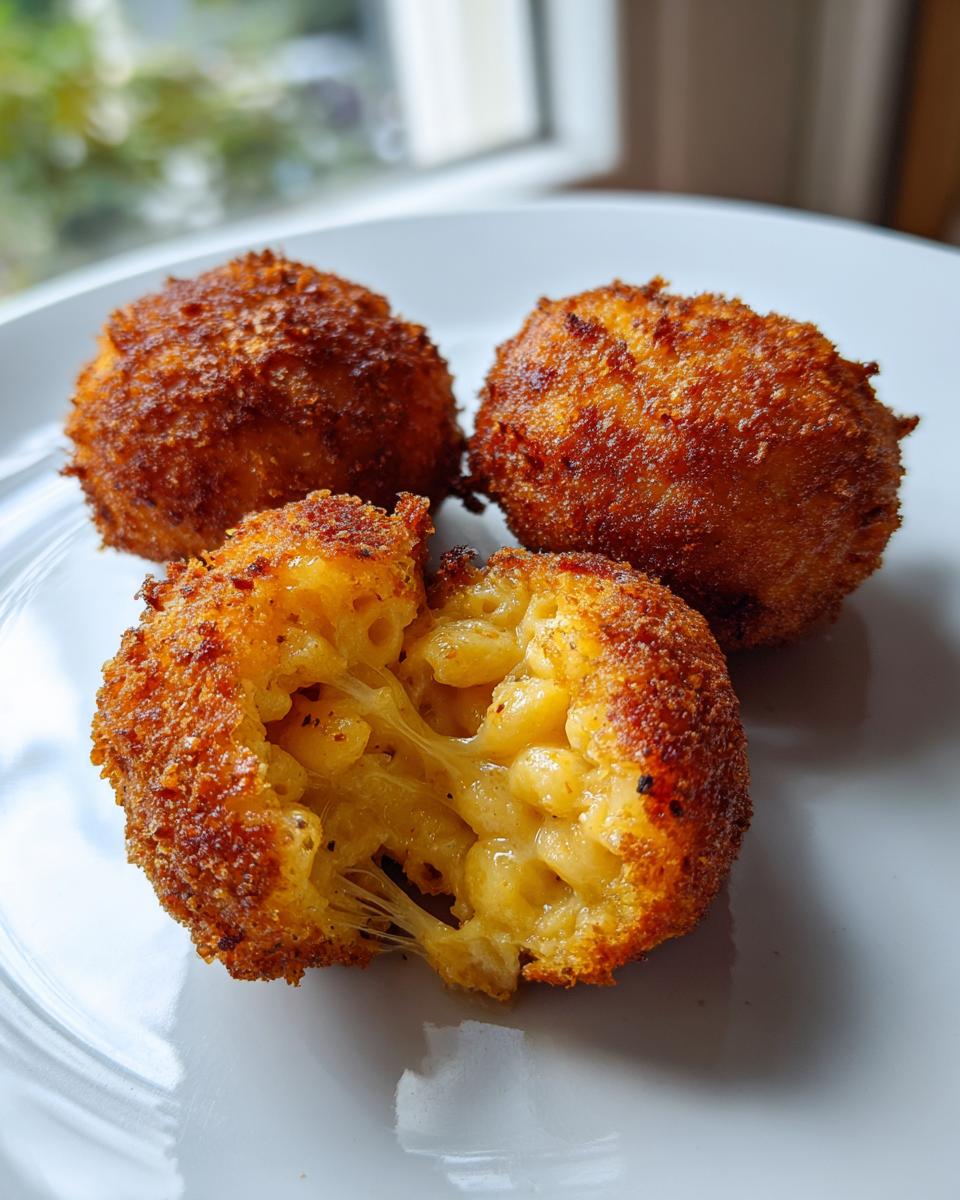
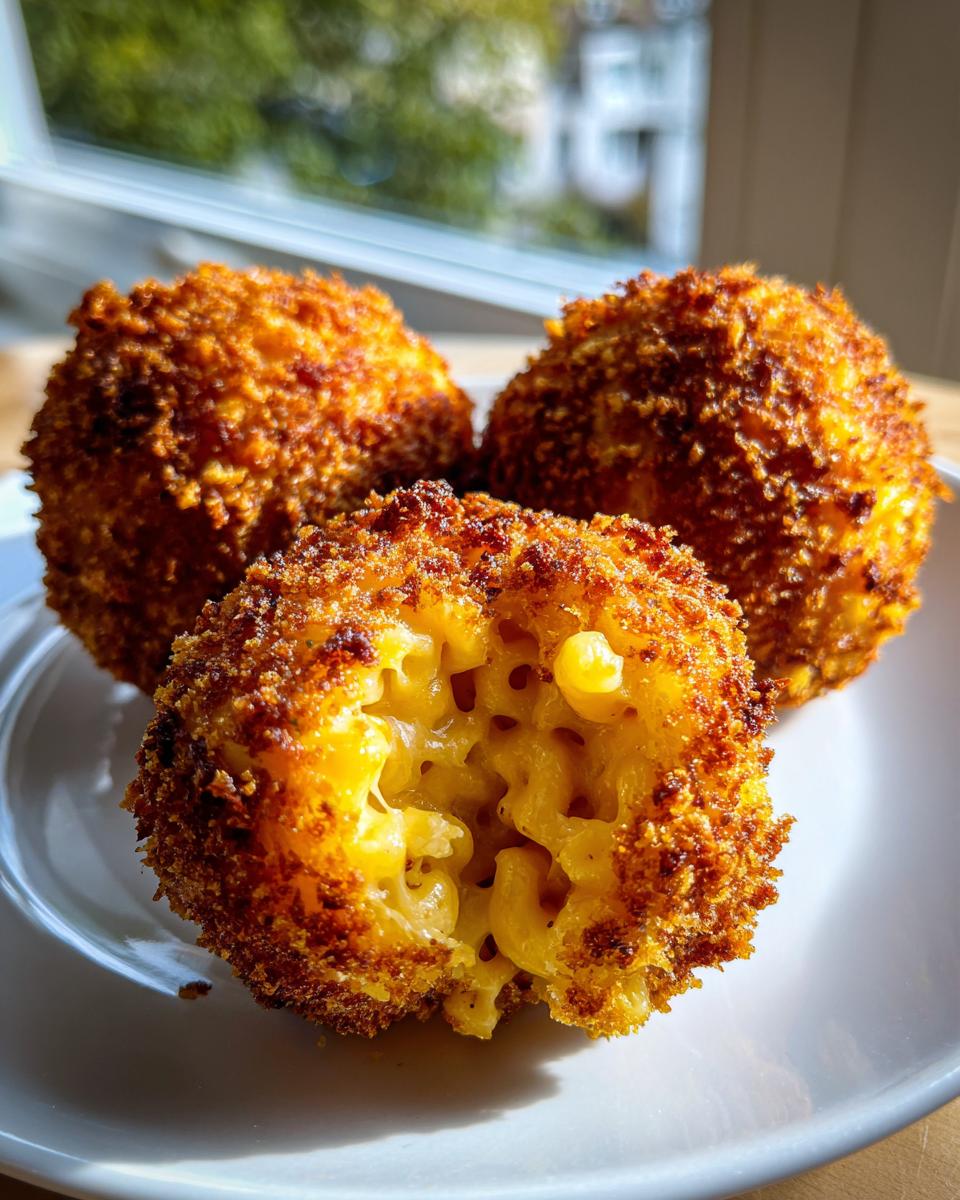
First up, if your mac and cheese isn’t already totally cold—like, refrigerator cold—you need to chill it for at least two hours. Once it’s firm, grab about a tablespoon and a half of the mixture in your hand and roll it gently into a nice, tight ball. Put all those little guys onto a parchment-lined sheet. My secret trick here is freezing them for a solid 30 minutes. This extra freeze makes them unbelievably sturdy for dredging!
Setting Up the Breading Station
Now, let’s build our assembly line! Clear three shallow dishes. In the first, add your cup of plain flour. In the second, whisk those two eggs until they are nice and frothy. The third dish is where we season our crunch: mix the Panko breadcrumbs with the garlic powder, salt, and pepper. Make sure that seasoning gets distributed evenly throughout the Panko so every bite of your fried mac and cheese balls is flavorful.
The Frying Process for Golden Results
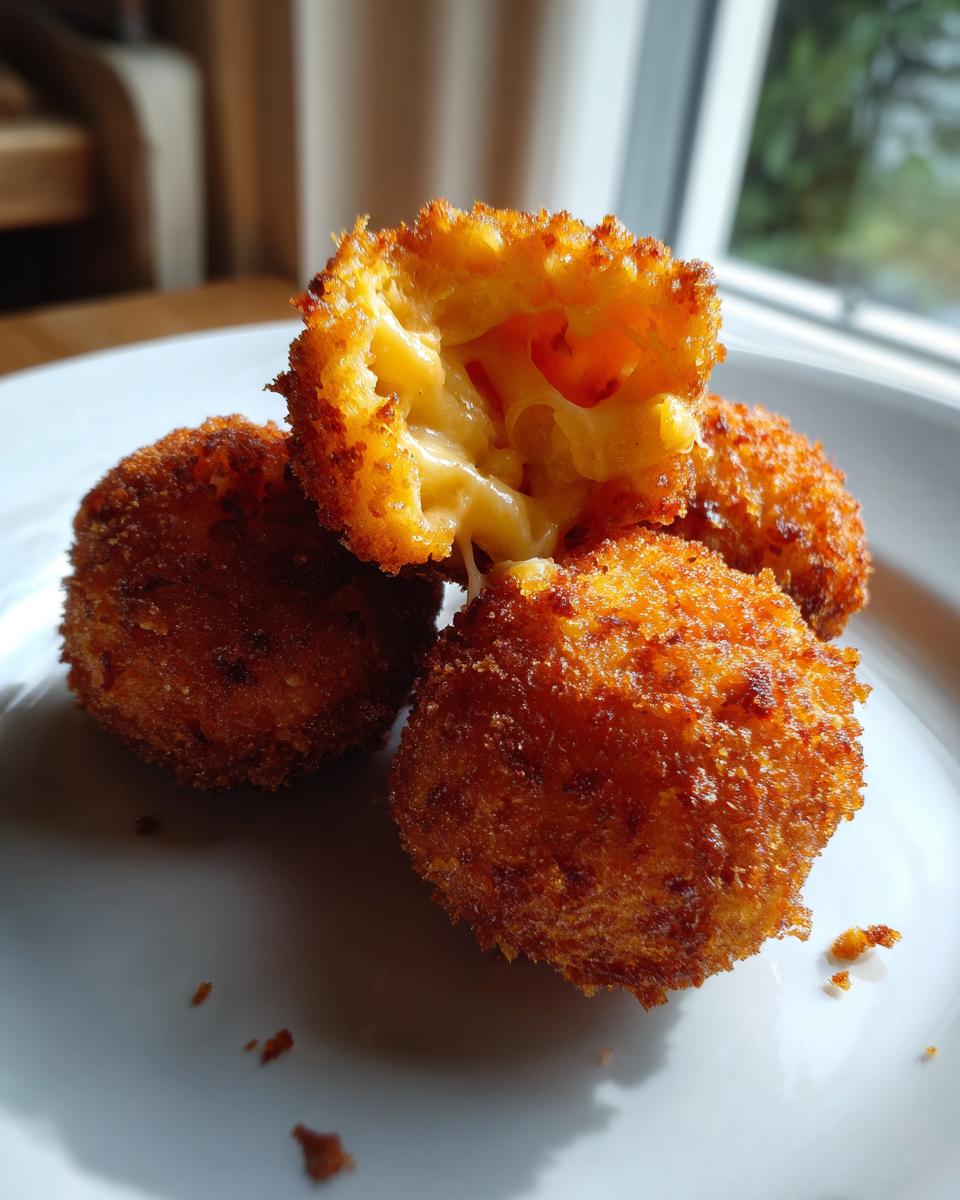
Time to heat the oil! You want a deep pot filled about two inches with vegetable oil, brought up to 350 degrees Fahrenheit (that’s 175 Celsius). Don’t guess the temperature; use a candy thermometer! Carefully drop in only about 4 or 5 balls at a time—we don’t want to dump them all in and drop the oil temperature, which leads to soggy snacks. They only need 2 to 3 quick minutes, turning them gently until they are gloriously golden brown all over. Scoop them out onto paper towels immediately so they can drain off that extra oil.
For more tips on timing and prep, especially if you need quick appetizers, you might find my post on deep dish cooking methods gives you inspiration for managing heat control!
Expert Tips for Unbeatable fried mac and cheese balls
Okay, now that you have the basic steps down, let’s talk finesse! Getting these fried mac and cheese balls perfect—golden, crunchy, and totally intact—comes down to a few small things I learned through trial and error (mostly error back in the day, oops!). My goal here is always to give you the tested, perfected recipe so you don’t have to waste time on the messy parts.
Achieving Maximum Crispness with Panko
I cannot stress this enough: regular breadcrumbs just aren’t going to cut it here. You absolutely must use Panko breadcrumbs. They are Japanese-style flakes, right? They are much lighter and flakier than the finely ground crumbs we usually keep on hand. When they hit that hot oil, they puff up just a tiny bit, which creates microscopic pockets of air. That’s what gives you that signature, shatteringly crisp armor around the cheese. It’s a totally different texture, trust me!
Oil Temperature Control: The Secret to No-Burst Balls
This is probably the single most important piece of advice I can give you for frying anything, especially something as delicate as a ball of cheesy mac. If your oil isn’t hot enough—say, below 325°F—the breading soaks up all that grease before it can crisp up, making your fried mac and cheese balls soggy and heavy. Yuck!
But here’s the flip side: if the oil is screaming hot—like over 375°F—the outside will brown and burn in about 30 seconds flat, leaving you with raw, molten cheese inside. We are aiming for that sweet spot right at 350°F. That temperature is hot enough to quickly seal the coating and crisp up the Panko while allowing the interior to wonderfully melt without escaping. Always use a dedicated thermometer, please!
If you need inspiration for other simple, foolproof recipes that use controlled heat, maybe take a peek at my soft pretzel tutorial—it relies on similar timing principles!
Make-Ahead and Storage for Your fried mac and cheese balls
One thing I love about these snacks—besides the taste, obviously—is that they are perfect for planning ahead! You can totally assemble your fried mac and cheese balls right up until they are breaded. Once they are fully coated in that seasoned Panko, just pop them onto the baking sheet and slide them into the freezer. They’ll keep beautifully for up to a month, which is amazing for party prep!
Now, if you fry them straight from frozen, don’t worry, it’s easy. You just need to add about a minute or two to that cook time we talked about to make sure the center is perfectly warm. If you are looking for other make-ahead appetizers, you should see my recipe for crockpot BBQ meatballs; it’s a lifesaver during busy weekends!
Serving Suggestions for fried mac and cheese balls
Okay, congratulations, your balls are golden, crispy, and ready! But honestly, what is a perfect fried snack without the perfect dip? Dipping is half the fun, right? These fried mac and cheese balls are hearty, so you want a bright or tangy sauce to cut through that rich, sharp cheese.
The classics are the classics for a reason. You absolutely must offer a classic, warm marinara sauce. The tomato acidity is just wonderful against the fried crust. And if you have a crowd that loves cool, creamy ranch dressing, definitely put a bowl out. My sister swears by it!
If you want to step it up just a tiny bit, try making a quick spicy aioli. It’s super easy: just grab some good quality mayonnaise, mix in a little garlic powder, a squeeze of lemon juice, and a dash of your favorite hot sauce. It gives you that cool, creamy element but with a little kick to wake up those taste buds. For more dip inspiration, you should see my incredibly creamy homemade queso recipe—it works great for dipping these too!
Frequently Asked Questions About fried mac and cheese balls
Okay, FAQs! These are always the questions I get asked most after people try my recipes. You’re probably wondering about substitutions or how long these tasty little fried mac and cheese balls last once they come out of the oil. I’ve got the quick answers right here for you!
Can I bake these fried mac and cheese balls instead of frying?
You totally can, and I know some of you are trying to keep things lighter! If you bake them, you’ll need to spray them very generously with oil first, maybe even use your air fryer. But here is my honest opinion: frying is what gets you that signature, crunchy crust. Baking them will result in something that is more like a baked mac and cheese bite—still tasty, yes, but you lose that extreme textural contrast we worked so hard for!
What kind of macaroni and cheese works best for these bites?
The very best, hands-down, is the firm, cold mac and cheese you have left over from the fridge. It needs to hold its shape when you scoop it! If you are making it specifically for this recipe—and not using leftovers—I suggest something sharp, like a good sharp cheddar mixed maybe with a tiny bit of Gruyère for that nutty flavor. But whatever you use, it must be thick enough to handle being rolled tightly into balls!
How long do these stay crispy after frying?
This is the tricky part about deep-fried appetizers! When they are fresh out of the oil and sitting on that wire rack, they are perfect. Honestly, for the best experience, you should eat them within the first 10 to 15 minutes. After about 20 minutes, the moisture from the warm cheese inside starts to soften that beautiful Panko coating slightly. They are still delicious, but that initial *crunch* begins to fade a bit. If you are making them for a party, try to time them so they come out right before serving!
If you need more snack-making advice, jump over to my guide on making perfect little jalapeno poppers—timing is key there too!
Nutritional Estimate for fried mac and cheese balls
Alright, let’s talk fuel for all that fun! Since every batch of mac and cheese base is a little different—depending on how much cheese versus milk you pack in there—these numbers are just an estimate. Think of this as a general guideline for two of these glorious fried mac and cheese balls. Remember, we’re aiming for pure comfort here, not necessarily a light snack!
- Serving Size: 2 balls
- Calories: 350
- Fat: 22g
- Carbohydrates: 28g
- Protein: 10g
This information assumes you’re using a standard sharp cheddar base. If you use a lighter cheese, your values will shift, but wow, are they worth it!
Share Your Cheesy Creations
Whew! You made it through the chilling, the breading, and survived the deep fryer—that means you’re now in possession of some of the best, crispiest fried mac and cheese balls known to humankind! I just love hearing about your kitchen adventures.
Once you’ve served these up for your next party or game day, please come back here and let me know how it went. Did your family devour them in five minutes flat? Did you try a special dip that knocked everyone’s socks off? Drop a rating below or leave me a comment so I can see your success stories!
If you have any burning questions that I missed in the FAQ, or if you just want to send me a virtual high-five, you can always reach out via my contact page. Happy snacking, everyone, and thank you for baking with Bliss Batter!
PrintCrispy Fried Mac and Cheese Balls

Make these fried mac and cheese balls for an easy party appetizer. They are crispy outside, creamy inside, and perfect for game day or snacking.
- Prep Time: 20 min
- Cook Time: 10 min
- Total Time: 30 min
- Yield: About 16 balls 1x
- Category: Appetizer
- Method: Deep Frying
- Cuisine: American
- Diet: Vegetarian
Ingredients
- 4 cups cooked macaroni and cheese (leftover works well)
- 1 cup all-purpose flour
- 2 large eggs, beaten
- 1 1/2 cups panko breadcrumbs
- 1 teaspoon garlic powder
- 1/2 teaspoon salt
- 1/4 teaspoon black pepper
- Vegetable oil, for frying
Instructions
- If your macaroni and cheese is soft, chill it in the refrigerator for at least 2 hours until firm enough to roll.
- Scoop about 1.5 tablespoons of the chilled mac and cheese and roll it into a ball shape. Place the formed balls on a baking sheet lined with parchment paper. Freeze for 30 minutes to firm up further.
- Set up a breading station with three shallow dishes. Place the flour in the first dish. Whisk the eggs in the second dish. Mix the panko breadcrumbs, garlic powder, salt, and pepper in the third dish.
- Take the chilled mac and cheese balls and dredge each one in the flour, shaking off any excess.
- Dip the floured ball into the beaten egg mixture, letting any extra drip off.
- Roll the egg-coated ball thoroughly in the seasoned panko breadcrumbs until completely covered. Press gently to help the crumbs adhere.
- Pour vegetable oil into a deep pot or Dutch oven to a depth of about 2 inches. Heat the oil to 350 degrees Fahrenheit (175 degrees Celsius).
- Carefully place 4-5 balls into the hot oil, ensuring you do not overcrowd the pot. Fry for 2-3 minutes, turning occasionally, until they are golden brown and crispy.
- Remove the fried balls with a slotted spoon and place them on a wire rack lined with paper towels to drain excess oil.
- Serve immediately while warm. These pair well with marinara sauce or ranch dressing.
Notes
- You can prepare the breaded balls ahead of time and freeze them on the baking sheet for up to one month. Fry directly from frozen, adding a minute or two to the cooking time.
- For a different flavor profile, consider adding a pinch of smoked paprika to your breadcrumb mixture.
- If you are looking for simple ways to manage your weekly meals, consider using a meal planning approach to incorporate leftovers like this.
Nutrition
- Serving Size: 2 balls
- Calories: 350
- Sugar: 3
- Sodium: 550
- Fat: 22
- Saturated Fat: 10
- Unsaturated Fat: 12
- Trans Fat: 0.5
- Carbohydrates: 28
- Fiber: 1
- Protein: 10
- Cholesterol: 75