

Oh, I know that feeling. The calendar flips to November (or December!), and suddenly that beautiful holiday feast feels less like joy and more like a giant, intimidating bird waiting in the freezer. We all stress about cooking the perfect turkey and ending up with that dry, sad centerpiece everyone politely pretends to enjoy. Stop right there! That panic ends today, my friends. I’ve spent years perfecting my Unforgettable Roast Turkey Recipe, and I promise, this herb butter method is your absolute shortcut to achieving true excellence. We’re going for that guaranteed Juicy Turkey Guide
result without breaking a sweat. You’ve got this!
- Why This Herb Butter Roast Turkey Recipe Guarantees a Juicy Turkey Guide Result
- Gathering Ingredients for Your Ultimate Roast Turkey Recipe
- Step-by-Step Instructions for Perfect Turkey Cooking Times
- The Essential Resting Period for Your Holiday Centerpiece Bird
- Tips for Success: Achieving the Best Roasted Turkey
- Serving Suggestions for Your Savory Turkey Dinner
- Storing and Reheating Leftover Turkey
- Frequently Asked Questions About Roasting Turkey
- Share Your Perfect Turkey Success
- Share Your Perfect Turkey Success
Why This Herb Butter Roast Turkey Recipe Guarantees a Juicy Turkey Guide Result
So, why do I swear by this herb butter technique? It all comes down to moisture protection. We are creating a flavorful shield right where it matters most—underneath the breast skin! By rubbing that wonderful mixture of fresh herbs and butter directly onto the meat before it even sees the oven, we are locking in every bit of juice. This is the secret to that perfect Moist Turkey Technique
everyone dreams about.
Also, that initial blast of high heat—425°F, wow!—is key to achieving that shimmering Crispy Skin Turkey
finish. It shocks the skin into crisping up fast, locking in all the goodness before we drop the temperature down for a gentle roast. If you’re looking for a reliable way to avoid a dry bird, I highly recommend pairing this method with a good brine beforehand, like the one I detailed here: my favorite turkey brine.
Our Simple Turkey Preparation Promise
When I started sharing this, my goal was simple: to create an Easy Holiday Turkey
recipe that works for everyone, not just pastry artists! I’ve tested this method dozens of times in my own kitchen—through messy early trials and perfect holiday runs—and I promise it’s straightforward. You don’t need fancy equipment; you just need good butter and faith in the process. We work out all the kinks so your holiday centerpiece comes out beautifully, just like you pictured it.
Gathering Ingredients for Your Ultimate Roast Turkey Recipe
Okay, now for the fun part: gathering our amazing ingredients! When it comes to a holiday centerpiece bird, the ingredients have to be right, because we aren’t hiding behind a heavy sauce—we want the flavor of the bird and the herbs to shine. I’ve listed everything you need below, but pay close attention to the prep details; that’s where the magic starts to happen even before we turn on the oven.
- 1 (12-14 pound) whole turkey, thawed—Make sure it’s fully thawed! Nothing is worse than starting dinner on Thanksgiving morning!
- 1 cup unsalted butter, softened—And I mean truly softened, like finger-print soft, not melted soup.
- 1/4 cup fresh rosemary, chopped—Yes, fresh! Trust me on this one.
- 1/4 cup fresh thyme leaves
- 2 tablespoons fresh sage, chopped
- 4 cloves garlic, minced
- 1 tablespoon kosher salt
- 1 teaspoon black pepper
- 1 large onion, quartered
- 1 lemon, halved
- 1 cup chicken broth—This goes in the bottom of the pan to keep things steamy! If you want to skip the broth, I have an amazing, foolproof gravy recipe that uses the drippings instead!
- 2 tablespoons olive oil
Ingredient Notes and Substitution Tips
This recipe really relies on the impact of the fresh aromatics. For the best Herb Butter Turkey
flavor, please use fresh rosemary, thyme, and sage. Dried herbs just don’t release that deep, earthy perfume when they melt into the butter. If you absolutely must substitute the fresh herbs, use about half the amount in dried herbs, but the browning might be a bit different.
If you’re out of chicken broth for the pan base, water works in a pinch, but the broth adds richness to the pan drippings we’ll eventually use. Also, remember—we separate the skin from the breast meat before applying the butter. That’s the key to keeping the white meat juicy while the outer skin gets beautifully brown and crisp. No substitutes for that step, okay? It’s crucial!
Step-by-Step Instructions for Perfect Turkey Cooking Times
Alright, let’s get this magnificent bird ready for the oven! We are roasting this beauty using a two-temperature method, which helps us nail the crust while keeping the inside tender. The goal here is achieving those ideal Perfect Turkey Cooking Times
so you aren’t hovering anxiously near the stove all day. This whole process is what makes it a truly impressive Oven Roasted Turkey!
Preparing the Herb Butter and Initial Steps
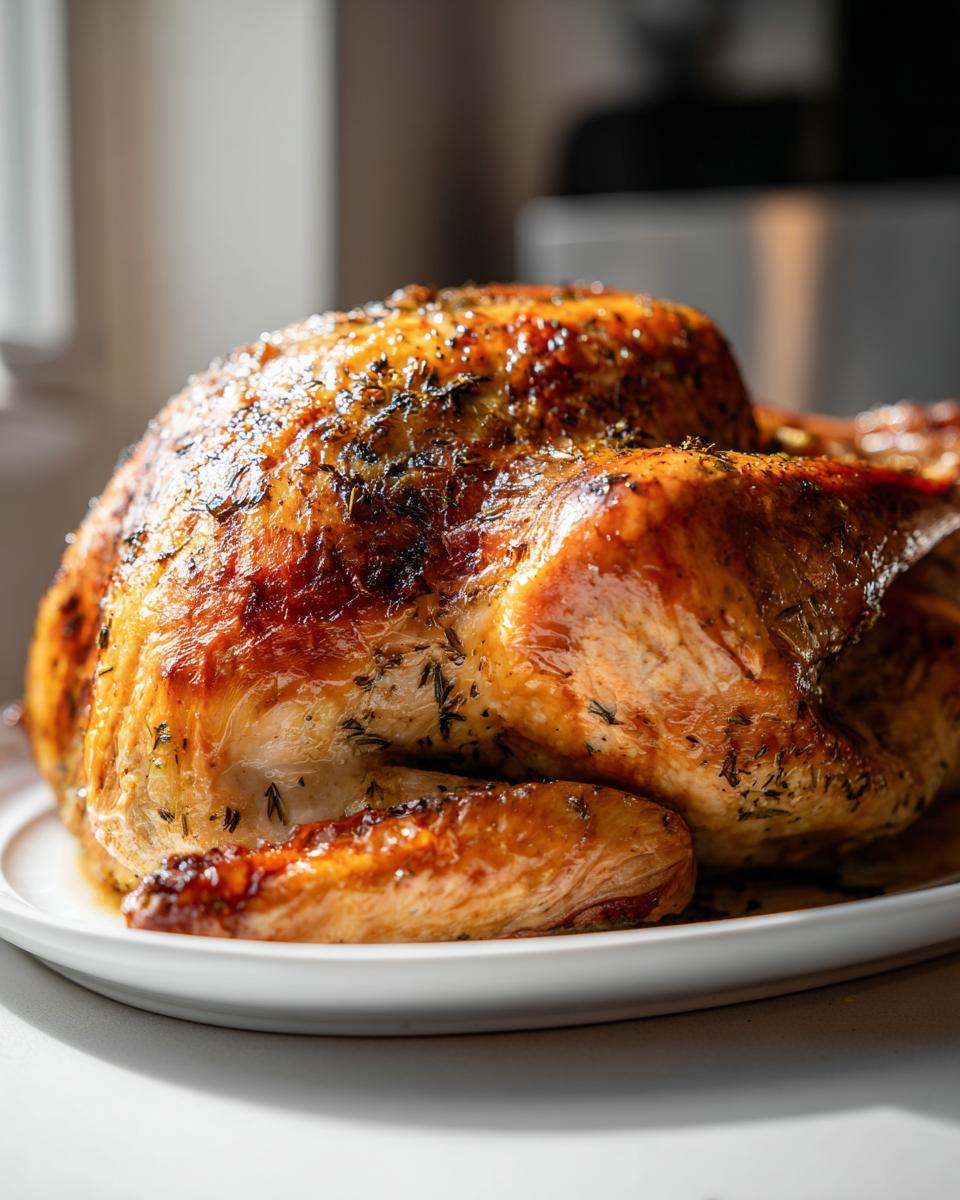
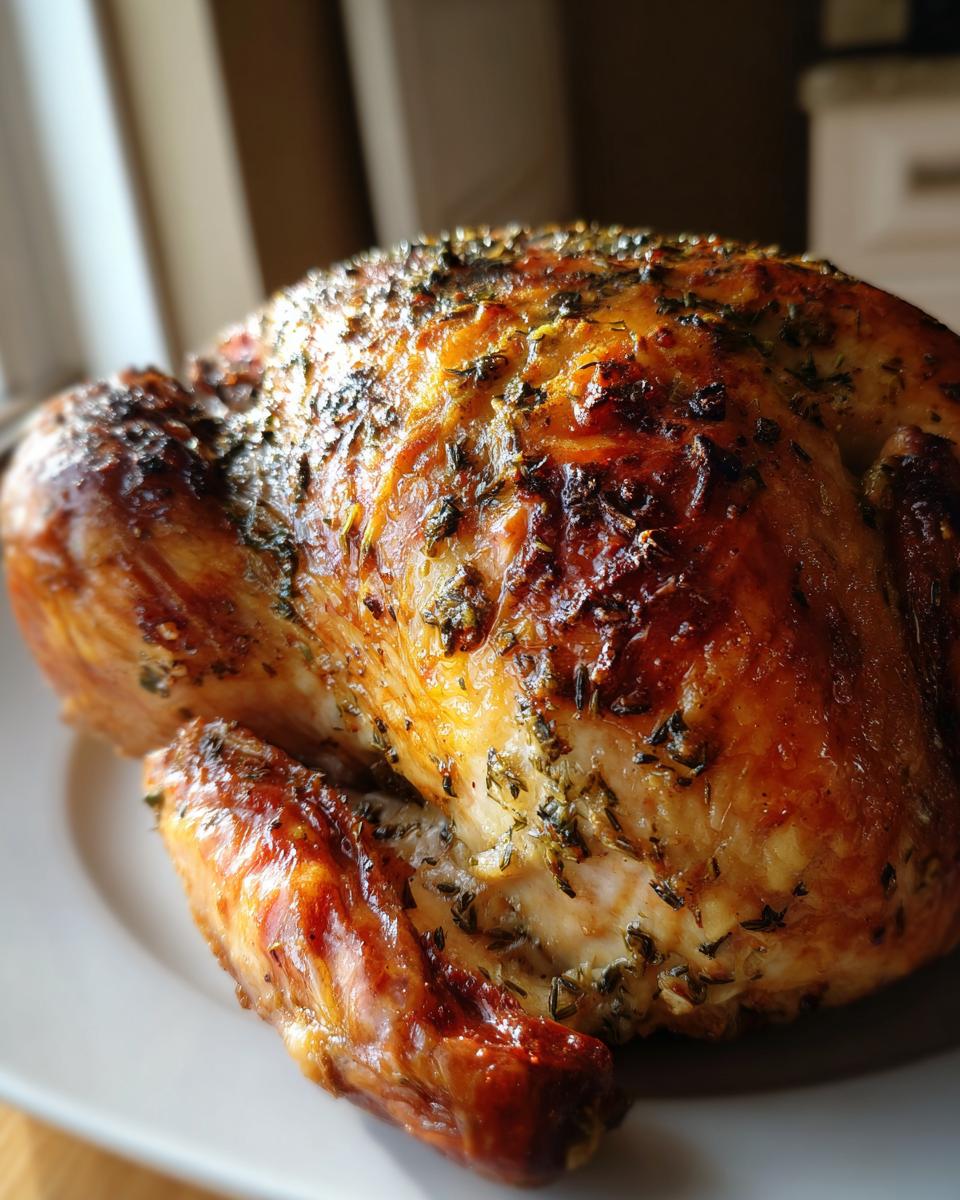
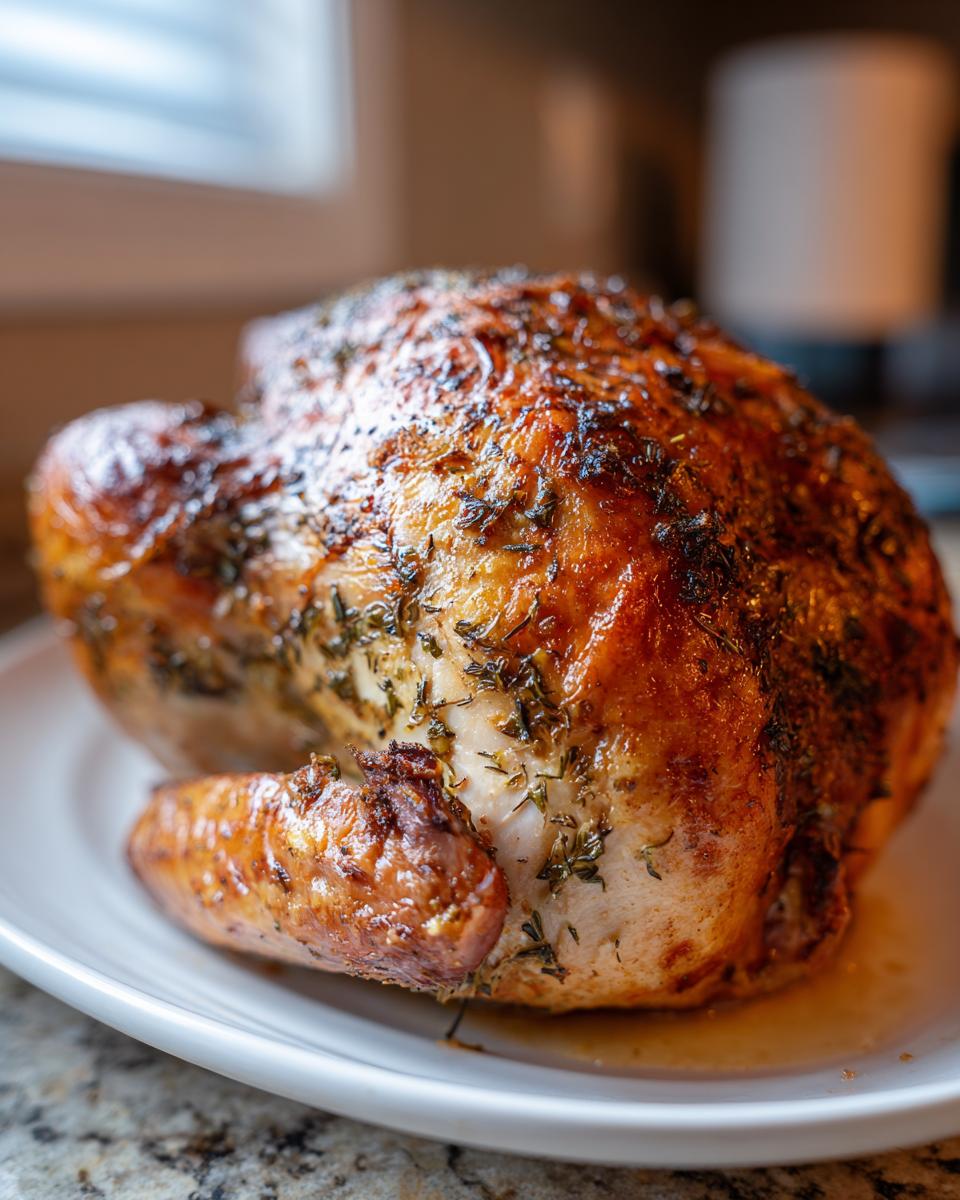
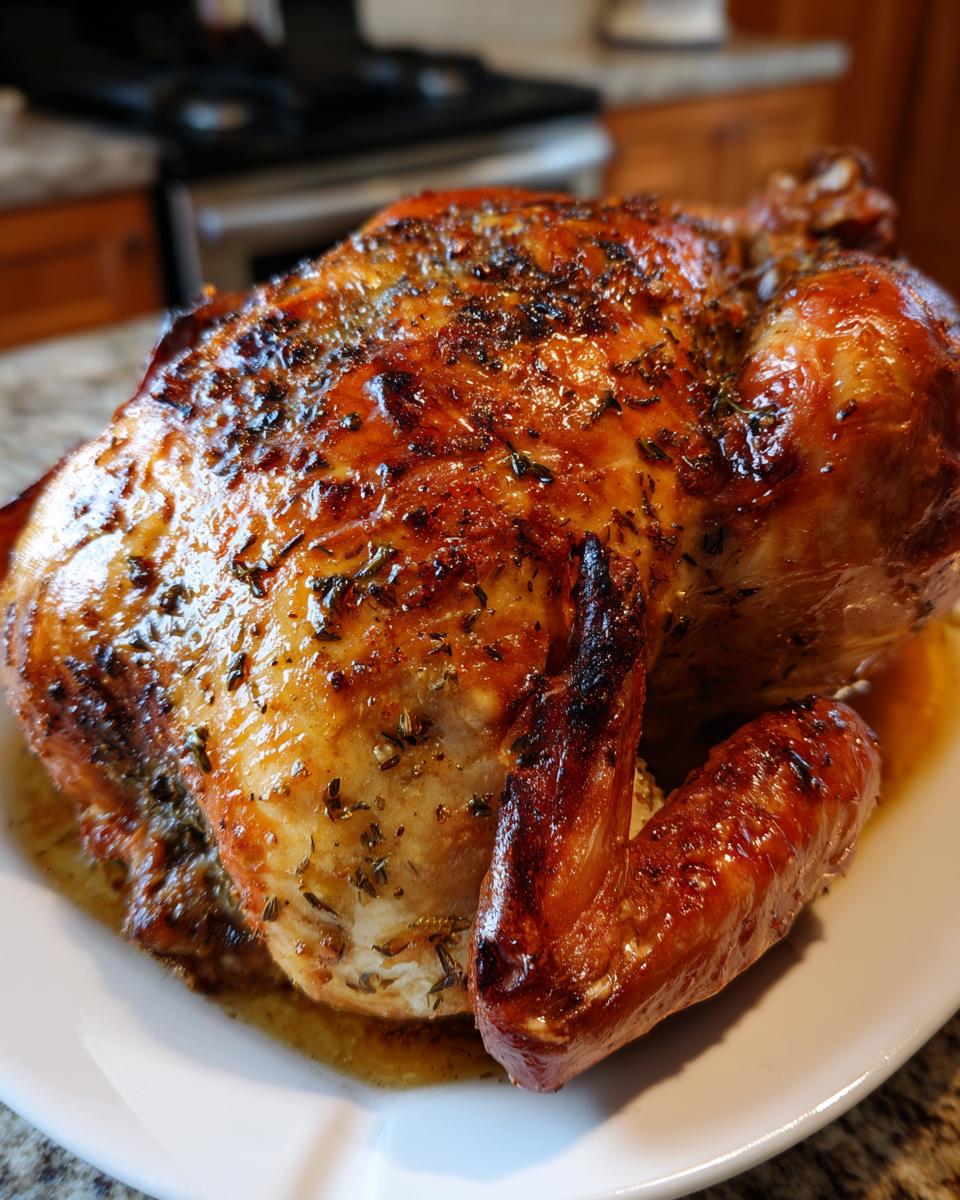
First things first: Pat that whole turkey absolutely bone dry, inside and out, using paper towels. I cannot stress this enough—dry skin means Crispy Skin Turkey
later, wet skin means rubbery skin! Once it’s dry, gently work your fingers between the skin and the breast meat. Take half of that amazing herb butter you made and rub it directly onto the meat under the skin. Then, just cover the outside with the rest of that herbaceous goodness. Pack the cavity with the onion and lemon, pour the broth into the pan bottom, and we’re ready for the blast!
Roasting Technique for a No Dry Turkey Recipe
Preheat your oven to a hot 425°F. We roast at this high temperature for just 30 minutes to get that skin going. Then, drop the temperature down immediately to 325°F to finish the cooking gently. This two-step method is the key to being a No Dry Turkey Recipe
pro! Remember to baste it with pan juices every 45 minutes. If you see the breast getting too dark before the center is done, just loosely tent it with foil. That simple temperature adjustment will save your holiday dinner, I promise!
While we are focusing on the main dish, always have those sides ready to go! If you want mashed potatoes that taste like they took sixteen hours but only took thirty minutes, you absolutely have to try my foolproof creamy holiday side suggestion. They are the perfect partner for this savory bird!
The Essential Resting Period for Your Holiday Centerpiece Bird
Okay, listen up, because this is where most people rush, and rushing is the enemy of the Juicy Turkey Guide
! Once that thermometer hits 165°F, you must, absolutely must, pull that bird out of the oven. I know the smell is intoxicating, and you’re starving, and that roasting pan is screaming “carve me now!” But hold tight. That bird needs a vacation.
This resting time is critically important for moisture retention. Think about it: while the bird was roasting, all those delicious juices were rushing frantically to the center to keep it from drying out or being undercooked. If you cut into it immediately, those juices just spill right out onto the cutting board—that’s why everyone ends up with dry breast meat!
By letting it rest, loosely tented with foil, you give those muscle fibers time to relax and reabsorb all those tasty liquids. I insist on a minimum of 30 minutes for a bird this size—40 minutes is even better if you can manage it! Use that time to mix up a batch of my super soft homemade dinner rolls or just pour yourself a glass of something to celebrate! That wait guarantees every single slice fulfills the promise of a moist holiday centerpiece bird.
Tips for Success: Achieving the Best Roasted Turkey
Phew! We’ve got the herb butter on, we’ve handled the temperature spikes, and we’re being patient during the crucial rest. But if you want to elevate this roast from “great” to the one everyone asks about next year, I have a few more insider little secrets from my testing days that really push it over the top. These aren’t in the main steps because they are optional, but wow, do they deliver!
First up, remember that baking powder trick I mentioned in the notes? Seriously, try it! If your skin is looking a little pale after the initial blast but you still have another hour of roasting, whisk about a teaspoon of regular baking powder into a tablespoon of melted butter and brush it over the skin. It sounds nuts, I know, but the baking powder helps lift the skin structure so it crisps up like spun sugar. It’s my favorite little hack for guaranteeing beautiful color.
Secondly, let’s talk about that thermometer. Forget the little plastic pop-up timer that comes with the bird—throw that thing away! The only reliable way to guarantee perfect Best Roasted Turkey
results and hit that sweet spot is using a dependable digital meat thermometer. You need to check the deepest part of the thigh, making sure your probe isn’t touching bone, and it needs to read 165°F. If you’re worried about drying out the breast meat while the thigh catches up, try stuffing your herbs and aromatics (onion/lemon) up under the skin toward the breast, creating a little pocket of protection there.
Finally, if you are making stuffing, please roast it separately! I know tradition calls for stuffing the bird, but stuffing insulates the center of your roast, which throws off all the timing and often leads to us overcooking the meat just trying to get the dressing safe. If you absolutely must cook it inside, make sure you have a reliable thermometer that you stick right into the center of the stuffing, as that needs to hit 165°F too. For my classic, foolproof recipe that stays perfectly moist and savory, check out my Classic Stuffing Recipe—it’s much less stressful cooked outside the bird!
Serving Suggestions for Your Savory Turkey Dinner
Now that we’ve mastered the bird, let’s talk about what deserves to be next to this beautiful, juicy centerpiece! Since we used all those lovely fresh rosemary and thyme notes in the butter, we want sides that really sing alongside that savory flavor. Forget boring mashed potatoes; you need my famous Brown Butter Mashed Potatoes—the richness of the brown butter plays so well with the roasted herbs. This bird deserves the best!
Pairing Ideas for Your Christmas Turkey Feast
For a true Christmas Turkey Feast
vibe, you should elevate everything! Beyond the potatoes, consider keeping the sides bright. A quick side of roasted root vegetables seasoned simply with salt, pepper, and a tiny drizzle of olive oil lets the flavor of the main dish shine. And, of course, if you are serving this roast turkey for the holidays, you simply have to have homemade gravy ready to go. You can find my favorite recipe that utilizes all the pan drippings over here, which everyone loves!
This roast turkey is a showstopper all on its own, but these pairings help make the whole meal unforgettable. If you want even more inspiration for a golden bird, you might love checking out the incredible dish someone created over at Kitchen Rage; their techniques are just fantastic!
Storing and Reheating Leftover Turkey
The big feast is over, but the delicious memories—and the leftovers!—still linger. The goal now is to treat those glorious bits of roasted meat right so they don’t turn into dry disappointments later in the week. Remember how much effort we put into keeping that bird moist? We need to honor that effort when we store and reheat it!
For storage, safety is key. Slice the meat off the bone as soon as the bird has cooled down enough to handle safely. Don’t let it sit at room temperature for more than two hours, okay? Divide the meat into shallow, airtight containers. Storing it in very thin layers or small batches helps it cool down faster in the fridge, which is crucial for food safety. This should keep it perfectly fine for about three to four days in the refrigerator.
Now, for reheating, the enemy is dry heat! Never, ever try to reheat thin slices uncovered in a hot oven—that’s just asking for chewy meat. The best way to resurrect those savory slices is to introduce a little moisture back into the equation. You can lightly dunk the slices into warm chicken broth or use the reserved pan drippings, just warming them up gently on the stovetop over low heat. This adds moisture back into the muscle fibers.
Alternatively, low and slow is the way to go in the oven. Place your slices in a baking dish, pour a little broth or stock over the bottom—just enough to cover the bottom of the pan, not submerge the meat—cover the dish tightly with foil, and heat it at a very low 300°F until warmed through. This gentle steam bath prevents the meat from tightening up.
If you’re looking for a whole new delicious way to use up those leftovers that tastes nothing like the original dinner, you absolutely must try making soup! I have a fantastic leftover turkey soup recipe that turns delicious leftovers into a comforting meal everyone will slurp up!
Frequently Asked Questions About Roasting Turkey
Even with the best recipe in hand, you might have a few little wobbles of doubt right before you tackle your first holiday bird. That’s totally normal! I’ve gathered up the most common questions I hear from folks trying this Roast Turkey Recipe
for the first time. Don’t let these little technical things stop you from making your Savory Turkey Dinner
masterpiece!
How do I know when my turkey is done?
This is the big one, isn’t it? Forget waiting for the little plastic popper the factory puts in the bird—that’s unreliable! For the most accurate result and to ensure we meet that Moist Turkey Technique
goal, you must use a reliable instant-read thermometer. You’re checking two places: the deepest part of the thigh, avoiding the bone, and the thickest part of the breast. Both spots need to register 165°F. If you pull it out right at that temperature, the resting period will carry it perfectly to doneness without drying out.
Can I skip the herb butter?
Oh, you could, but why would you want to skip the flavor? The herb butter is what guarantees that wonderful aromatic infusion we talk about in this Best Roasted Turkey
process! If you absolutely can’t use butter—maybe due to an allergy—you can swap it for olive oil mixed with the same herbs and garlic. However, the butter helps the skin brown beautifully, so if you use just oil, make sure you use that little baking powder trick I mentioned earlier to help the skin crisp up. You’ll find more guidance over on Wear Site about general roasting that backs up skin technique!
What size roasting pan do I need for a 14-pound bird?
A good rule of thumb is to have at least two inches of clearance on all sides of your bird for even cooking and proper air circulation. For a 14-pound turkey, a sturdy roasting pan that is at least 16 inches long and 12 inches wide is usually perfect. Make sure your pan fits comfortably in your oven with room around it for air to flow—this helps prevent uneven cooking. If your pan seems a bit snug, consider pulling out one of the oven racks to give it more space on the bottom.
Do I need to brine if I’m using this herb butter recipe?
That’s such a great question! Since this recipe already has internal butter helping keep the meat juicy, a short brine or soak beforehand isn’t strictly *necessary*, but it truly elevates the flavor and makes it an almost guaranteed Juicy Turkey Guide
. If you have the time, a simple dry brine for 24 hours works wonders, or you can use my wet brine recipe here. It adds an extra layer of seasoning right into the meat fibers. If you skip the brine, just make sure you are generous with the salt in that herb butter!
And hey, if you end up with lots of flavorful leftovers, don’t just toss them in a sad sandwich—turn it into something amazing! I have a wonderful recipe for a Turkey Pot Pie that uses up all those savory bits perfectly.
Share Your Perfect Turkey Success
I truly hope this guide takes the stress out of your holiday cooking and helps you achieve the most gorgeous, juicy bird you’ve ever made. If you follow these steps for your Roast Turkey Recipe
, I know you’ll be so proud of the final result!
When you bake this—whether it’s for Thanksgiving or a joyful Christmas Turkey Feast
—please come back and leave a star rating below! I love hearing about your results and seeing your beautiful centerpiece birds on social media. Tag me in your photos so I can cheer you on. If you followed my tips, I hope this was definitely your Best Roasted Turkey
yet. Happy cooking, and let’s make some delicious memories together!
For more tried-and-true home baking and roasting confidence, feel free to browse all my reliable guides, like this one for a simple roast chicken alternative, just in case you need a smaller bird next time!
PrintThe Ultimate Juicy Herb Butter Roast Turkey for Holidays
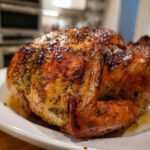
Follow this simple, step-by-step guide to create a perfectly golden, incredibly juicy roast turkey with crispy, flavorful skin. This herb butter method is the secret to a stress-free holiday centerpiece.
- Prep Time: 30 min
- Cook Time: 3 hr 30 min
- Total Time: 4 hr 0 min
- Yield: 10 servings 1x
- Category: Holiday Main Dish
- Method: Roasting
- Cuisine: American
- Diet: Low Fat
Ingredients
- 1 (12-14 pound) whole turkey, thawed
- 1 cup unsalted butter, softened
- 1/4 cup fresh rosemary, chopped
- 1/4 cup fresh thyme leaves
- 2 tablespoons fresh sage, chopped
- 4 cloves garlic, minced
- 1 tablespoon kosher salt
- 1 teaspoon black pepper
- 1 large onion, quartered
- 1 lemon, halved
- 1 cup chicken broth
- 2 tablespoons olive oil
Instructions
- Remove the turkey from its packaging. Take out the neck and giblets from the cavities. Pat the entire turkey, inside and out, completely dry with paper towels. This step is key for crispy skin.
- In a small bowl, combine the softened butter, chopped rosemary, thyme, sage, minced garlic, salt, and pepper. Mix until you have a uniform herb butter.
- Gently separate the skin from the breast meat using your fingers, being careful not to tear the skin. Rub about half of the herb butter mixture directly onto the breast meat under the skin.
- Rub the remaining herb butter mixture all over the outside of the turkey skin.
- Place the onion quarters and lemon halves inside the main cavity of the turkey.
- Place the turkey on a roasting rack set inside a large roasting pan. Pour the chicken broth into the bottom of the pan. Brush the skin lightly with olive oil.
- Preheat your oven to 425 degrees Fahrenheit.
- Roast the turkey at 425 degrees Fahrenheit for 30 minutes to start crisping the skin.
- Reduce the oven temperature to 325 degrees Fahrenheit. Continue roasting until a meat thermometer inserted into the thickest part of the thigh (not touching bone) registers 165 degrees Fahrenheit. For a 14-pound bird, this usually takes about 3 to 3.5 hours total cooking time.
- Baste the turkey with pan juices every 45 minutes. If the skin begins to brown too quickly, loosely tent the breast with aluminum foil.
- Once the turkey reaches 165 degrees Fahrenheit, remove it from the oven. Tent it loosely with foil and let it rest for at least 30 minutes before carving. This resting period allows the juices to redistribute, guaranteeing a moist bird.
Notes
- For the crispiest skin, consider rubbing the turkey with a thin layer of melted butter mixed with a teaspoon of baking powder before the final hour of roasting.
- If you want to stuff your turkey, use a bread-based stuffing and ensure it reaches an internal temperature of 165 degrees Fahrenheit when cooked inside the bird.
- Use fresh herbs for the best flavor infusion into the butter. Dried herbs will not provide the same aromatic quality.
Nutrition
- Serving Size: 6 oz cooked meat
- Calories: 350
- Sugar: 1
- Sodium: 450
- Fat: 18
- Saturated Fat: 7
- Unsaturated Fat: 11
- Trans Fat: 0
- Carbohydrates: 1
- Fiber: 0
- Protein: 45
- Cholesterol: 150