
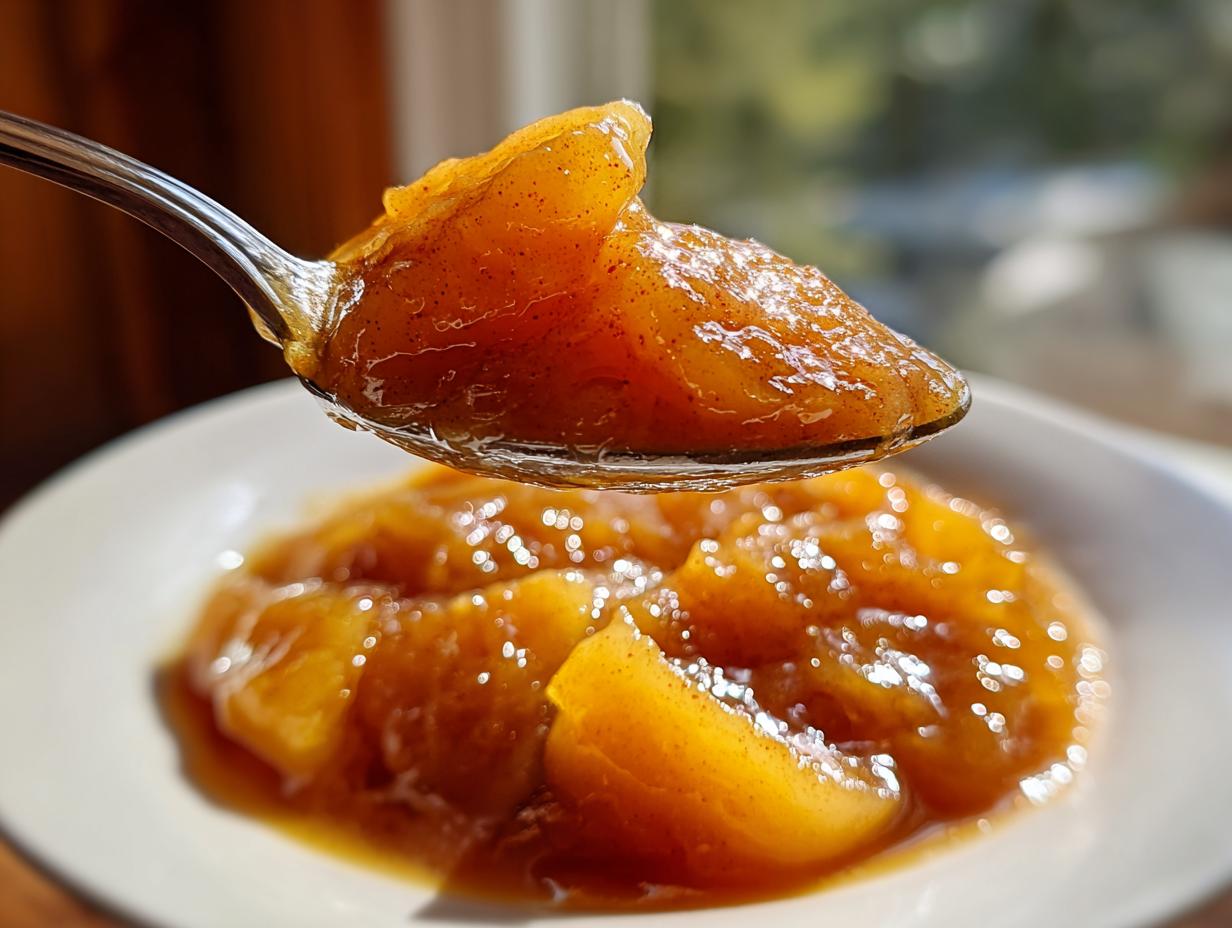
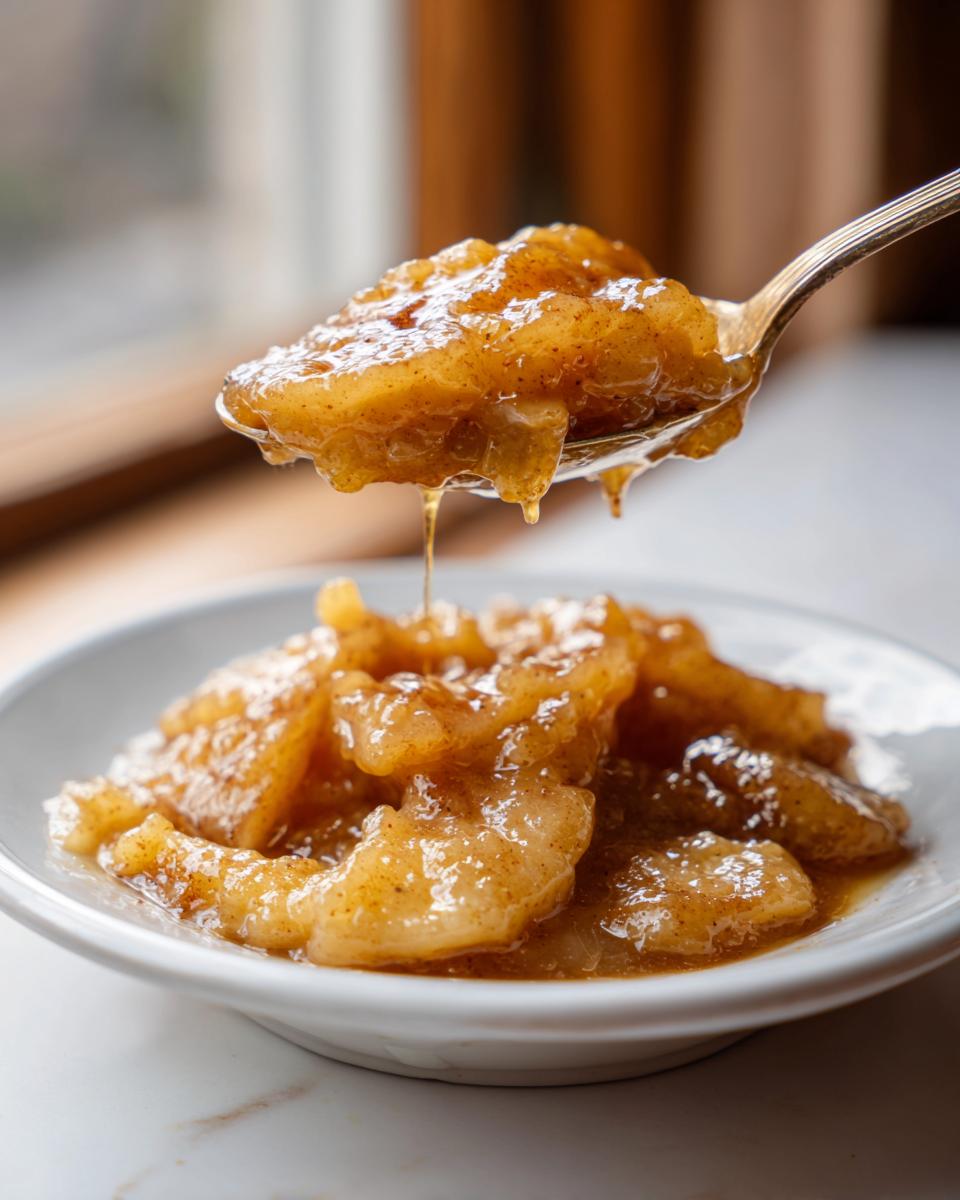
Oh, friends, let’s talk about that sad, watery stuff you find in a can at the store. It’s just… disappointing, right? The apples are always mushy, the spice is lacking, and it never seems to thicken right! I was so tired of mediocre pie filling that I set out to create the absolute best homemade apple pie filling you can imagine. This, right here, is the answer: an Easy Stovetop Apple Pie Filling with Brown Sugar and Warm Spices that comes together in about 30 minutes. Trust me, getting that perfect, slightly firm-but-tender apple texture while ensuring the sauce is glossy and thick was an obsession of mine when I started Bliss Batter. We’re replacing the blandness with deep, caramelized flavor!
- Why This Homemade Apple Pie Filling Recipe Beats Store-Bought (E-E-A-T Focus)
- Gathering Ingredients for Your Perfect Apple Pie Filling
- How to Make Stovetop Apple Pie Filling: Step-by-Step Instructions
- Tips for Achieving the Perfect Thick Apple Pie Filling Texture
- Beyond the Pie: Creative Uses for This Apple Pie Filling
- Ingredient Notes and Substitutions for Your Apple Pie Filling
- Storage and Making Ahead with Your Apple Pie Filling
- Frequently Asked Questions About Homemade Apple Pie Filling
- Estimated Nutritional Snapshot for This Apple Pie Filling
- Share Your Blissful Apple Creations
Why This Homemade Apple Pie Filling Recipe Beats Store-Bought (E-E-A-T Focus)
Honestly, making this stovetop filling is the secret to elevating any fall dessert recipe. When you ditch the **canned apple pie substitute**, you keep total control. The biggest difference you’ll notice immediately is the texture. Store-bought fillings are often one-note mush, but using my technique keeps the apple slices intact—they soften beautifully but never disintegrate.
I also love having control over the spices. I use cinnamon, nutmeg, and a little allspice for that deep, cozy warmth, but you can easily dial it up or down! That’s the beauty of making your **apple pie filling from scratch**.
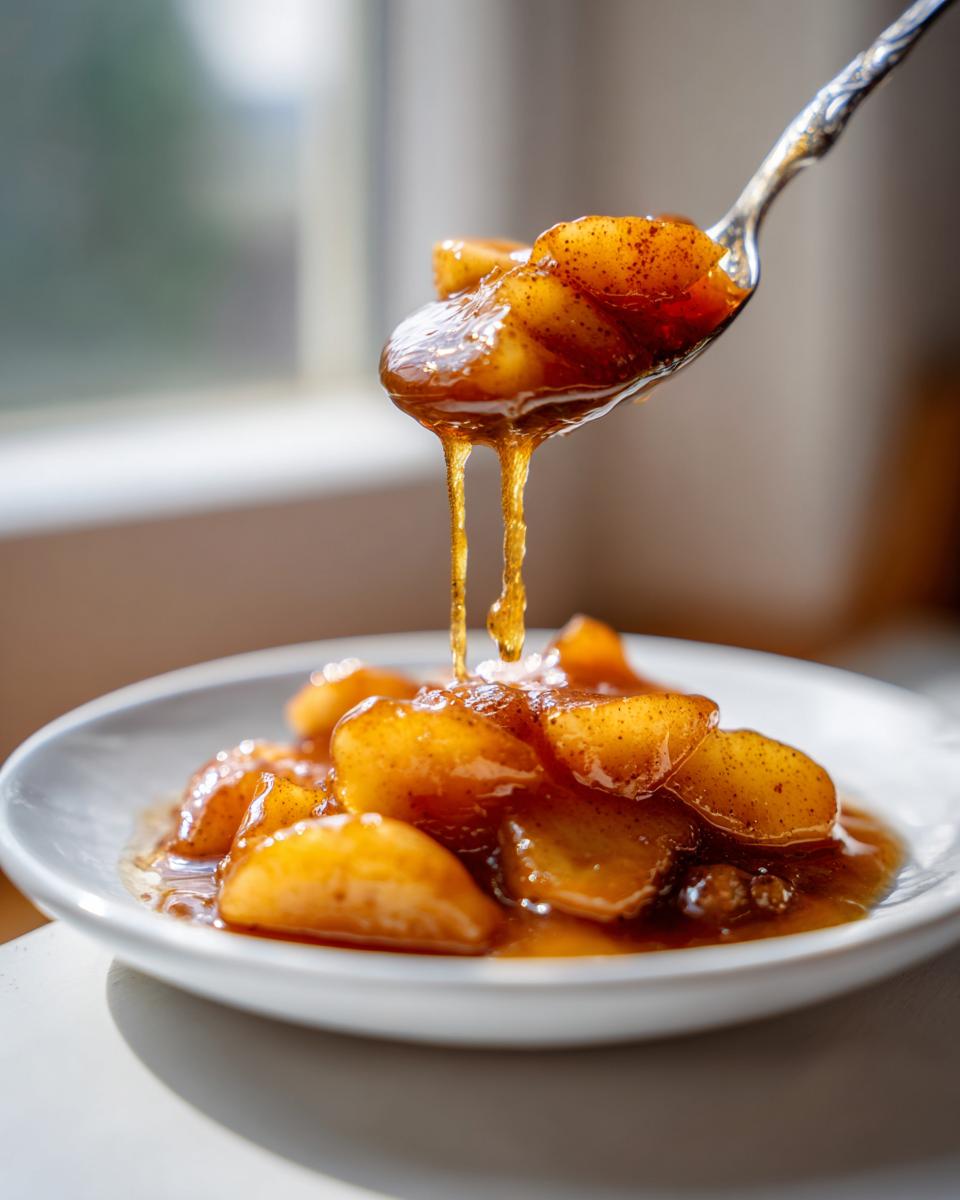
And the thickness? Forget watery nightmares! By activating the cornstarch right in the pan with the brown sugar, we guarantee a glossy, rich sauce that clings perfectly to every slice. This results in a truly **thick apple pie filling** that bakes up perfectly every single time. It’s worth the five extra minutes on the stove, promise. You can even make a big batch and use the extra as an easy apple pie topping over ice cream!
Gathering Ingredients for Your Perfect Apple Pie Filling
The magic truly starts before the heat even turns on, doesn’t it? When you’re making **brown sugar apple filling** from scratch, the quality of what goes in dramatically affects what you get out. This recipe is incredibly simple, relying mostly on pantry staples, but there is one critical area where we absolutely cannot cut corners: the apples!
For this recipe, I highly recommend using a mix of apples. If you just use something super sweet, you’ll end up with applesauce. If you use something too tart, it can taste harsh. My favorite duo is Granny Smith for that perfect tart bite and texture stability, paired with Honeycrisp for just a touch of sweetness. Slicing them thin—about 1/4 inch—is key so they cook evenly on the stovetop. You’ll see a lovely recipe for slow cooker apple butter linked here if you ever want to go the slow-and-low route, but for this quick filling, precise slicing matters!
Ingredient List for Apple Pie Filling from Scratch
- 6 large apples (like Granny Smith or Honeycrisp), peeled, cored, and sliced 1/4 inch thick
- 3/4 cup packed light brown sugar
- 1/4 cup granulated sugar
- 1/4 cup cornstarch
- 1 teaspoon ground cinnamon
- 1/4 teaspoon ground nutmeg
- 1/8 teaspoon ground allspice
- 1/4 teaspoon salt
- 2 tablespoons lemon juice
- 1/4 cup water
- 2 tablespoons unsalted butter
How to Make Stovetop Apple Pie Filling: Step-by-Step Instructions
This is where the magic happens, and honestly, this entire process is faster than opening a can! Since we are making a beautiful **stovetop apple filling**, we control every element down to the glossiness of the sauce. Don’t rush these first steps because that initial mix is what prevents lumps later on. You want all those wonderful flavors—the sugar, the spices, and the cornstarch magic—to be perfectly acquainted before the apples jump in.
Mixing Dry Ingredients and Creating the Sauce Base
First things first: grab a medium saucepan. Dump in your brown sugar, white sugar, cornstarch, cinnamon, nutmeg, allspice, and salt. Give this a really good whisk! I mean it, really whisk it until you see no streaks of white cornstarch hanging around. If you introduce wet ingredients before the dry are fully combined, you’ll end up with little sticky cornstarch pockets in your filling, and nobody wants that gummy surprise. Once that’s one uniform powder, whisk in your water and lemon juice until everything is totally smooth. It should look a little cloudy, but entirely lump-free. That’s your perfect base!
Cooking Down the Apples for the Best Apple Pie Filling
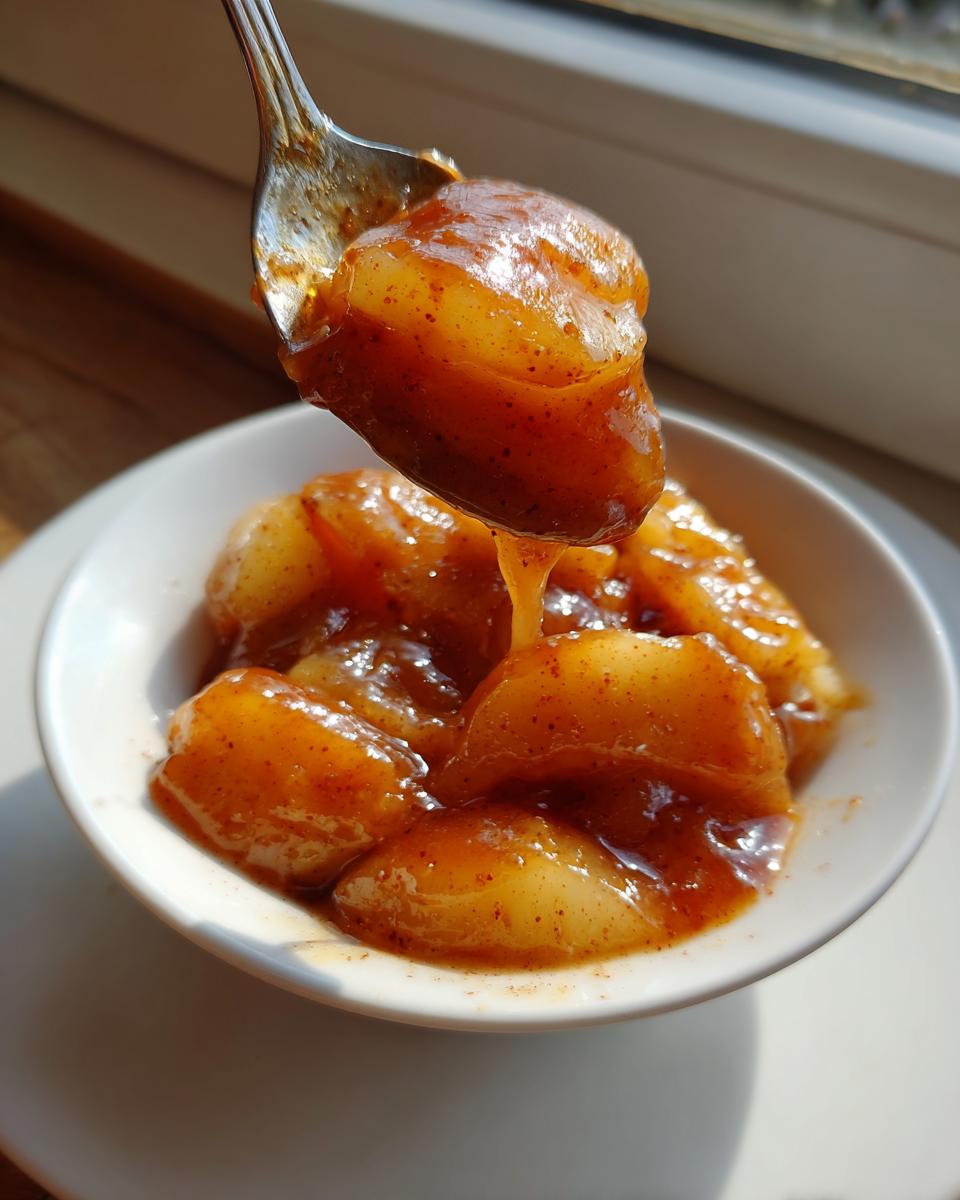
Now, gently toss in those perfectly sliced apples and give them a good fold until every single slice is coated in that spiced sugar mixture. Place the pan over medium heat. This is crucial: you need to stir frequently here so the sugars don’t scorch on the bottom. Keep cooking for about 8 to 10 minutes. You are looking for two things: the sauce should start bubbling happily, and the apples should begin to soften just slightly. We want tender, not mushy! Remember, they cook a tiny bit more when you put them into the final pie. This method ensures you get the best apple pie filling structure imaginable.
Finishing Touches: Butter and Setting the Homemade Apple Pie Filling Recipe
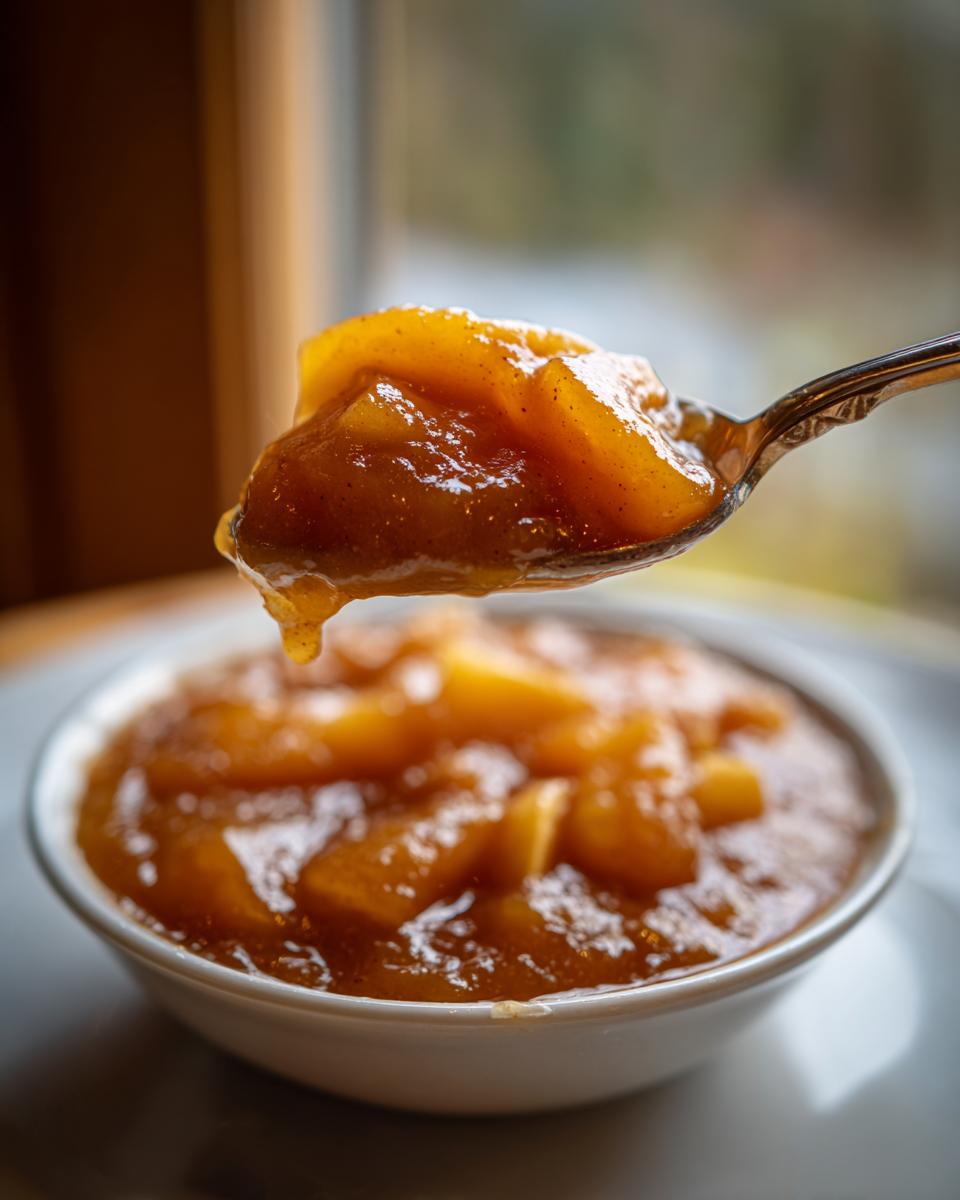
Once you see that beautiful, glossy shine and the apples are almost tender, pull the saucepan right off the heat. Now, add your 2 tablespoons of cold unsalted butter. Stir gently until it melts completely. That butter adds a little richness and helps give the sauce that beautiful sheen we all look for. This is vital for achieving the **thick apple pie filling** consistency later on: You must let this filling cool completely before you use it, whether it’s going into your flaky crust or being used as a topping. Cooling allows the cornstarch to fully activate and set up into that perfect, decadent texture.
Tips for Achieving the Perfect Thick Apple Pie Filling Texture
Okay, let’s get real about the biggest frustration when making any **spiced apple filling**: runniness! There is nothing worse than slicing into what should be a firm, saucy pie and seeing liquid run all over the plate. The key here is the cornstarch, and how we treat it. You absolutely must ensure that the cornstarch is totally dissolved in the liquid *before* you turn the heat on high. If you have lumps, you’ll end up with those pockets of gooey, undercooked starch.
The second texture secret is twofold: apple choice and cooling time. Using a firmer apple like Granny Smith means the apples release moisture slowly rather than dumping it all out at once, which thins your sauce. Also, the filling has to cool down! It looks a bit looser when hot, but that cornstarch locks everything into place as it cools. Don’t be tempted to thicken it too much on the stove, or you’ll end up with apple jelly! If you want extra insurance, I sometimes soak my sliced apples in a little extra lemon water first, which I read about once, and it seems to help them maintain their shape. For more fun apple ideas, check out my favorite apple fritter bites recipe!
Beyond the Pie: Creative Uses for This Apple Pie Filling
Now that you have this incredible **homemade apple pie filling recipe**, you might wonder if you have to wait until Thanksgiving to use it all up. Absolutely not! This quick stovetop version is so good, it deserves to be featured in more than just pies. Think of this as the ultimate shortcut for a fantastic **quick apple dessert** any night of the week.
My absolute favorite way to use leftovers is spooning a generous amount onto a stack of my famous fluffy pancakes on a Saturday morning. It turns breakfast into a celebration! It also makes an amazing, ready-made filling for Danishes or even rolled up inside crescent dough to make quick, gooey pastries. Seriously, this filling transforms into the most delicious **easy apple pie topping** imaginable.
If you’re feeling ambitious, use it as the center for homemade cinnamon rolls—you can find my technique for that in my monkey bread recipe notes. It keeps things incredibly flavorful without all the peeling and chopping!
Ingredient Notes and Substitutions for Your Apple Pie Filling
When I’m developing recipes, I always want you to feel like you can make it work, even if your pantry looks a little different than mine that day. While the measurements here are dialed in for perfection, substitutions are totally fine, especially with apples! If you can’t find a mix of tart and sweet, just adjust your sugar slightly. If you’re stuck with all sweet apples, dial back the white granulated sugar by a tablespoon or two, because we want that lovely tartness from the lemon juice and the natural tang of the apple to shine through.
If you run out of brown sugar, don’t panic! You can definitely use all white sugar, but you need to compensate for that rich, molasses flavor brown sugar brings. You can substitute about half the required brown sugar with an equal amount of maple syrup. Maple syrup gives a lovely, earthy sweetness, though the final color of the filling might be a little lighter. Just remember that maple syrup is runnier than packed brown sugar, so you might need to add just a tiny extra sprinkle of cornstarch—maybe an extra teaspoon—to make sure that sauce sets up nicely. If you’re curious about other fall flavors, check out my notes on making real pumpkin spice!
For the spices, if you are missing that allspice, you can usually swap it out with a little extra nutmeg. It won’t be exactly the same, but it still keeps that warm, cozy vibe going strong. The real goal here is just getting those tender spiced apples mixed into a thick base, and that’s easily achievable even with small tweaks!
Storage and Making Ahead with Your Apple Pie Filling
One of the best things about making your **apple pie filling from scratch** on the stovetop is that you create a built-in time-saver for future baking! This filling stores beautifully, which means you can totally prepare it on a less busy day and have the core component of a delicious dessert ready to go. I often make a huge double batch when apples are at their peak in the fall.
Once it has completely cooled down—and I mean completely, don’t skip that—transfer the filling into a clean, airtight container. In the refrigerator, this **brown sugar apple filling** stays fresh and tastes amazing for about 10 days. Since the cornstarch has already done its setting work, it stays wonderfully thick even after a few days.
If you want to keep it longer, pop it into the freezer! This filling freezes like a dream. I use freezer-safe bags (squeezing out all the air!) or small, sealed jars, and it lasts wonderfully for about 3 months. When you’re ready to use it, just thaw it overnight in the fridge. It might look a little looser when thawed, but give it a quick stir, and it should snap right back into that beautiful, glossy consistency we worked so hard for.
Now, about canning: If you’re looking to keep this on the shelf for months and months, you would need a proper pressure canning setup. Since this recipe relies on cornstarch thickening and not just oven heat, I personally recommend sticking to refrigeration or freezing for safety and best texture results. For long shelf life, I usually stick to my tried-and-true recipes like my moist banana bread recipe for shelf-stable treats! For everything else, the fridge or freezer works perfectly, giving you that homemade goodness whenever a craving hits!
Frequently Asked Questions About Homemade Apple Pie Filling
Can I use pre-sliced apples in this recipe instead of cutting them myself?
Oh, I know the temptation to skip the peeling and coring! While you certainly *can* use pre-sliced apples to make this **easy dessert filling**, I really advise against it if you want the best texture. Pre-sliced apples are often uneven, and they release water much faster when heated, which can lead to that runny filling we talked about. If you absolutely must use them, make sure they are firm, tart apples, and perhaps reduce the added water by just a tablespoon. Remember, fresh slicing is a huge part of our success!
What should I do if my finished filling tastes too sweet?
That’s an easy fix, thankfully! If you taste your **brown sugar apple filling** before cooling and feel it’s too sweet, you can instantly balance it out by adding a little more acid. The lemon juice we call for is essential, but you can stir in 1 teaspoon of fresh lemon juice or even a small splash of apple cider vinegar right at the end when you add the butter. That little bit of tartness cuts right through the sugar, bringing out the wonderful **warm spiced apples** flavor profile instead. You can explore some great flavor pairings in the notes section of my chai spice cookies recipe, thinking along the same lines of balancing sweetness!
Is this recipe suitable for a deep-dish pie that bakes for a long time?
This is a super practical question! Because this is a pre-cooked, **stovetop apple filling**, it is absolutely fantastic for deep-dish pies. Since the apples are already tenderized and the sauce is already thickened, you won’t run into the problem of having raw, hard apples under a perfectly browned crust, which is what happens if you load a deep pie with raw filling. My main advice here is to ensure the filling is completely cooled before you put it into the bottom crust. If you use hot filling, it can actually melt your bottom crust! Since the apples are already cooked, you might find your bake time is slightly shorter than a recipe calling for raw apples, so watch the crust color carefully!
Can I make this filling without cornstarch?
The short answer is: you *can*, but it won’t be the same! Cornstarch is our insurance policy for that thick, glossy structure. If you wanted to skip it, you would need to use about 1/2 cup more of finely ground flour or arrowroot powder, but flour can sometimes give a slightly cloudy or pasty flavor if not cooked long enough. To get that perfect, clear, scoopable texture that you want in the **best apple pie filling**, I really stick to the cornstarch. It’s just the tidiest thickener for this particular recipe!
Estimated Nutritional Snapshot for This Apple Pie Filling
Now, I always feel a little funny putting nutrition labels on recipes that are mostly about pure, unadulterated joy, but I know some of you lovely bakers like to know what’s going into your treats! Please remember that since this is a recipe developed right here in my home kitchen, and not in a sterile lab, these numbers are very close estimates based on the standard measurements provided.
This information is calculated assuming a serving size of 1/2 cup of the final apple pie filling. It’s designed to give you a general idea, not a clinical analysis. You’ll notice the sugar content is a bit higher, which is expected since we’re using both white and brown sugar to get that deep, caramelized flavor we love so much in our **brown sugar apple filling**!
- Serving Size: 1/2 cup
- Calories: 250
- Sugar: 45g
- Sodium: 110mg
- Fat: 3g
- Saturated Fat: 2g
- Carbohydrates: 58g
- Protein: 0g
See? Mostly apples and goodness! If you are looking to reduce the sugar or fat, you can certainly experiment, but remember that for consistency, the cornstarch needs balancing, as we discussed earlier. These values reflect the recipe exactly as written, providing that classic, comforting American flavor!
Share Your Blissful Apple Creations
Now that you have the perfect, foolproof **apple pie filling from scratch**, I truly cannot wait to see what you create with it! My greatest happiness comes from imagining my recipes filling your tables and creating new memories for your families, just like my grandmother’s did for mine years ago.
Did you use this **spiced apple filling** in a classic double-crust pie? Did you spoon it warm over toast? Or maybe you discovered a brilliant new way to use it as an **easy apple pie topping**—I’m always looking for new ideas!
Please, when you finish your baking adventure, come back here and leave a little star rating and a comment telling me how it went. Your feedback helps others feel confident diving into baking, and I read every single one!
If you took a gorgeous photo of your creation—maybe a glistening slice of pie or a stack of pancakes dripping with that thick, brown sugar glaze—share it on social media and tag me so I can admire your handiwork! Knowing that you brought a little homemade bliss into your day is what Bliss Batter is all about.
If you’re looking for more simple joy, I encourage you to pop over to my About page to read more about my baking philosophy! Happy baking, my friends!
If you’re looking for more inspiration on classic recipes, this recipe on homemade apple pie filling with brown sugar is a wonderful one to check out, too!
PrintThe Best Homemade Apple Pie Filling: Thick, Juicy, and Spiced

Make superior apple pie filling from scratch on your stovetop. This recipe uses brown sugar and warm spices for a thick, juicy texture that beats any store-bought can.
- Prep Time: 15 min
- Cook Time: 15 min
- Total Time: 30 min
- Yield: About 6 cups 1x
- Category: Dessert Filling
- Method: Stovetop
- Cuisine: American
- Diet: Vegetarian
Ingredients
- 6 large apples (like Granny Smith or Honeycrisp), peeled, cored, and sliced 1/4 inch thick
- 3/4 cup packed light brown sugar
- 1/4 cup granulated sugar
- 1/4 cup cornstarch
- 1 teaspoon ground cinnamon
- 1/4 teaspoon ground nutmeg
- 1/8 teaspoon ground allspice
- 1/4 teaspoon salt
- 2 tablespoons lemon juice
- 1/4 cup water
- 2 tablespoons unsalted butter
Instructions
- Combine the brown sugar, granulated sugar, cornstarch, cinnamon, nutmeg, allspice, and salt in a medium saucepan. Whisk these dry ingredients together well.
- Add the water and lemon juice to the saucepan. Whisk until the cornstarch is completely dissolved and the mixture is smooth.
- Add the sliced apples to the saucepan. Gently toss the apples with the sugar mixture until every slice is coated.
- Place the saucepan over medium heat. Cook, stirring frequently, until the mixture begins to bubble and thicken. This takes about 8 to 10 minutes. You want the apples to soften slightly but still hold their shape.
- Once the filling is thick and glossy, remove the pan from the heat. Stir in the butter until it melts completely into the hot filling.
- Remove the filling from the heat and let it cool completely before using it in your pie crusts or desserts. Cooling allows the filling to set to the proper thickness.
Notes
- For the best texture, use a mix of tart and sweet apples. Granny Smith holds its shape well, while Honeycrisp adds sweetness.
- If you plan to use this as a topping for pancakes or waffles, you can cook the apples slightly longer until they are very tender.
- This filling is excellent spooned over vanilla ice cream or used as a filling for cinnamon rolls.
Nutrition
- Serving Size: 1/2 cup
- Calories: 250
- Sugar: 45
- Sodium: 110
- Fat: 3
- Saturated Fat: 2
- Unsaturated Fat: 1
- Trans Fat: 0
- Carbohydrates: 58
- Fiber: 3
- Protein: 0
- Cholesterol: 8