
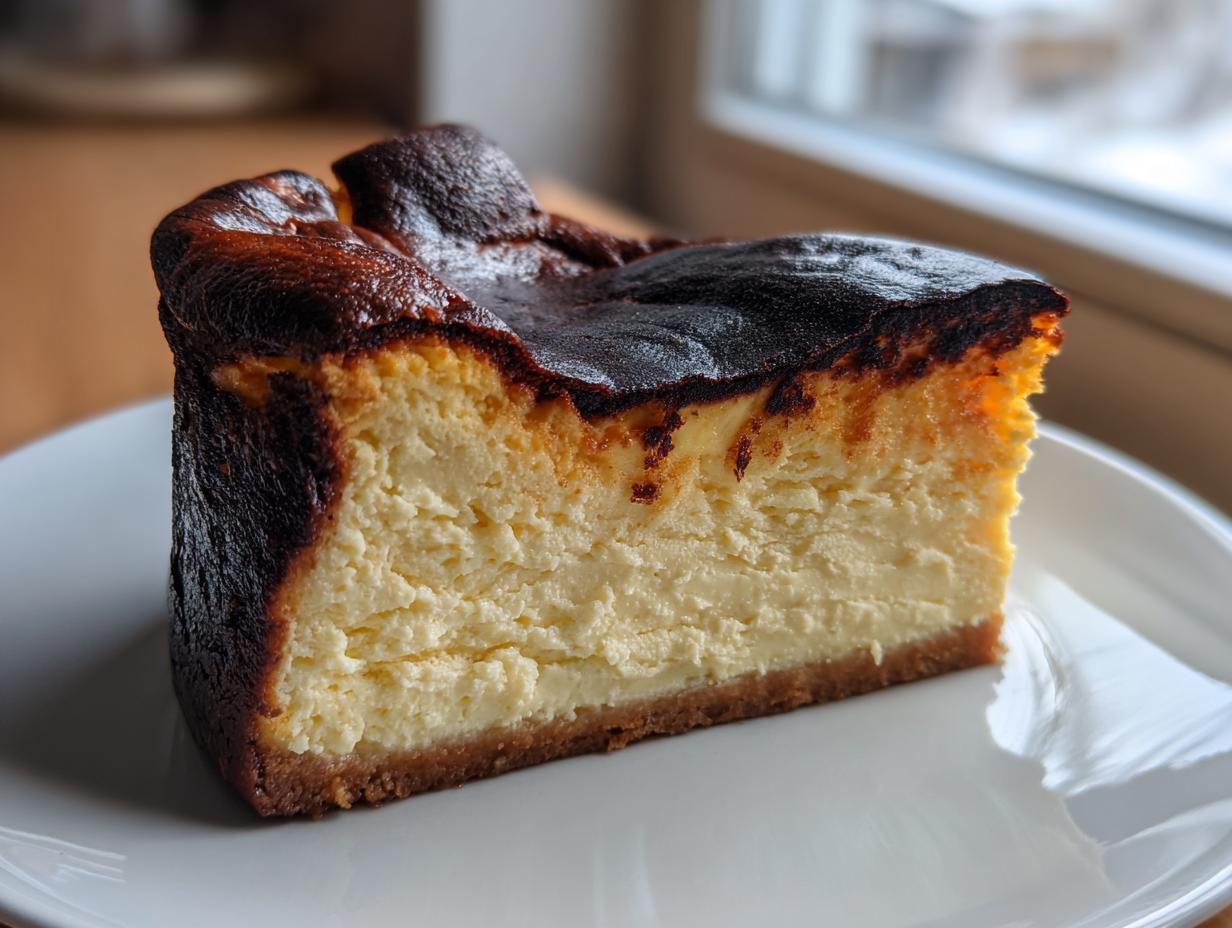
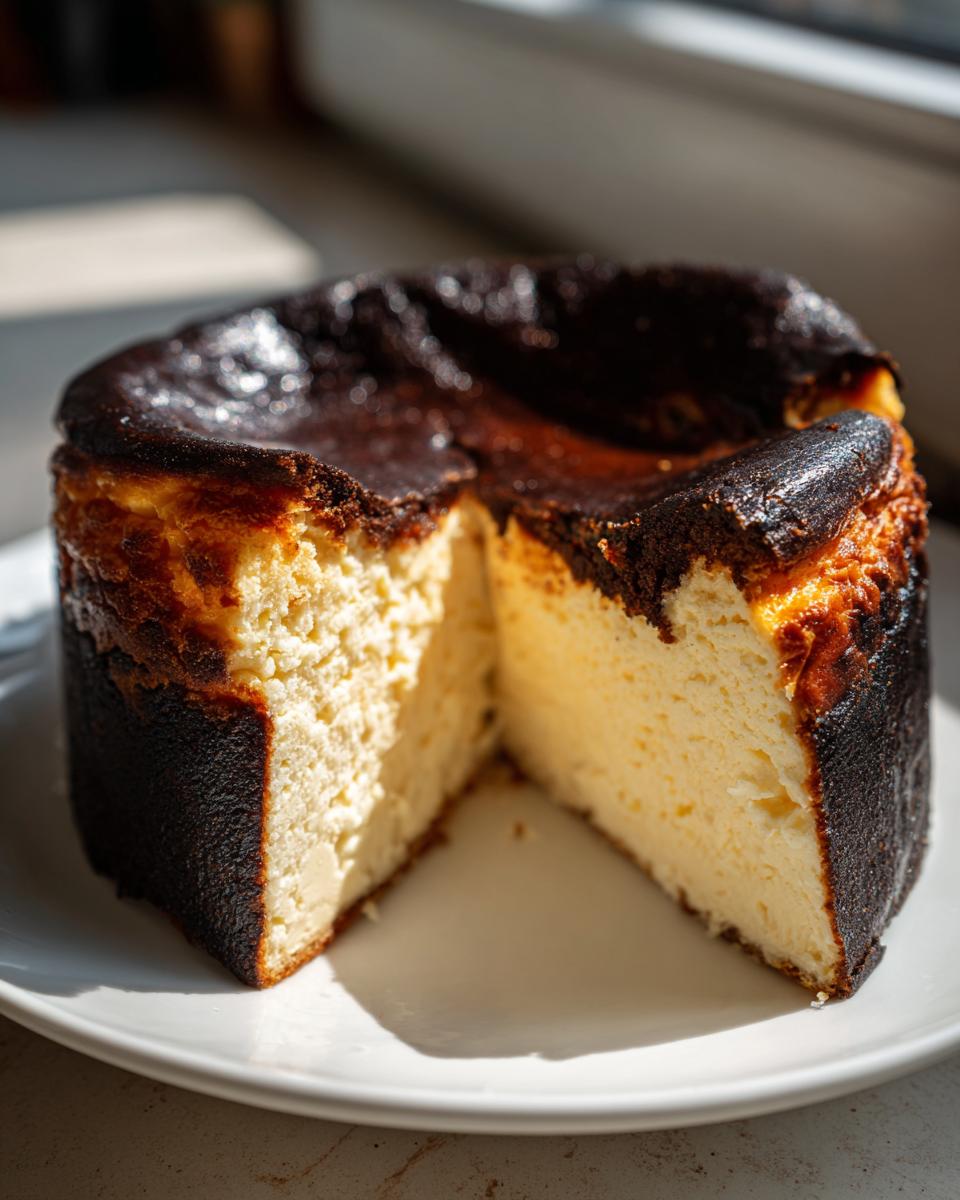
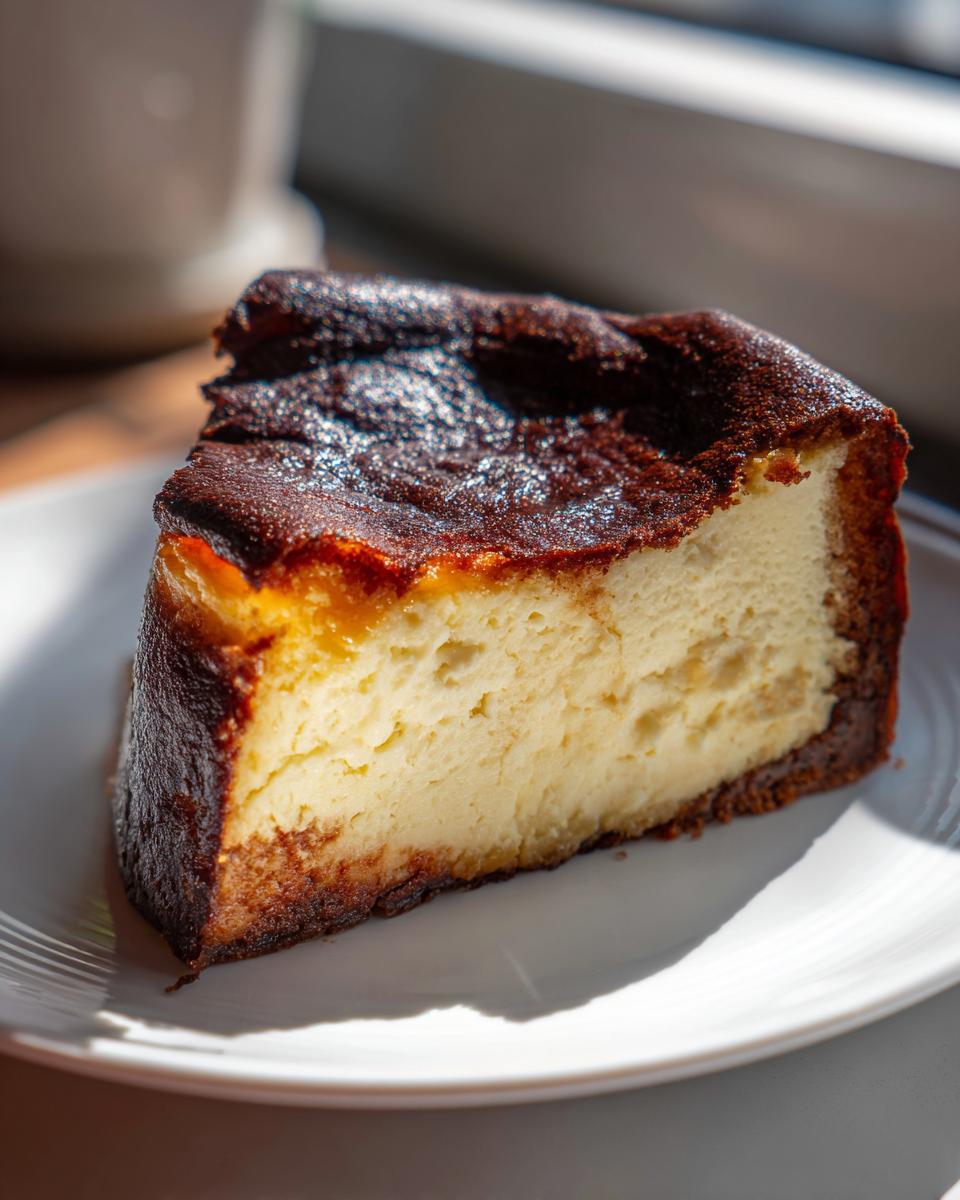
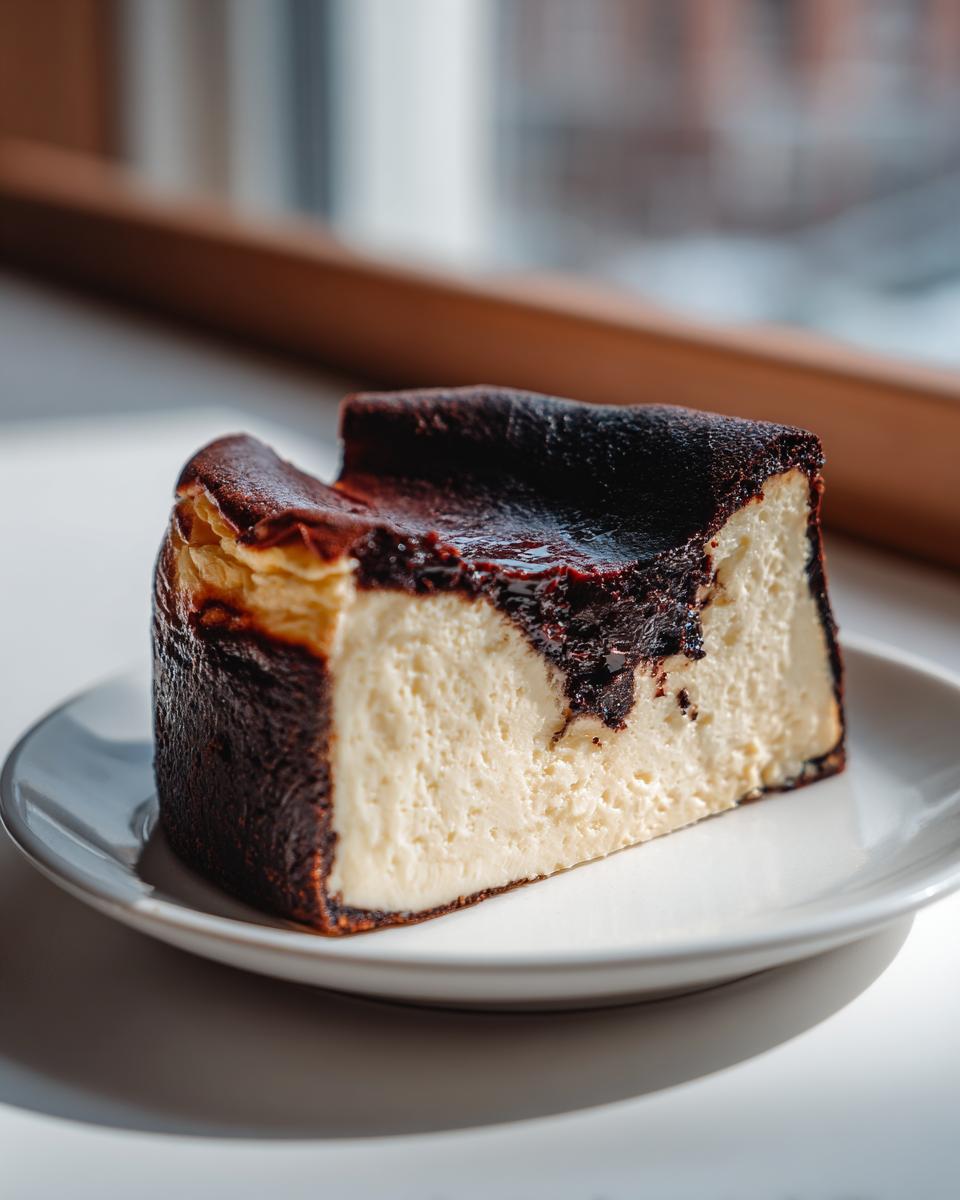
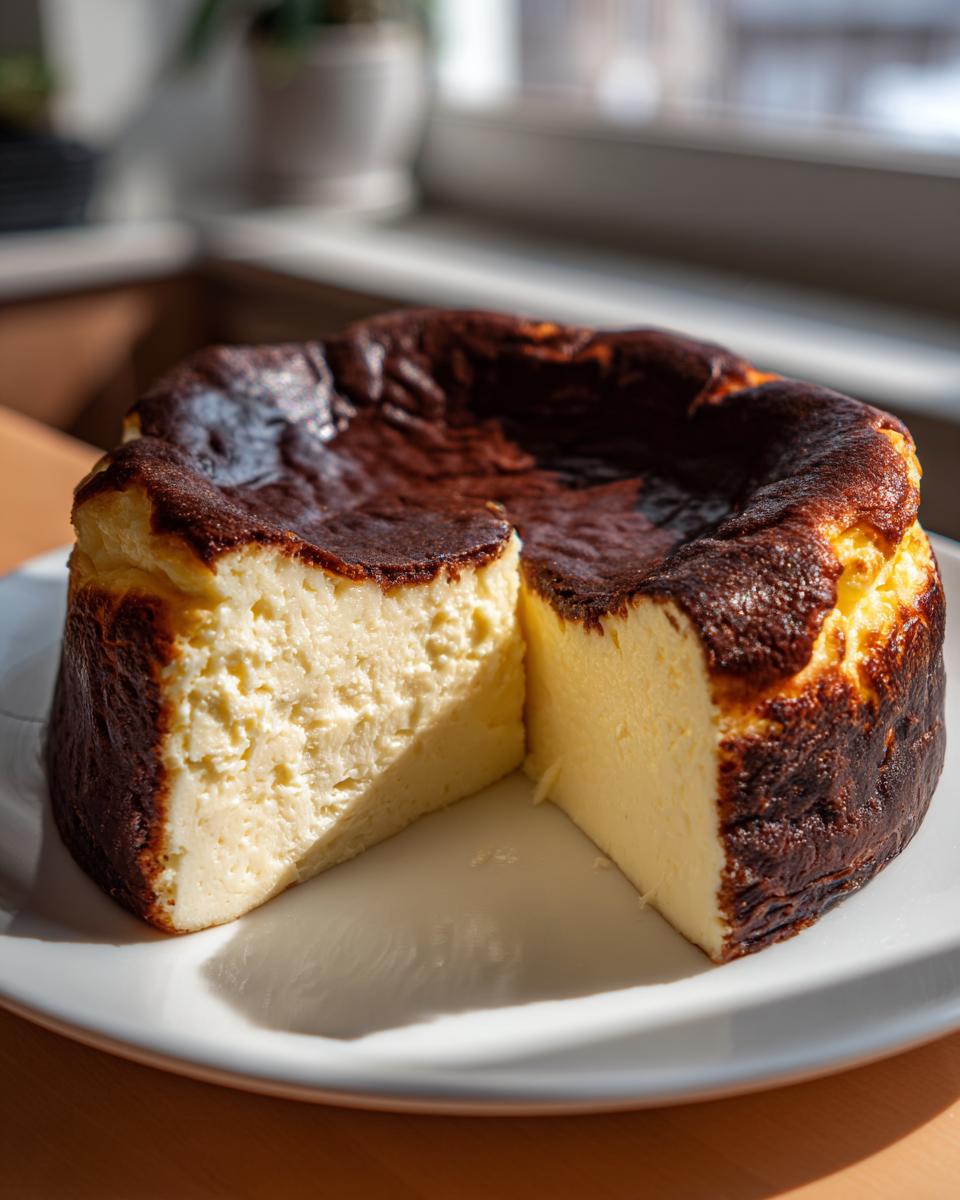
Oh, my heart! If you’ve been scrolling around looking for that one showstopper dessert that looks impossibly gourmet but is secretly a breeze to bake, stop right here. Seriously, put your phone down and grab your mixing bowl. I’m talking about the incredible basque burnt cheesecake. This Spanish style marvel, straight out of San Sebastian, is my absolute favorite thing to make because it requires zero fussy steps—no water bath, no perfect pie crust, just pure, creamy magic.
When I was deep in my corporate event planning years, I needed baking to be my escape, something that felt special without demanding perfection. This recipe delivers that every single time! We’re talking about a dessert that looks beautifully rustic with its deeply caramelized edges and melts into this velvety center. Trust me, when you pull this out of the oven, you’ll feel like a pastry genius, even if you’re just starting out. If you want to know more about my baking philosophy, you can always check out my journey here on the About page.
- Why This Easy Basque Burnt Cheesecake Recipe Works (The Bliss Batter Promise)
- Ingredients for the Classic Basque Burnt Cheesecake Recipe
- How To Make Burnt Cheesecake: Step-by-Step Instructions
- Expert Tips for the Best Basque Cheesecake
- Serving and Storing Your Decadent Cream Cheese Cake
- Variations on the Rustic Cheesecake Recipe
- Frequently Asked Questions About Basque Burnt Cheesecake
- Estimated Nutrition for This Simple Ingredients Cheesecake
- Share Your Spanish Style Cheesecake Success
Why This Easy Basque Burnt Cheesecake Recipe Works (The Bliss Batter Promise)
I know what you’re thinking: “Burnt? Creamy? How can both things be true?” That’s the magic of the basque burnt cheesecake, and honestly, it’s why I love sharing it! This recipe strips away all the anxiety baking usually brings. We focus on a few pure ingredients and let that high oven temperature do the hard work for us.
Here’s why you can trust this method to give you that gorgeous result every time:
- It uses only 7 core ingredients—no fussy caramel sauces or long ingredient lists here!
- It’s lightning fast to mix up. Seriously, 15 minutes max!
- We embrace the rustic look. Those dark spots are flavor, not failure!
No Crust, No Fuss: Mastering Crustless Cheesecake Baking
One of the best parts about this Spanish style cheesecake is that it completely skips the crust. That means no mixing butter and crumbs, no worrying about a soggy bottom, and no fiddling around with springform pans that stick. This is true crustless cheesecake baking, letting the rich, eggy batter stand on its own merits. It just simplifies everything, making it one of the best easy baked cheesecakes out there.
Achieving the Perfect Velvety Cheesecake Center
The texture is what blows everyone away! To get that dreamy, cloud-like interior, you absolutely must use room temperature ingredients—I mean it! Cold lumps will ruin your smooth batter. We mix everything super gently once those eggs go in. Seriously, low speed, just until combined. This careful handling ensures you get that signature velvety cheesecake center rather than one that’s tough or grainy. That’s the secret handshake for success!
Ingredients for the Classic Basque Burnt Cheesecake Recipe
When it comes to this basque burnt cheesecake, we rely on fewer, better ingredients. It’s almost shocking how few things you need to pull off this impressive baked good! Keeping everything at room temperature is my biggest non-negotiable here—it’s the key to that lump-free, smooth batter we want before it hits the heat. You can find some of my other favorite ingredient-focused recipes, like my pumpkin cheesecake, over here.
Here is exactly what you’ll need for this simple ingredients cheesecake:
- 1.5 lbs cream cheese, softened to room temperature
- 8 oz mascarpone cheese, room temperature
- 1 1/4 cups granulated sugar
- 4 large eggs, room temperature
- 2 large egg yolks, room temperature
- 1 3/4 cups heavy cream
- 1 tablespoon all-purpose flour
- Pinch of fine sea salt
How To Make Burnt Cheesecake: Step-by-Step Instructions
Okay, friends, this is where the magic really happens! Making the basque burnt cheesecake feels dramatic, but I promise it’s honestly just a few straightforward steps mixing ingredients we already talked about. Don’t be scared by the high temperature; that’s what gives us that beautiful, dark, caramelized exterior and keeps the inside so gloriously soft. I still remember the first time I saw it getting dark, and I nearly pulled it out early! Glad I didn’t, though. If you want to check out my cinnamon monkey bread recipe sometime, it’s less dramatic, but just as delicious right here.
Preparing the Pan and Oven for High Heat Cheesecake Baking
First things first, crank that oven up! We need it blazing hot, 400°F (200°C), for some serious high heat cheesecake baking. For the pan, we use an 8-inch springform pan, but here’s the trick: line it with two sheets of parchment paper, crisscrossing them, and let them stick up way over the edges. This messy, rustic overhang is intentional! It gives the sides texture as the cake rises and falls. Don’t try to make it neat; embrace the chaos!
Mixing the Creamy Cheesecake Dessert Batter
Grab your electric mixer—or a very strong arm! Beat that room temperature cream cheese until it’s silk. Then, in go the mascarpone and sugar until everything is fluffy and you can’t feel any sugar grit left. Now, here’s the important part for that stunning creamy cheesecake dessert outcome: add your eggs and yolks one at a time, mixing on *low* speed just until they disappear. If you beat wildly here, you’ll incorporate too much air, and we want dense and silky, not fluffy!
Baking for the Signature Caramelized Top Desert
Pour that liquid batter into your prepared pan. Yes, it’s supposed to be thin! Now, pop it into that hot oven for about 45 to 55 minutes. You’re looking for the top to be deeply browned—almost black in spots. Don’t fret! That char gives you that signature look for your caramelized top desert. The center should still have a definite wobble, like pudding. It will settle down as it cools, I promise. Once it’s out, just let it sit on the counter for a couple of hours before chilling.
Expert Tips for the Best Basque Cheesecake
If you want your basque burnt cheesecake to go from delicious to truly legendary, you have to pay attention to a few little details. These aren’t hard rules, but they are the things I learned the hard way! My biggest piece of advice comes straight from the recipe notes: everything must be at room temperature.
Why does that matter so much? Well, when your cream cheese and mascarpone are soft and supple, they combine with the sugar into one silky mass. If they’re cold, you end up with little lumps that refuse to integrate, which completely ruins that luxurious, velvety dreaminess we are aiming for.
I vividly remember my first time baking one; the top got so dark so fast, I thought I’d ruined the whole thing! I almost yanked it out at 35 minutes. But I held strong, trusted the process, and when it cooled, that ridiculously dark top gave way to the most perfect, creamy interior. Don’t fear the dark spots; they are flavor! If you love that caramelized edge, you should also check out my salted caramel brownies sometime; they have that intense flavor, too.
Serving and Storing Your Decadent Cream Cheese Cake
Alright, now for the hardest part: waiting! This basque burnt cheesecake needs time to rest. The temptation to slice into that gorgeous caramelized top while it’s hot will be strong, but trust me, you need patience for this decadent cream cheese cake to reach its peak texture.
Here’s the scoop on serving: if you want that signature, almost mousse-like, soft center that tastes spectacular right out of the oven, let it cool completely on the counter for at least two hours. Serving it at room temperature is key for that jiggly, luscious feeling. Want something denser? You can chill it for 4 hours or overnight, and it firms up nicely, almost like a New York style, but definitely don’t skip those initial cooling hours.
When storing your leftovers—if you have any, lucky you!—just wrap the whole thing, or individual slices, gently. Keep it covered in the refrigerator, but remember to pull it out about 30 minutes before serving to let it come back toward room temperature for the best mouthfeel. For more crowd-pleasing chocolate recipes, check out my classic chocolate cake recipe!
Variations on the Rustic Cheesecake Recipe
While this classic basque burnt cheesecake is perfect on its own—that pure cream cheese flavor is divine—I love tinkering just a little bit when I’m not worried about a first-time baker’s success! This is such a forgiving rustic cheesecake recipe that it welcomes subtle flavor enhancements.
My favorite trick for adding depth? Throw in just a teaspoon of pure vanilla extract right in with the heavy cream. Or, if I’m feeling extra zesty, I’ll scrape the zest of one small lemon right into the batter when I add the cream cheese. It brightens up the whole thing! Sometimes I even sprinkle a little cardamom over the parchment paper before I pour in the batter. Honestly, the cake is so simple, a tiny flavor boost really shines through. Speaking of spices, if you love warm flavors, you absolutely have to try my chai spice cookies next!
Frequently Asked Questions About Basque Burnt Cheesecake
I know sometimes even the best instructions leave you with a few nagging questions. Baking this basque burnt cheesecake is so different from traditional methods that people worry constantly about whether they’re doing it right, especially during that high-heat bake! Don’t stress; these are the exact things I worried about when I first started baking this Spanish beauty. It’s all about managing expectations versus reality.
Can I make a Basque Burnt Cheesecake in a loaf pan?
Absolutely, yes! People love making the burnt Basque cheesecake loaf pan variation because it’s easy to slice and serve. If you use a standard loaf pan, just remember that the batter will be deeper. This means you need to keep an eye on it! You might need to lower the temperature slightly after the first 20 minutes or add an extra 5 to 10 minutes to your total baking time. Don’t let the sides burn while the center is still setting. It’s one of my favorite ways to make this rustic treat, though!
Why is my cheesecake still liquid in the middle?
If your center is too liquidy, it usually means two things: either you pulled it out too soon, or you haven’t let it chill long enough! Remember, we are aiming for a definite, significant wobble—like thick gelatin or unset pudding—when you take it out of the oven. That’s the sign of a perfectly cooked interior. It seems scary, I know! But the chilling process is what firms up that creamy texture. You need a minimum of 4 hours, but my absolute favorite texture comes when it chills overnight in the fridge. That liquid wobble miraculously sets into that luscious, velvety cheesecake center!
If you’re interested in making a fun, slightly less rich dessert next, my recipe for a pumpkin roll is a great follow-up!
Estimated Nutrition for This Simple Ingredients Cheesecake
I always try to keep things transparent here at Bliss Batter, even though baking treats like our basque burnt cheesecake are more about joy than counting macros! Since this is a decadent cream cheese cake made with rich ingredients, it certainly falls into the ‘treat yourself’ category. Remember, these numbers are just estimates based on the specific recipe measurements, so they might vary depending on what brand of mascarpone you use!
Anyone looking for a dessert made purely from simple ingredients cheesecake shouldn’t be surprised by the richness here. For one slice:
- Calories: 450
- Fat: 35g
- Carbohydrates: 28g
- Protein: 8g
It’s worth every single bite, I promise!
Share Your Spanish Style Cheesecake Success
Now that you’ve created this stunning, rustic basque burnt cheesecake, I just have to know how it turned out! Did you embrace the dark top? Did you serve it slightly warm like those amazing bakers in San Sebastian? Please drop me a rating below, leave a comment telling me about your experience, and certainly share a picture if you post it online! I love seeing your bakes. If you need to reach out with questions, my contact page is right here. For more Spanish style inspiration, check out what The Spanish Apron recommends!
PrintEasy Basque Burnt Cheesecake Recipe: Creamy Center and Caramelized Top
Create the stunning, rustic Basque Burnt Cheesecake at home. This recipe delivers a rich, velvety interior and a signature deeply caramelized exterior using simple ingredients and high-heat baking. It is crustless and surprisingly easy to make.
- Prep Time: 15 min
- Cook Time: 55 min
- Total Time: 70 min
- Yield: 8 servings 1x
- Category: Dessert
- Method: Baking
- Cuisine: Spanish
- Diet: Vegetarian
Ingredients
- 1.5 lbs cream cheese, softened to room temperature
- 8 oz mascarpone cheese, room temperature
- 1 1/4 cups granulated sugar
- 4 large eggs, room temperature
- 2 large egg yolks, room temperature
- 1 3/4 cups heavy cream
- 1 tablespoon all-purpose flour
- Pinch of fine sea salt
Instructions
- Line an 8-inch springform pan with two large sheets of parchment paper, allowing the paper to overhang the sides significantly. This rustic look is part of the charm.
- Preheat your oven to 400°F (200°C).
- In a large bowl, use an electric mixer or a sturdy whisk to beat the softened cream cheese until it is completely smooth. Scrape down the sides of the bowl.
- Add the mascarpone cheese and beat until just combined and smooth.
- Gradually add the granulated sugar, mixing on medium speed until the mixture is light and creamy, ensuring no sugar granules remain.
- Add the eggs one at a time, mixing on low speed after each addition just until incorporated. Add the egg yolks and mix briefly. Do not overmix the batter once the eggs are added.
- Slowly pour in the heavy cream while mixing on low speed. Mix until the batter is uniform.
- Sift the flour and salt over the batter. Gently fold the flour mixture in by hand using a spatula until just combined.
- Pour the batter into the prepared pan. The batter will be quite liquid.
- Bake at 400°F (200°C) for 45 to 55 minutes. The top should be deeply caramelized, almost black in spots, and the center should still have a significant wobble.
- Remove the cheesecake from the oven. It will deflate as it cools. Let it cool completely on a wire rack at room temperature for at least 2 hours.
- Once cool, chill the cheesecake in the refrigerator for at least 4 hours, or preferably overnight, before serving.
Notes
- Use room temperature ingredients for the smoothest batter possible. This prevents lumps in your creamy cheesecake center.
- For the best texture, serve this decadent dessert at room temperature. If you prefer a denser finish, chill it longer.
- This rustic cheesecake requires high heat to achieve the signature caramelized top. Do not worry if the top looks very dark.
Nutrition
- Serving Size: 1 slice
- Calories: 450
- Sugar: 30
- Sodium: 150
- Fat: 35
- Saturated Fat: 22
- Unsaturated Fat: 13
- Trans Fat: 0.5
- Carbohydrates: 28
- Fiber: 0
- Protein: 8
- Cholesterol: 180