
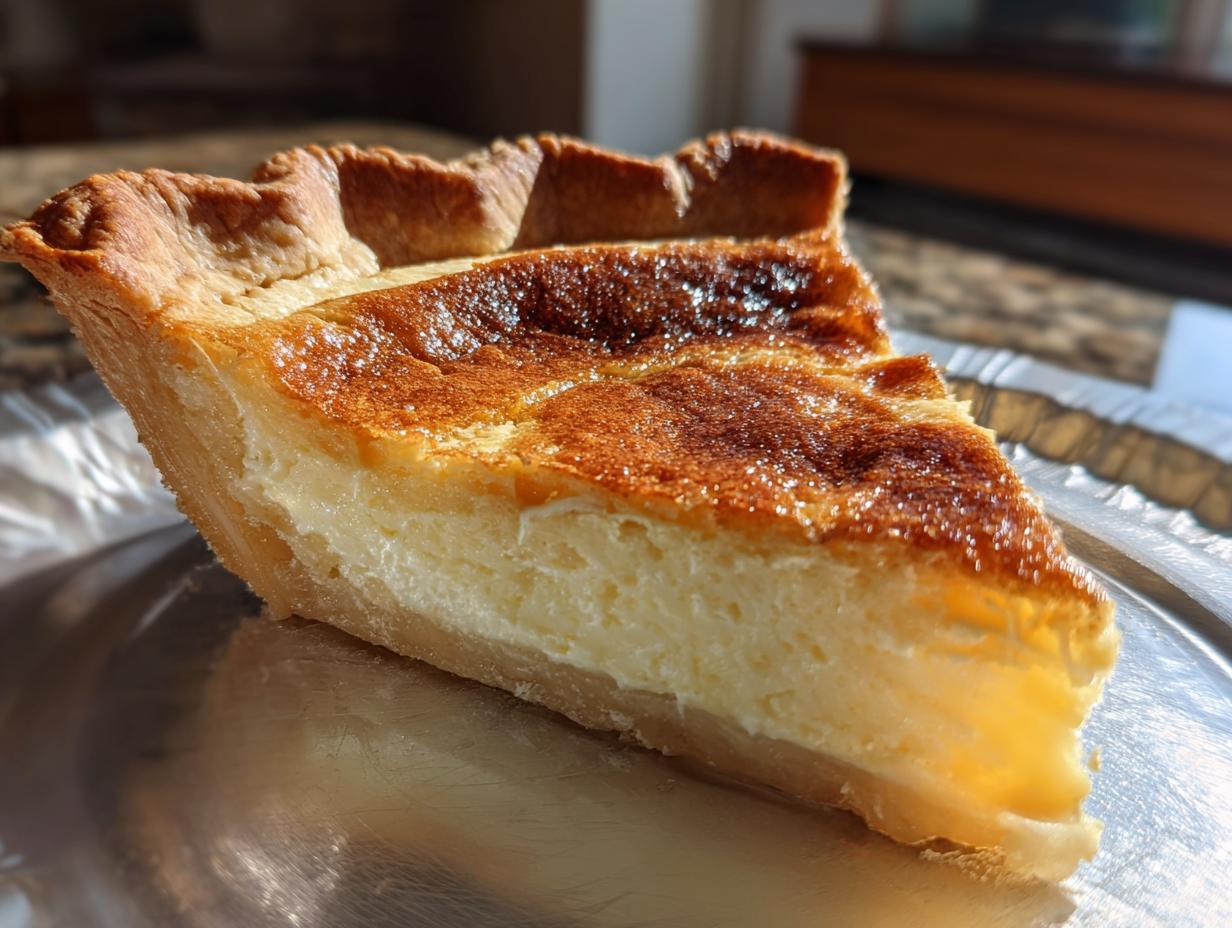
Do you ever just crave that dessert that instantly wraps you up in memory? Like walking into your grandmother’s kitchen on a crisp Sunday afternoon? For me, that feeling always tastes like sweet, deep butterscotch. I know we all have our go-to comforting treats, but trust me when I say this classic butterscotch pie is the ultimate version of that feeling baked right into a crust. It’s the recipe I turn to when I need something truly reliable, rich, and utterly foolproof.
When I moved away from the fast pace of my old events job and started Bliss Batter, this was one of the very first recipes I dedicated myself to perfecting. I wanted something traditional—nothing trendy or overly complicated—but it had to deliver that smooth, decadent flavor every single time. This isn’t just a dessert; it’s a little slice of home, carefully developed so you can create it with complete confidence. If you love that deep, warm flavor profile, you should also check out my recipe for salted caramel brownies—it hits a similar comfort note!
- Why This Classic Butterscotch Pie Recipe Works
- Ingredients for Your Homemade Butterscotch Pie
- Step-by-Step Instructions for the Perfect Butterscotch Pie
- Tips for the Ultimate Homemade Butterscotch Pie
- Serving Suggestions for Your Rich Butterscotch Dessert
- Storage and Reheating Instructions for Butterscotch Pie
- Frequently Asked Questions About Making Butterscotch Pie
- Estimated Nutritional Data for Creamy Butterscotch Pie
- Share Your Classic Butterscotch Pie Creations
Why This Classic Butterscotch Pie Recipe Works
Why bother with store-bought when you can make something this incredible from scratch? This recipe truly stands out. It’s what I consider the best butterscotch pie because it guarantees that satisfying, nostalgic flavor without any fuss. It holds up beautifully.
- Flaky crust integrity meets lush, set filling.
- The flavor is deep and perfectly balanced—not too sweet!
- It’s reliable; I promise it sets up right every time you try it.
If you’ve ever loved my old-fashioned oatmeal raisin cookies, you’ll appreciate the commitment to traditional, deep flavor here!
Achieving the Silky Creamy Butterscotch Pie Filling
The secret to that melt-in-your-mouth texture, the one that makes people close their eyes when they take the first bite, is all in mastering the custard. We are talking about the ultimate creamy butterscotch pie filling here. You absolutely must temper those egg yolks!
Tempering means slowly introducing heat to the eggs by whisking in a little bit of that hot sugar mixture before adding them to the main pot. Seriously, never dump cold yolks into hot liquid, or you’ll end up with sweet scrambled eggs! Constant stirring while cooking is also non-negotiable—it keeps the texture silky smooth and prevents scorching on the bottom.
Ingredients for Your Homemade Butterscotch Pie
Gathering your ingredients is part of the fun, right? When you’re making a true classic like this, quality matters. I use standard pantry staples, but make sure you have your crust totally ready to go before you start cooking the filling, because everything moves fast once the heat is on! I’ve got all the details on my flaky crust (or your preference for a buttermilk biscuit maker might need a good pie shell guide!) below.
- 1 pre-made or homemade 9-inch pie crust (must be baked and cooled completely!)
- 1/2 cup packed light brown sugar (make sure it’s packed tightly!)
- 1/4 cup granulated sugar
- 1/4 cup cornstarch (this is our thickening power!)
- 1/4 teaspoon salt
- 1 1/2 cups whole milk
- 1/2 cup heavy cream
- 3 large egg yolks, lightly beaten (save those whites for meringue later!)
- 4 tablespoons unsalted butter
- 1 teaspoon vanilla extract
- Optional: Meringue or whipped topping for serving
Step-by-Step Instructions for the Perfect Butterscotch Pie
Okay, deep breath! This might seem like a lot of steps, but honestly, the cooking part flies by. Just like when I make my tender coffee cake, the magic is in keeping things moving and paying attention right when you need to. Remember, we are making a spectacular, rich butterscotch pie here, so a few minutes of focused stirring is a small price to pay!
Preparing the Sugar Base and Milk Mixture for Your Butterscotch Pie
First thing’s first, step one is simple: make sure that 9-inch crust you made (or bought!) is completely cool. We don’t want a melty crust! Now, grab a medium saucepan—this is your primary workspace. Whisk together your brown sugar, granulated sugar, cornstarch, and salt until they are totally unified. Then, slowly pour in the whole milk and heavy cream, whisking constantly until everything is smooth as silk before you turn on the stove. That smooth start is key!
Tempering Eggs for a Smooth Creamy Butterscotch Pie Filling
This is where we earn that silky texture! While the sugar mixture heats, gently whisk those three egg yolks in a small bowl. When the mixture in the saucepan gets hot and starts bubbling (about 8 to 10 minutes in), you have to temper them. That means taking about half a cup of that hot liquid and drizzling it *very slowly* into the yolks while you whisk like crazy. This gently warms them up so they don’t curdle when they hit the main pot. Once they are acclimated, pour that warmed yolk mixture right back into the saucepot and whisk it all together again!
Finishing and Chilling the Classic Butterscotch Pie
After adding the eggs back, keep cooking gently for just another minute or two until that filling is visibly thick—think pudding consistency but even firmer. Take it *off* the heat completely before stirring in your four tablespoons of butter and the vanilla until they disappear. Try not to let it boil after the eggs go in! Pour that glorious filling into your cooled crust right away. My absolute favorite trick to keep the top perfect is pressing a piece of plastic wrap directly onto the filling’s surface. You must chill this beauty for at least 4 hours so it sets up perfectly before you top it for serving!
Tips for the Ultimate Homemade Butterscotch Pie
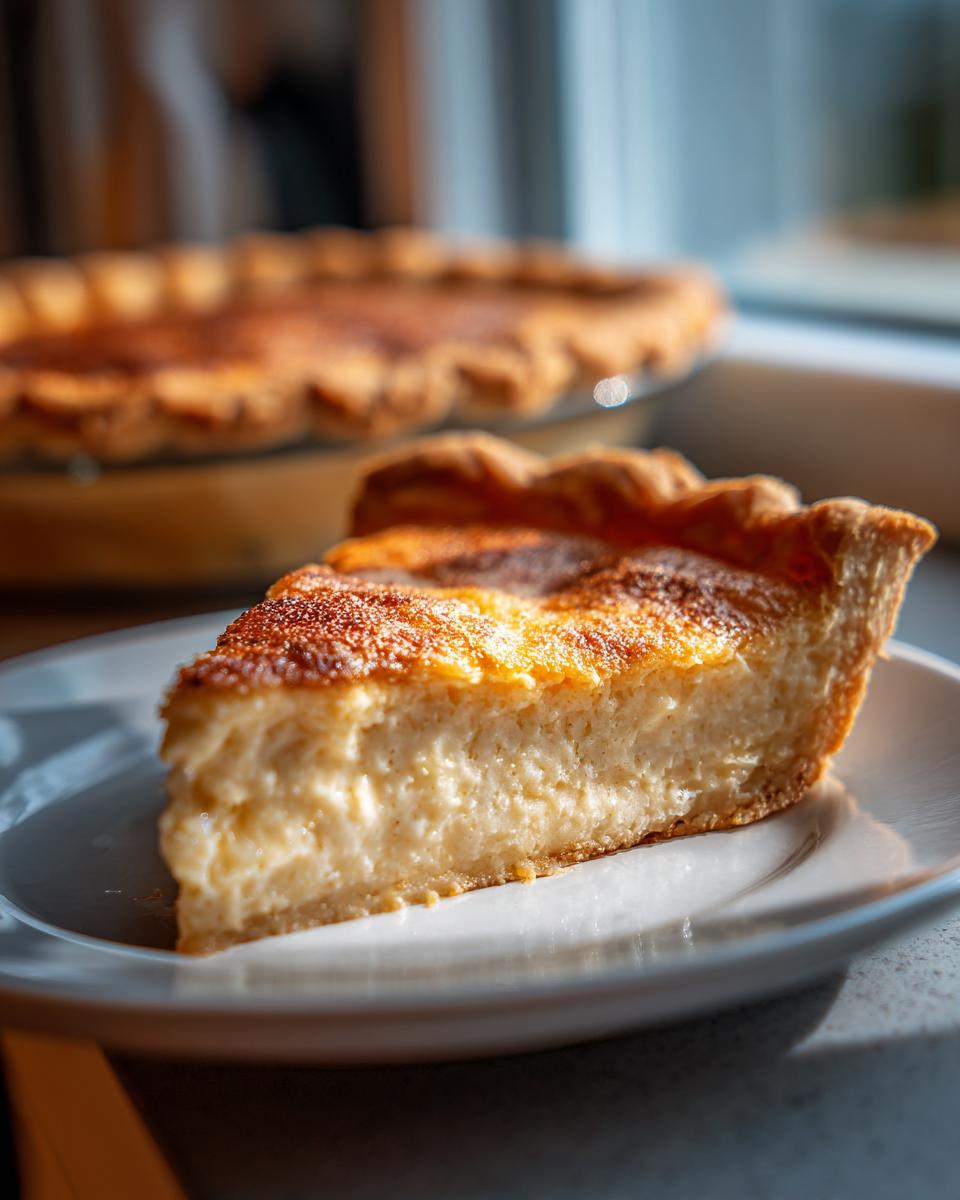
Making this old fashioned butterscotch pie is wonderful because it reminds us of the simple desserts our grandparents used to make. When I first started testing this recipe years ago, I used whatever crust I had on hand, and let me tell you, using a baked shell is essential! You need that sturdy base to hold that heavy, rich filling.
If you’re using a different crust, like a graham cracker option, remember that it needs to be fully chilled before you pour in the hot filling, otherwise, you’ll get a sad, crumbly mess later on. These little details are what take a good pie and turn it into a truly show-stopping dessert you’ll want to make again and again. And if you need a fun drink pairing, try whipping up my apple cider cocktail!
Crust Options for Your Butterscotch Pie
For that classic feel, stick to a flaky, pre-baked pastry crust—it just holds up best against the creamy filling. However, if you’re short on time or just craving something different, a graham cracker crust butterscotch pie is divine! Make sure you press the crumbs firmly into the pan and chill it thoroughly before you even think about pouring in that hot custard. It’s an easy switch that saves time but still delivers big flavor!
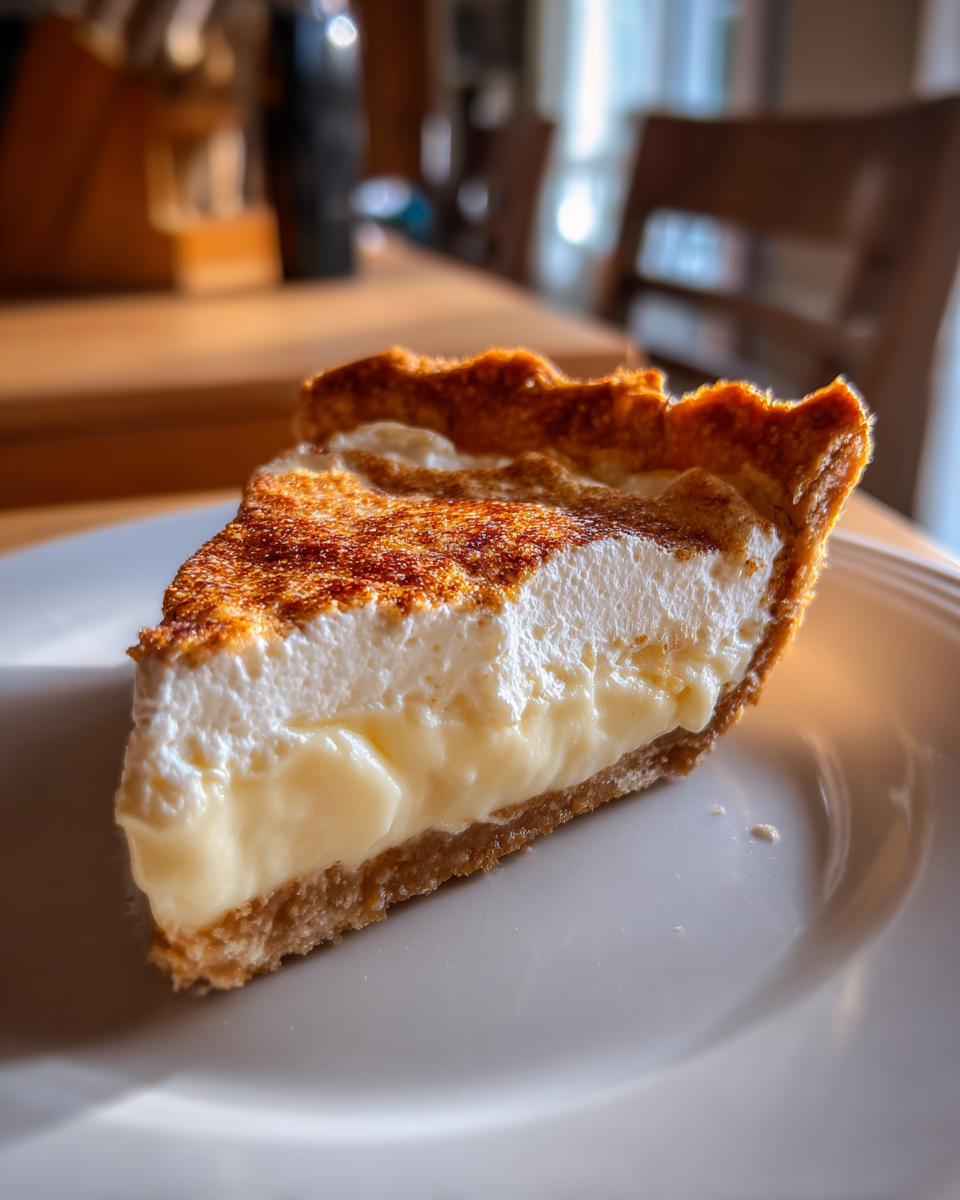
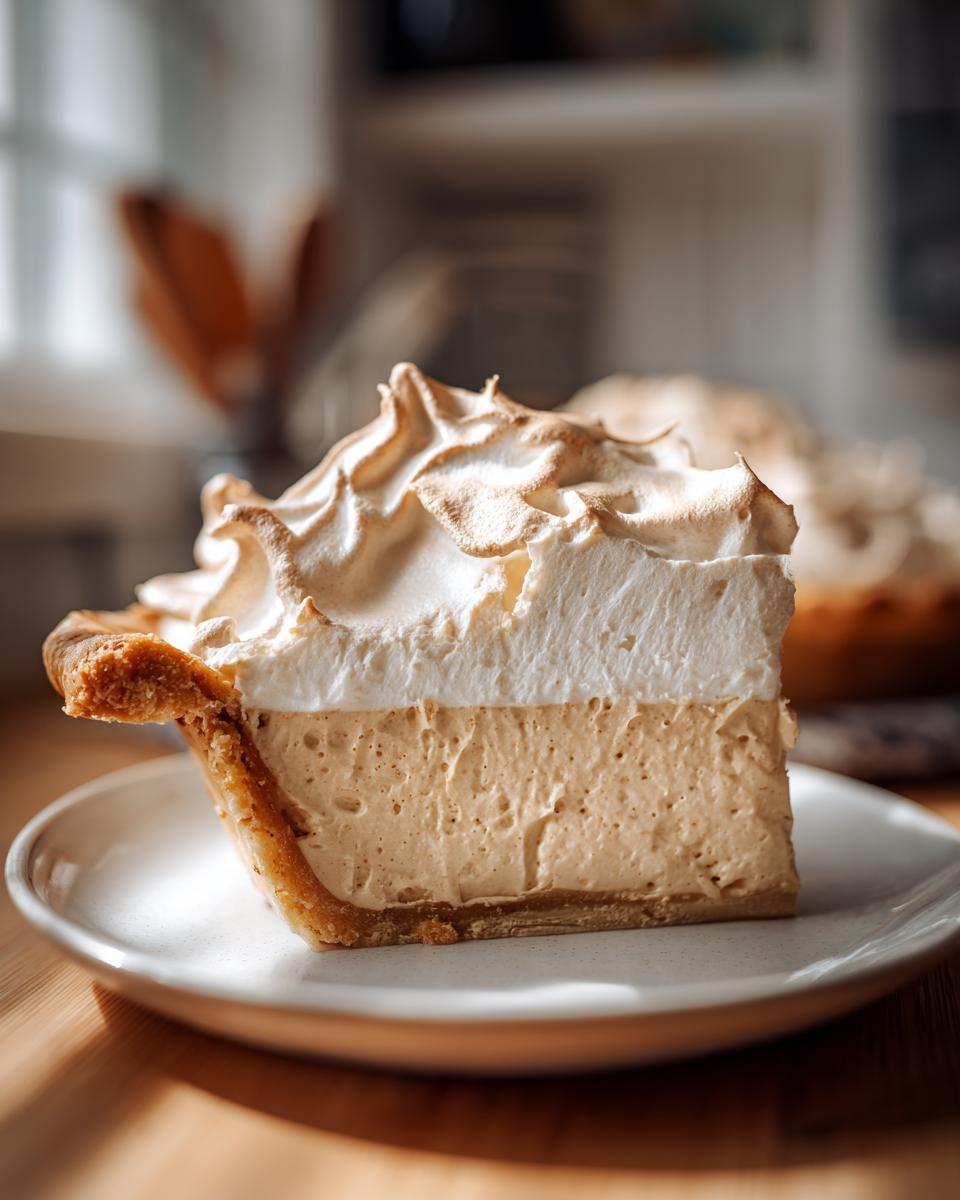
Serving Suggestions for Your Rich Butterscotch Dessert
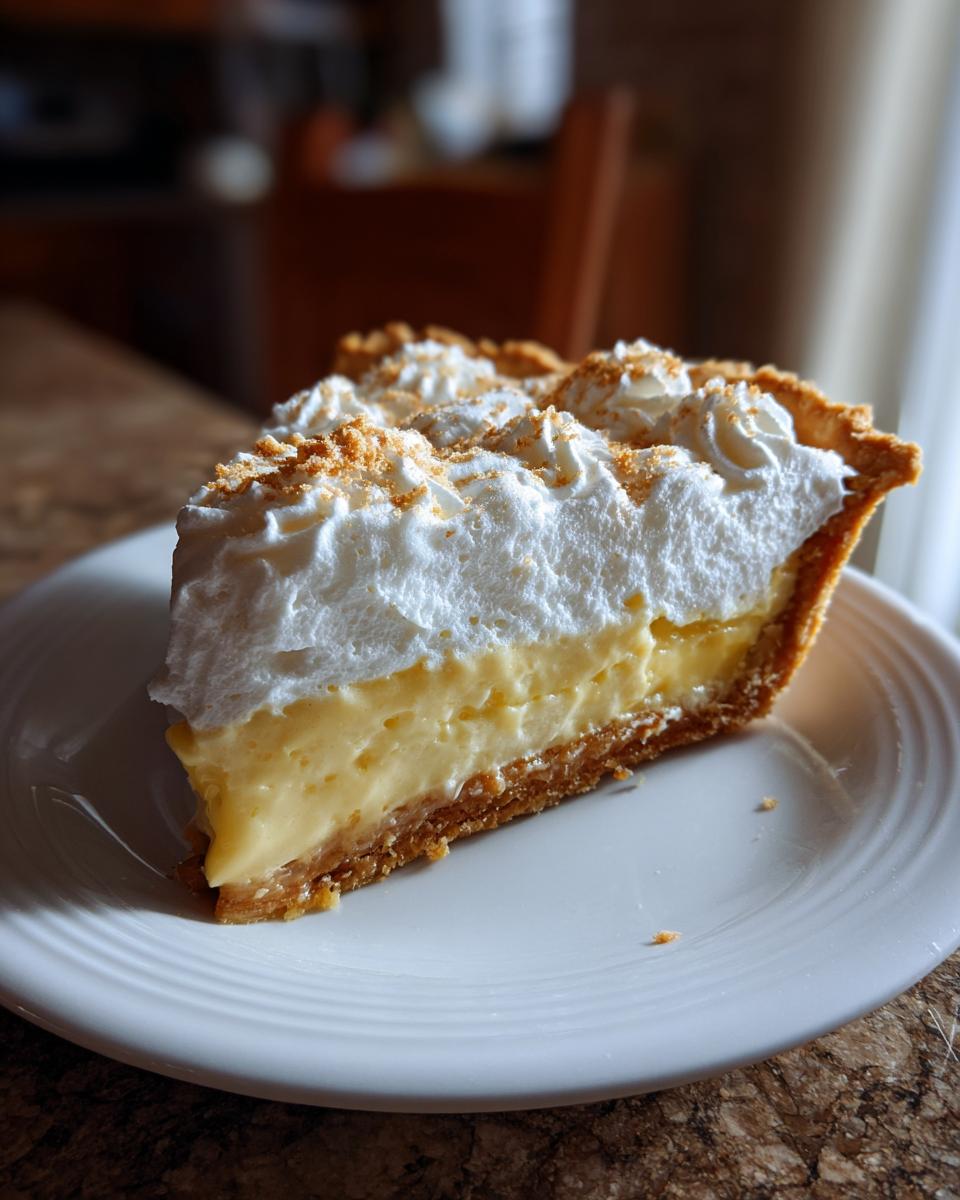
Now that you have this gorgeous, rich dessert hanging out in the fridge, perfectly set, it’s time for the fun part: the topping! The recipe calls for either the classic, soft meringue or maybe just a dollop of simple whipped cream. I always lean toward fresh whipped cream; it just cuts through that buttery richness so nicely.
If you’re serving this up, keep it cozy! It’s peak comfort food desserts territory. A simple dusting of flaky sea salt right before serving can really make those caramelized notes pop. And if you need a perfect warm drink pairing for a chilly evening, I love sipping on my hot toddy alongside a slice. It’s just divine!
Storage and Reheating Instructions for Butterscotch Pie
Because this pie has that rich, egg-based filling, we keep it chilling! My rule of thumb is that this butterscotch pie stays absolutely perfect in the fridge for about three to four days when covered well. You don’t want to reheat it, though; custard pies really shine when served cold or slightly cool straight from the refrigerator. If you want to add whipped topping, always wait until right before serving so it stays light and airy. For the best texture down the line, try serving it alongside a warm treat like my cinnamon monkey bread!
Frequently Asked Questions About Making Butterscotch Pie
I always get so many questions after people try making this pie for the first time! And that’s fantastic, because that means you’re excited about it! Dealing with custard pies can feel a little intimidating, but once you nail the technique, you’ll feel like a baking magician. I want you to have success, so let’s cover the things people ask about most often when they’re trying to make the best butterscotch pie.
Can I make a no bake butterscotch pie using this recipe?
That’s a great question if you’re looking for a quick fix! You can definitely find wonderful butterscotch pie no bake options out there, but this specific recipe requires you to cook the custard on the stovetop because we are using egg yolks to create that amazing richness. If you need something that skips the stove entirely, you’ll want a recipe that specifically uses instant pudding mixes or relies heavily on stabilizers like whipped cream or Cool Whip to set up. This one is our traditional, cooked custard version!
What is the difference between this classic butterscotch pie and a caramel pie?
This is where flavor history comes in! People often mix them up, but they are distinct! A true butterscotch flavor comes from boiling or cooking brown sugar with butter right from the start, which gives you that deeper, molasses-y complexity—it’s what makes our pie an old fashioned butterscotch pie. Caramel, on the other hand, is traditionally made by cooking white granulated sugar until it browns first, then adding cream and butter. They’re both delicious, but butterscotch has that signature, rich brown sugar soul!
If you’re looking for other simple, pantry-friendly baking projects, my recipe for rustic pumpkin beer bread is another one that requires very little fuss!
Estimated Nutritional Data for Creamy Butterscotch Pie
I know some of us count macros, and some of us just count slices! If you need the rundown for this indulgence, here are the estimates for one slice of this pie as we typically make it (with the baked crust, but before any topping is applied). Remember, these are just guidelines based on the ingredients listed in the recipe.
- Calories: 380
- Fat: 20g
- Carbohydrates: 48g
- Protein: 5g
- Sugar: 35g
Since baking is science, these numbers can shift depending on the exact size of your eggs or the brand of butter you use. But this gives you a good idea of how rich and satisfying this comfort food dessert truly is!
Share Your Classic Butterscotch Pie Creations
Baking should always be a shared experience, that’s the whole point of Bliss Batter! I truly love seeing your beautiful creations come to life in your kitchens. Did you go with a fluffy meringue or keep it simple with whipped cream? Don’t forget to leave a rating—five stars help other folks know this is the comforting classic they’ve been looking for!
Snap a picture and share it so we can all admire your perfect slice! If you want to see some amazing examples or need inspiration, you can always check out other amazing recipes, like this one for butterscotch pie inspiration, or try my super simple classic tomato soup next time you need a cozy meal!
PrintClassic Homemade Creamy Butterscotch Pie

Create a nostalgic, rich dessert with this classic butterscotch pie recipe. You get a silky, creamy butterscotch filling made from scratch, set in a flaky crust. This recipe honors tradition and delivers pure comfort.
- Prep Time: 20 min
- Cook Time: 15 min
- Total Time: 4 hours 35 min
- Yield: 8 servings 1x
- Category: Dessert
- Method: Stovetop Cooking
- Cuisine: American
- Diet: Vegetarian
Ingredients
- 1 pre-made or homemade 9-inch pie crust (baked)
- 1/2 cup packed light brown sugar
- 1/4 cup granulated sugar
- 1/4 cup cornstarch
- 1/4 teaspoon salt
- 1 1/2 cups whole milk
- 1/2 cup heavy cream
- 3 large egg yolks, lightly beaten
- 4 tablespoons unsalted butter
- 1 teaspoon vanilla extract
- Optional: Meringue or whipped topping for serving
Instructions
- Prepare your 9-inch pie crust and let it cool completely after baking.
- In a medium saucepan, whisk together the brown sugar, granulated sugar, cornstarch, and salt.
- Gradually whisk in the whole milk and heavy cream until smooth.
- Cook the mixture over medium heat, stirring constantly, until it thickens significantly and begins to bubble. This takes about 8 to 10 minutes. Reduce the heat if it starts to scorch.
- In a separate small bowl, whisk the egg yolks lightly.
- Temper the egg yolks: Slowly pour about 1/2 cup of the hot sugar mixture into the egg yolks while whisking constantly. This prevents the eggs from scrambling.
- Pour the tempered egg mixture back into the saucepan with the remaining hot filling, whisking well.
- Continue to cook over medium-low heat for 1 to 2 minutes, stirring constantly, until the filling is very thick. Do not let it boil after adding the eggs.
- Remove the saucepan from the heat. Stir in the butter and vanilla extract until the butter is fully melted and incorporated.
- Pour the hot, creamy butterscotch filling immediately into the cooled, pre-baked pie crust.
- Press plastic wrap directly onto the surface of the filling to prevent a skin from forming.
- Chill the pie in the refrigerator for at least 4 hours, or until the filling is completely set.
- Before serving, top with your preferred meringue or whipped topping. Slice and enjoy this rich dessert.
Notes
- For the best flavor, use good quality butter and pure vanilla extract.
- If you prefer a graham cracker crust butterscotch pie, substitute the baked pastry crust with a chilled, pressed graham cracker crust.
- To make a quick topping, beat 1 cup of heavy cream with 2 tablespoons of powdered sugar until stiff peaks form.
Nutrition
- Serving Size: 1 slice
- Calories: 380
- Sugar: 35g
- Sodium: 210mg
- Fat: 20g
- Saturated Fat: 12g
- Unsaturated Fat: 8g
- Trans Fat: 0.5g
- Carbohydrates: 48g
- Fiber: 1g
- Protein: 5g
- Cholesterol: 95mg