

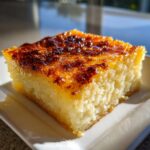
Oh, friends, if my grandmother were here, she’d be bustling around the kitchen telling me to put on a fresh pot of coffee because we absolutely have to talk about this cake. You know those treats that just smell like pure comfort? For me, that’s the cassava cake. It’s such an iconic, wonderfully simple Filipino dessert, rich with coconut and creaminess that just melts away the hard edges of the day.
I know some recipes for this can feel intimidating, but I promise you, my ‘Bliss Batter’ version is the Easy Cassava Cake you’ve been dreaming of. We’re going to nail that perfect balance: a base that’s delightfully chewy but wonderfully moist cassava cake, topped with a golden, spoonably smooth custard. I developed this recipe because I wanted everyone to experience that tropical sunshine without needing a trip to the specialty store or spending hours hovering over the oven. Trust me, making this classic right at home is something special! You can read more about my baking journey over on our About Page, but for now, let’s get baking!
- Why This Easy Cassava Cake Recipe Works for Everyone
- Gathering Ingredients for Your Cassava Cake
- How to Prepare the Best Filipino Cassava Cake Recipe
- Tips for Success with Your Baked Cassava Cake
- Variations: Cassava Cake with Macapuno and Cheesy Cassava Cake Recipe
- Serving Suggestions for this Tropical Baked Goods Delight
- Storage and Reheating Instructions for Cassava Cake
- Frequently Asked Questions About Cassava Cake
- Share Your Cassava Cake Creations
Why This Easy Cassava Cake Recipe Works for Everyone
I want you to feel totally confident walking into the kitchen for this one. This isn’t some fussy bake from a fancy pastry magazine! It’s about taking an incredible authentic Filipino dessert and making it foolproof for your busy week. When people tell me they finally mastered this recipe, it makes my day! We focus on simple assembly and technique so the ingredients do all the heavy lifting. If you love rich, satisfying textures, you’ll find all the best dessert recipes right here. Check out our dessert collection here!
Achieving the Perfect Chewy Cassava Cake Texture
The secret sauce, truly, is the cassava itself. We use grated cassava, which when mixed just right with the creamy coconut milk and condensed milk, creates that signature chewiness. You aren’t aiming for fluffy cake batter here; you’re aiming for something dense, rich, and perfectly mouth-coating. Don’t over-mix the base once you add the wet ingredients—we just want everything happy and combined!
The Secret to a Creamy Cassava Cake Topping
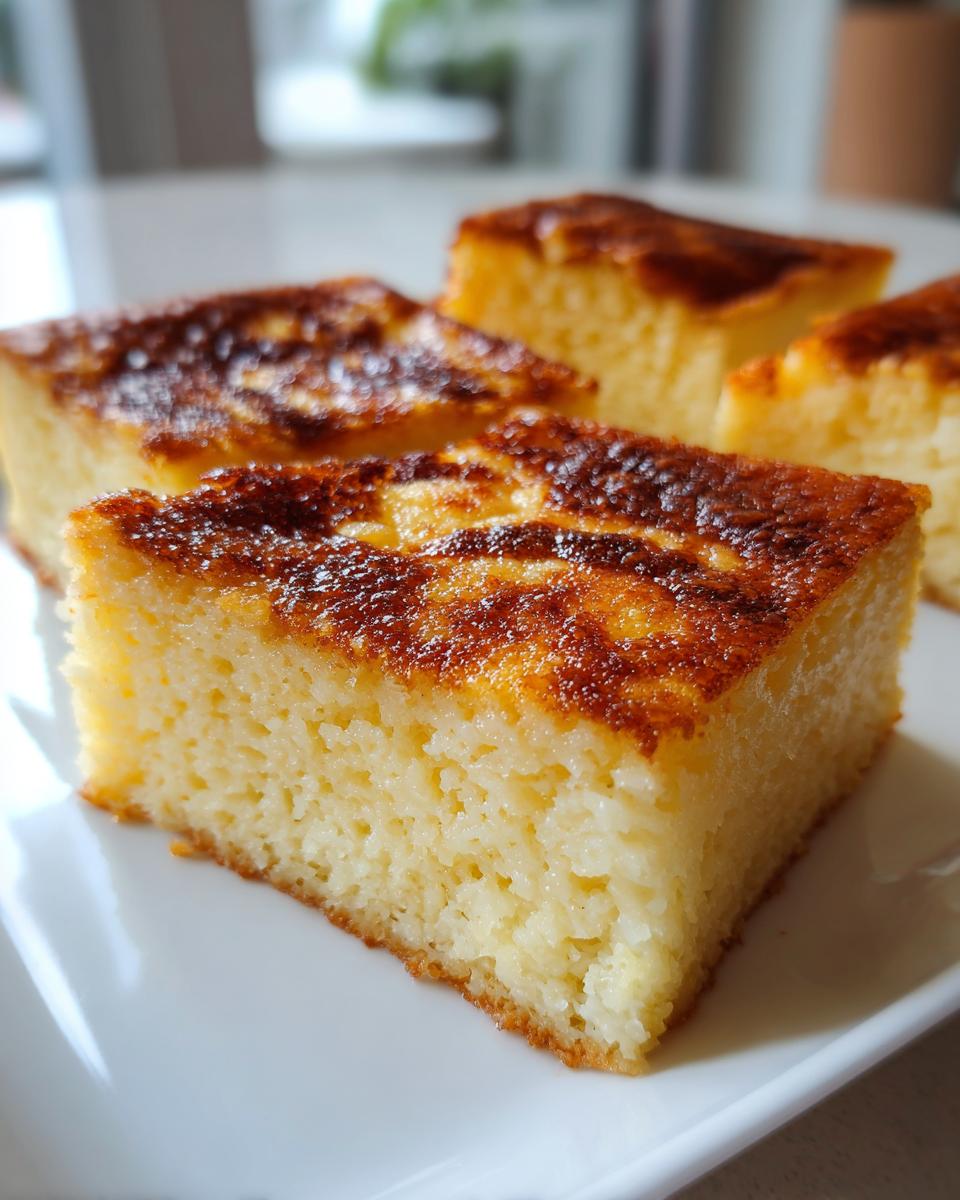
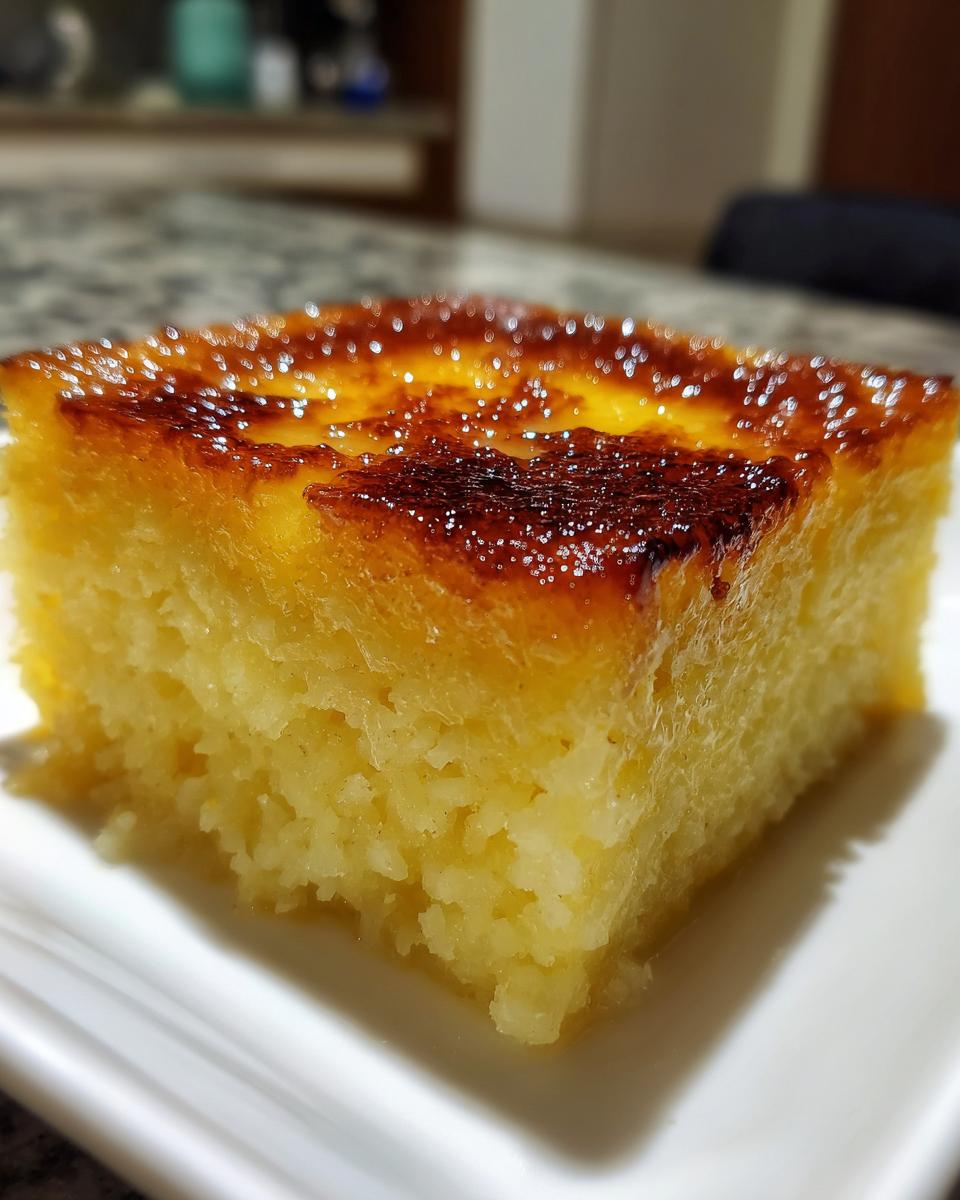
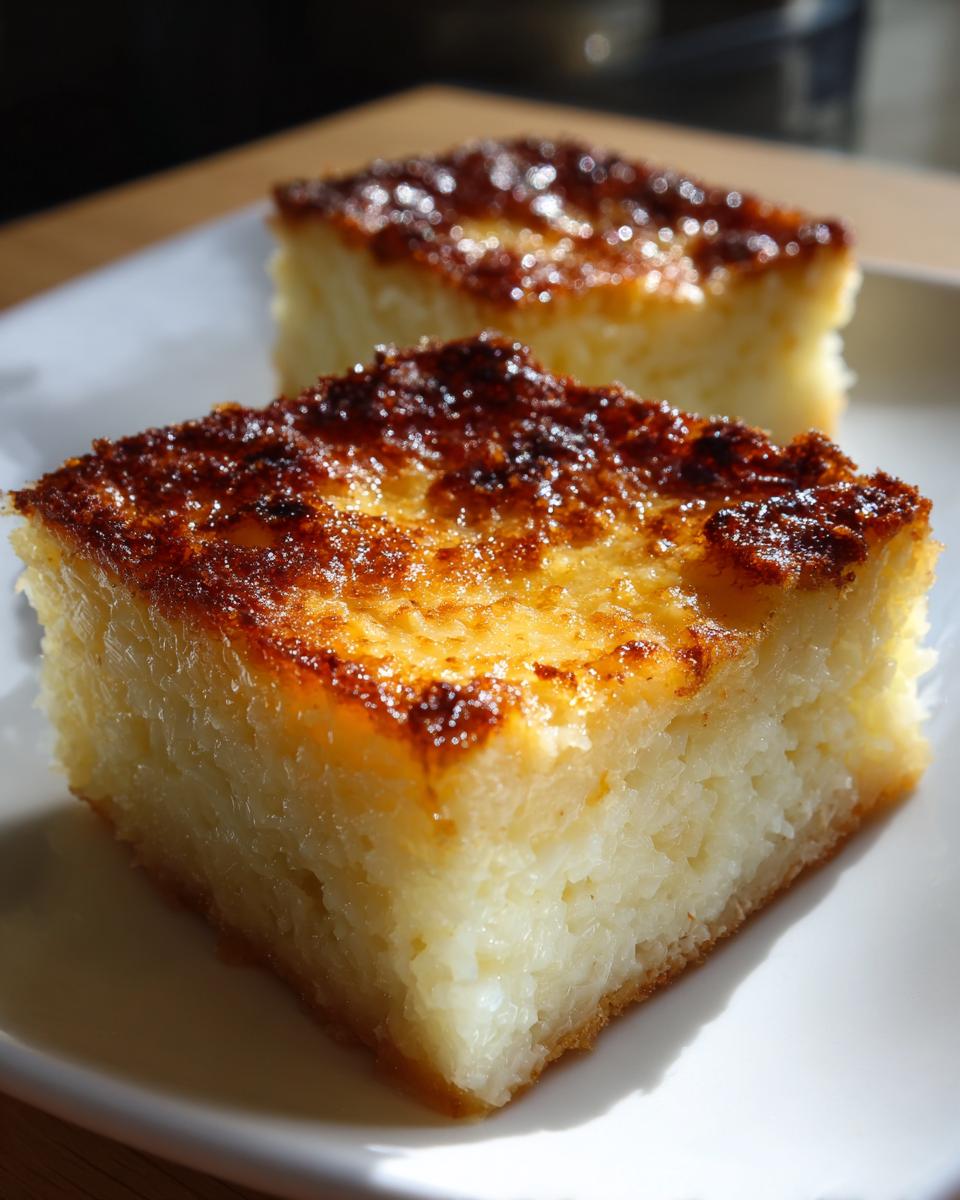
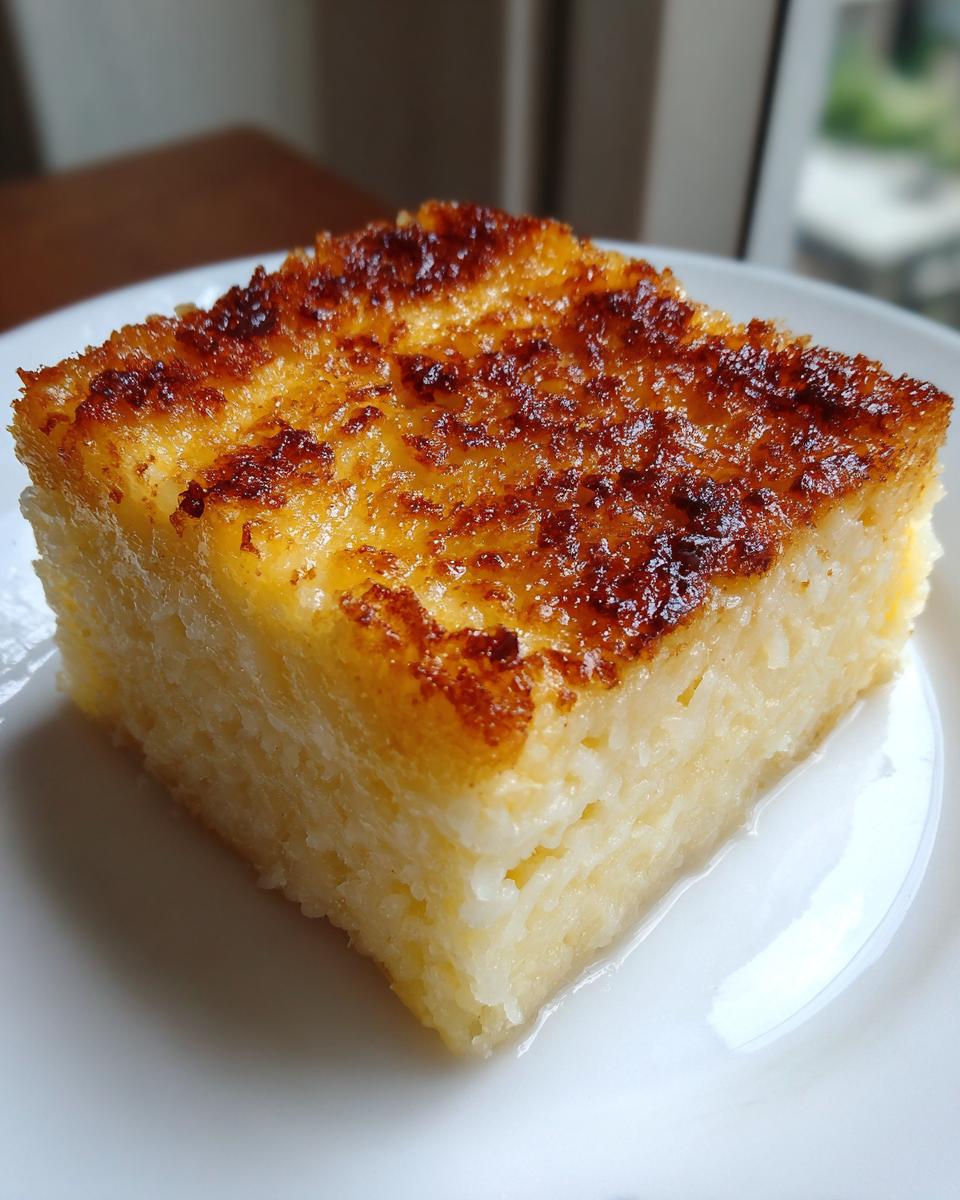
Everyone asks about that beautiful, shiny top! That’s our simple custard layer, and honestly, it sounds more complicated than it is. We save a little bit of the rich liquid to whisk with an egg yolk separately. Pouring that over the hot, partially baked base locks in all that moisture and creates a clean separation between the chewy bottom and the velvety gold top. It sets up gorgeously!
Gathering Ingredients for Your Cassava Cake
When it comes to making any great bake, especially a classic like this, the ingredients have to be right. I laid everything out on my counter before I even turned the oven on—it just helps me stay organized! We’re keeping this list straightforward because that’s what makes it such a fantastic quick cassava recipe. You’ll notice rich ingredients like full-fat coconut milk and condensed milk; these are non-negotiable for that deep, tropical sweetness that defines the best cassava cake recipe.
Here’s what you’ll need for the base and the decadent topping. Make sure you have your 9×13 inch pan ready to go! I always use parchment paper with an overhang—it saves so much frustration when lifting this heavy, gorgeous dessert out later.
- 4 cups grated cassava (fresh or frozen, thawed)
- 1 (13.5 oz) can full-fat coconut milk
- 1 (14 oz) can sweetened condensed milk
- 1/2 cup granulated sugar
- 1/2 cup melted unsalted butter, plus more for greasing
- 2 large eggs
- 1 teaspoon vanilla extract
- 1/4 teaspoon salt
- 1/2 cup Macapuno strings (optional, for texture)
- 1/2 cup shredded mild cheddar cheese (optional, for topping)
Ingredient Notes and Substitutions for Cassava Cake
Let’s talk about the star: the cassava. If you’re using fresh, I always say squeeze out any excess watery liquid you can—we want the flavor, not a soup! However, thawed frozen grated cassava is totally reliable and often easier for folks who don’t have access to fresh root vegetables every day. Don’t skip the coconut milk; it’s what gives us that signature rich flavor in this cassava cake with coconut milk.
Now for the fun optional bits! If you can find Macapuno strings, grab them. They add delightful little bites of chewy coconut, enhancing the tropical feel of this sweet cassava dessert. And yes, cheese! It sounds wild, but a mild cheddar on top melts down beautifully, giving you that famous savory-sweet contrast found in many cheesy cassava cake recipes.
How to Prepare the Best Filipino Cassava Cake Recipe
Alright, let’s get into the fun part! This is where we turn those lovely ingredients into the most satisfying cassava cake you’ve ever had. The whole process is naturally divided into two simple baking stages, which is the trick to getting that chewy bottom and that perfect, lovely custard top. Remember, preheat that oven to 350°F (175°C) first thing! I also can’t stress enough: grease your 9×13 inch pan well, and for absolute peace of mind, line the bottom with parchment paper, letting the sides stick up like little handles. This helps us lift the whole thing out cleanly later.
Mixing the Cassava Cake Base
Grab your biggest bowl—we’re making a big, satisfying batch! You’re just going to dump everything in: the grated cassava, the coconut milk, the whole can of condensed milk, sugar, melted butter, those two eggs, vanilla, and salt. Now, whisk it all together until it looks happy and uniform. Don’t worry about bringing in tons of air; we want density here! If you decided to include the optional Macapuno strings, gently fold those in last. You want them distributed, but you don’t want to smash them up or overwork the batter at this stage. Then, pour it right into your prepared pan.
Baking and Creating the Creamy Cassava Cake Topping
The base layer goes into the oven for about 45 to 55 minutes. You’ll see the edges start setting up and getting a slight color. While that’s happening, whisk up your custard topping in a separate little bowl—just a bit more condensed milk, a splash of coconut milk, and one extra egg yolk. When that base layer is hot and firm enough to hold the topping, carefully pour that custard over the top! Slide it back in for another 15 to 20 minutes. Keep an eye on the topping; we want it set and golden brown. If you’re doing the cheesy version, sprinkle that cheese on in the last five minutes so it just melts gorgeously. The most important rule for texture? Let it cool completely. Seriously, give it a few hours on the counter!
Tips for Success with Your Baked Cassava Cake
I’ve certainly had a few batches that didn’t look exactly picture-perfect when they came out, so let me share the little tricks I’ve learned over the years to guarantee that beautiful, signature result every single time. Getting that wonderful, chewy cassava cake texture comes down to two things: proper draining and temperature control. If you’re using fresh cassava, I really recommend squeezing out as much liquid as humanly possible right before you mix the base. If that mixture is too wet, the bottom layer won’t set up right, and that’s how you end up with a soupy layer instead of that perfect dense chew.
Also, my little hack for the top? If your custard layer seems to be browning too quickly before it sets inside, just slide a piece of aluminum foil loosely over the top for the last ten minutes of that final bake. We need the heat to penetrate and finish cooking without scorching those lovely coconut fats. Patience during the cooling phase is also huge for the final structure of your cassava cake. Don’t rush to slice it! You can check out more of my tested baking wisdom on layering and setting techniques here.
Variations: Cassava Cake with Macapuno and Cheesy Cassava Cake Recipe
Okay, once you feel comfortable making the classic, it’s time to play around! This cassava cake is like a blank, delicious canvas waiting for you to add your favorite splashes of flavor. Don’t be scared of the add-ins; they truly take this Filipino Cassava Cake Recipe to the next level.
If you manage to find Macapuno strings—which are basically young coconut preserves—fold about half a cup into the base batter right before it goes into the oven. They soften beautifully and give you these sweet, soft strands in every bite. It’s a textural dream!
For the cheese lovers? That’s my favorite deviation! After you pour on that lovely custard topping (Step 6 in the instructions), wait until the last 5 minutes of baking time. Sprinkle on about half a cup of shredded mild cheddar. It melts into this lovely, slightly salty blanket over the sweet custard. It’s truly fantastic and pairs wonderfully with the richness of the coconut milk in your sweet cassava dessert.
If you want more ideas on combining creamy textures and flavors, check out how I handle cream cheese swirls in my pumpkin cheesecake recipe. It gives you some insight into balancing sweetness!
Serving Suggestions for this Tropical Baked Goods Delight
This rich, sweet, and dense cassava cake really shines when paired with something bright or slightly salty to cut through that creamy coconut goodness. I always serve mine either slightly warm or at room temperature; never cold from the fridge, if you can help it!
For beverages, you absolutely have to try it alongside a warm cup of coffee—it’s the perfect pairing for that afternoon *merienda*. If you’re feeling fancy, try it with my salted caramel latte recipe; the hint of salt elevates everything. If you need a lighter snack pairing, a few slices of fresh mango on the side work wonders. It doubles down on that wonderful tropical feel!
Storage and Reheating Instructions for Cassava Cake
Because this cassava cake is so wonderfully dense and rich with coconut milk, it really needs a little careful storing to keep that texture perfect. Once it’s completely cool—and I mean truly cool, remember that step?—wrap the remaining squares tightly in plastic wrap or pop them into an airtight container. You should definitely refrigerate any leftovers. It keeps beautifully for about four to five days!
Do not try to eat it ice-cold! When you’re ready for a treat, taking a square out about 20 minutes before serving really helps soften it up. If you need it warm right away, zap it gently in the microwave for about 15 seconds. That little bit of heat wakes up the creamy moisture perfectly.
Frequently Asked Questions About Cassava Cake
I get so many wonderful questions about this recipe once folks start baking it, and I love hearing from you! It’s all part of the fun of sharing these treasured recipes. Don’t hesitate to reach out if you have more questions after you bake it; you can always contact me on my contact page!
Can I make this a Quick Cassava Recipe without baking the topping separately?
That’s a great thought if you’re really pressed for time! While it would be tempting to dump everything in at once, I strongly advise against it for achieving the best cassava cake recipe texture. The two-step baking method is crucial! If you bake the base until it’s set first, then add the custard, you guarantee that separation between the dense, chewy cassava cake underneath and the silky-smooth top. Baking it all together usually results in the custard sinking or the base never fully setting properly. A little patience here really pays off!
What is the difference between Cassava Cake and Cassava Bibingka?
This is one of my favorite things to explain! For the most part, in the home kitchen here in the States, when we talk about this recipe, we are talking about the same delicious thing. The term Cassava Bibingka usually refers to the traditional Filipino version, often baked in banana leaves or thinner pans, which is very similar to our baked version here. This recipe definitely captures that authentic, comforting flavor profile!
Is this considered a Gluten Free Cassava Dessert?
Great question! Yes, absolutely! Since the foundation of this entire dessert relies on grated cassava root rather than wheat flour, this is naturally a wonderful, gluten free cassava dessert option. It’s always amazing to have a rich, decadent treat that fits into different dietary needs without sacrificing any of that creamy texture we love.
How long does the cassava cake need to set before slicing?
This is the hardest part, I know! You want to dig in right away, but seriously, wait! If you try to slice this warm, it will just fall apart. For the best result, let your moist cassava cake cool completely to room temperature—that usually takes at least 3 to 4 hours on the counter for a 9×13 pan. As it cools, the starches firm up, and that’s what locks in the perfect chewiness!
Share Your Cassava Cake Creations
Now, the best part! I’ve given you my foolproof method for this wonderfully creamy and chewy cassava cake, but baking is so much better when we share the results, right? I absolutely love seeing your photos and hearing how this classic turned out in your own kitchens.
Did you go for the classic topping, or did you make that incredible cheesy cassava cake version? Tell me about it in the comments below! Leaving a rating helps other folks see how reliable and delicious this Filipino Cassava Cake Recipe is, and honestly, those comments keep me motivated to share even more simple, joyful recipes. Don’t forget to tag me on social media when you share your squares—I can’t wait to see all that golden-brown goodness! If you are new here and want to know more about Bliss Batter, check out our About Page!
PrintEasy Filipino Cassava Cake with Creamy Custard Topping
Create a moist, chewy, and rich Filipino Cassava Cake, often called Cassava Bibingka. This simple recipe guides you to a perfect golden-brown, creamy custard top, making it an accessible classic dessert.
- Prep Time: 20 min
- Cook Time: 75 min
- Total Time: 95 min
- Yield: 12 servings 1x
- Category: Dessert
- Method: Baking
- Cuisine: Filipino
- Diet: Vegetarian
Ingredients
- 4 cups grated cassava (fresh or frozen, thawed)
- 1 (13.5 oz) can full-fat coconut milk
- 1 (14 oz) can sweetened condensed milk
- 1/2 cup granulated sugar
- 1/2 cup melted unsalted butter, plus more for greasing
- 2 large eggs
- 1 teaspoon vanilla extract
- 1/4 teaspoon salt
- 1/2 cup Macapuno strings (optional, for texture)
- 1/2 cup shredded mild cheddar cheese (optional, for topping)
Instructions
- Preheat your oven to 350°F (175°C). Grease and line a 9×13 inch baking pan with parchment paper, leaving an overhang for easy removal.
- In a large bowl, combine the grated cassava, coconut milk, condensed milk, sugar, melted butter, eggs, vanilla extract, and salt. Mix well until everything is fully incorporated.
- If using, gently fold in the Macapuno strings.
- Pour the batter evenly into the prepared baking pan.
- Bake the base layer for 45 to 55 minutes, or until the edges are set and lightly golden.
- While the base bakes, prepare the custard topping. In a separate bowl, whisk together 1/2 cup of the condensed milk (reserved from the can, if possible, or use a fresh amount), 1/4 cup coconut milk, and 1 egg yolk until smooth.
- Carefully remove the partially baked cake from the oven. Gently pour the custard mixture evenly over the hot cassava base.
- Return the cake to the oven and bake for another 15 to 20 minutes, or until the custard topping is set and lightly golden brown. If using cheese, sprinkle it over the custard during the last 5 minutes of baking until melted and golden.
- Remove the cake from the oven and let it cool completely in the pan on a wire rack. Cooling allows the cake to firm up for easier slicing.
- Once cool, slice the **moist cassava cake** into squares and serve.
Notes
- For the best chewy texture, ensure your grated cassava is well-drained if using fresh, wet cassava. Squeeze out excess liquid if necessary.
- To achieve that signature golden-brown custard top, watch the cake closely during the final baking stage. You can briefly switch the oven to broil for 1-2 minutes at the very end, watching constantly to prevent burning.
- This **Filipino Cassava Cake Recipe** tastes even better the next day after the flavors have fully melded.
Nutrition
- Serving Size: 1 square
- Calories: 350
- Sugar: 35g
- Sodium: 150mg
- Fat: 18g
- Saturated Fat: 14g
- Unsaturated Fat: 4g
- Trans Fat: 0g
- Carbohydrates: 45g
- Fiber: 3g
- Protein: 5g
- Cholesterol: 45mg