
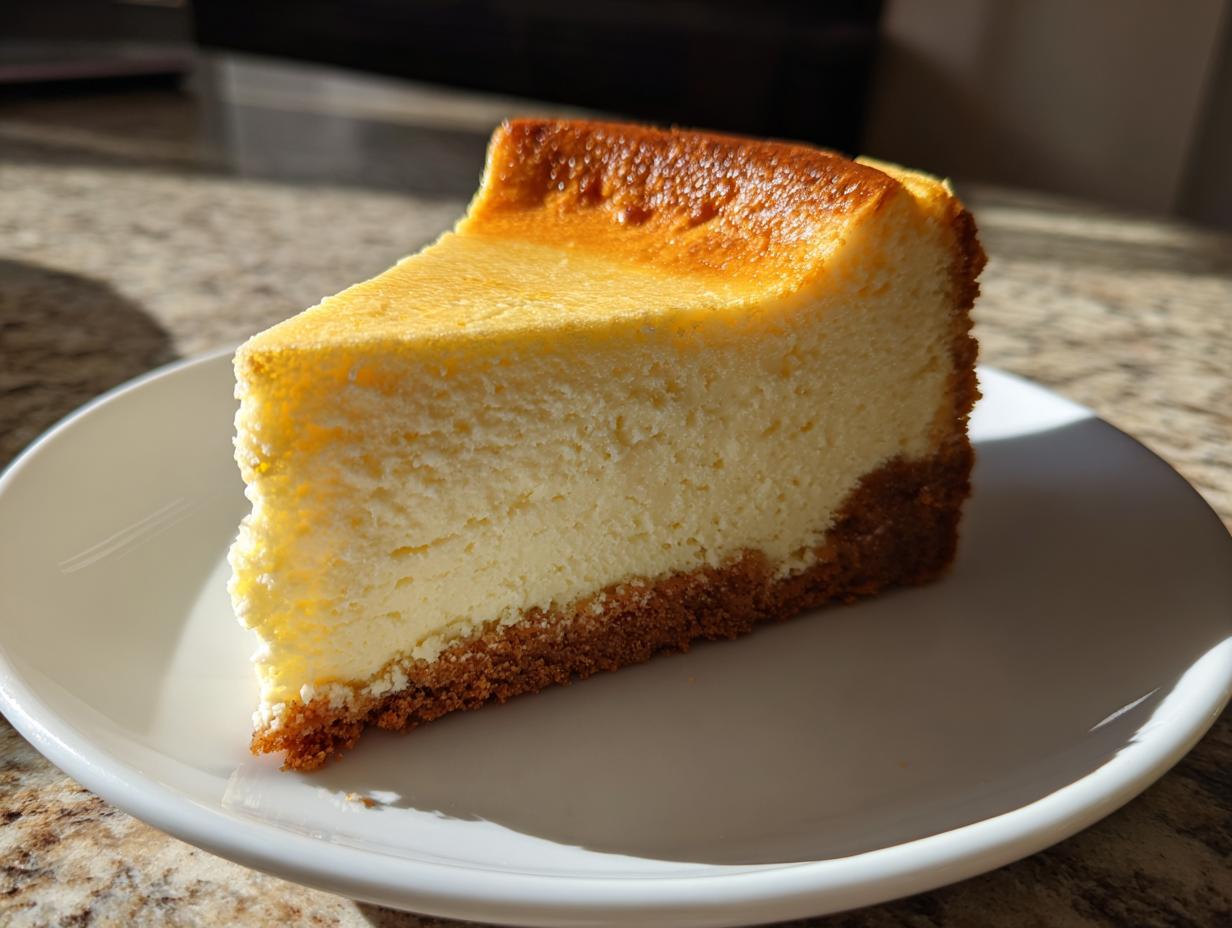
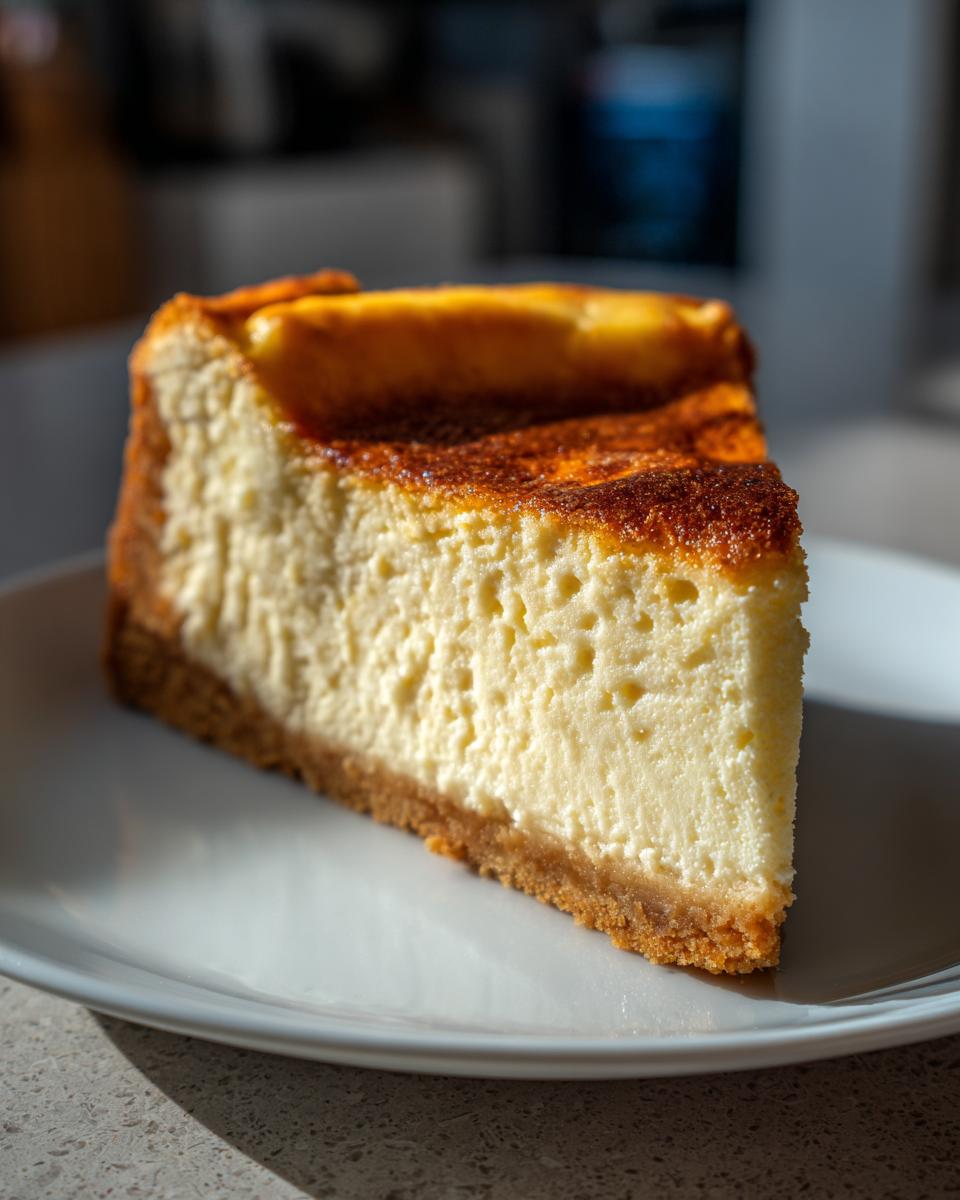
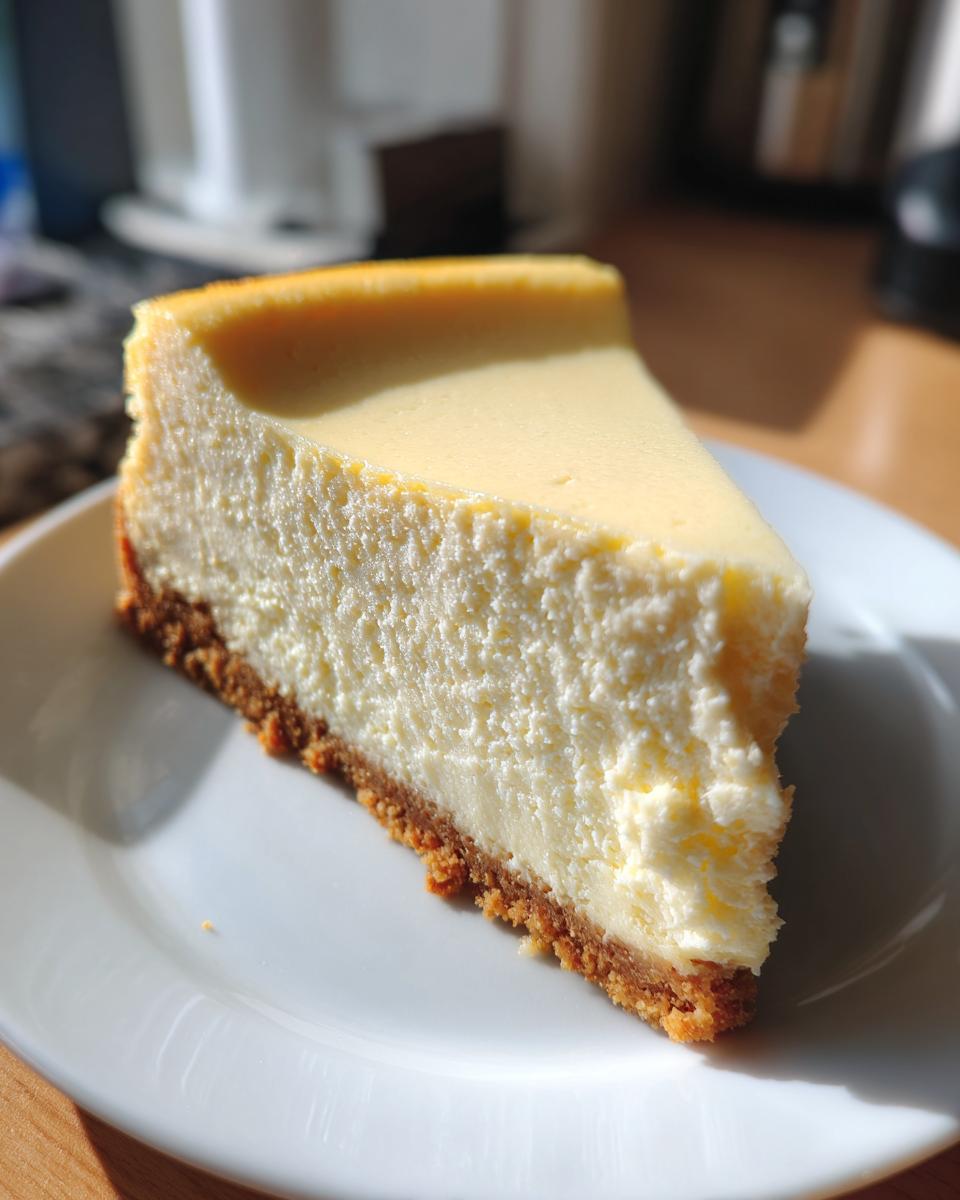
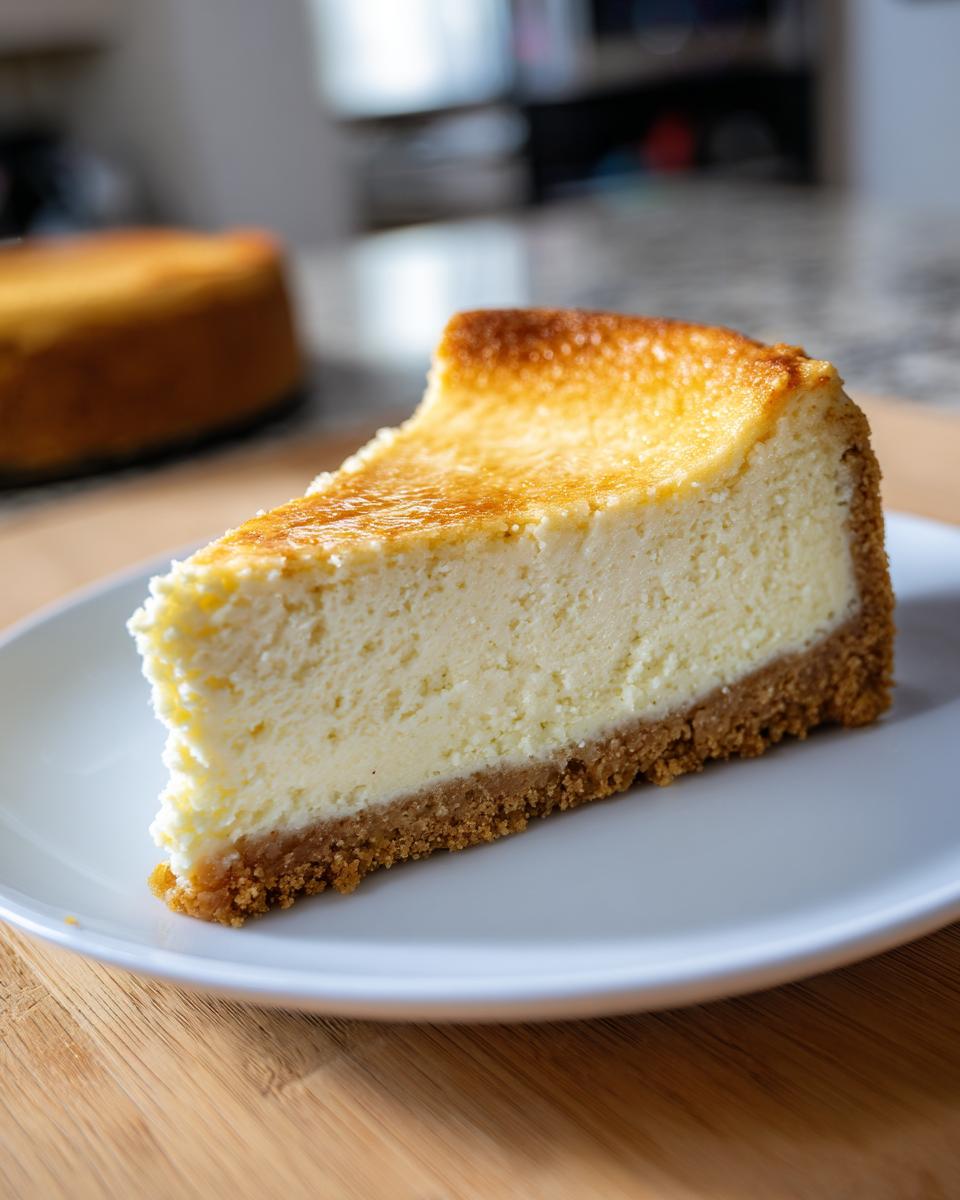
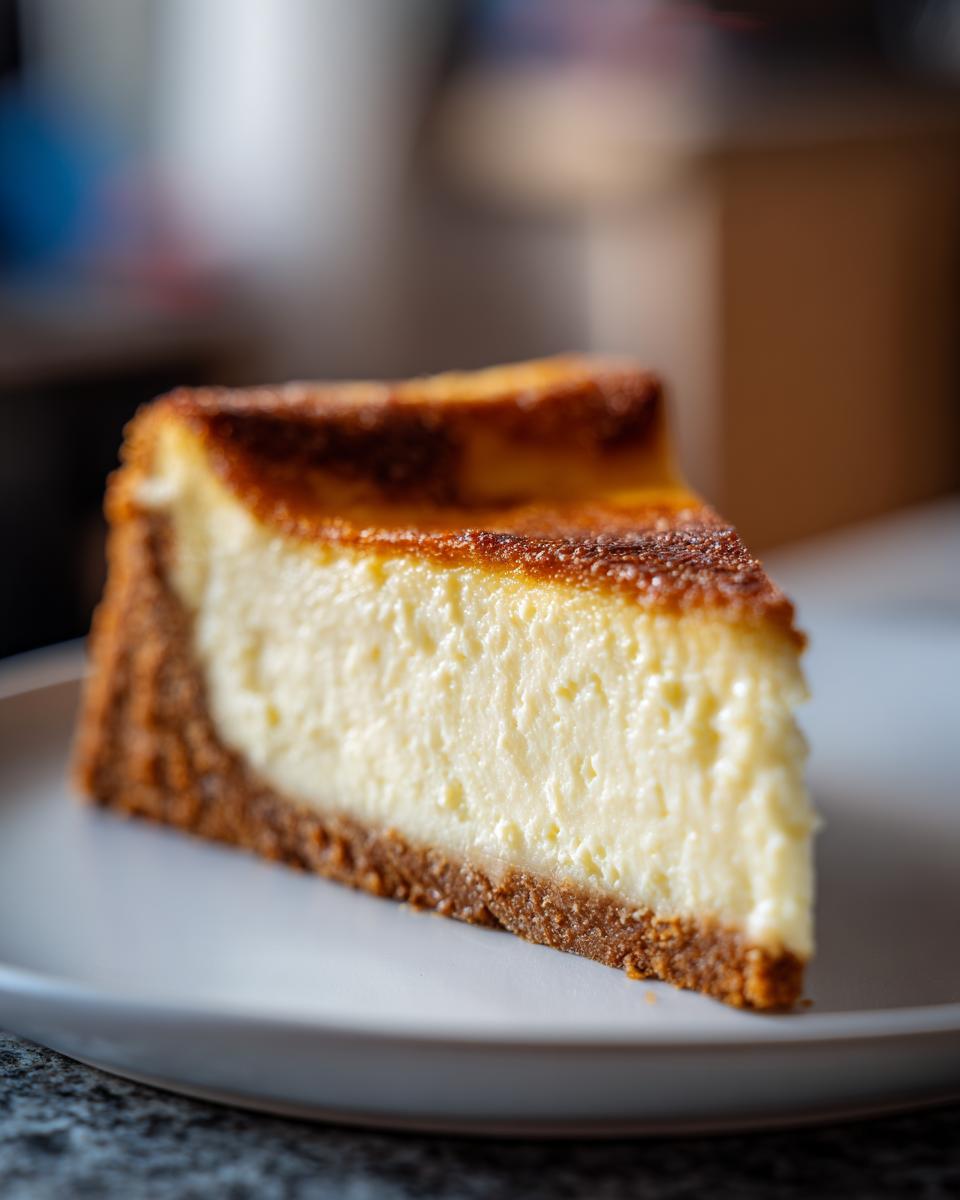
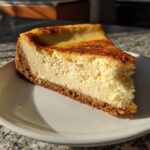
Oh, cheesecake! Just the word makes my heart sing. There’s something so utterly decadent and comforting about a perfectly creamy, dense New York-style cheesecake. Forget fussy desserts, this is the showstopper that makes everyone’s eyes light up. I remember the first time I successfully pulled one of these beauties out of the oven – the whole house smelled like heaven, and the first bite? Pure bliss. My grandmother taught me that baking is all about love, and this classic cheesecake recipe is definitely made with heaps of it. Trust me, this is your foolproof path to cheesecake magic!
- Why You'll Love This Classic Cheesecake Recipe
- Ingredients for the Perfect Cheesecake
- Crafting Your New York Cheesecake: Step-by-Step
- Tips for Cheesecake Success
- Serving and Storing Your Delicious Cheesecake
- Frequently Asked Questions About Cheesecake
- Nutritional Information (Estimated)
- Share Your Cheesecake Creations!
Why You’ll Love This Classic Cheesecake Recipe
Seriously, this cheesecake is a game-changer! It’s got that super creamy, dense texture everyone raves about, and the buttery graham cracker crust? Oh my goodness, it’s perfection. The best part is that it’s actually really straightforward to make, even if you’ve never tackled a cheesecake before. It’s the kind of dessert that makes everyone go “wow!” and it’s just begging for some fresh berries or a dollop of whipped cream. It’s my absolute go-to when I want something truly special without all the fuss.
Ingredients for the Perfect Cheesecake
Alright, let’s talk about what you’ll need to make this dream of a cheesecake! It’s pretty straightforward, but paying attention to the details, like making sure your cream cheese is good and soft, really makes a difference. Here’s the lineup:
- 1.5 cups graham cracker crumbs (about 10-12 full-sheet crackers)
- 1/4 cup granulated sugar
- 6 tablespoons unsalted butter, melted
- 4 (8-ounce) packages full-fat cream cheese, softened to room temperature (this is super important!)
- 1.5 cups granulated sugar
- 1/4 cup all-purpose flour
- 1 cup sour cream, at room temperature
- 1 teaspoon pure vanilla extract
- 4 large eggs, at room temperature
Crafting Your New York Cheesecake: Step-by-Step
Alright, home bakers, this is where the magic really happens! Making a fantastic cheesecake isn’t intimidating, I promise. It just needs a little love and attention at each stage. Follow these steps, and you’ll have a showstopper that’s just begging to be on your dessert table. If you love this kind of comforting dessert, you might also want to check out our pumpkin cheesecake recipe or even a super easy no-bake version!
Preparing the Graham Cracker Crust
First things first, let’s get that yummy crust ready. Just mix up your graham cracker crumbs, that little bit of sugar, and the melted butter until it all looks like wet sand. Press this goodness firmly and evenly into the bottom of your springform pan. A quick 10 minutes in the oven gets it perfectly toasted and set. Then, just let it cool while you whip up the filling.
Making the Creamy Cheesecake Filling
Now for the star of the show! In a big bowl, beat your softened cream cheese until it’s super smooth – no lumps allowed! Gradually add the sugar and flour, mixing until they’re just combined. Then, stir in the sour cream and that lovely vanilla. This is where patience is key: add the eggs one at a time, mixing on low speed *just* until each one is incorporated. Seriously, don’t go wild beating it; we don’t want tons of air in there!
The Water Bath Baking Technique for a Perfect Cheesecake
Okay, this is my secret weapon for that super smooth, crack-free cheesecake: the water bath baking! It sounds fancy, but it’s easy. First, wrap the outside of your springform pan really well in a couple of layers of heavy-duty foil. This protects it from the water. Then, pour your luscious filling over the crust. Carefully place the wrapped pan into a larger roasting pan. Now, gently pour hot water into the roasting pan until it comes about halfway up the sides of your springform pan. This gentle, steamy environment helps the cheesecake bake evenly, preventing those annoying cracks and ensuring a silky-smooth texture all the way through. It’s the best way to achieve that classic cheesecake look!
Cooling and Chilling Your Cheesecake
We’re almost there! Once your cheesecake is baked (you’ll see the edges are set but the center still has a little jiggle), turn off the oven. Prop the door open just a bit and let the cheesecake hang out in there for about an hour. This slow cooling prevents sudden temperature changes that can cause cracks. After that, take it out of the water bath, remove the foil, and let it cool completely on a wire rack. Finally, cover it up and pop it in the fridge overnight. I know, waiting is hard, but trust me, this chilling time is crucial for the flavor to deepen and the whole thing to set up perfectly.
Tips for Cheesecake Success
Okay, let’s chat about making this *classic cheesecake recipe* absolutely perfect! These little tricks are what separate a good cheesecake from a show-stopping, melt-in-your-mouth masterpiece. Trust me, a few simple steps make all the difference and help guarantee you get those dreamy, creamy cheesecake tips everyone loves. For some extra genius insights on tips, you might even check out how we approach things in our lasagna tips – sometimes the principles are surprisingly similar!
Room Temperature Ingredients Matter for Cheesecake
This is HUGE, people! Make sure your cream cheese, sour cream, and eggs are all sitting out on the counter for at least an hour. Cold ingredients just don’t blend smoothly into that luscious batter, and you’ll end up with little lumps. Room temp ingredients mean a silky-smooth filling, every single time. So worth the wait!
Avoiding Overmixing for a Silky Cheesecake Texture
Once you add those eggs, be gentle! You really, really don’t want to beat the batter at high speed or for too long. Overmixing whips too much air into the cheesecake, and that’s often when you get those dreaded cracks. Just mix on low until everything is *just* combined. Think of it as a gentle hug for your batter, not a wrestling match!
The Importance of Patience: Chilling Your Cheesecake
I know, I know, you want to dive right in! But seriously, the chilling time is crucial. That hour in the oven after you turn it off, the cooling on the rack, and especially that overnight chill in the fridge are what allow the cheesecake to set up perfectly and for all those amazing flavors to really meld together. Patience here is rewarded with the most incredible texture.
Serving and Storing Your Delicious Cheesecake
This cheesecake is already divine on its own, but feel free to dress it up! A swirl of my caramel apple recipe topping or a drizzle of something bright and fruity always looks gorgeous. Some fresh berries alongside, or even a refreshing apple cider cocktail would be lovely. Leftovers? Just wrap it up tightly in plastic wrap and pop it in the fridge. It’ll keep wonderfully for about 4-5 days. You can absolutely freeze slices too, just wrap them super well!
Frequently Asked Questions About Cheesecake
What is the best type of cream cheese for cheesecake?
You absolutely want to grab the full-fat, block-style cream cheese for this classic cheesecake recipe. Those little tubs of spreadable cream cheese just won’t give you that rich, dense texture we’re going for. Stick to the blocks!
How can I prevent my cheesecake from cracking?
Ah, the dreaded crack! The biggest secrets are using a water bath (like we talked about!), making sure your ingredients are at room temp, not overmixing the batter once the eggs are in, and letting it cool down super gradually. Patience is key here!
Can I make a cheesecake ahead of time?
Definitely! In fact, I highly recommend it. This cheesecake gets even better after a good long chill in the fridge. It really lets all those amazing flavors meld together and ensures it sets up perfectly. It’s the ideal make-ahead dessert!
Nutritional Information (Estimated)
Just a heads-up, the numbers below are estimates because how you make it can change things a bit! This is for a generous slice, of course. We’re looking at roughly 450 calories, with about 28g of fat (that’s the rich, creamy goodness!), 8g of protein, 40g of carbs, and around 35g of sugar. Enjoy every bite, you deserve it!
Share Your Cheesecake Creations!
Okay, you’ve made it through the baking adventure! Now, I absolutely want to see your gorgeous cheesecakes. Did it turn out perfectly? Did you add any fun toppings? Snag a picture and tag us on social media, or just drop a comment below and tell me all about it! Sharing your triumphs (and even your little oopsies!) helps us all bake better. Want to know more about our baking philosophy? Check out our ‘About Us’ page!
PrintClassic New York Cheesecake
A creamy, dense, and rich New York-style cheesecake with a buttery graham cracker crust. This recipe provides a foolproof guide to achieving a perfect, velvety texture.
- Prep Time: 25 min
- Cook Time: 75 min
- Total Time: 8 hours 40 min
- Yield: 12 servings 1x
- Category: Dessert
- Method: Baking
- Cuisine: American
- Diet: Vegetarian
Ingredients
- 1.5 cups graham cracker crumbs
- 1/4 cup granulated sugar
- 6 tablespoons unsalted butter, melted
- 4 (8-ounce) packages cream cheese, softened
- 1.5 cups granulated sugar
- 1/4 cup all-purpose flour
- 1 cup sour cream
- 1 teaspoon vanilla extract
- 4 large eggs
Instructions
- Preheat your oven to 350°F (175°C). Wrap the outside of a 9-inch springform pan with heavy-duty aluminum foil.
- In a medium bowl, combine graham cracker crumbs and 1/4 cup sugar. Pour in melted butter and mix until combined. Press mixture evenly into the bottom of the prepared springform pan. Bake for 10 minutes. Remove from oven and let cool.
- In a large bowl, beat cream cheese with an electric mixer until smooth. Gradually beat in 1.5 cups sugar and flour until well combined. Beat in sour cream and vanilla extract.
- Add eggs one at a time, beating on low speed just until each egg is incorporated. Do not overmix.
- Pour the filling over the prepared crust. Tap the pan gently on the counter to release any air bubbles.
- Place the springform pan in a larger roasting pan. Carefully pour hot water into the roasting pan to come halfway up the sides of the springform pan.
- Bake for 60-75 minutes, or until the edges are set and the center is slightly jiggly.
- Turn off the oven, crack the oven door open, and let the cheesecake cool in the oven for 1 hour.
- Remove the cheesecake from the water bath and remove the foil. Let it cool completely on a wire rack.
- Chill the cheesecake in the refrigerator for at least 6 hours, or preferably overnight, before serving.
Notes
- For a smoother texture and to prevent cracks, ensure your cream cheese and sour cream are at room temperature.
- Avoid overmixing the batter once the eggs are added, as this can incorporate too much air and lead to cracks.
- Chilling is crucial for the cheesecake to set properly and for the flavors to meld.
Nutrition
- Serving Size: 1 slice
- Calories: 450
- Sugar: 35g
- Sodium: 300mg
- Fat: 28g
- Saturated Fat: 17g
- Unsaturated Fat: 11g
- Trans Fat: 0g
- Carbohydrates: 40g
- Fiber: 1g
- Protein: 8g
- Cholesterol: 120mg