
Oh, my heart sings when I talk about baking that requires almost no fuss! You know those days when you want that warm, deeply satisfying dessert aroma filling your house, but your energy tank is running on fumes? I’ve been there! That’s why I’m constantly searching for ways to bring that simple, homemade happiness back, even when life gets hectic. For me, the true magic doesn’t come from complicated techniques; it comes from proving just how much flavor you can pack into something incredibly easy. That’s where the ultimate simple cherry dump cake recipes 3 ingredients shines. It’s my little secret weapon for feeling like a baking superstar without sacrificing my evening!
- Why This Three Ingredient Cherry Dump Cake Recipes 3 Ingredients is Your New Go-To
- Gathering Your Components for the Cherry Dump Cake Recipes 3 Ingredients
- Step-by-Step Guide to the Easiest Dessert Ever
- Expert Tips for Perfecting Your Cherry Dump Cake Recipes 3 Ingredients
- Serving Suggestions for Your Quick Cherry Dessert
- Storage and Make Ahead Cherry Dump Cake Recipes 3 Ingredients
- Frequently Asked Questions About Cherry Dump Cake Recipes 3 Ingredients
- Nutritional Snapshot for Your Basic Dump Cake Instructions
- Share Your Bliss Batter Creations
Why This Three Ingredient Cherry Dump Cake Recipes 3 Ingredients is Your New Go-To
Honestly, when I first heard about this technique, I was skeptical. Could something so unbelievably fast really taste good? Trust me, it does! This recipe is the pinnacle of minimal ingredient baking. It’s designed for when you need something impressive on the table, like yesterday. We aren’t going to let life’s chaos steal our dessert time, are we? Absolutely not!
Speed and Simplicity: The Definition of a Quick Cherry Dessert
If you measure your success by how little time you spend washing dishes, you’re going to love this! The actual prep time is about five minutes—that’s right, five! You literally dump everything in the pan. This makes it the perfect choice for a spontaneous gathering or when you need a fast baked fruit dessert after a long day. It’s the definition of a simple cherry dump cake, folks.
Flavor Without Fuss: Achieving a Great Three Ingredient Dessert
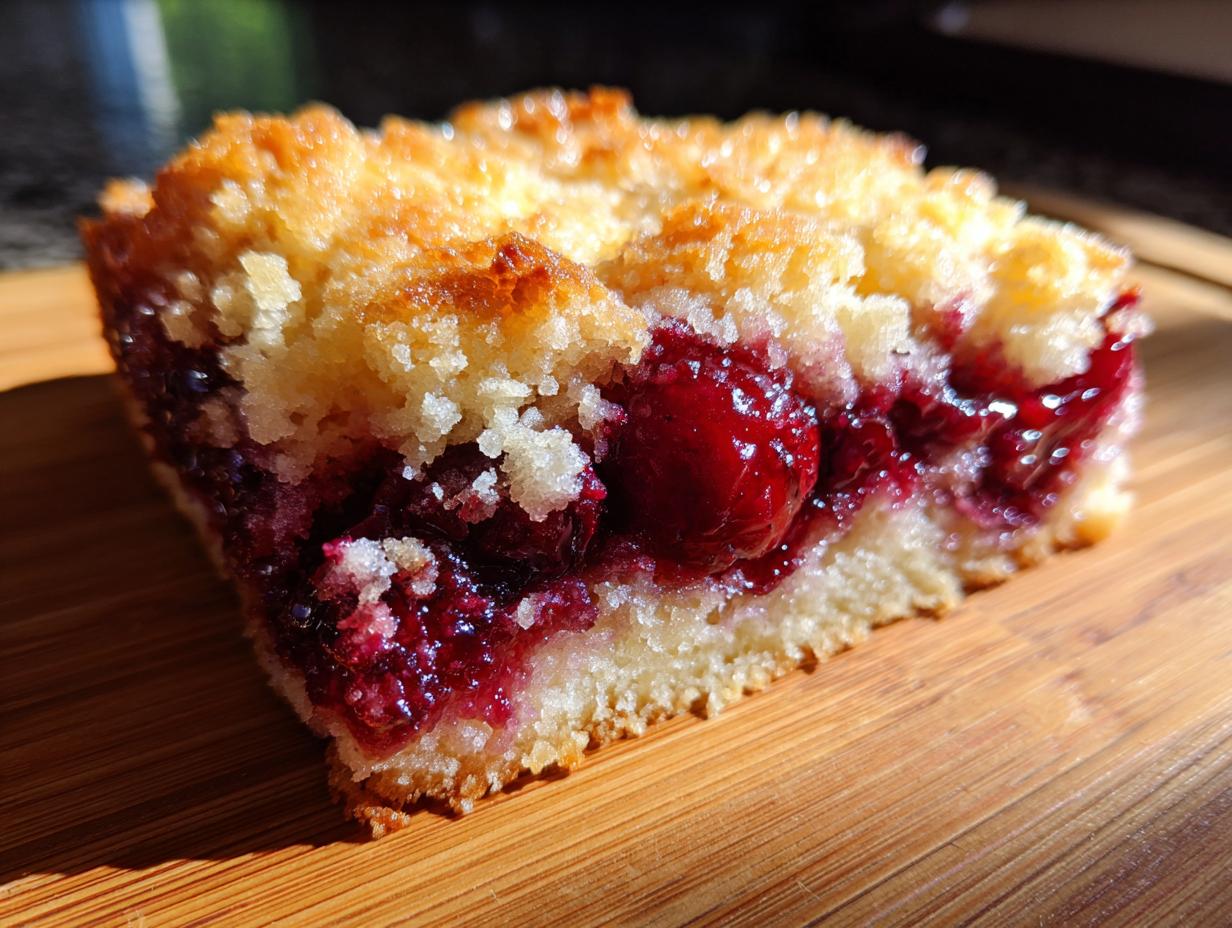
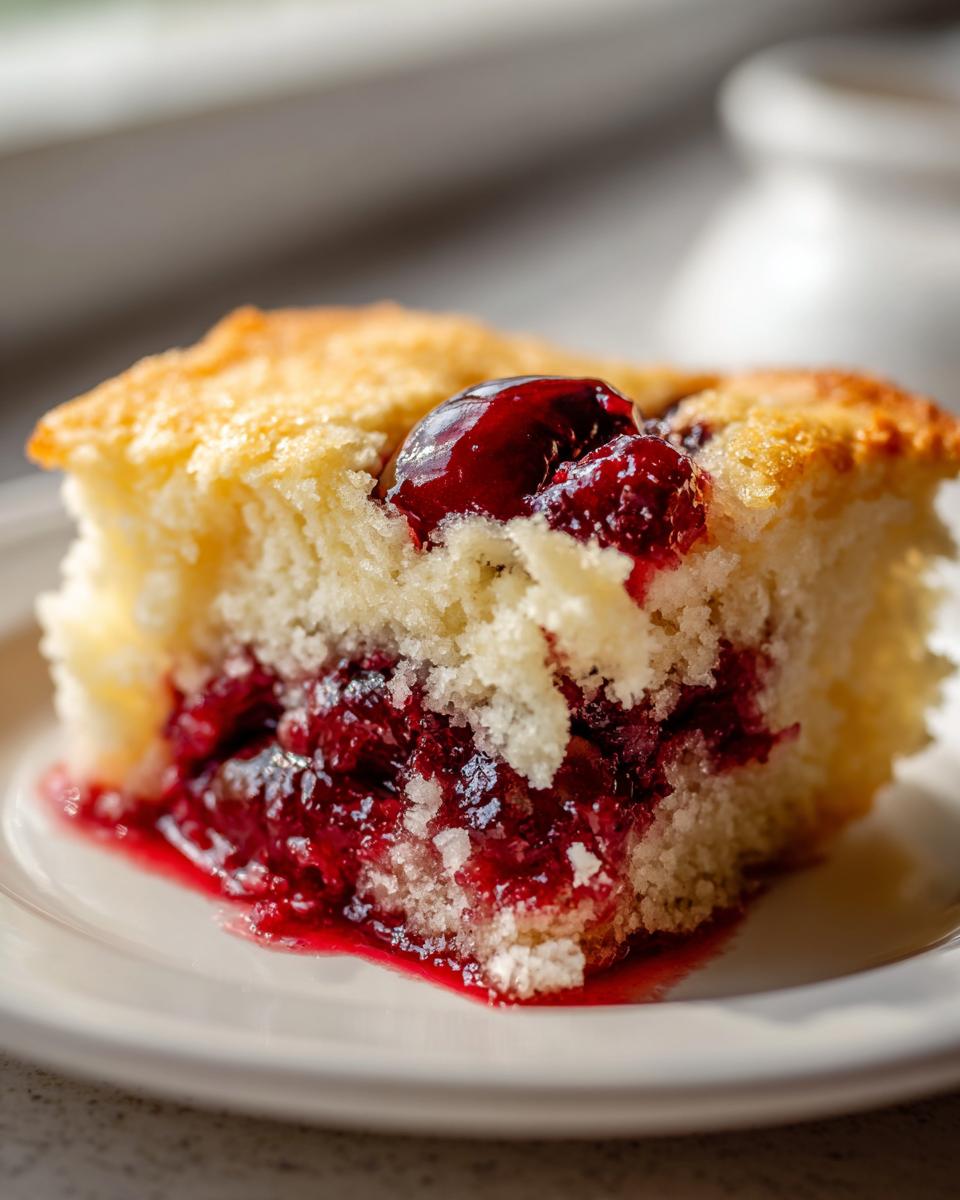
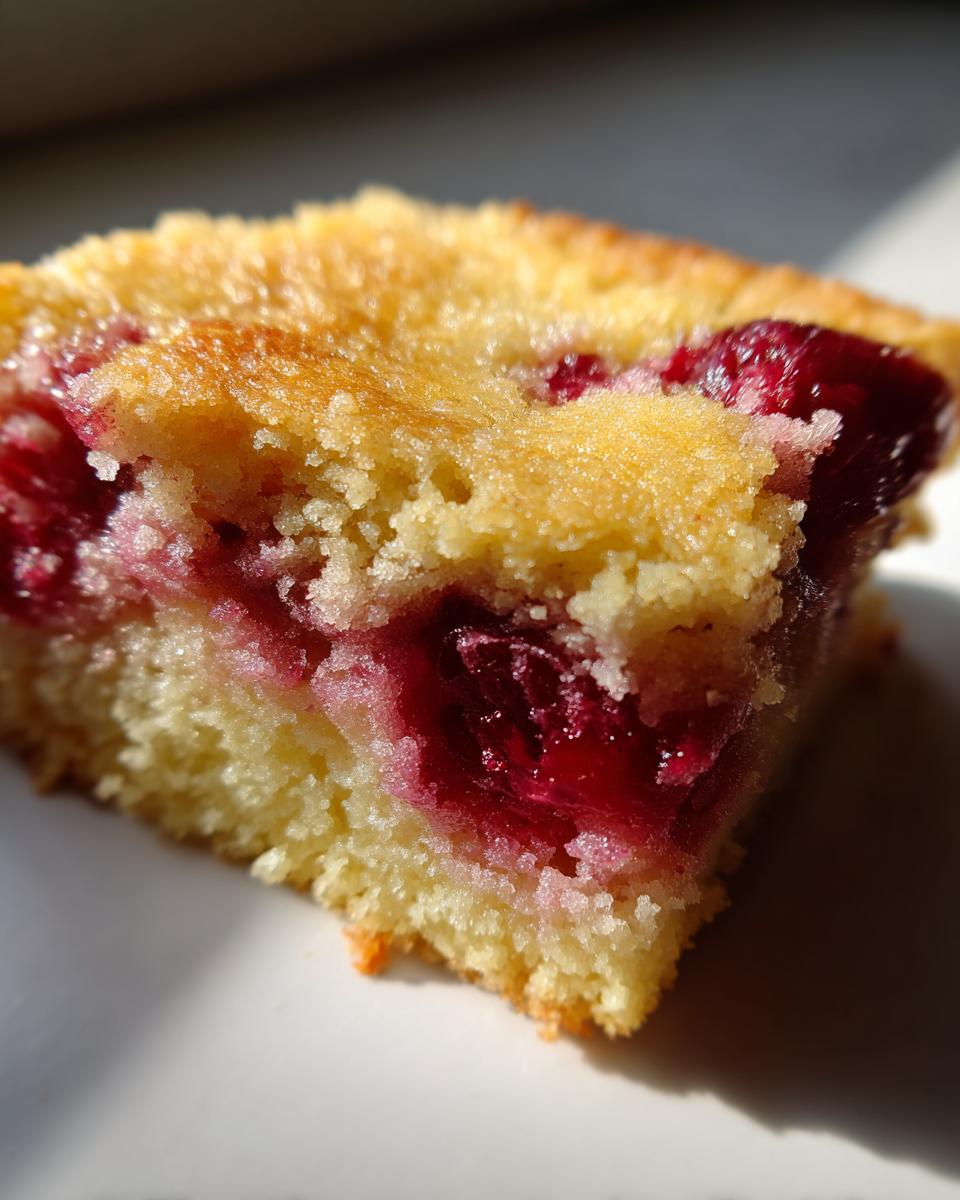
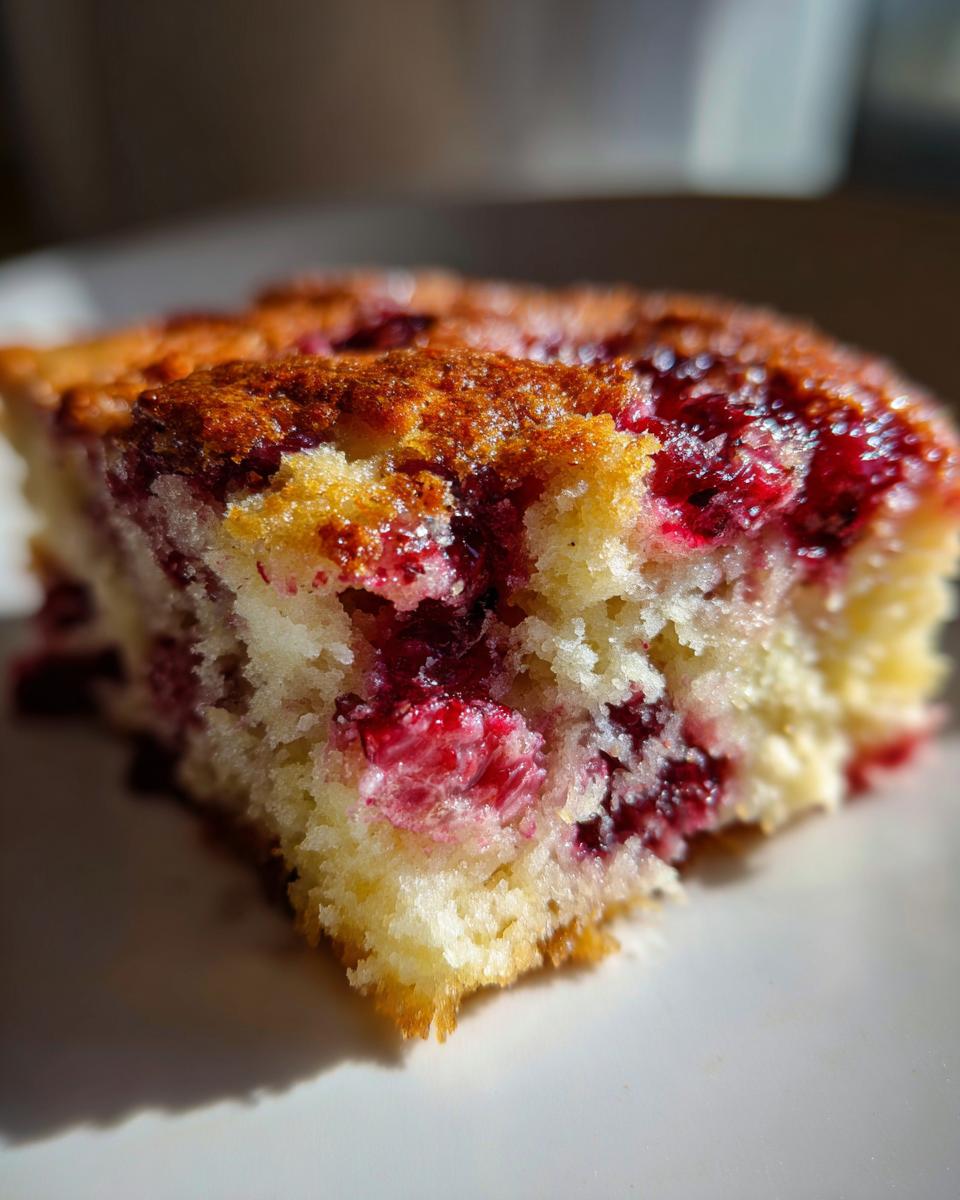
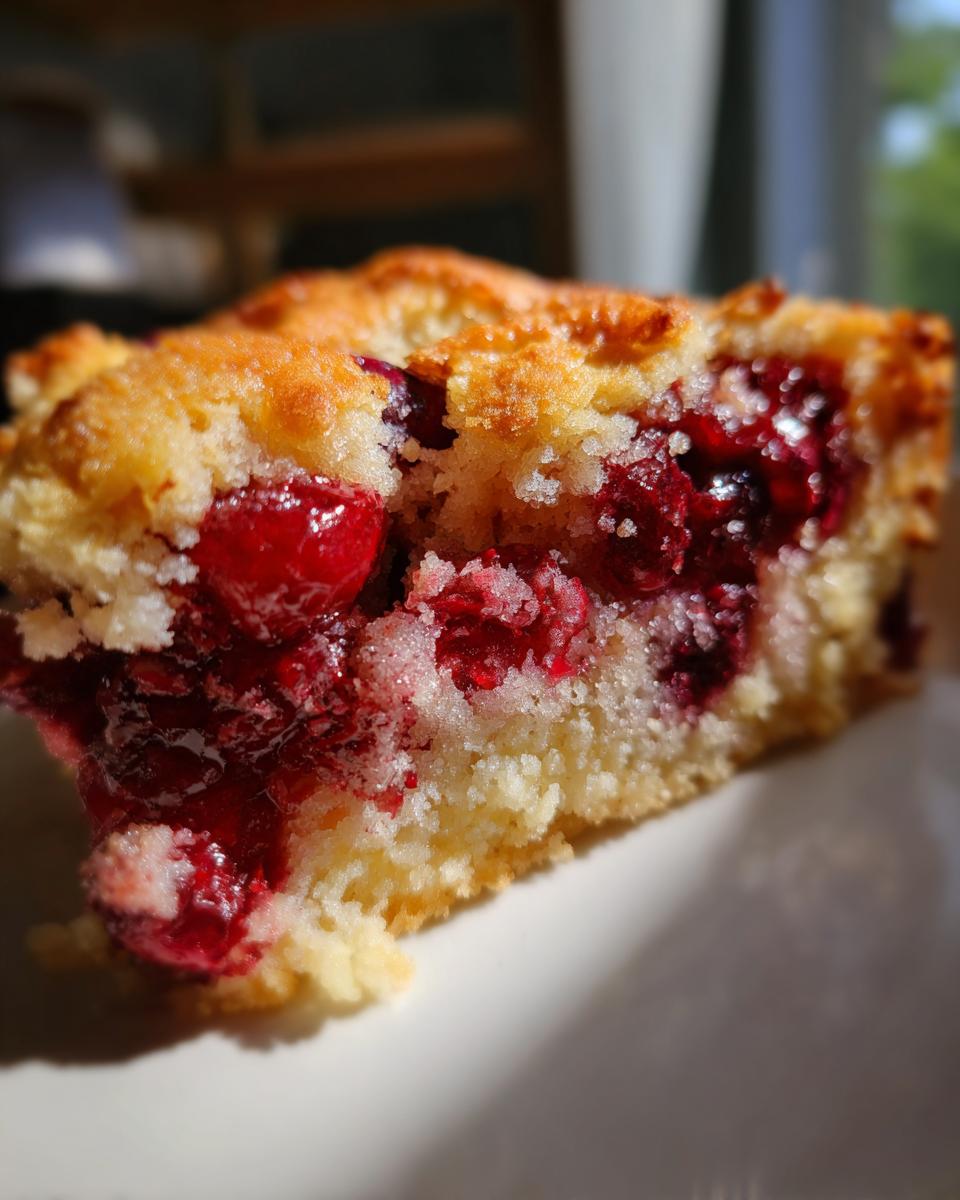
People always ask me how you get such a rich, slightly crisp topping with just cake mix and butter. It’s the magic of the dump cake structure! The melted butter soaks into the dry cake mix during baking, creating these gorgeous, buttery, streusel-like crumbles over the sweet, tart fruit. You end up with something that feels way more complex than a three ingredient dessert should be. It’s pure brilliance!
Gathering Your Components for the Cherry Dump Cake Recipes 3 Ingredients
Okay, let’s talk about what you need! Since we are aiming for the absolute simplest version—our benchmark cherry dump cake recipes 3 ingredients—you won’t need bowls, mixers, or fancy gadgets. You just need three main players, and that’s it! I promise you won’t be digging through your pantry for obscure extracts or weird spices. These are the core elements that make this entire recipe work their magic together.
Ingredient Specifics for Your Basic Dump Cake Instructions
When gathering your items, precision matters just a tiny bit regarding the box mix. Here is exactly what you need for a perfect, straightforward bake:
- 1 (21 ounce) can cherry pie filling
- 1 (15.25 ounce) box yellow cake mix (Listen closely here: You must use the standard yellow cake mix! No angel food or reduced sugar versions, please. They change the structure completely for this specific recipe.)
- 1/2 cup (1 stick) unsalted butter, melted
See? That’s truly all there is to it! Using unsalted butter gives you control over the final saltiness, which is a little tip I always stick to, even in my **basic dump cake instructions**.
Step-by-Step Guide to the Easiest Dessert Ever
This is where the magic happens, and by magic, I mean barely moving your hands! Seriously, if you are looking for a true no fuss cherry cake, this is it. Before we even grab the filling, get your oven fired up to 350 degrees Fahrenheit. You want that dish warm and ready right away. Then, I always take a tiny bit of the butter I melted and just lightly grease my 9×13 inch dish. It keeps things from sticking later, which is always a bonus!
Preparing the Base Layer for Your Cherry Dump Cake Recipes 3 Ingredients
Okay, now for the delicious part! Don’t hesitate—just pour that whole can of cherry pie filling right into your prepared pan. I use a rubber spatula to gently nudge it around so it covers the bottom evenly. You want a nice, flat layer of that gorgeous, sweet-tart cherry goodness waiting underneath.
The Critical Step: Layering Dry Mix and Butter
This is the most important instruction when we talk about quick cherry dessert: DO NOT MIX! Grab your dry cake mix and gently sprinkle it evenly over the entire cherry layer. Try not to poke down any big clumps; just get an even carpet of dry mix across the top. After that, take your melted butter and drizzle it slowly and evenly over the whole surface. You are not stirring anything—the butter seeps down as it bakes, forming that beautiful crust.
Baking Times and Resting for Perfect Results
Into the oven it goes for about 40 to 50 minutes. You’ll know it’s done when the edges of that cherry filling are bubbling up nicely and the cake topping looks golden brown and completely set. But wait! I know you’re going to want to dive right in, but you must let it rest for at least 15 minutes after it comes out. This resting time lets the structure set up perfectly so that when you scoop it, it doesn’t turn into soup. Trust me, it’s worth the short wait!
Expert Tips for Perfecting Your Cherry Dump Cake Recipes 3 Ingredients
Even though this is one of the simplest recipes you’ll ever make—a true champion in minimal ingredient baking—I still have a few tricks up my sleeve to make sure yours is absolutely textbook perfect. Don’t worry, these don’t involve adding extra ingredients, just smart execution!
Ingredient Swaps for Your Simple Cherry Dump Cake
While yellow cake mix is my favorite because it gives the crust a beautiful, almost vanilla-blonde hue, you definitely have wiggle room here! If you only have white cake mix or butter cake mix on hand, go for it! They both work beautifully in our simple cherry dump cake. Also, this hack is fantastic for other fruits. If you have apple pie filling or blueberry filling, use those instead of cherry for a different, but equally delicious, low effort fruit cake!
Baking Advice for a Low Effort Fruit Cake
Sometimes ovens lie, right? If you notice the topping getting deeply golden way too soon—say, halfway through the baking time—but the center still seems a little soft when you gently jiggle the pan, don’t panic! Just grab a piece of aluminum foil and lightly tent the top. This allows the heat to keep working on the filling underneath without burning that gorgeous buttery crust we worked so hard to create by drizzling the butter just so!
Serving Suggestions for Your Quick Cherry Dessert
Now that you’ve created the easiest dessert ever, the real fun begins: serving it! While it’s fantastic all by itself—seriously, that crisp topping is addictive—I have to tell you my absolute favorite way to enjoy this **cherry dump cake recipes 3 ingredients**. You absolutely must pair a warm scoop of this with cold, good-quality vanilla bean ice cream.
When the cold cream meets that warm, buttery crust and the sweet tart filling, it’s pure bliss. The contrast in temperature and texture just sings! If you aren’t a fan of ice cream, a dollop of fresh, lightly sweetened whipped cream is always lovely too. It’s dessert perfection, made in about five minutes of effort.
Storage and Make Ahead Cherry Dump Cake Recipes 3 Ingredients
Okay, I always preach about eating desserts fresh from the oven, especially fruit bakes, because that topping is at its crumbliest perfection when warm! For the best results with your cherry dump cake recipes 3 ingredients, I totally recommend baking it right before you plan to serve it. That crisp, buttery layer is truly something special when it first cools down a bit.
But let’s be real, sometimes we bake more than we can eat! The good news is that leftovers store really well. Keep any extra in the fridge, covered tightly, for up to three or four days. It’s a great make ahead cherry dessert, even if you bake it fresh that morning.
When you’re ready to enjoy a slice the next day, don’t just grab it cold from the fridge! That topping won’t be as crisp. Instead, I pop a slice onto a microwave-safe plate and give it about 15 to 20 seconds. Just enough heat to make the cherry filling gooey and remind you of that first warm bite. It tastes almost brand new again!
Frequently Asked Questions About Cherry Dump Cake Recipes 3 Ingredients
I love diving into your questions! It means you’re getting ready to bake, and that makes me so happy. Since we are keeping things super simple here, most of the questions revolve around swapping things out or comparing it to other quick bakes. I want you to feel totally confident to try this cherry pie filling dessert hack!
Can I use a different type of cake mix in this three ingredient dessert?
Yes, you absolutely can mix it up in your three ingredient dessert! While my heart belongs to yellow cake mix for that slightly buttery, classic flavor, feel free to use white cake mix or butter cake mix. The main thing to watch out for is avoiding angel food cake mix or any of those reduced-sugar versions. They just don’t have the right texture or sugar content needed to crisp up beautifully over the cherries.
Is this recipe truly a ‘low effort fruit cake’ if I have to melt butter?
Oh, honey, yes! Melting butter takes maybe 45 seconds in the microwave. That’s the absolute peak of the active work you’ll do, besides opening a can and pouring a box! It’s such a minimal step compared to creaming butter and sugar for 10 minutes like in a traditional cake. This is absolutely a premier low effort fruit cake option for any baker.
What is the difference between this and an easy cherry cobbler recipe?
That’s a smart question! An easy cherry cobbler recipe usually involves making a separate topping, often a biscuit dough or a batter that is spooned loosely over the fruit. With a true dump cake, you are sprinkling the dry cake mix right on top, and the melted butter creates a firm, crisp, almost cookie-like crust that sets completely. It’s much more structured than a typical cobbler topping!
Nutritional Snapshot for Your Basic Dump Cake Instructions
Now, I’m not big on counting every single crumb, because honestly, dessert should be enjoyed! But since you asked for clarity on what’s in this deliciousness, here’s a quick look. Please remember, since we are only using three basic components, these are just fantastic estimates based on standard ingredient averages for one slice. Enjoy the bliss, knowing that this is a truly **basic dump cake instructions** treat.
- Serving Size: 1 slice
- Calories: 350
- Sugar: 45g
- Fat: 17g
Share Your Bliss Batter Creations
I truly hope you loved making this incredible dessert! If you tried out these **cherry dump cake recipes 3 ingredients** and it brought a moment of bliss into your day, please let me know! Head down to the comments below and rate it 5 stars if you loved the simplicity. I would be so thrilled to hear what you served it with—was it ice cream? A dusting of powdered sugar? Tell me all about your favorite way to enjoy this quick treat! You can also check out more about the heart of Bliss Batter over here.
PrintThree Ingredient Cherry Dump Cake
Make a simple, sweet cherry dessert using only three basic components. This recipe is fast and requires minimal effort.
- Prep Time: 5 min
- Cook Time: 50 min
- Total Time: 55 min
- Yield: 8 servings 1x
- Category: Dessert
- Method: Baking
- Cuisine: American
- Diet: Vegetarian
Ingredients
- 1 (21 ounce) can cherry pie filling
- 1 (15.25 ounce) box yellow cake mix (do not use angel food or reduced sugar varieties)
- 1/2 cup (1 stick) unsalted butter, melted
Instructions
- Preheat your oven to 350 degrees Fahrenheit. Lightly grease a 9×13 inch baking dish.
- Pour the entire can of cherry pie filling into the prepared baking dish and spread it evenly across the bottom.
- Sprinkle the dry yellow cake mix evenly over the layer of cherry pie filling. Do not mix the layers.
- Drizzle the melted butter evenly over the top of the dry cake mix layer.
- Bake for 40 to 50 minutes, or until the topping is golden brown and the filling is bubbly around the edges.
- Let the cake cool for at least 15 minutes before serving.
Notes
- For a slightly different flavor, you can substitute the yellow cake mix with white or butter cake mix.
- This recipe works well with other canned fruit fillings, such as apple or blueberry, for a quick fruit cake variation.
- Serve warm with a scoop of vanilla ice cream for an easy dessert.
Nutrition
- Serving Size: 1 slice
- Calories: 350
- Sugar: 45
- Sodium: 320
- Fat: 17
- Saturated Fat: 10
- Unsaturated Fat: 7
- Trans Fat: 0
- Carbohydrates: 48
- Fiber: 1
- Protein: 3
- Cholesterol: 40