
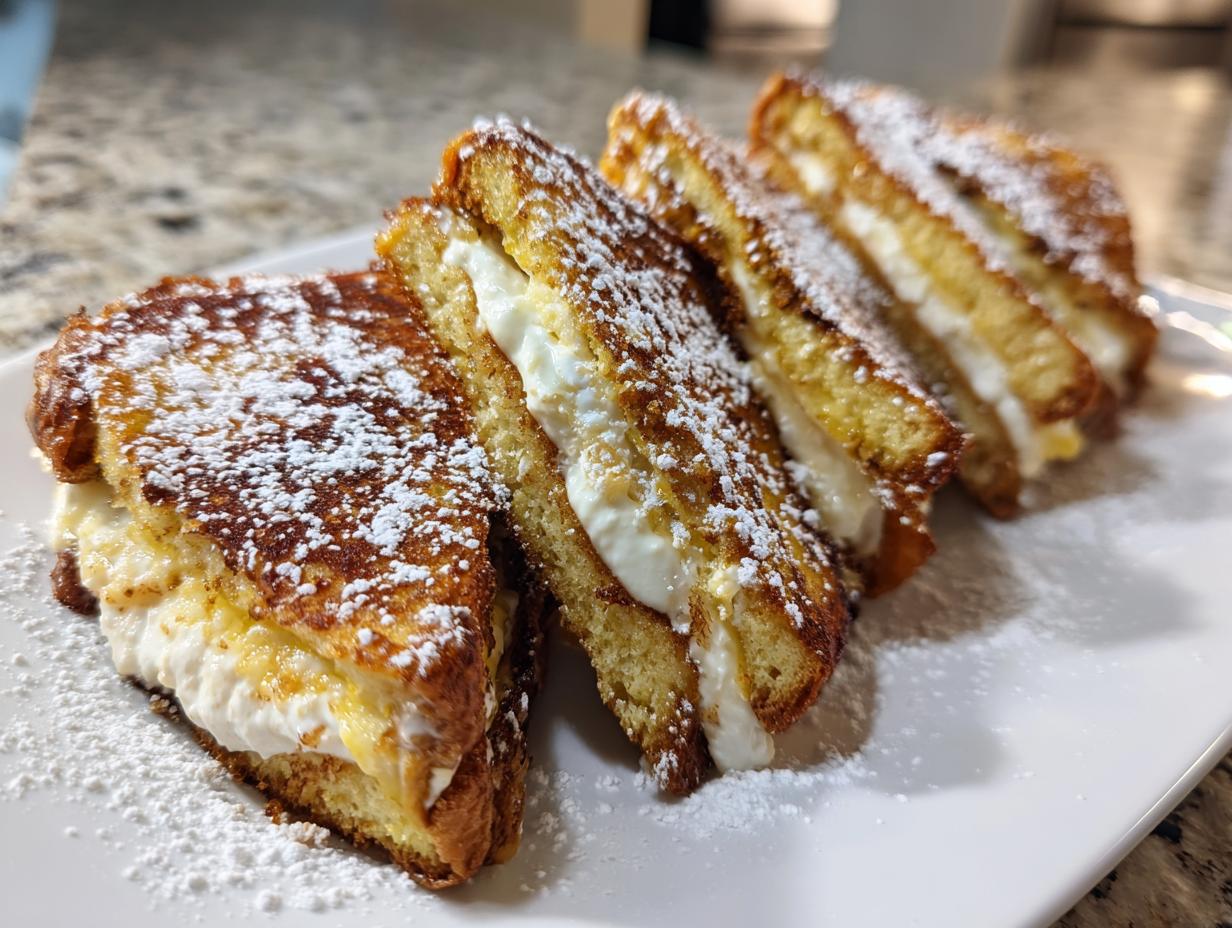
Are you tired of the same old routine for Saturday morning breakfast? Me too! That’s why I’m so excited to share what I honestly believe is the ultimate way to upgrade your weekend brunch game: stuffed french toast! Forget thin slices that soak up too much egg and fall apart. We’re making something decadent here, something rich, featuring a creamy vanilla cream cheese filling that melts just slightly while cooking. I promise you, this recipe is designed by me, Claire Sterling, to be absolutely foolproof. Every batch I test in my kitchen comes out perfectly golden and feels like a genuine treat. As I always say over on the About Page, happiness is homemade, and this recipe proves it! Get ready for a weekend brunch centerpiece you’ll want to make every month!
- Why This Cream Cheese Stuffed French Toast Recipe is Your New Weekend Brunch Centerpiece
- Gathering Ingredients for Perfect Stuffed French Toast
- How to Make Easy Stuffed French Toast Step-by-Step
- Tips for Success with Stuffed French Toast
- Variations on the Stuffed French Toast Recipe
- Make Ahead Brunch Options for Stuffed French Toast
- Serving Suggestions for Your Decadent Breakfast
- Storing and Reheating Leftover Stuffed French Toast
- Frequently Asked Questions About Stuffed French Toast
- Your Next Homemade Breakfast Treats Adventure
Why This Cream Cheese Stuffed French Toast Recipe is Your New Weekend Brunch Centerpiece
Seriously, why are we still serving regular French toast when we could be making this? If you’re looking for Decadent Breakfast Ideas that practically scream “weekend,” you’ve found it. This isn’t just breakfast; it’s dessert masquerading as fuel for your Saturday morning adventures! It’s so satisfying and feels incredibly fancy, even though I promise you, it’s surprisingly Easy Stuffed French Toast to pull off.
Here’s what makes this recipe the absolute star of your brunch table:
- It’s decadent! That sweet, creamy filling guarantees every bite feels special.
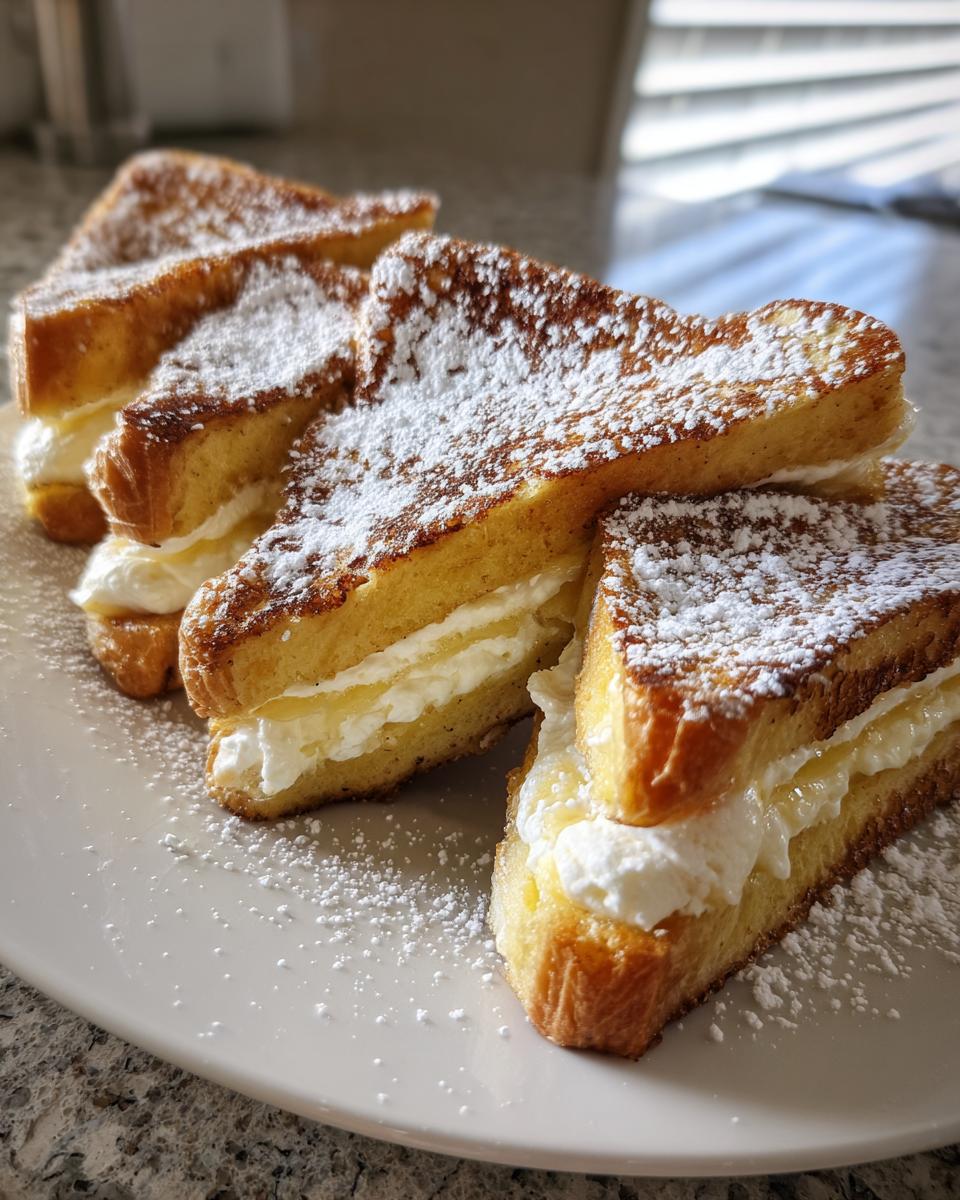
- The texture is pure heaven: a perfectly Golden Brown French Toast exterior giving way to a soft, warm, custardy center.
- It’s designed to impress everyone you serve it to, making it the perfect Weekend Brunch Centerpiece.
- It truly captures that “Dessert for Breakfast” vibe we all occasionally crave!
You bake your standard breakfast into something magical. Trust me, once you serve this, your friends are going to start expecting it every time you host! Check out more of my favorite brunch recipes for more inspiration.

Gathering Ingredients for Perfect Stuffed French Toast
Okay, listen up. If you want amazing, spill-proof stuffed french toast, the ingredients matter a whole lot. We aren’t cutting corners here, but don’t worry, these are all simple things you likely have or can grab easily. My focus, as always, is getting you foolproof results, so pay close attention to the state the ingredients need to be in!
Using high-quality bread is probably the biggest non-negotiable for this recipe—it needs to be thick enough to handle the filling and the egg bath without getting soggy. You can find great brioche or challah in most grocery stores, and trust me, the richness of those breads pays off big time.
For the Cream Cheese Stuffed French Toast Filling
This is the heart of the magic, so make sure your cream cheese is truly softened up. I mean it, leave it on the counter for at least an hour. You do NOT want lumps in this mixture—it needs to be silky smooth!
- 8 oz cream cheese (make sure it’s softened!)
- 1/4 cup granulated sugar
- 1 teaspoon vanilla extract
For the Custard and Cooking the Stuffed French Toast
Here’s where we build the coating for that gorgeous golden exterior we are after. Remember I said thick bread? That’s crucial here to hold everything in. You’ll need 8 thick slices of Brioche or Challah for this batch.
- 1 large egg
- 1/2 cup milk (Whole milk gives you the best custard, honestly!)
- 1/4 teaspoon ground cinnamon
- Pinch of salt
- 2 tablespoons butter, for cooking
- Powdered sugar, for dusting
- Maple syrup, for serving
If you’re planning ahead—say, getting ready for a big Sunday brunch—you can actually assemble the sandwiches (the filling part) the night before and keep them covered in the fridge. It saves so much stress in the morning! I talk more about how to pull that off later, but having your ingredients ready is step one to stress-free baking. For more tips on efficient cooking, feel free to check out my thoughts on easy weeknight dinners—it’s the same principle of preparation!
How to Make Easy Stuffed French Toast Step-by-Step
Okay, here is where the fun starts! I kept this recipe as simple as possible because preparing a big weekend brunch shouldn’t feel like rocket science. Follow these steps precisely, and you’ll have incredible stuffed french toast on the table in about 30 minutes total. Remember that great tip I mentioned earlier about assembling them ahead of time? If you do that, focus only on steps 3, 4, and then jump straight to Step 6 when you wake up! For those cooking fresh, let’s get going!
Creating the Creamy Filling
First things first, we need that gorgeous filling ready to go. Grab the bowl with your softened cream cheese, the sugar, and the vanilla. You need to beat this mixture—either with a hand mixer or a sturdy whisk—until everything is totally smooth. I mean it, if you can feel any sugar granules or little lumps of cold cheese, keep beating! We want this to spread easily and melt beautifully inside the toast. Once it’s perfectly creamy, just set that bowl aside while you prep the custard.
Assembling Your Stuffed French Toast Sandwiches
This assembly is what turns basic bread into spectacular stuffed french toast. Take your thick bread slices. Spread half of that amazing cream cheese mixture evenly onto the flat side of one slice. Don’t be shy, but don’t mound it up so high that it oozes out when you press it! Then, cap it immediately with a second slice of bread to make a complete sandwich. Repeat this with the remaining bread slices and filling until you have four stuffed sandwiches.
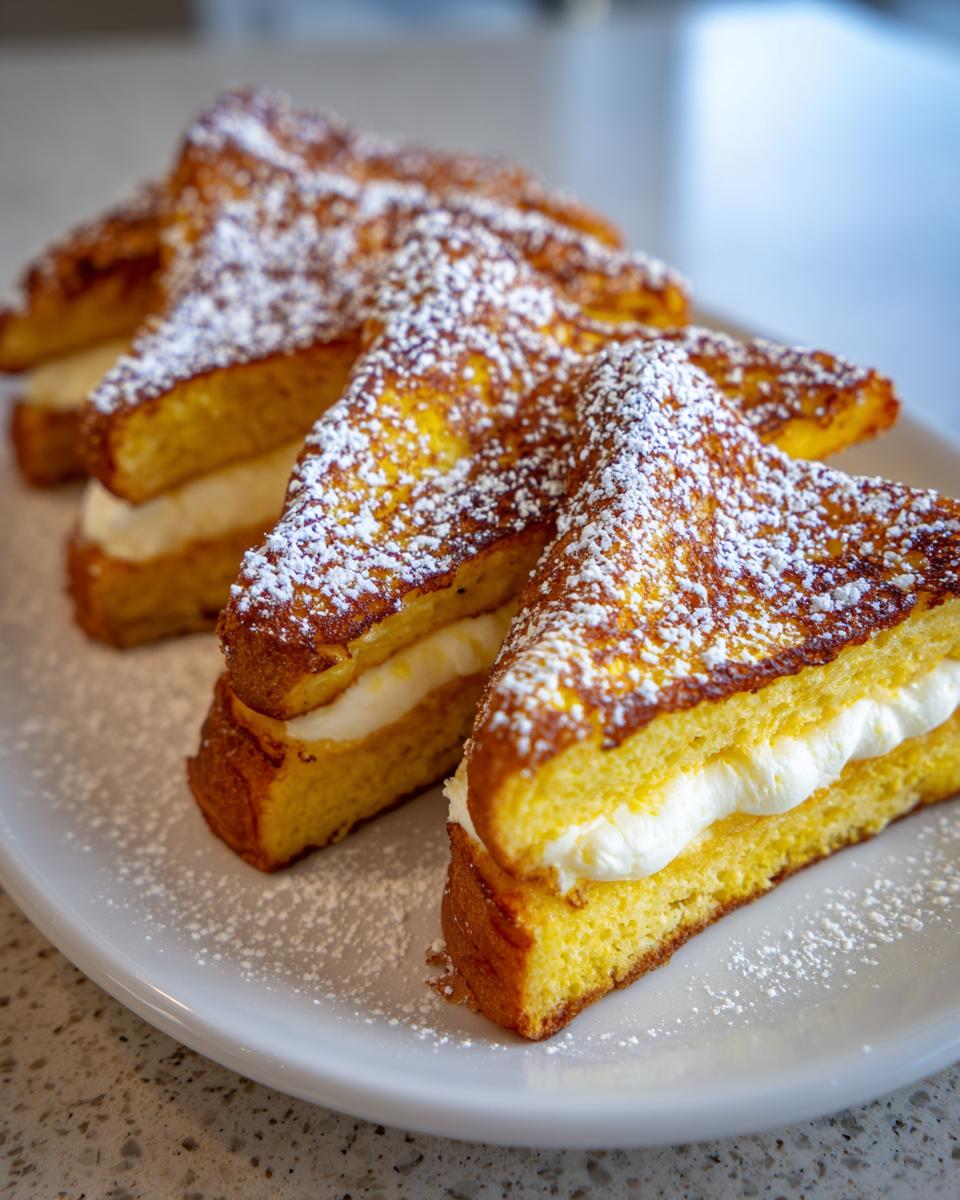
Now, here’s where you decide: either cut the sandwiches diagonally right now into triangles (which helps them look extra fancy!) or leave them whole if your bread slices look big, like Texas toast. If you didn’t use the sandwich method and instead want a pocket cut into the side of the bread, make sure that hole is big enough to stuff the filling in, and then gently press the edges of the bread together. Sealing those edges is so important to keep that creamy center locked inside while cooking. You can learn more detailed assembly methods here.
Dipping and Achieving Golden Brown French Toast
Time for the custard! In a shallow dish—a pie plate works perfectly—whisk your egg, milk, cinnamon, and salt until they are totally blended. Now, take one assembled, stuffed piece of toast and gently place it into that custard. You have to be quick here! Let it soak for only about 15 to 20 seconds on one side, then flip it, and give the other side about 15 to 20 seconds too. Do NOT let it sit there soaking like a sponge! Over-soaking is the fastest way to destroy the structure and end up with soggy bread. We are aiming for a quick coating that adds flavor without making it mushy.
Next, melt that butter in your skillet or griddle over medium heat. Medium heat is key! Place your dipped toast in the hot butter. We need about 3 to 4 minutes per side to get that perfect, Golden Brown French Toast finish while ensuring the interior filling has a chance to warm up nicely.
If you notice the outside is browning way too fast before your filling is gooey, just drop the heat down slightly. Keep wiping out the pan between batches and adding fresh butter for the best flavor. Feel free to explore the methods over at Delish for alternative cooking techniques if you need a new perspective!
Tips for Success with Stuffed French Toast
I’ve learned a few things over the years of making this stuffed french toast—mostly the hard way, by having cream cheese ooze out everywhere and end up with bread that’s burnt on the outside and cold inside! But don’t you worry, I’m sharing my hard-won wisdom so your experience is smooth sailing. Getting that perfect contrast—crisp outside, warm cream cheese inside—is all about management.
Bread Selection and Custard Saturation
I can’t stress this enough: your bread choice sets the stage! You absolutely need thick slices, like Brioche or Challah. If you use standard thin sandwich bread, the structure just won’t hold up, and you’ll end up with leaky messes all over your skillet. The thickness gives you space to spread the filling AND maintain structural integrity.
When it comes to the custard dip, it’s a race against time. Thick bread means it *can* soak up a bit more liquid than regular toast, but you still have to be fast. Keeping that soak time to about 15-20 seconds per side is crucial for that Puffy French Toast texture, not the sad, soggy one. We want the exterior coated, but the center should remain sturdy enough to hug that filling snugly.
Heat Control for Perfect Stuffed French Toast Cooking
This is where most people mess up getting that lovely texture preference we all want! If your pan is too hot—blazing hot—you’re just going to burn your beautiful golden exterior before the cream cheese filling even has a chance to get warm and gooey. Seriously, the filling needs a few minutes over gentle heat to soften up nicely.
I always start my skillet on medium, let the butter melt and bubble gently, and then, if I see the bread browning too quickly in the first minute, I immediately drop the heat down to medium-low. This lower, slower cook time is the secret weapon for achieving that perfect warm center without sacrificing the crispy crust. It’s worth the extra minute or two!
If you’re keen on exploring how temperature control works with other breakfast items, you might enjoy reading through my thoughts on apple pancakes—the same low-and-slow idea applies there for maximum fluffiness!
Variations on the Stuffed French Toast Recipe
The base recipe for our stuffed french toast is amazing with vanilla cream cheese, but that doesn’t mean we can’t get creative—especially since I know some of you love adding fruit or just want that extra spiced kick! Part of the fun of making Homemade Breakfast Treats is customizing them to your liking. Don’t feel tied down just to the basic cream cheese filling!
Since we have such a perfect foundation—thick, sturdy bread and creamy filling—it handles extra additions like a champ. This is where you can really tailor it to what you have in the fridge or what you’re craving!
Fruity Stuffed Toast Additions
If you want to lean into the Fruity Stuffed Toast feeling, berries are your best friend! Luckily, we already have that solid cream cheese mixture ready to go. To incorporate things like strawberries or blueberries, you just need a little prep work first.
For instance, if you’re using strawberries, I suggest taking about a quarter cup of fresh berries and gently mashing them up with a fork until they are mostly broken down but still a little chunky. Then, you fold that into the cream cheese filling mixture we made earlier. If you’re using anything wet like blueberries, make sure they are patted dry first so they don’t introduce excess liquid into the filling, which could make things messy when cooking. It makes the filling look gorgeously swirled, almost like a cheesecake!
Cinnamon Sugar French Toast Twist
Who doesn’t love the warmth of churros or a spiced donut? If you want to give your stuffed french toast that amazing spiced upgrade, we can focus on the cinnamon element. You already have a little cinnamon in the egg custard, but we can definitely boost the flavor profile here!
You have two easy choices. First, you can amp up the spice in your cream cheese filling—go ahead and add a full half teaspoon of cinnamon to that mixture along with the vanilla. Second, for that literal cinnamon sugar coat, try this: Instead of just dusting with powdered sugar after it comes out of the pan, make a small mixture of equal parts cinnamon and sugar (maybe 1/4 cup of each). While the toast is still hot, carefully dip the cooked sides into that mixture as if you were rolling a churro donut. That creates an instantly crunchy, sugary crust that is totally addictive. If you’re looking for more spice inspiration in your baking life, check out my recipe for cinnamon monkey bread—it’s packed with cozy flavor!
Make Ahead Brunch Options for Stuffed French Toast
I love the idea of sleeping in on a weekend, and that’s why I pushed hard to make a truly great make ahead brunch version of this recipe. No one wants to stand over a skillet at 7 AM when they could be enjoying coffee! We can absolutely prepare this amazing stuffed french toast ahead of time, achieving that same incredible texture as the fresh version. While this isn’t a traditional casserole style in the sense of baking it all together, we can prepare the filled bread so that breakfast is ready to go when you are.
If you want to plan ahead for your next gathering, here is the secret to turning this into a simple morning setup. Please remember that thick bread is doubly important here so it doesn’t turn into mush overnight!
Here is how you take this stuffed french toast recipe and transition it to an overnight prep:
- Assemble your sandwiches exactly as directed in Step 3 of the main instructions (Filling placed between two slices, edges sealed). Do NOT cut them into pieces or dip them in the custard yet!
- Carefully wrap each assembled sandwich tightly in plastic wrap. You want zero air exposure. Make sure to press the plastic down around the edges where you sealed the filling in.
- Place the wrapped sandwiches into an airtight container or zip-top bag. You can refrigerate these for up to 24 hours.
When morning rolls around, this is where you’ll need about five extra minutes: Unwrap the sandwiches and then proceed immediately to Step 4 (Dipping). You must dip them in the custard mixture right before cooking, coating them completely. Because the bread has already rested, you might only need about 10-15 seconds per side in the egg mixture now!
Even though this isn’t technically the baked casserole you sometimes see, getting the assembly done early is the key to an Easy Stuffed French Toast morning. If you’re planning an early start, exploring an actual Overnight Stuffed French Toast casserole might be fun, and you can check out tips for that style right over here for more overnight inspiration. If you want to see popular ways other people handle the overnight method, check out this great resource for overnight french toast baked options. Either way, the preparation magic happens the night before!
Serving Suggestions for Your Decadent Breakfast
We’ve done the hard part—the careful assembly and the perfect pan-fry for your stuffed french toast. Now comes the fun part: loading it up with toppings that take this from great to absolutely swoon-worthy! Since we already have that creamy, slightly sweet center locked inside, we need toppings that complement that richness, not fight it.
First offense: Make sure you dust everything liberally with powdered sugar right before serving. It looks beautiful and adds that final touch of sweetness we associate with a true treat. I’ve been known to just open the container and shake some over the top while the toast is still hot!
Next, maple syrup is non-negotiable, even though this tastes like dessert for breakfast. Drip nice, warm syrup over the top. If you want something extra special, try warming your syrup slightly and maybe mixing in a tiny dash of vanilla or even a drizzle of caramel sauce. If you ever need inspiration for decadent sauces while working on your next big baking project, think about how simple caramel can transform things!
Finally, fresh fruit is the perfect counterpoint to all that rich cream cheese. A handful of fresh raspberries or sliced strawberries adds a needed pop of tartness and color. It instantly makes the plate look like it came straight from a fancy brunch cafe. No need for anything complicated; just pile it on and dive in!
Storing and Reheating Leftover Stuffed French Toast
Because this stuffed french toast is so rich and satisfying, sometimes you just can’t finish all four sandwiches we made! And honestly, reheating leftovers is one of the best parts of being prepared for the week—instant breakfast!
If you have any leftovers, the most important thing is to store them correctly right away. Don’t just leave them sitting out. Once they’ve cooled down completely, place them into an airtight container. I usually line the container with a paper towel first, just to absorb any residual moisture, and then gently nestle the pieces inside. They should keep well in the refrigerator for about three days. That’s three days of having a decadent breakfast idea ready to go!
The Best Way to Reheat for Maximum Crispness
Now, I know the temptation is huge to just toss a slice into the microwave for 30 seconds. Don’t give in! Microwaving turns that beautiful, crisp golden exterior we worked so hard for into a sad, floppy piece of bread. We want to bring back that texture, right?
The absolute best way to reheat your leftover stuffed french toast is in the oven. Truly! Lay the pieces out in a single layer on a baking sheet. You don’t need to grease the sheet since there’s already fat in the bread and filling. Pop that tray into an oven preheated to about 350 degrees Fahrenheit. Let them heat through for about 8 to 10 minutes. This gentle heat warms the cream cheese filling perfectly while drying out the crust just enough to make it crisp again. It tastes almost as good as fresh!
Quick Reheating on the Stovetop (If You’re In a Rush)
If you’re in a desperate rush and need breakfast fast, the skillet can work in a pinch, but you need to treat it gently. Add just a tiny pat of butter—really just enough to lightly coat the pan—and set the heat to medium-low. Place the toast in the pan and flip it every couple of minutes until it’s heated through. Keep checking the outside so it doesn’t burn before the center warms up. It works, but it won’t usually get *quite* as crispy as the oven method, so manage your expectations!
If you’re planning meals and want to see how I use leftovers later in the week for inspiration on other dishes, you might want to check out my notes on repurposing ingredients in my pot roast recipe guides—it’s all about not wasting what you’ve made!
Frequently Asked Questions About Stuffed French Toast
I always gather a few frequently asked questions that pop up about this recipe. It’s totally normal to have questions when you’re trying to make something this decadent! Getting the hang of this stuffed french toast is super simple once you know the little tricks. I want you to feel totally confident heading into your kitchen!
What is the easiest way to make Stuffed French Toast?
Honestly, the easiest way, and the method I always recommend for beginners who are nervous about filling leakage, is the sandwich method we detailed in the main instructions. You spread the filling mixture evenly across the surface of one slice of bread, and then you cap it right away with the second slice. Gently pressing the edges together really helps seal everything in before you even dip it into the custard. Trust me, once you get that seal right, you’ve mastered Easy Stuffed French Toast!
Can I use regular sandwich bread for this recipe?
Oh, please don’t! If you use standard, thin sandwich bread, I guarantee you will end up with a mess. Thin slices just don’t offer enough barrier between that wonderful, soft cream cheese filling and the hot skillet. When the filling heats up, it expands, and if the bread is too flimsy, it just bursts right out. That’s why I keep stressing the importance of thick-cut bread like Brioche or Challah. You need that sturdy base to maintain structure and deliver that satisfyingly Golden Brown French Toast crust without losing everything in the pan!
Can I freeze the assembled French Toast for later?
Yes, you absolutely can! This is a fantastic trick for future busy mornings, and it turns into a real time-saver for meal planning later on. Once you’ve assembled the sandwiches (filled and pressed together, but NOT dipped in the custard yet!), you wrap them tightly, just like in the make-ahead section. You can store these pre-assembled pieces in the freezer for up to a month! When you pull them out, let them thaw overnight in the fridge, and then treat them exactly as you would the refrigerated make-ahead batch. Dip them right before cooking in the morning for a fantastic boost to your weekend breakfast!
Why is my cream cheese filling still lumpy?
If your filling is lumpy, it’s almost always because the cream cheese wasn’t soft enough. If you try to beat cold cream cheese, you end up with chunks that don’t mix well with the sugar and vanilla. Before you start mixing anything, your 8 oz block needs to be totally soft—you should be able to easily press your finger into it leaving a clean indent. If you are ever short on time, you can microwave the cream cheese briefly, maybe 10 or 15 seconds maximum, just until it’s pliable around the edges, but you have to be so careful not to melt it!
We put so much love into this recipe because every moment spent creating these wonderful Homemade Breakfast Treats should result in pure joy. If you bake this up and love the results, let me know! I always love hearing which filling variation other bakers tried out. You can find more of my favorite baking tips and tricks, especially when it comes to managing temperatures so things don’t burn, over in my guide to pumpkin french toast settings.

Your Next Homemade Breakfast Treats Adventure
Whew! Now that you’ve mastered the art of making truly decadent stuffed french toast, I want to hear all about it! Don’t just make this once and forget it; this is the kind of recipe that totally deserves a spot in your regular rotation for special mornings.
I rely so much on your feedback because it tells me if I’ve done my job making these recipes accessible and delicious for everyone. So, please, please leave me a rating on the recipe card below! Tell me how many stars you’re giving this creamy dream, and more importantly, tell me what you did differently.
Did you stick with the classic vanilla cream cheese? Or did you get adventurous and try out the strawberry swirl or maybe even a hint of cinnamon sugar when you dipped them? I’m so curious to know which filling variation won your family over!
If you ended up taking pictures of your beautiful, golden-brown stacks—and I really hope you did!—tag me on social media! Seeing what you create in your kitchen is honestly the best part of my job. It proves that anyone can create something truly special right from home. If you have any final questions or want to send a note my way, my contact page is always open for you over at Contact. Now go enjoy that amazing breakfast you just made!
PrintDecadent Cream Cheese Stuffed French Toast

Make this easy, rich French toast filled with sweet vanilla cream cheese. It creates a golden, crispy exterior with a soft, custardy center, perfect for a special weekend brunch centerpiece.
- Prep Time: 15 min
- Cook Time: 15 min
- Total Time: 30 min
- Yield: 4 servings 1x
- Category: Breakfast
- Method: Pan Frying
- Cuisine: American
- Diet: Vegetarian
Ingredients
- 8 thick slices of bread (Brioche or Challah recommended)
- 8 oz cream cheese, softened
- 1/4 cup granulated sugar
- 1 teaspoon vanilla extract
- 1 large egg
- 1/2 cup milk (whole milk preferred)
- 1/4 teaspoon ground cinnamon
- Pinch of salt
- 2 tablespoons butter, for cooking
- Powdered sugar, for dusting
- Maple syrup, for serving
Instructions
- Prepare the filling: In a medium bowl, beat the softened cream cheese, granulated sugar, and vanilla extract until smooth. Set aside.
- Prepare the custard: In a shallow dish, whisk together the egg, milk, cinnamon, and salt until well combined.
- Assemble the toast: Take one slice of bread and spread half of the cream cheese mixture evenly over one side. Place a second slice of bread on top to create a sandwich. Repeat with the remaining bread and filling to make four sandwiches.
- Cut the sandwiches in half diagonally to create four triangles, or leave whole if using very thick bread. Carefully cut a pocket or slit into the side of each sandwich, large enough to insert the filling, if you did not make a sandwich style. If making sandwiches, gently press the edges together to seal the filling inside.
- Dip each stuffed sandwich into the egg mixture, coating both sides completely. Let the bread soak for about 15 to 20 seconds per side; do not over-soak.
- Cook the toast: Melt butter in a large skillet or griddle over medium heat. Place the stuffed French toast in the hot skillet, working in batches if necessary. Cook for 3 to 4 minutes per side until golden brown and crispy. Reduce heat slightly if the outside browns too quickly before the inside is heated through.
- Serve immediately dusted with powdered sugar and drizzled with maple syrup. This recipe offers a great alternative to standard meal planning for a special weekend treat.
Notes
- Use thick-cut bread, like Texas toast or brioche, to prevent the filling from leaking out during cooking.
- For a make-ahead option, assemble the stuffed sandwiches, cover them, and refrigerate them overnight. Dip them in the egg mixture just before cooking in the morning.
- If you want a fruit swirl, mix 1/4 cup of mashed strawberries or blueberries into the cream cheese filling.
Nutrition
- Serving Size: 1 slice
- Calories: 450
- Sugar: 25g
- Sodium: 400mg
- Fat: 24g
- Saturated Fat: 14g
- Unsaturated Fat: 10g
- Trans Fat: 0.5g
- Carbohydrates: 45g
- Fiber: 2g
- Protein: 15g
- Cholesterol: 150mg