
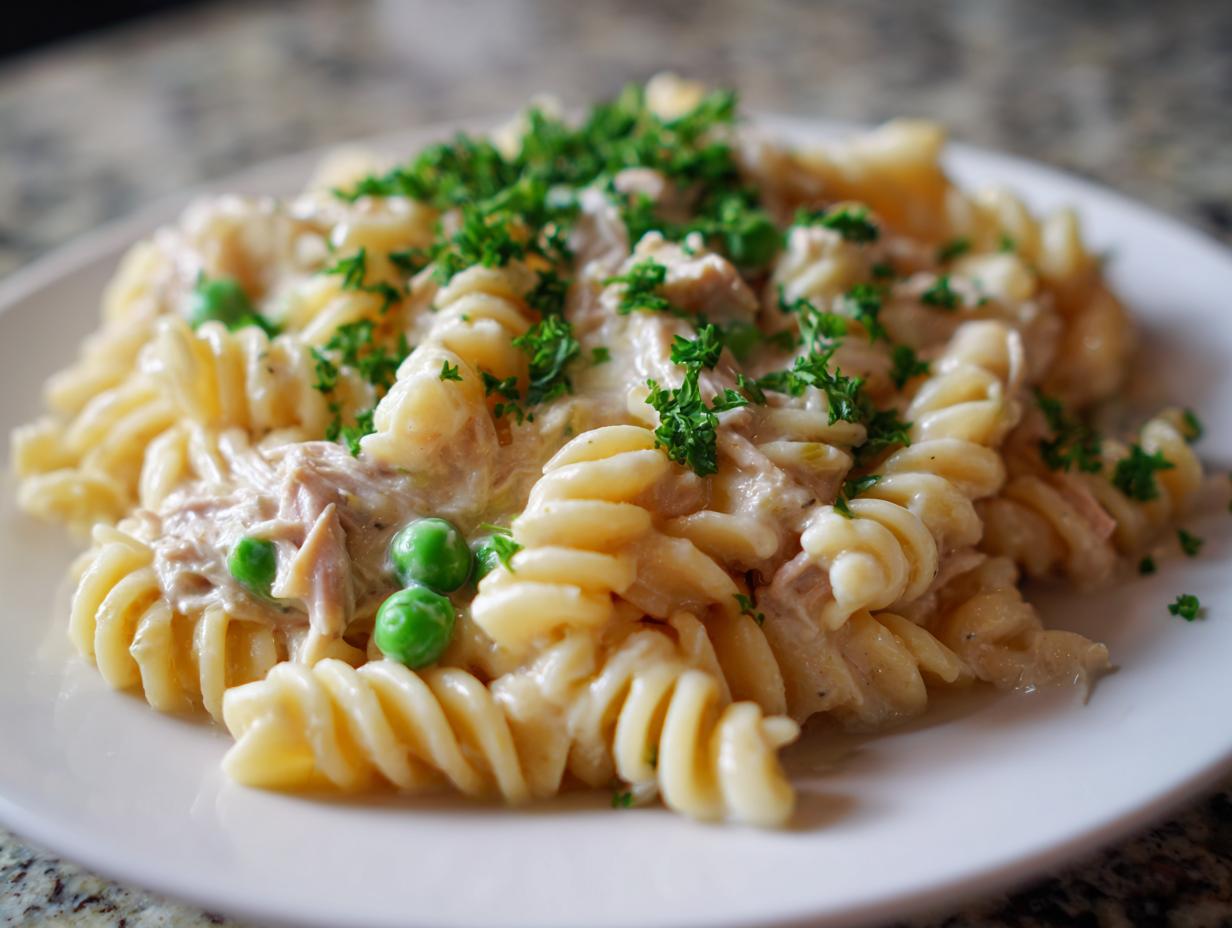
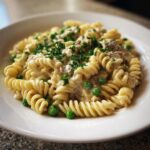
Oh, listen to me—sometimes you just need that hug-in-a-bowl feeling, right? And that’s exactly what this One-Pan Creamy Tuna Pasta delivers. Forget complicated dinners; this is your new go-to comfort food that magically cleans itself up! Seriously, this ultimate tuna pasta comes together in under 30 minutes, making it the perfect solution for those frantic weeknights.
As I always say here at Bliss Batter, creating joy shouldn’t require a culinary degree or hours of scrubbing pans. I worked hard to make sure even savory dishes like this creamy classic are foolproof. It uses simple pantry staples to turn into the most satisfying dinner you’ll make all week. You’re going to love how easy this tuna pasta recipe is!
- Why This One-Pan Creamy Tuna Pasta is Your New Weeknight Tuna Pasta Favorite
- Ingredients Needed for the Ultimate Tuna Pasta
- Step-by-Step Instructions for Easy Tuna Pasta Recipe
- Tips for Success with Creamy Tuna Pasta Bake Variations
- Serving Suggestions for Your Weeknight Tuna Pasta
- Storage and Reheating for Leftover Tuna Pasta
- Answering Common Questions About Tuna Pasta
- Making Meal Planning Simple with This Tuna Pasta
- Share Your Easy Pantry Meals Success
Why This One-Pan Creamy Tuna Pasta is Your New Weeknight Tuna Pasta Favorite
I know your life is busy, and honestly, mine isn’t much different! That’s why I’ve worked hard to make sure this simple tuna pasta knocks out three of the biggest dinner headaches all at once. It’s everything you want: comforting, fast, and hardly any dishes!
-
Quick Prep for a 30 Minute Tuna Dinner
You read that right—this whole thing is done in about 30 minutes total. That means you can easily fit this delicious, warm meal into even the craziest evening schedule. It truly is my answer for a perfect quick tuna pasta dinner when you feel like you have zero time.
-
The Magic of One Pan Tuna Pasta Cleanup
This is where we save our sanity! This recipe uses just one main pot or skillet. That means way less time spent over the sink after dinner and more time relaxing. Say goodbye to scrubbing multiple saucepans because we are sticking to our one pan tuna pasta promise!
-
Budget Friendly Tuna Pasta Using Pantry Staples
Nothing feels better than knowing you made a fantastic, tasty dinner without running to the store. Since we lean heavily on canned tuna and pantry basics like flour and milk, this becomes an incredibly budget friendly tuna pasta option that is reliable all year long.
Ingredients Needed for the Ultimate Tuna Pasta
Okay, let’s talk ingredients! Because we are aiming for that amazing creamy texture without any fuss, grabbing the right ingredients beforehand is crucial. This recipe relies heavily on things I almost always have stashed away, which is perfect for an impromptu dinner night. Trust me, having everything measured out makes the actual cooking process so relaxing.
Pasta and Base Components for Creamy Tuna Pasta
For the foundation of our comfort food pasta, you need:
- Pasta: 12 ounces. I always reach for penne or rotini here. Their shapes really grab onto that creamy sauce we’re building.
- Olive Oil: Just 1 tablespoon to get things started in that one pan.
- Garlic: 2 cloves, minced. Don’t you dare use jarred if you can help it—fresh garlic makes all the difference in that first aromatic hit!
- All-Purpose Flour: 1/4 cup. This is what makes our quick roux to thicken everything up beautifully.
- Milk: 2 cups, whole or 2%. This gives us the rich body, but two-percent works just fine if you’re watching things slightly.
- Broth: 1 cup of chicken or vegetable broth. This adds so much more depth than just using milk alone.
Flavor Boosters and Tuna for Your Tuna Pasta
These bits turn plain ingredients into something super savory and bright. Remember to have your tuna ready to go!
- Dijon Mustard: Just 1 teaspoon. This is my secret weapon against bland sauces; it adds tang without tasting overtly like mustard.
- Seasonings: We’re keeping it simple: 1/2 teaspoon salt and 1/4 teaspoon black pepper. Go easy initially, you can always adjust later.
- Canned Tuna: Two 5-ounce cans, make sure they are fully drained. I usually press the water out with the lid to get every last drop of excess moisture gone.
- Frozen Peas: 1 cup. They go in frozen, no thawing needed, they just chill out in the sauce and warm up perfectly.
- Cheese: 1/2 cup shredded cheddar or Gruyère. Gruyère melts so velvety—it’s worth grabbing if you have it!
- Fresh Finish: 1 tablespoon fresh lemon juice and 1 tablespoon chopped fresh parsley. These go in right at the end for that necessary pop of brightness.
Step-by-Step Instructions for Easy Tuna Pasta Recipe
Now for the best part—putting it all together! Since we are making this a true easy tuna pasta recipe, everything happens right in that one large pot. Just make sure you clean it out quickly after cooking the pasta, or use a nice, big skillet. Patience during the sauce building is key, but really, the hands-on time is minimal!
Cooking the Pasta and Building the Roux for Tuna Pasta
First things first, get your pasta cooking according to the package directions until it’s just *al dente*—don’t overcook it! Before you drain it, scoop out about half a cup of that starchy cooking water; that reserved water is liquid gold for fixing the sauce later. Drain the pasta and set it aside for a minute.
Head back to your empty pot or skillet and get the tablespoon of olive oil heating over medium heat. Toss in your minced garlic. You want it fragrant, so cook it for exactly one minute. Watch it closely! The second step is adding the flour right over that garlic and oil. Whisk that together constantly for a full minute—that’s your roux! This minute cooks out the raw flour taste, and it’s super important for a good, smooth sauce.
Creating the Creamy Sauce Base for Your Tuna Pasta Dinner
This is where the magic happens for our creamy tuna pasta! Slowly, and I mean *slowly*, start whisking in the milk until everything looks smooth. Once that milk is fully incorporated, whisk in your broth, the Dijon mustard, salt, and pepper.
Bring this mixture up to a gentle simmer, stirring often. You’re looking for the sauce to thicken up so it coats the back of a spoon nicely—this usually takes us about three to five minutes. Keep stirring so you don’t scorch the bottom! If you let it get happy and bubbly for a few minutes, you’ll have the perfect base for your quick tuna pasta dinner.
Finishing the One Pan Tuna Pasta Assembly
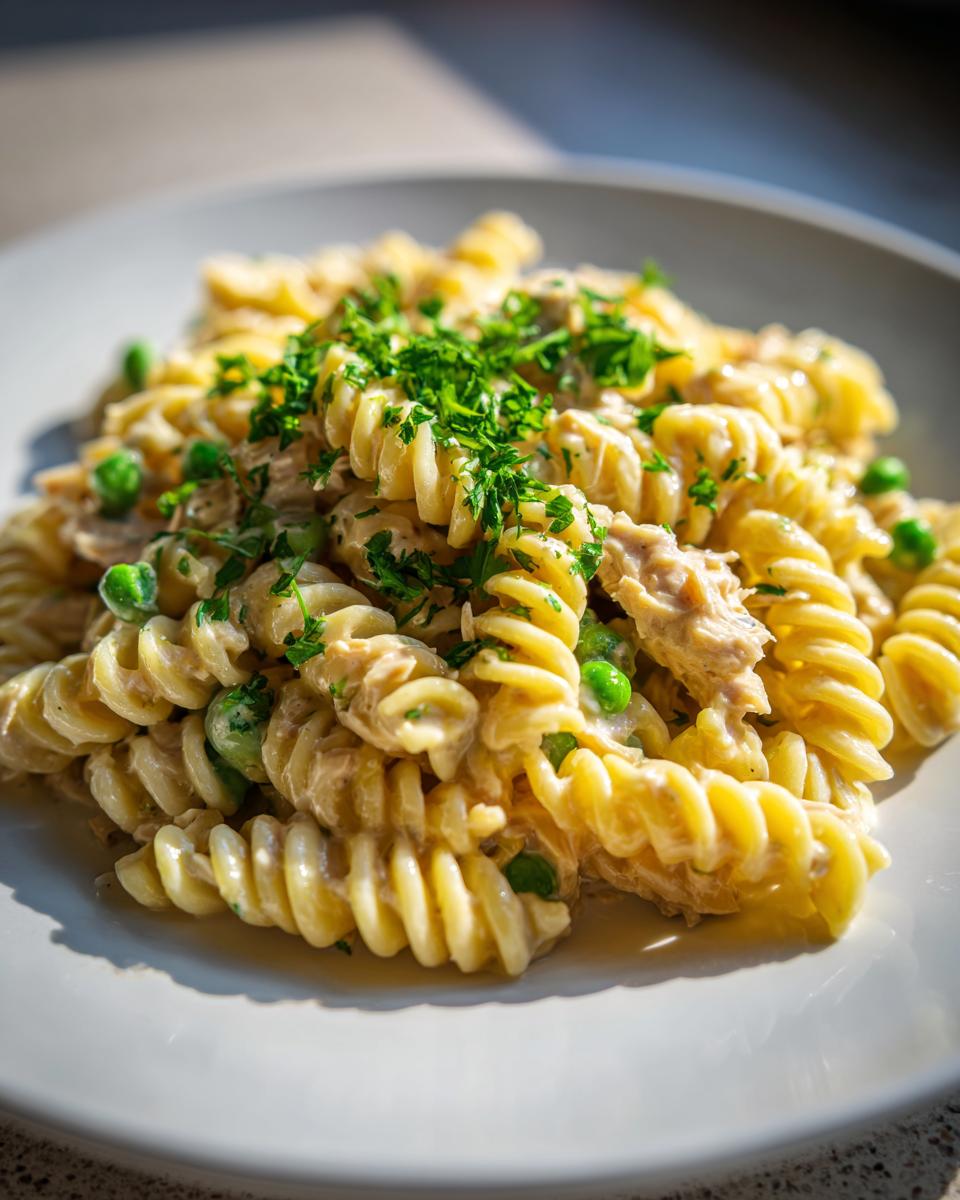
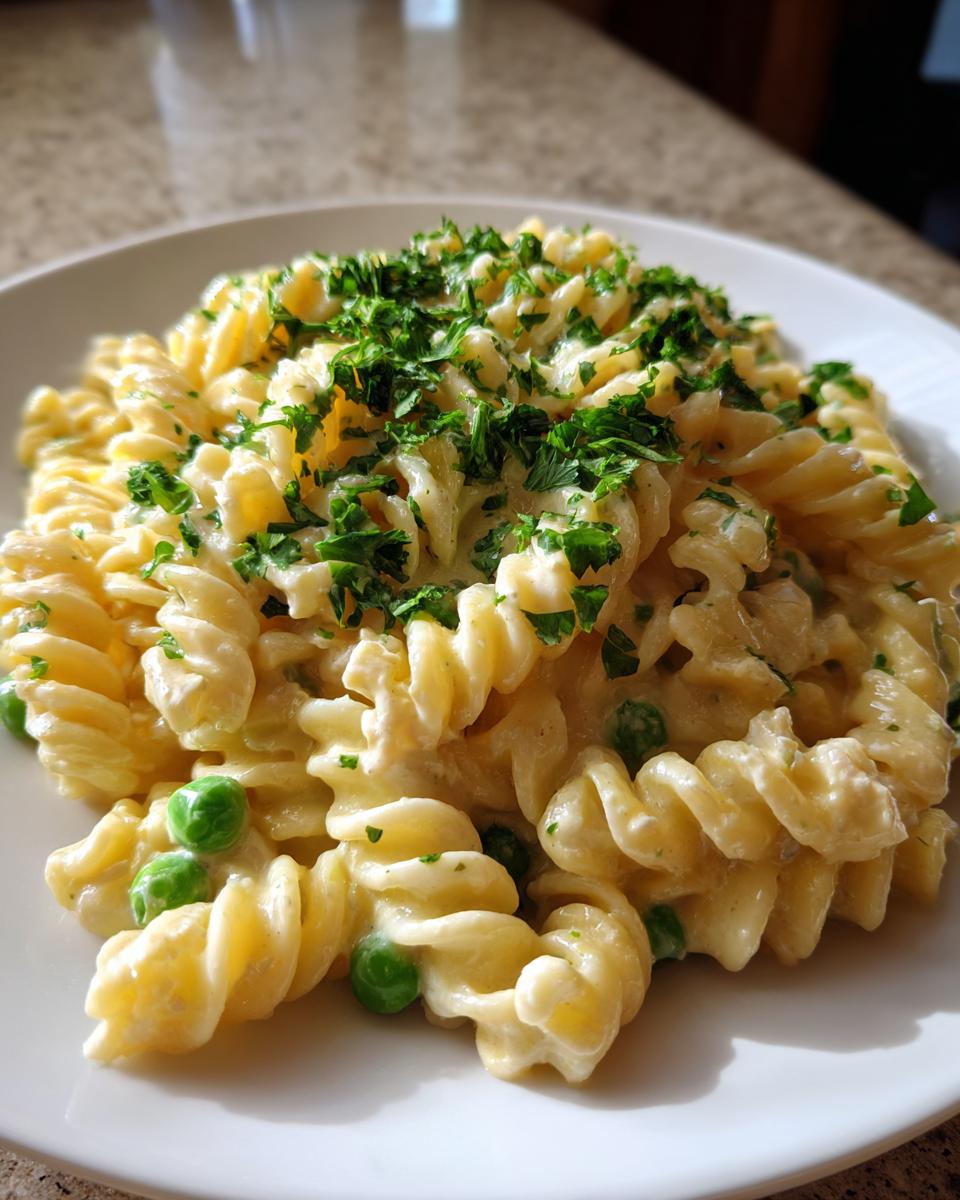
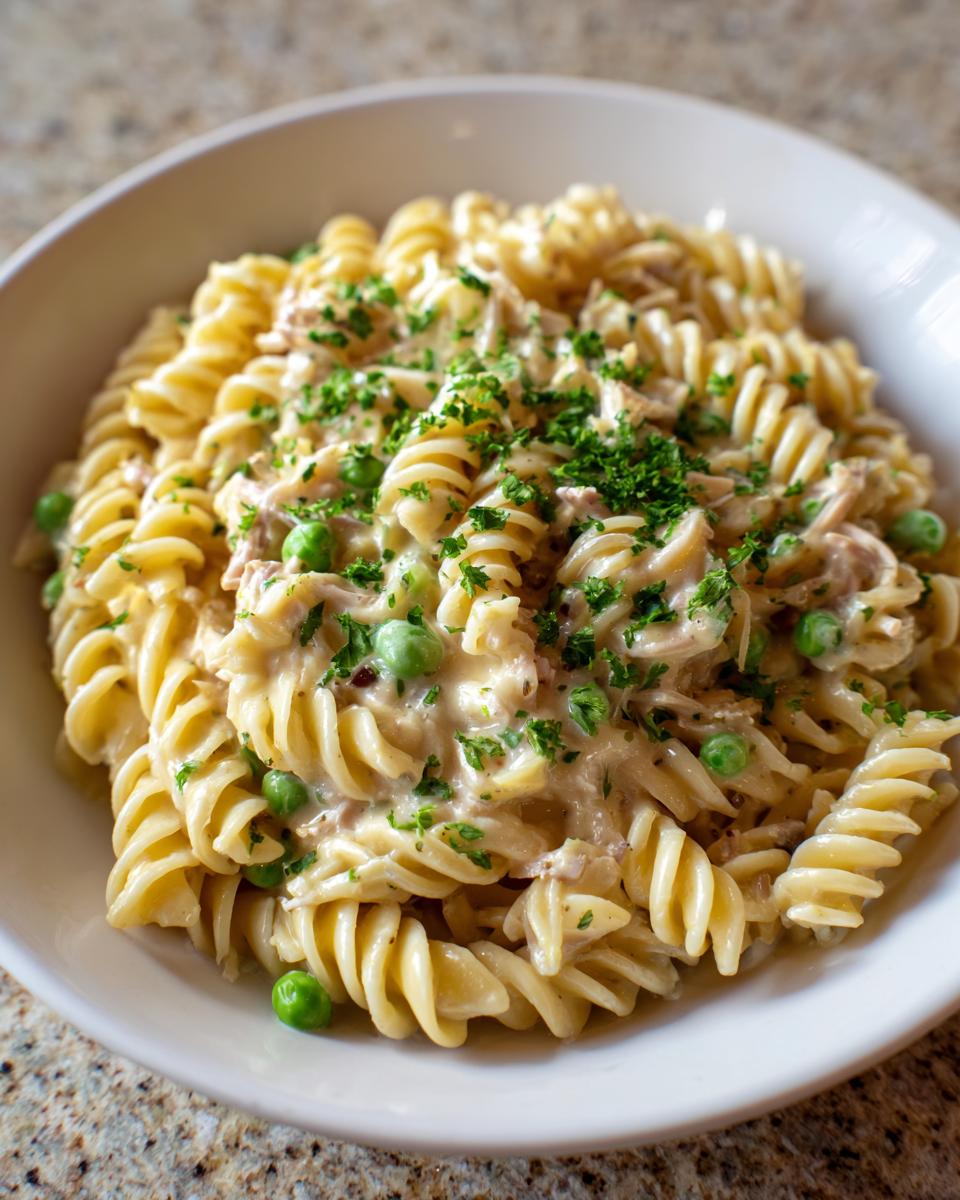
Now, drop the heat way down low before you add anything else. Stir in your drained tuna, the frozen peas (they’ll thaw fast!), and that shredded cheese until it’s all melted into one glorious, velvety mess. Next, toss your cooked pasta right back into the skillet. Mix everything until every piece of pasta is coated in that creamy goodness.
If the sauce ends up looking just a little too tight or gloppy—which happens when the pasta soaks up too much—just stir in a little splash of that reserved pasta water until it flows the way you want it to. Finally, pull the whole thing off the heat completely and stir in your fresh lemon juice and parsley. That brightness cuts through the richness perfectly. Dinner is served!
Tips for Success with Creamy Tuna Pasta Bake Variations
When you’ve got leftovers, or maybe you just want that crispy top layer, this recipe is super flexible! Since we already have a gorgeous Mornay-style sauce happening here, turning this into a proper creamy tuna pasta bake is incredibly easy. It’s one of those great canned tuna casserole recipes that just feels like a warm hug.
Making a Cheesy Tuna Pasta Bake Casserole
If you decide to bake it, transfer your finished stovetop mixture into a baking dish. I usually mix a handful of Panko breadcrumbs with a drizzle of olive oil and sprinkle that right on top. Then, pop it into your 375°F oven for about 15 minutes. You want that breadcrumb layer golden brown and beautiful. This adds a fantastic crunch to counter all that creamy sauciness. It turns into a real showstopper cheesy tuna pasta bake!
Ingredient Swaps for Your Tuna Pasta
Don’t stress if you’re missing one thing; we can usually work around it. If you want it richer, try tuna packed in olive oil instead of water—just drain it well! You can absolutely swap out the cheddar for Monterey Jack or smoked Gouda if you want a different flavor profile. Also, if you’re out of milk, using heavy cream cut slightly with broth works wonderfully for an even silkier texture.
Serving Suggestions for Your Weeknight Tuna Pasta
Since this weeknight tuna pasta comes together so fast, you have extra time to throw together a quick, fresh side dish to balance out all that creamy richness. You don’t need anything fussy; simple is best when the main course is this comforting!
My favorite thing to pair with this dish is something crisp, green, and maybe a little tangy. It just cuts through the cheese and cream so nicely. You’ve got your hearty meal covered; now let’s add some freshness!
- A Simple Side Salad: Seriously, just grab some mixed greens, maybe throw in a few sliced radishes or cucumbers, and dress it lightly with a basic vinaigrette made from red wine vinegar, olive oil, salt, and pepper. It takes about three minutes to whip up, but it makes the whole meal feel less heavy.
- Steamed Green Beans or Broccoli: If you want more veggies inside the meal and not on the side, steam some broccoli florets right along with the pasta (just add them for the last 4 minutes of the pasta cooking time). If you want a separate side, steam some green beans and toss them with a little butter and flaky salt.
- Crusty Bread for Dipping: Okay, this isn’t healthy, but who cares? If you have a baguette or some nice rolls lying around, warm them up! Use that crusty bread to mop up every last little bit of that leftover lemon-garlic cream sauce in your bowl. You absolutely must do this at least once!

See? No complicated meal planning required for the sides. This tuna pasta dinner is happy just being the big star of the show!
Storage and Reheating for Leftover Tuna Pasta
One of the beautiful things about this comfort food pasta is that it often tastes even better the next day—if you store it right! The biggest enemy of leftover creamy sauces is the refrigerator, believe it or not. That sauce likes to seize up and get thick when it cools down too much, leaving you with dry noodles the next day.
When you’re putting away your extras, I always recommend treating the leftovers gently. Pop your dish into an airtight container, but here’s the secret: add a tiny splash of milk or broth *before* you seal the lid. Just a tablespoon or two!
This little bit of added liquid gives the sauce something to absorb during the chill time, so when you go to reheat it, the noodles drink up that liquid instead of sucking all the moisture right out of the sauce itself.
Reheating Your Creamy Tuna Pasta Perfectly
When it’s time to eat those leftovers—maybe for a quick lunch the next day—don’t just blast it in the microwave until it’s lava hot. You need to coax that creaminess back!
Put the leftovers in a microwave-safe bowl. Before heating, add another small sprinkle of milk or water—maybe a teaspoon this time. Microwave it in short, 30-second bursts, stirring well between each burst. This gentle heating allows the sauce to re-emulsify without becoming grainy or separating.
If you are reheating a large batch on the stovetop, use a small saucepan over medium-low heat. Add a generous splash of milk or broth and stir it constantly until it’s smooth and steaming hot all the way through. Seriously, don’t skip the liquid addition; it makes all the difference between “meh” leftovers and a nearly-as-good-as-fresh reheat!
Answering Common Questions About Tuna Pasta
I get questions all the time about adapting recipes, and that’s the best part of cooking, right? We all have slightly different pantries or needs! Since this recipe leans super hard into the warm, cheesy comfort food pasta zone, these answers focus on keeping that cozy vibe while making a few tweaks.
Can I turn this creamy tuna pasta into a cold salad?
Hoo, that’s a tough one for this specific recipe! Because we built this sauce using flour and simmering milk, it’s designed to be served piping hot. If you chill this mixture, the sauce will set up almost like paste. If you absolutely must have a cold dish, you’d need to make a separate dressing!
For a true cold salad, you should bypass the roux entirely and make a simple vinaigrette or a mayo/yogurt-based dressing, like what you’d use for a traditional simple tuna pasta salad. If you chill *this* specific hot dish, you’ll need to thin it considerably with extra milk or broth when reheating just to get it moving again.
How do I make this a healthy tuna pasta ideas version?
That’s a great question, because while this is budget-friendly, it is rich because of that creamy sauce! To shift this toward healthy tuna pasta ideas territory, the easiest swap is the milk. Try using unsweetened almond milk or even skim milk instead of whole milk; it thins the sauce slightly, but the cheese adds back the richness.
Secondly, instead of white pasta, try whole wheat pasta or even high-protein lentil pasta, which holds up well to creamy sauces. And always, always bulk it up! You can easily double the amount of frozen peas, or toss in some steamed broccoli or chopped celery right along with the tuna. That boosts your fiber and nutrients immediately!
What if I don’t have milk for the sauce?
Oh, I’ve certainly been there when the milk carton looked suspiciously empty! If you don’t have regular milk, Heavy Cream is your best friend here—just use about half the amount of cream and cut the rest with chicken broth until you hit the 2-cup liquid measurement total. That guarantees velvetiness.
If you’re out of cream too, try this: melt 2 tablespoons of cream cheese into the broth and let it dissolve completely before adding the other liquids. It works like a charm to create that rich mouthfeel we expect from a classic canned tuna casserole, just without using milk as the main base!
Making Meal Planning Simple with This Tuna Pasta
If you’re anything like me, you stress about what you’re making for dinner even when you know you have amazing, quick options hiding in the pantry. That’s why this recipe is gold for easy meal planning! Because it comes together in 30 minutes total, we can build an entire week of easy eats around it.
The beauty of getting this quick tuna pasta dinner done on a Tuesday night is that you’ve suddenly handled Wednesday or Thursday lunch without breaking a sweat. That’s efficiency, and it saves me so much mental energy later in the week!
Here are a few ways I integrate this dish into my routine to keep life smooth:
- Cook Once, Lunch Twice: Make a slightly larger batch than needed for dinner, specifically leaving two servings aside right before you add the lemon and parsley. Keep those portions separate in airtight containers—those are your lunches for the next day! You can reheat them exactly as I described above.
- The “Flex Night” Staple: I keep all the non-perishable ingredients (pasta, broth, canned tuna, dried seasonings) stocked constantly. When my carefully laid-out recipe card for something complicated gets thrown out by a toddler or forgotten, I pivot immediately to this recipe. Knowing that a solid, protein-packed meal is always accessible takes a huge weight off my shoulders.
- Weekend Simplicity: If you happen to be baking this into a creamy tuna pasta bake casserole style, it holds up wonderfully in the fridge for 3 to 4 days. This makes it perfect for batch cooking on a Sunday so you always have a ready-to-go dinner waiting for you on Monday night, freeing up your weekend for fun stuff instead of cooking!
Don’t let the concept of meal planning sound scary or overwhelming. Sometimes, planning means knowing exactly which simple, satisfying recipe you can fall back on when everything else goes sideways!
Share Your Easy Pantry Meals Success
Now that you’ve tried this incredibly versatile and satisfying one pan tuna pasta, I truly want to hear all about it! We build this community here at Bliss Batter on shared kitchen triumphs, and I get such a thrill seeing your results. This recipe is meant to be reliable, easy, and budget-friendly, making it a perfect easy pantry meals hero.
Did you add smoked paprika or use Gruyère like I suggested? Maybe you turned it into that glorious baked casserole? Don’t keep those delicious details to yourself!
Please take a moment and leave a rating right here on the recipe card—even a simple star rating helps me know if I’m hitting the mark with these quick dinners. More importantly, drop a comment below and tell me what you thought! I read every single one of them, and your feedback helps me improve resources for everyone.
And if you snapped a picture of your creamy, cheesy masterpiece on the table, I would absolutely love to see it! Tag me on social media using our main tag so I can share the love and see how this simple dish brightened up your weeknight. I can’t wait to see what you created!
PrintOne-Pan Creamy Tuna Pasta with Lemon
Make this ultimate comfort dinner quickly using pantry staples. This one-pan creamy tuna pasta comes together fast and uses simple ingredients for a satisfying weeknight meal.
- Prep Time: 10 min
- Cook Time: 20 min
- Total Time: 30 min
- Yield: 4 servings 1x
- Category: Dinner
- Method: Stovetop
- Cuisine: American
- Diet: Vegetarian
Ingredients
- 12 oz pasta (penne or rotini recommended)
- 1 tablespoon olive oil
- 2 cloves garlic, minced
- 1/4 cup all-purpose flour
- 2 cups milk (whole or 2%)
- 1 cup chicken or vegetable broth
- 1 teaspoon Dijon mustard
- 1/2 teaspoon salt
- 1/4 teaspoon black pepper
- 2 (5 oz) cans tuna in water, drained
- 1 cup frozen peas
- 1/2 cup shredded cheddar or Gruyère cheese
- 1 tablespoon fresh lemon juice
- 1 tablespoon fresh parsley, chopped
Instructions
- Cook the pasta according to package directions until al dente. Drain the pasta, reserving about 1/2 cup of the cooking water. Set the cooked pasta aside.
- In the same large pot or a deep skillet, heat the olive oil over medium heat. Add the minced garlic and cook for 1 minute until fragrant. Do not let it brown.
- Whisk in the flour to create a roux. Cook, stirring constantly, for 1 minute.
- Slowly whisk in the milk until the mixture is smooth. Then, whisk in the broth, Dijon mustard, salt, and pepper.
- Bring the sauce to a simmer, stirring often. Let it cook for 3 to 5 minutes until the sauce thickens enough to coat the back of a spoon. This forms your creamy base.
- Reduce the heat to low. Stir in the drained tuna, frozen peas, and shredded cheese until the cheese melts completely into the sauce.
- Add the cooked pasta back into the skillet. Toss everything together until the pasta is fully coated in the creamy sauce. If the sauce is too thick, add a splash of the reserved pasta water until you reach your desired consistency.
- Remove the skillet from the heat. Stir in the fresh lemon juice and chopped parsley.
- Serve immediately. This simple recipe is a great alternative to complex meal planning.
Notes
- For a richer flavor, use tuna packed in olive oil instead of water.
- If you prefer a baked casserole, transfer the mixture to a baking dish, top with breadcrumbs, and bake at 375°F (190°C) for 15 minutes until golden.
- This recipe is budget friendly, using common pantry items.
Nutrition
- Serving Size: 1 serving
- Calories: 550
- Sugar: 6
- Sodium: 650
- Fat: 15
- Saturated Fat: 7
- Unsaturated Fat: 8
- Trans Fat: 0
- Carbohydrates: 65
- Fiber: 4
- Protein: 38
- Cholesterol: 55