
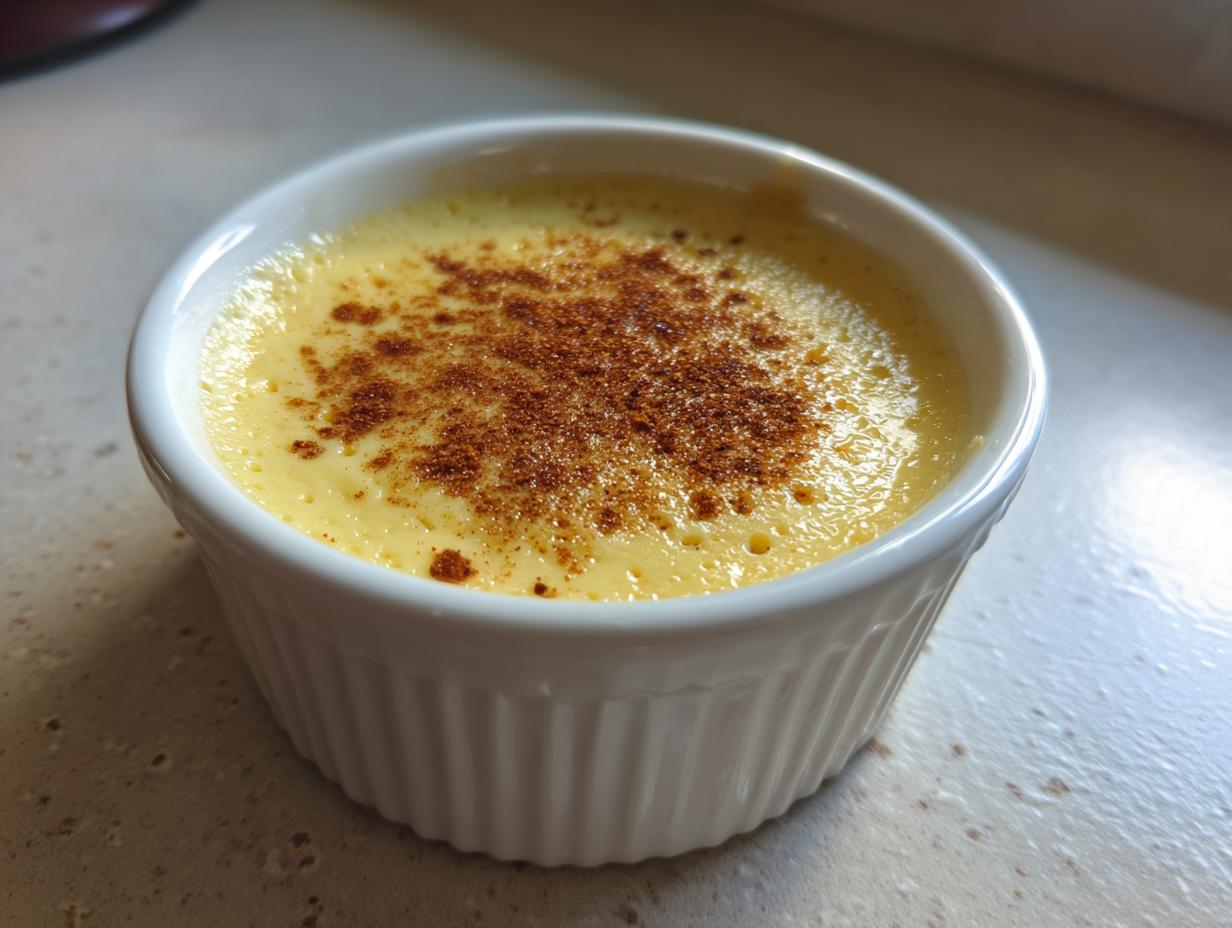
Do you ever just crave that one dessert that tastes exactly like childhood? You know, the one that smells like sweet comfort and requires so little fuss? I get it. That’s exactly why I’m sharing our absolute best egg custard recipe with you today. We call this the Fail-Proof Creamy Classic Baked Egg Custard because honestly, it will work for you!
I’m Claire from Bliss Batter, and while I used to host big corporate events—you can read more about my journey here—I found my real peace creating simple, perfect bakes right here in my kitchen. My goal is to hand you recipes that work, every single time, so you feel confident creating that silky, smooth dessert we all dream about. Forget fancy techniques; this classic vanilla custard is pure home magic.
- Why This Fail-Proof Egg Custard Recipe Works for Everyone
- Ingredients for Your Creamy Baked Custard
- Step-by-Step Instructions for Perfect Egg Custard
- Adapting Your Recipe: Easy Egg Custard Pie Variation
- Tips for Success with Homemade Egg Custard
- Serving Suggestions for Classic Vanilla Custard
- Storage and Reheating Instructions for Your Egg Custard
- Frequently Asked Questions About Making Egg Custard
- Finding Joy in Simple Sweet Treats
Why This Fail-Proof Egg Custard Recipe Works for Everyone
When I first started experimenting with baked custards, I had a few curdled disasters in the trash. We’ve cleaned up all those mistakes in this recipe so you don’t have to suffer the same fate! This version is designed around three core promises: perfect texture, totally beginner-friendly steps, and that nostalgic taste we all want.
- Unbeatable Creamy Texture: This isn’t grainy; it’s the kind of silky smooth custard that melts the second it hits your tongue.
- Truly Beginner-Friendly: We skip the electric mixers and focus on gentle hand mixing—trust me, it makes all the difference.
- Classic Appeal: It brings back all those wonderful memories of a good, solid, old fashioned dessert without any fussy additions.
Achieving That Silky Smooth Custard Texture
That magic texture comes down to two non-negotiable steps we do right at the beginning. First, we gently warm the milk and slowly pour it into the eggs—that’s the tempering. If you dump it all in, you get sweet scrambled eggs, and nobody wants that! Second, you absolutely must strain the mixture. Giving it a quick pass through a fine-mesh sieve removes any tiny bits that could interfere with that beautiful, silky smooth custard finish. It’s a small step with huge results.
The Comfort of an Old Fashioned Dessert
There’s just something about a simple baked custard that feels like coming home. This isn’t a flashy, modern dessert; it’s pure comfort food made the way our grandmothers knew best. When you serve this **old fashioned dessert**, you’re not just serving a sweet treat, you’re serving nostalgia. It’s simple, it’s wholesome, and it requires just four main ingredients. That’s why it remains a classic year after year.
Ingredients for Your Creamy Baked Custard
You won’t believe how simple the ingredient list is for this luscious dessert! Truly, this is about quality over quantity. For this creamy baked custard, you just need the basics simmered together gently. We are keeping our flavor profile classic, so vanilla and a hint of nutmeg are our stars. Make sure you have absolutely everything measured out before you start heating anything!
- 4 large eggs (the structure builders!)
- 1/2 cup granulated sugar
- 1/4 teaspoon salt
- 1 teaspoon vanilla extract
- 2 cups whole milk (don’t skimp here!)
- Pinch of ground nutmeg (just for sprinkling on top before baking)
Ingredient Notes and Substitutions for Egg Custard
Okay, let’s talk about the milk. If you want that rich, deeply satisfying mouthfeel that makes this a standout homemade egg custard, you really should use whole milk. Skim milk just doesn’t deliver the necessary fat content for that ultimate creamy texture we are aiming for.
If you absolutely must use a lower-fat option, try half-and-half instead of skim, just to get a little bit more body back into the mix. Everything else is pretty standard, but remember, good vanilla extract makes a huge difference in a simple dessert like this. Don’t settle for the cheap stuff!
Step-by-Step Instructions for Perfect Egg Custard
Alright, this is where the magic happens, and trust me, it’s easier than it sounds! Remember, the goal here is gentle cooking. We are making a luxurious egg custard, not a quick scramble. So, take your time with these steps—patience is the secret ingredient for that creamy texture.
First things first: Get your oven preheated to a calm 325°F (160°C). Before anything else, set your larger roasting pan onto the center rack, and place your baking dish or those cute little ramekins inside it. We need everything in place before we start mixing our liquids.
Next, we mix the wet and dry ingredients gently. Whisk those four eggs just until they look combined—I mean it, don’t get vigorous! Add your sugar and salt, whisking just enough to dissolve the sugar. Then, gently warm up those two cups of whole milk until you see steam, but please don’t let it boil. Boiling milk is the enemy of soft **custard with milk and eggs**!
The most important technique comes next: Slowly drizzle that warm milk into your egg bowl while you whisk continuously and calmly. Keep that whisk moving! Once everything looks happy together, pour the whole mixture through a fine-mesh sieve. This straining step is non-negotiable if you want a guaranteed smooth result. You can check out some of my layering tips, which rely on similar principles of gentle incorporation, here.
Preparing the Water Bath for Your Egg Custard
This water bath, or bain-marie, is your insurance policy against rubbery edges! The hot water surrounding your custard dish creates a humid, gentle heat that cooks the custard evenly from the outside in. This is the only way to guarantee that beautiful, silky smooth custard without any scorched spots or curdling edges. Once your custard mix is in the pan, carefully pour boiling water into the outer roasting pan so it comes halfway up the sides of your custard container. Be steady when pouring, as splashes are guaranteed to make a mess!
Tempering Eggs: The Secret to No Fail Dessert Recipe
Tempering is just a fancy word for gently introducing warm liquid to eggs so they don’t seize up. If you shake the bowl wildly, you create tons of tiny air bubbles that bake unevenly and ruin that smooth surface. Keep your whisk hand steady and slow when adding the milk. We are aiming for a truly **no fail dessert recipe**, and that starts with respecting the temperature difference between the eggs and the milk. Gently whisk until you have one unified mixture, nice and slow, just like we did when making our classic caramel apples!
Adapting Your Recipe: Easy Egg Custard Pie Variation
Now, I know some of you are pie people, and that’s totally fine! You can absolutely turn this perfect base into an Easy Egg Custard Pie without changing the main filling ingredients. If you want a crust—and who doesn’t love a flaky one?—just take your favorite 9-inch unbaked pie crust and place it in a dish. Pour that gorgeous, strained egg custard mixture right in there.
Since the pie crust adds a little insulation, you’ll need to bake it a bit longer. Look for about 50 to 60 minutes inside that same water bath we prepared. You’re looking for the center to just barely wobble when you move the rack. I have some tips for getting a truly flaky crust ready for this filling, which you can check out here. If you skip the crust, you can still have a single-serving treat by using ramekins!
Tips for Success with Homemade Egg Custard
I’ve made this recipe so many times now—seriously, it’s a staple in my house—that I’ve learned a few little tricks that make the difference between a good custard and a mind-blowingly creamy baked custard.
First tip: Don’t rush the cooling process! After you pull that pan out of the water bath, it’s still cooking on residual heat. If you try to check for doneness right away, you’ll overbake it. I remember one winter when I was trying to rush dessert before a phone call, I took it out too early, thought it looked too wobbly, and put it back in for an extra ten minutes. Oops! That second bake turned it slightly grainy. Always let it cool on the rack first so it can settle down gently.
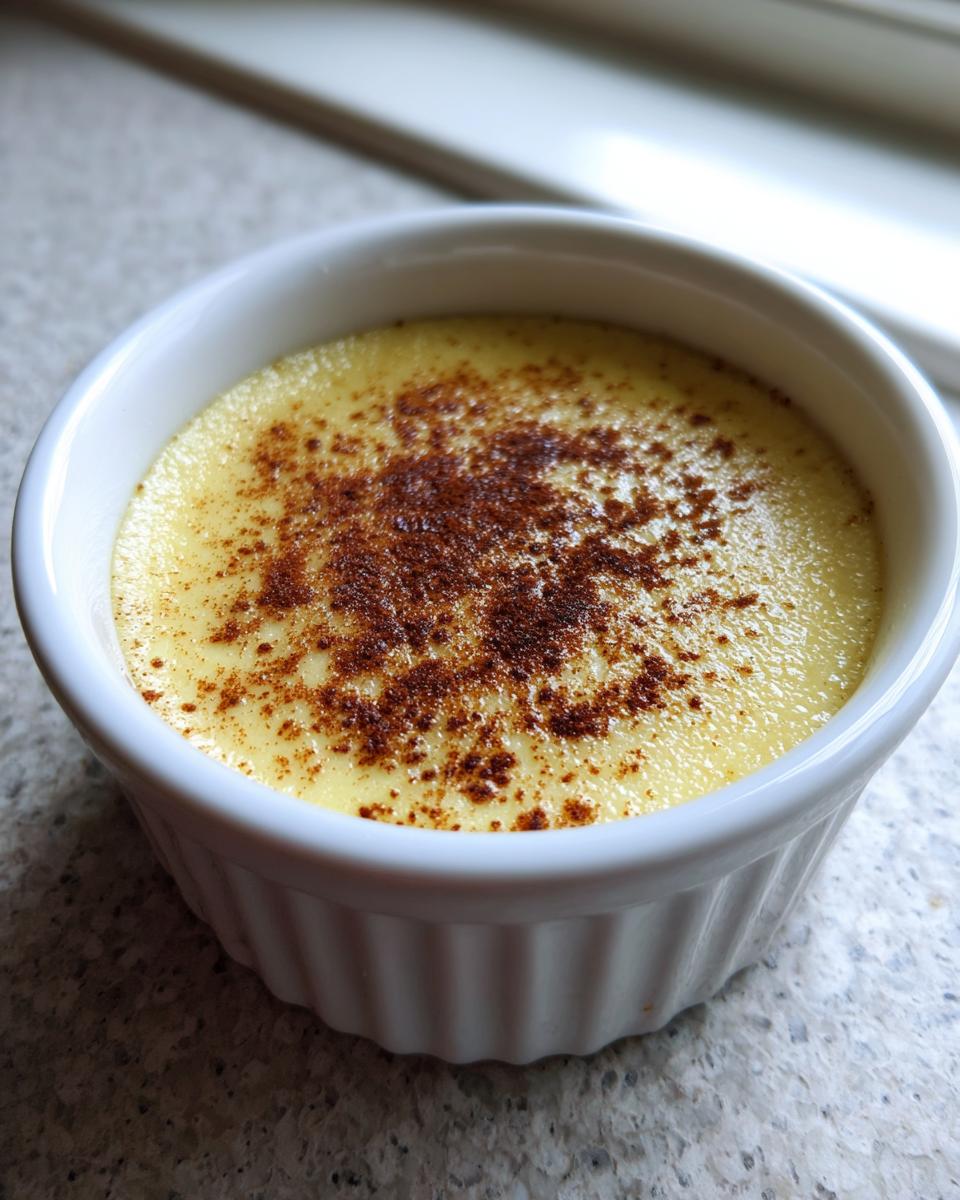
My second piece of advice is about the nutmeg. I always dust the top *before* it goes into the oven. When you sprinkle it on after baking, sometimes it just sits on top in a weird layer. Baking it with the custard allows that spice to infuse lightly into the top layer of the custard as it sets. It’s subtle, but it makes for a much better overall flavor profile.
Finally, and this comes straight from my time obsessing over these recipes—check the doneness based on the center jiggle, not just the toothpick coming out clean! The edges should definitely look firm when you gently nudge the pan. If the whole thing sloshes, it needs more time. If you want to see my journey and learn more about how I test my recipes from my corporate planning days to my kitchen, check out my About Page!
Serving Suggestions for Classic Vanilla Custard
Once your classic vanilla custard is perfectly chilled—and remember, you *must* chill it for those few hours—it’s time to think about dressing it up a little! This dessert shines on its own, but a little something extra never hurt anyone, right?
For a truly comforting experience, I love a drizzle of warm caramel sauce over the top. It mixes perfectly with the cool custard, providing that wonderful warm/cold contrast. You can find my favorite method for foolproof caramel right here!
If you prefer something lighter, skip the heavy sauces. A tiny handful of fresh, slightly tart berries, like raspberries or thinly sliced strawberries, adds color and a nice little counterpoint to the sweetness. A little dusting of powdered sugar is always simple and elegant, too!
Storage and Reheating Instructions for Your Egg Custard
This is another one of those easy steps that solidifies this as a great make-ahead dessert. Once your **egg custard** has cooled down to room temperature, you must cover it tightly—plastic wrap works perfectly—and put it in the fridge. You need a minimum of four hours for it to set up completely properly. Overnight is even better!
When it cools slowly, condensation can sometimes form little beads of moisture on the top surface. Don’t panic! Just gently dab that moisture away with a clean paper towel before serving. Store leftovers in the fridge, covered, for up to four days. I really don’t recommend reheating baked custard; it loses that lovely silky texture and can get a little watery!
Frequently Asked Questions About Making Egg Custard
I always get so many questions back from folks who try this recipe for the first time. It usually revolves around texture, because getting that silky smooth custard right is the key to everything! Bring on your questions; I’m happy to chat about troubleshooting!
Can I make this Simple Egg Custard Recipe without a Water Bath?
Oh, I wish you could, but I have to say no! The water bath is absolutely non-negotiable if you want that perfect, creamy result. Think of it like a tiny, humid oven wrapping around your dish. If you skip it, the direct, dry heat from the oven acts too fast on the eggs, and you will end up with something closer to a firm, unevenly cooked **custard with milk and eggs** rather than the smooth pudding we are aiming for. It’s the secret to banishing bubbles!
How do I know when my baked egg custard is truly done?
This is the trickiest part for beginners, but once you see it, you’ll never forget! You do the toothpick test around the edges, sure, but the real answer lies in the *jiggle*. When you gently nudge the roasting pan—not the custard dish itself—the edges should look completely set. The very center, about the size of a quarter, should still have a distinct, soft wobble to it, like really thick gelatin. If the whole thing is moving like soup, it needs more time!
If you try this **simple egg custard recipe** and still have issues or ideas you want to share, don’t hesitate to reach out to me on my Contact Page. Happy baking!
Finding Joy in Simple Sweet Treats
Now that you have mastered the perfect creamy baked custard, I really want to hear about it! Don’t be shy—let me know in the comments how yours turned out, especially if you tried the pie crust variation. Honestly, for those times when you’re juggling a busy week, recipes like this prove that great food doesn’t require hours of effort. Knowing I can whip up something delicious after checking out my easy weeknight dinner plans is such a win when it comes to efficient **meal planning**!
PrintFail-Proof Creamy Classic Baked Egg Custard

Make a silky smooth, old-fashioned egg custard dessert using simple ingredients. This recipe is designed to be foolproof for beginners, resulting in a creamy texture every time.
- Prep Time: 15 min
- Cook Time: 50 min
- Total Time: 65 min
- Yield: 6 servings 1x
- Category: Dessert
- Method: Baking (Water Bath)
- Cuisine: American
- Diet: Vegetarian
Ingredients
- 4 large eggs
- 1/2 cup granulated sugar
- 1/4 teaspoon salt
- 1 teaspoon vanilla extract
- 2 cups whole milk
- Pinch of ground nutmeg (for topping)
Instructions
- Preheat your oven to 325°F (160°C). Place a 1.5-quart baking dish or six 6-ounce ramekins inside a larger roasting pan.
- In a medium bowl, lightly whisk the eggs until just combined. Do not over-whisk, as this incorporates too much air and can cause bubbles.
- Whisk in the sugar, salt, and vanilla extract until the sugar begins to dissolve.
- Gently warm the milk in a saucepan over medium heat until steam rises, but do not let it boil.
- Slowly pour the warm milk into the egg mixture while continuously whisking gently. This tempering process prevents the eggs from scrambling.
- Strain the custard mixture through a fine-mesh sieve into a clean bowl to remove any chalazae or unmixed bits, which helps achieve a silky texture.
- Carefully pour the strained mixture into the prepared baking dish or ramekins.
- Place the roasting pan on the oven rack. Carefully pour hot water into the roasting pan until the water reaches halfway up the sides of the custard dish or ramekins. This water bath (bain-marie) ensures gentle, even cooking.
- Bake for 40 to 50 minutes for a large dish, or 35 to 45 minutes for ramekins. The custard is done when the edges are set but the center still jiggles slightly when gently nudged.
- Carefully remove the custard from the water bath. Let it cool on a wire rack to room temperature.
- Sprinkle the top lightly with nutmeg. Chill in the refrigerator for at least 4 hours, or until completely cold and firm, before serving.
Notes
- For an Egg Custard Pie variation, pour the strained mixture into a 9-inch unbaked pie crust. Bake in the water bath for 50–60 minutes until set.
- To avoid bubbles on the surface, do not use an electric mixer; whisk by hand gently.
- If you are interested in structured meal planning to fit specific dietary goals, look into meal delivery companies for assistance.
Nutrition
- Serving Size: 1 serving
- Calories: 180
- Sugar: 18
- Sodium: 120
- Fat: 7
- Saturated Fat: 4
- Unsaturated Fat: 3
- Trans Fat: 0
- Carbohydrates: 17
- Fiber: 0
- Protein: 10
- Cholesterol: 130