
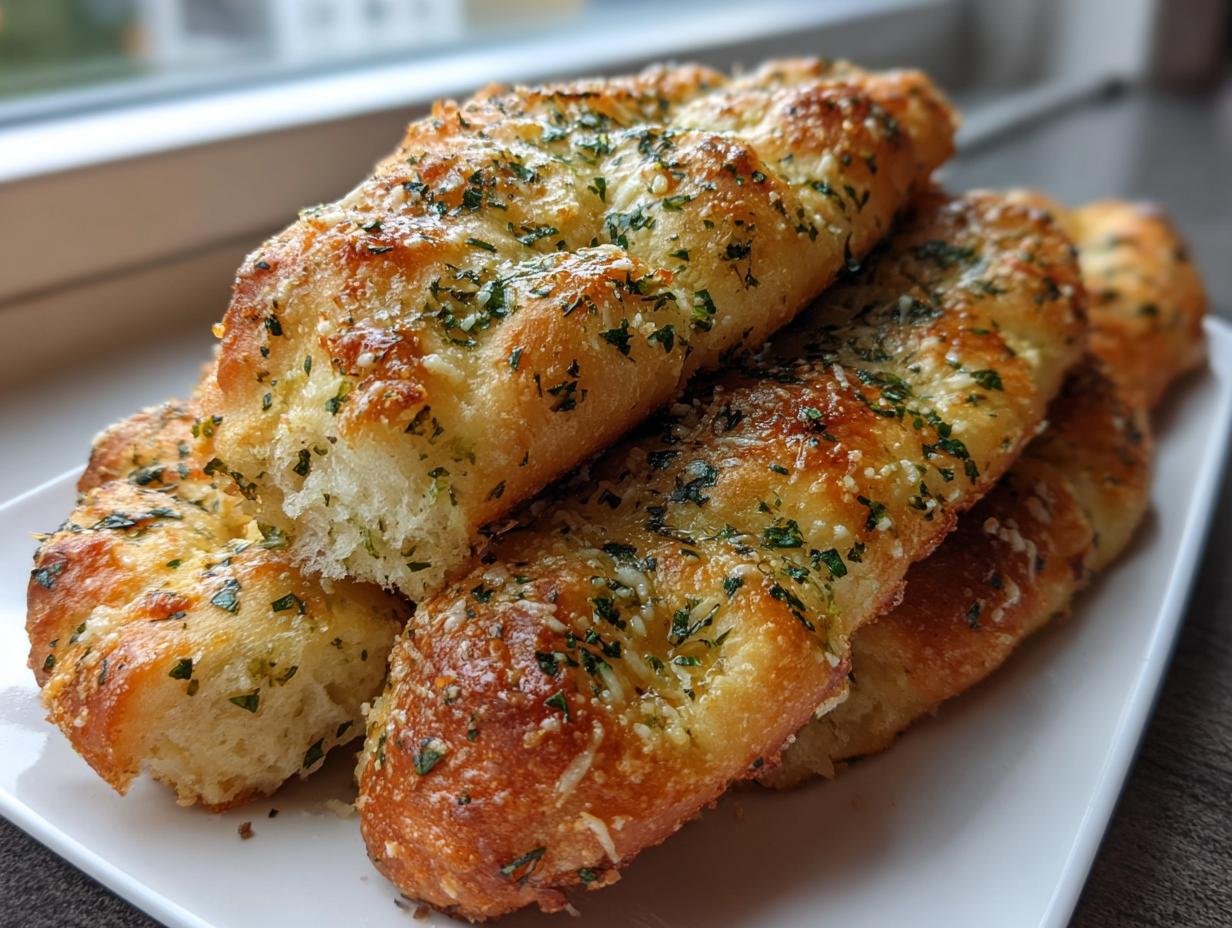
Do you ever just get that massive craving for those warm, buttery sticks you only seem to find at your favorite Italian spot downtown? Me too! That’s exactly why I spent so much time perfecting this recipe for homemade breadsticks. Forget those dry, little tubes you sometimes get; we are aiming for soft, fluffy, and chewy here. Trust me, this recipe delivers on that glorious texture. We’ve worked out every kink so you can feel confident making true, restaurant-quality Soft Garlic Breadsticks right on your own sheet pan. It’s all about that perfect balance of simple ingredients and the right steps, keeping with that core Bliss Batter mission, which you can read more about on our About page, to make everything feel achievable!
- Why This Homemade Breadsticks Recipe is a Keeper
- Ingredients for Perfect Soft Garlic Breadsticks
- Step-by-Step Instructions for Homemade Breadsticks Recipe
- Tips for Copycat Breadsticks Success
- Serving Suggestions for Your Italian Breadsticks Side Dish
- Storing Leftover Breadsticks
- Frequently Asked Questions About Making Breadsticks
- Nutritional Estimates for Your Breadsticks
- Share Your Homemade Breadsticks Creations
Why This Homemade Breadsticks Recipe is a Keeper
What I love about this recipe is that it takes something that seems complicated—yeast dough—and makes it totally approachable. These aren’t just any breadsticks; they are my tested and perfected batch of No Fail Breadsticks. They come out perfectly chewy every single time. If you’re looking for Easy Breadsticks that beat the take-out menu, these are it! You can have this amazing side dish ready surprisingly fast, too.
- Unbeatable softness guaranteed.
- Quick rising time—ready in about an hour!
- Incredibly rich, buttery garlic flavor.
Achieving Fluffy Yeast Breadsticks Texture
The secret to ditching that dense, restaurant-style chewiness isn’t magic; it’s the yeast doing its job! We let the yeast wake up properly in the warm water and sugar, which creates those tiny bubbles that puff up big in the oven. That initial 1-hour rise is crucial for getting those gorgeous, fluffy, pillow-y results for your Quick Bread Sticks. Don’t rush that step, okay? If you’re planning your weeknight meals, this fits perfectly into a shorter prep window—check out some other speedy ideas over on my weeknight dinners page!
Ingredients for Perfect Soft Garlic Breadsticks
Okay, let’s talk ingredients! For any recipe, especially one that tries to mimic a classic, you need quality stuff that you can rely on. I always list things out clearly so you know exactly what to grab before you start mixing. We’ve got the base dough ingredients, which are super simple pantry staples, and then the topping—that glorious, garlicky bath that makes these breadsticks legendary. Don’t feel pressured to change these basic components; they are the foundation for the softest dough you’ll ever work with!
Dough Components
- 1 1/2 cups warm water (about 110°F – make sure it’s warm enough to wake the yeast!)
- 2 1/4 teaspoons active dry yeast
- 2 tablespoons granulated sugar
- 4 cups all-purpose flour, plus more for dusting
- 1 teaspoon salt (for the dough itself)
- 1/4 cup olive oil, plus more for greasing the bowl
Buttery Garlic Topping for Breadsticks
- 1/2 cup unsalted butter, melted (room temperature is fine if you’re mixing it well)
- 4 cloves garlic, minced (please, no jarred stuff if you can help it!)
- 1 teaspoon dried Italian seasoning
- 1/2 teaspoon salt (for topping)
- 1/4 cup grated Parmesan cheese (This is our secret weapon if you want to dive straight into that amazing Cheesy Breadsticks Recipe!)
Step-by-Step Instructions for Homemade Breadsticks Recipe
I promised you easy, and I promise these instructions hold your hand through every phase! Getting that perfect soft texture means paying a little attention to the dough first. We’re using yeast, so we need to be patient for that rise—though honestly, besides waiting, it’s hands-off time. Once they hit the oven, you’re only looking at about 15 minutes until you’ve got something magnificent. This method guarantees the best homemade breadsticks that stay soft long after they cool down! For some serious dough work, you can look at my recipe for pumpkin beer bread, but these are much faster!
Preparing the Fluffy Breadsticks Dough
First things first, we need to proof that yeast! In a big bowl—I usually use my stand mixer bowl—mix your warm water, sugar, and that active dry yeast. Wait about 5 to 10 minutes until it looks foamy on top. That foam means the yeast is happy and ready to work its magic. Next, gently mix in your flour, olive oil, and salt until you have a shaggy mess. Now, turn it out onto a floured surface. You have to knead this dough for about 5 to 7 minutes until it feels smooth and springs back when you poke it. If it springs back fast, you know you’ve hit that perfect elastic state for breadsticks!
Rising and Shaping Your Breadsticks
Grab a clean bowl, give it a quick slick of olive oil, and place your smooth dough inside. Cover it up tight—plastic wrap works great—and leave it somewhere warm for 1 hour. Seriously, an hour! It needs to double in size. While it’s doing its thing, go ahead and preheat your oven to 375°F (190°C) and line a big sheet pan with parchment paper. Once risen, gently punch the air out. Divide the dough in half. Roll each half into a roughly ½-inch thick rectangle and then use a knife or pizza cutter to slice them into 10 to 12 strips. Now, gently stretch each strip a bit before placing them on your tray. You can even let them rest for 10 minutes right here if you are moving slowly.
Applying the Buttery Garlic Flavor to Breadsticks
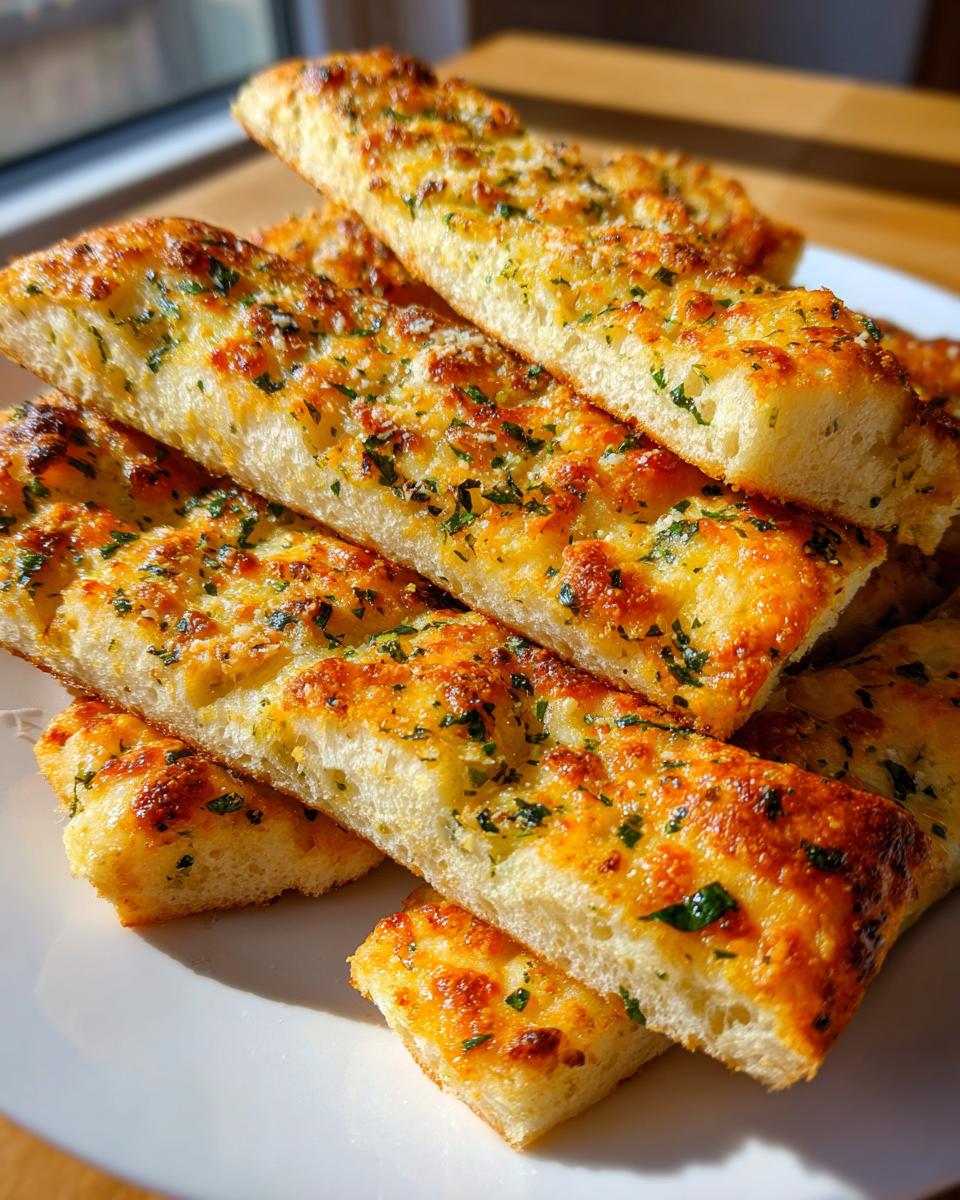
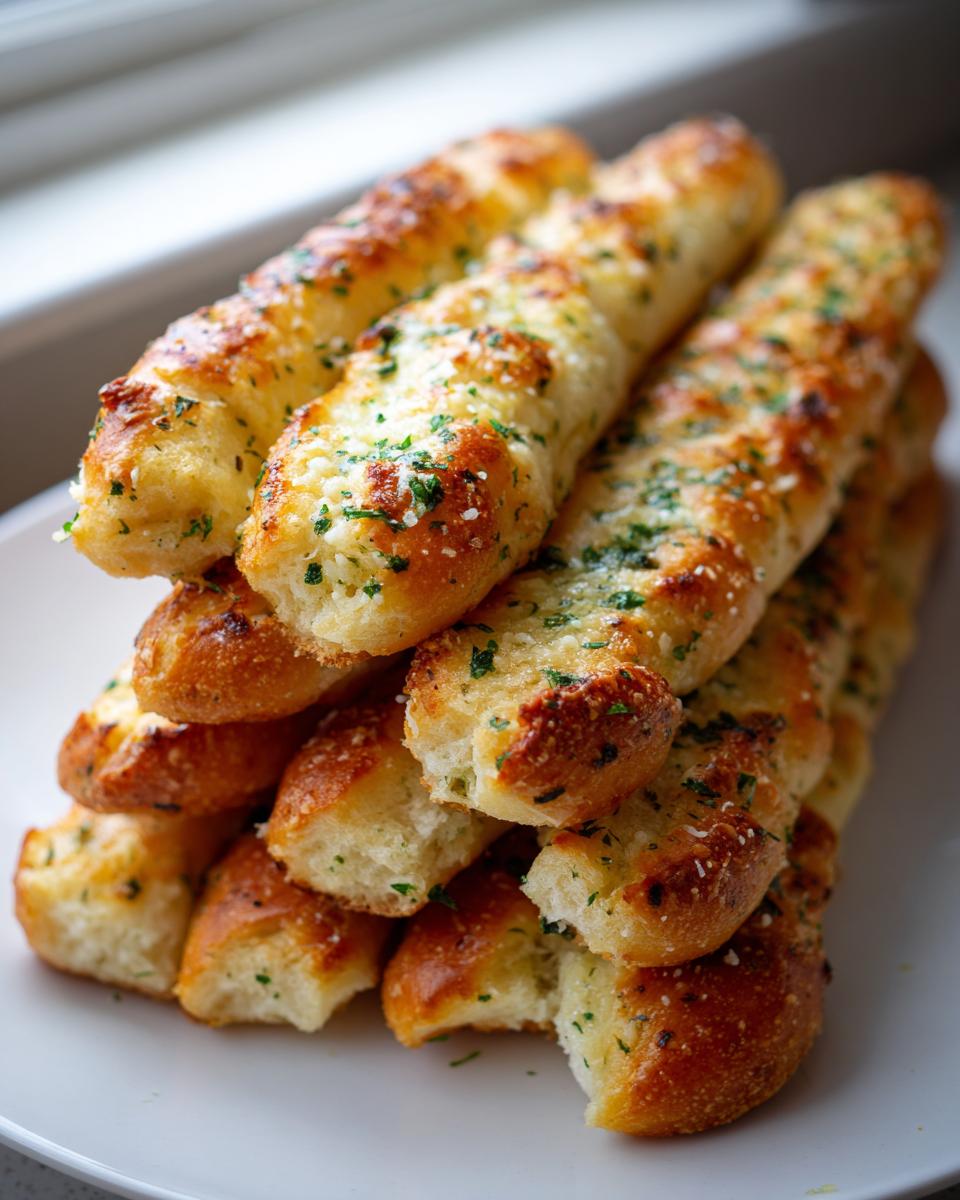
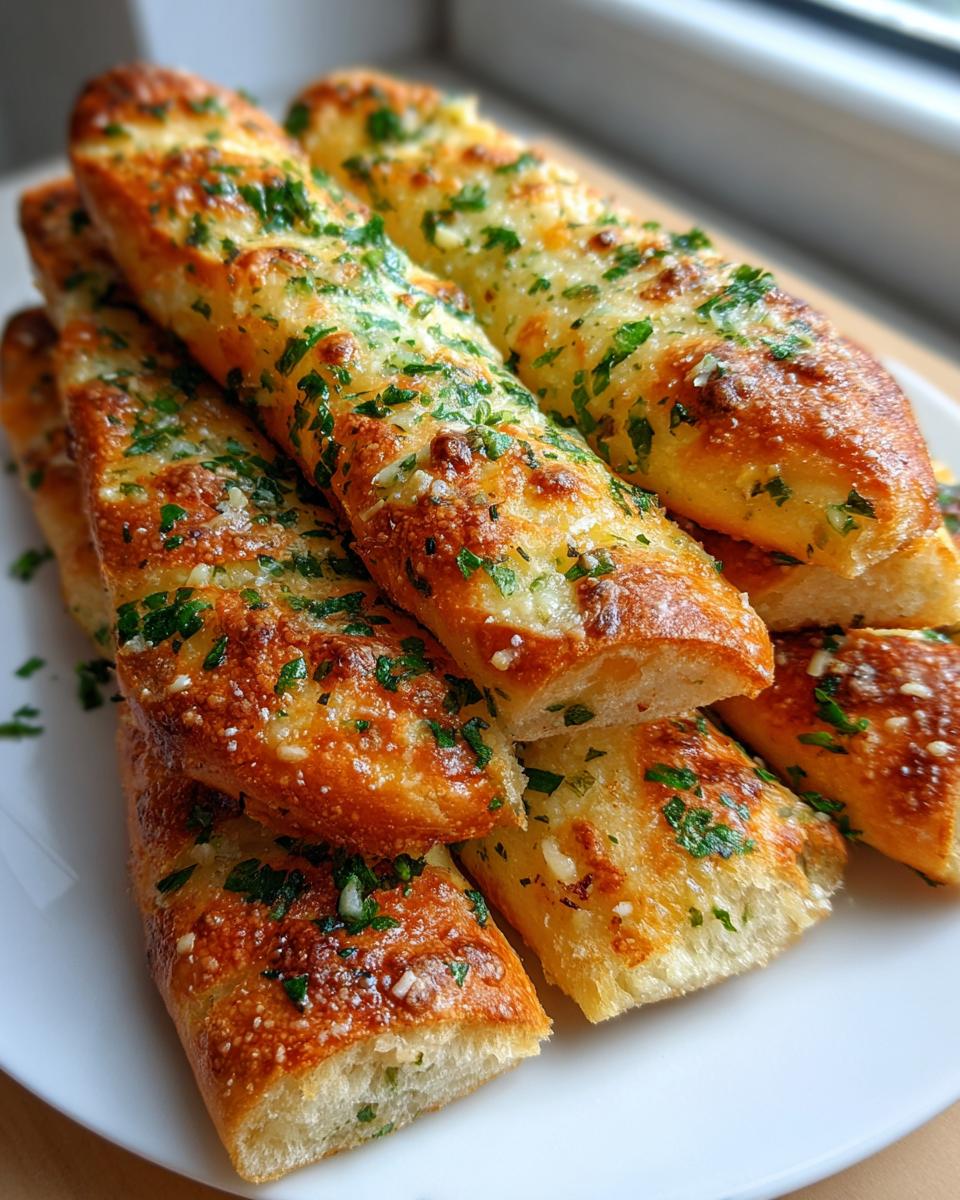
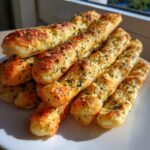
This is where the restaurant magic happens! Melt your butter and whisk in your minced garlic, Italian seasoning, and that little bit of topping salt. If you’re going for the cheesy version? Stir in that Parmesan right now! Before they go into the oven, brush every single strip with that garlicky mixture. Bake them for 12 to 15 minutes until they get that lovely light golden color. But don’t stop there! As soon as they come out, hit them again with any remaining butter. That double-glaze makes these the ultimate Buttery Garlic Breadsticks; it locks in flavor and moisture for the softest bite!

Tips for Copycat Breadsticks Success
You really want those famous super-soft, slightly puffy restaurant vibes? It’s all in the details after the kneading is done! The most important thing for achieving that Olive Garden Copycat Breadsticks feeling is making sure your environment is warm enough for that first rise. If your kitchen is chilly, put the bowl near a warm oven (not turned on, of course!) or even inside a microwave for an hour—it works like a charm for fast-rising dough. Don’t skip that final brush of butter when they come out of the oven; that’s the main trick for that signature buttery sheen on your breadsticks.
Troubleshooting Common Breadsticks Issues
If your dough seems slow and won’t double after an hour, your water might have been too cold for the yeast! Give the bowl a quick warm-up (maybe resting it on top of a warm burner for five minutes) and be patient. Another thing: if your finished breadsticks seem a bit tough, you likely over-kneaded them or added too much flour during shaping. Next time, try keeping a tiny bowl of water on the side and dipping your fingers in before you adjust the flour on the counter. A little moisture goes a long way to keeping things tender. For more baking insights, I broke down some great layering tips over on my lasagna tips page!
Serving Suggestions for Your Italian Breadsticks Side Dish
Honestly, these breadsticks are so good they could be a main course themselves, but they really shine when paired up with something saucy!
Since they are the perfect Dinner Side Bread Recipe, think about what usually needs a good piece of bread for soaking up flavor. They are amazing dunked into a bowl of my creamy tomato soup. And of course, if you’re making anything with a rich red sauce, like maybe a big plate of spaghetti or even a hearty deep-dish pizza, you absolutely need these on the table. They make any Italian night feel instantly more special and complete!
Storing Leftover Breadsticks
These breadsticks are best right out of the oven, nobody can argue with that! But leftovers are a real thing, so what do we do? If you have any left, keep them in an airtight container at room temperature for up to two days. The fridge is a fast track to toughness, so avoid it if you can. When you are ready for round two, just sprinkle them with a tiny bit of water before reheating them quickly in the oven at 300°F for about five minutes. That steam brings back the soft chewiness!
Frequently Asked Questions About Making Breadsticks
I totally get it; when you’re finally ready to bake, you might have a few last-minute questions whirling around in your head. That’s perfectly normal! This recipe is designed to be totally straightforward, but sometimes those little details make all the difference between a good bake and a show-stopping bake. I’ve gathered up some common questions people have when trying to achieve that perfect fluffiness!
Can I use refrigerated dough for quick breadsticks?
Oh, the eternal quick fix! You absolutely *can* use refrigerated dough if you’re in a huge pinch—it will certainly save you about an hour of rising time. However, I have to be honest with you: those store-bought doughs will never give you the light, airy, cloud-like texture we get from using active dry yeast. The homemade dough lets the yeast do its thing, resulting in much fluffier yeast breadsticks. If you use canned dough, you miss out on that signature chewiness that makes these the best breadsticks for dipping!
How do I make the cheesy breadsticks variation?
That cheesy, salty sprinkle is my absolute favorite way to eat them! Making the Cheesy Breadsticks Recipe variation is super simple, and I actually mentioned it right in the ingredient list. All you need to do is toss about 1/4 cup of grated Parmesan cheese (the real stuff, if you can get it!) directly into the melted butter mixture right before you brush it on top of the shaped dough strips. It bakes right into that delicious crust. If you decide you want to skip the cheese and just have classic Italian spears, you can skip this step entirely!
Can I use garlic powder instead of fresh garlic in the topping?
Yes, you can definitely swap it out in a pinch! Fresh garlic is king for that pungent, bold flavor, especially when steeped in butter, but if you only have powder, go ahead! I recommend using about 1/2 teaspoon of garlic powder for every 4 cloves of fresh garlic listed in the recipe. Remember, garlic powder is much more concentrated, so don’t use too much or it can turn bitter fast. If you use the powder, you might want to brush the tops on twice—once before baking and once right after—to really amp up that comforting garlic finish for your Appetizer Breadsticks.
If you’re interested in more ways to use yeast in fun ways, you definitely need to check out my recipe for cinnamon monkey bread sometime!
Nutritional Estimates for Your Breadsticks
If you are tracking macros or just curious about what’s going into those incredible, buttery strips, I put together a general estimate for you. Keep in mind, because we are using real butter, real oil, and that amazing Parmesan cheese (if you choose the cheesy route!), these numbers are just a starting point.
These estimates are based on a serving size of 2 breadsticks. The exact values can shift depending on how heavy-handed you are with the garlic butter—and let’s be honest, who measures that part accurately?
- Serving Size: 2 breadsticks
- Calories: 180
- Fat: 8g
- Saturated Fat: 4g
- Trans Fat: 0g
- Carbohydrates: 24g
- Fiber: 1g
- Sugar: 2g
- Protein: 4g
- Sodium: 350mg
- Cholesterol: 15mg
Remember, these figures are just estimates based on the listed ingredients and don’t account for any major substitutions you might make when forming your perfect breadsticks. Like anything wonderfully comforting, they are best enjoyed in moderation!
Share Your Homemade Breadsticks Creations
And that’s it! You have officially mastered the famous, restaurant-style soft garlic breadsticks without ever leaving your kitchen. I am so excited for you to try these. Now, this is the fun part where we all get to celebrate this delicious bake together!
When you give this recipe a whirl in your kitchen, please don’t be shy! I absolutely love hearing what you think. Did you try the cheesy variation? Were they the perfect side dish for your pasta night? Drop by the comments section below and leave your star rating—it really helps other bakers know they are on the right track!
If you have any questions while you’re kneading or brushing on that glorious butter, or if you just want to send a picture (I live for those!), you can always reach out directly through my contact page. Happy dipping, friends!
PrintSoft Copycat Garlic Breadsticks (Better Than Restaurant Style)
Make soft, fluffy, and chewy homemade breadsticks with a rich garlic butter topping. This recipe is easy and yields results comparable to popular restaurant versions.
- Prep Time: 20 min
- Cook Time: 15 min
- Total Time: 1 hour 35 min
- Yield: 20-24 breadsticks 1x
- Category: Side Dish
- Method: Baking
- Cuisine: American
- Diet: Vegetarian
Ingredients
- 1 1/2 cups warm water (about 110°F)
- 2 1/4 teaspoons active dry yeast
- 2 tablespoons granulated sugar
- 4 cups all-purpose flour, plus more for dusting
- 1 teaspoon salt
- 1/4 cup olive oil, plus more for greasing
- 1/2 cup unsalted butter, melted
- 4 cloves garlic, minced
- 1 teaspoon dried Italian seasoning
- 1/2 teaspoon salt (for topping)
- 1/4 cup grated Parmesan cheese (optional, for cheesy version)
Instructions
- Activate the yeast: In a large bowl, combine the warm water, yeast, and sugar. Let this mixture sit for 5 to 10 minutes until it becomes foamy.
- Mix the dough: Add the flour, 1 teaspoon of salt, and 1/4 cup of olive oil to the yeast mixture. Mix until a shaggy dough forms.
- Knead the dough: Turn the dough out onto a lightly floured surface. Knead for 5 to 7 minutes until the dough is smooth and elastic.
- First rise: Lightly grease a large bowl with olive oil. Place the dough in the bowl, turning to coat. Cover the bowl with plastic wrap or a clean towel and let it rise in a warm place for 1 hour, or until doubled in size.
- Preheat and prepare: Preheat your oven to 375°F (190°C). Line a large baking sheet with parchment paper.
- Shape the breadsticks: Gently punch down the risen dough. Divide the dough into two equal pieces. Roll each piece into a rough rectangle about 1/2 inch thick. Cut each rectangle into 10 to 12 strips. Gently stretch each strip slightly to form a breadstick shape. Place the strips on the prepared baking sheet.
- Second rise (optional): Let the shaped breadsticks rest for 10 minutes while you prepare the topping.
- Make the garlic butter: In a small bowl, whisk together the melted butter, minced garlic, Italian seasoning, and 1/2 teaspoon of salt. If making the cheesy version, stir in the Parmesan cheese now.
- Bake: Brush the tops of the breadsticks generously with the garlic butter mixture. Bake for 12 to 15 minutes, or until the tops are lightly golden brown.
- Serve immediately: Brush with any remaining garlic butter immediately after removing them from the oven for extra flavor. These pair well with your meal planning efforts for dinner.
Notes
- For a softer texture, brush the tops with melted butter again halfway through the baking time.
- If you prefer a stronger garlic flavor, let the minced garlic steep in the melted butter for 10 minutes before brushing on the dough.
- These breadsticks are excellent served warm alongside pasta dishes or as an appetizer before a main course.
Nutrition
- Serving Size: 2 breadsticks
- Calories: 180
- Sugar: 2
- Sodium: 350
- Fat: 8
- Saturated Fat: 4
- Unsaturated Fat: 4
- Trans Fat: 0
- Carbohydrates: 24
- Fiber: 1
- Protein: 4
- Cholesterol: 15