
You know, the holidays just aren’t complete until something rich and wonderfully decadent comes out of the oven, right? Back home in New England, after the big Thanksgiving feast, we always looked forward to those creamy, spiced flavors creeping into the desserts. That’s exactly what inspired this recipe because I wanted the cheer of traditional eggnog and the sheer indulgence of a perfect cheesecake all in one spectacular slice. Trust me, this pumpkin cheesecake recipe is great, but this **Eggnog cheesecake** will steal the show at Christmas dinner. It’s unbelievably smooth, packed with nutmeg, and it just tastes like pure holiday joy. I promise, if you follow my simple steps, you’ll be serving the most amazing holiday centerpiece!
- Why This Eggnog Cheesecake Recipe is Your New Holiday Favorite
- Gathering Ingredients for Your Eggnog Cheesecake
- Step-by-Step Instructions for the Ultimate Eggnog Cheesecake
- Tips for a Flawless Eggnog Cheesecake Presentation
- Serving Suggestions for Your Eggnog Cheesecake
- Storage and Reheating Instructions for Eggnog Cheesecake
- Frequently Asked Questions About Eggnog Cheesecake
- Estimated Nutritional Data for Eggnog Cheesecake
- Share Your Bliss Batter Creations
Why This Eggnog Cheesecake Recipe is Your New Holiday Favorite
Honestly, ditch those stiff, basic holiday desserts for this one. When I developed this **eggnog cheesecake**, I wanted something that felt luxurious but tasted familiar—like wrapping up in your favorite wool sweater. It’s that perfect marriage of tangy, creamy cheesecake and the warm spice of a classic holiday drink. It’s the showstopper you need on your table this year.
- The texture is unbelievably smooth; it melts right in your mouth.
- That spice blend—lots of nutmeg and a hint of cinnamon—really sells the eggnog vibe.
- It’s rich, but the slight tartness from the cream cheese keeps it from feeling too heavy.
The Perfect Creamy Baked Cheesecake Tips
If you’re worried about cracks—and who isn’t when it comes to these beauties?—I’ve got you covered. The secret to getting that gorgeous, unblemished surface is all about temperature control. You absolutely must use room-temperature cream cheese so it mixes without any lumps, and you have to utilize that water bath (a *bain-marie*). These two things together are the best **creamy baked cheesecake tips** I can give you for flawless results!
Gathering Ingredients for Your Eggnog Cheesecake
Okay, diving into the ingredients is where the magic really starts to happen for this **Eggnog cheesecake**. You can’t skimp here, especially on dairy! Always make sure that cream cheese is truly softened—I mean, soft enough that your finger leaves a definite dent without pushing through. Lumpy cream cheese makes for a lumpy cheesecake, and we are aiming for supreme creaminess here, folks. We’ve got a crust to build and then that lush, spiced filling to mix up.
- Crust required: 1 1/2 cups graham cracker crumbs, 1/4 cup granulated sugar, and 6 tablespoons unsalted butter, melted.
- For the Filling: 3 (8 ounce) packages cream cheese (full fat, please!), 1 1/2 cups granulated sugar, 1/4 cup all-purpose flour, 1 teaspoon vanilla extract, 1/2 teaspoon ground nutmeg, and 1/4 teaspoon ground cinnamon.
- The Wet Stuff: 1/4 cup heavy cream, 1/2 cup good quality eggnog, 4 large eggs, and 1 tablespoon dark rum extract (if you’re feeling extra festive!).
Ingredient Notes and Substitutions for Eggnog Cheesecake
Let’s talk flavor bombs! You need good eggnog—the thick, rich kind you’d actually drink on its own. None of that watery stuff will do for this recipe. As for the dark rum extract? Please don’t skip it if you can help it! It adds that authentic boozy depth that really makes people say, “Wow, this tastes exactly like the drink!” If you can’t find rum extract, go ahead and boost that nutmeg in the **nutmeg spiced cheesecake** filling. And for the crust, if you run out of graham crackers, gingersnap cookies make an absolutely incredible, extra spicy base. They transform this into an amazing **Christmas cheesecake ideas** dessert!
Step-by-Step Instructions for the Ultimate Eggnog Cheesecake
Alright, deep breaths! Making a baked cheesecake can sound scary, but I promise, this whole process for our **Eggnog cheesecake** is totally manageable if you stick to the plan. Think of the water bath as your insurance policy against disaster—it keeps things tender and even in the oven. I’ve broken down every single step, from getting that crust ready right through to the slow cooling process that makes all the difference. We want rich, smooth, and creamy, and these steps get us there without any fuss. Don’t rush the cooling part; that’s the key to success!
Preparing the Spiced Crust for This Holiday Cheesecake Recipe
First things first, get your oven preheated to 325 degrees F. While it’s heating up, wrap that 9-inch springform pan *really* well with heavy-duty foil. I mean, wrap it like you’re mailing it somewhere important, because water getting into the crust is a nightmare! For the crust, just mix those graham cracker crumbs, the ¼ cup of sugar, and the melted butter until it looks like wet sand. Press it down hard and flat in the bottom of the pan—use the bottom of a glass to really pack it in. A well-packed base is essential for a sturdy holiday cheesecake recipe. Pop that into the oven for 10 minutes, then let it cool a little while you tackle the filling.
Mixing the Eggnog Flavored Dessert Filling
This is crucial: Make sure your cream cheese is super soft before you even think about turning on the mixer. Start by beating the cream cheese until it’s buttery smooth. Then, gently introduce the 1 ½ cups of sugar and the flour, mixing just until they disappear. Scrape the sides! Now add your flavorings—vanilla, nutmeg, cinnamon—along with the heavy cream and that lovely eggnog. Mix until you feel it getting silky. Here is the absolute most important part for a crack-free top: Add those four eggs in, one at a time, and mix only until you *just* can’t see the yellow yolk anymore. Seriously, stop mixing the second it’s incorporated. Over-beating the eggs incorporates too much air, and air bubbles collapse while baking, leading to cracks in your finished **eggnog flavored dessert**.
Baking and Cooling Your Nutmeg Spiced Cheesecake
Now we bake! Pour that lovely filling over your crust. Set the springform pan inside a big roasting pan. Carefully pour hot water into the *roasting pan* until the water comes about halfway up the sides of the cheesecake pan. That’s our water bath! Bake for about 60 to 75 minutes. You want the edges set but the center still wobbly, like firm Jell-O. When it’s done, turn the oven OFF, crack the door open a tiny bit, and just leave it in there to hang out for a full hour. This slow descent keeps your beautiful **nutmeg spiced cheesecake** from sinking or cracking. Once it’s cooled down outside the oven, pop it in the fridge overnight. You’ll thank me later!

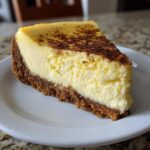
Tips for a Flawless Eggnog Cheesecake Presentation
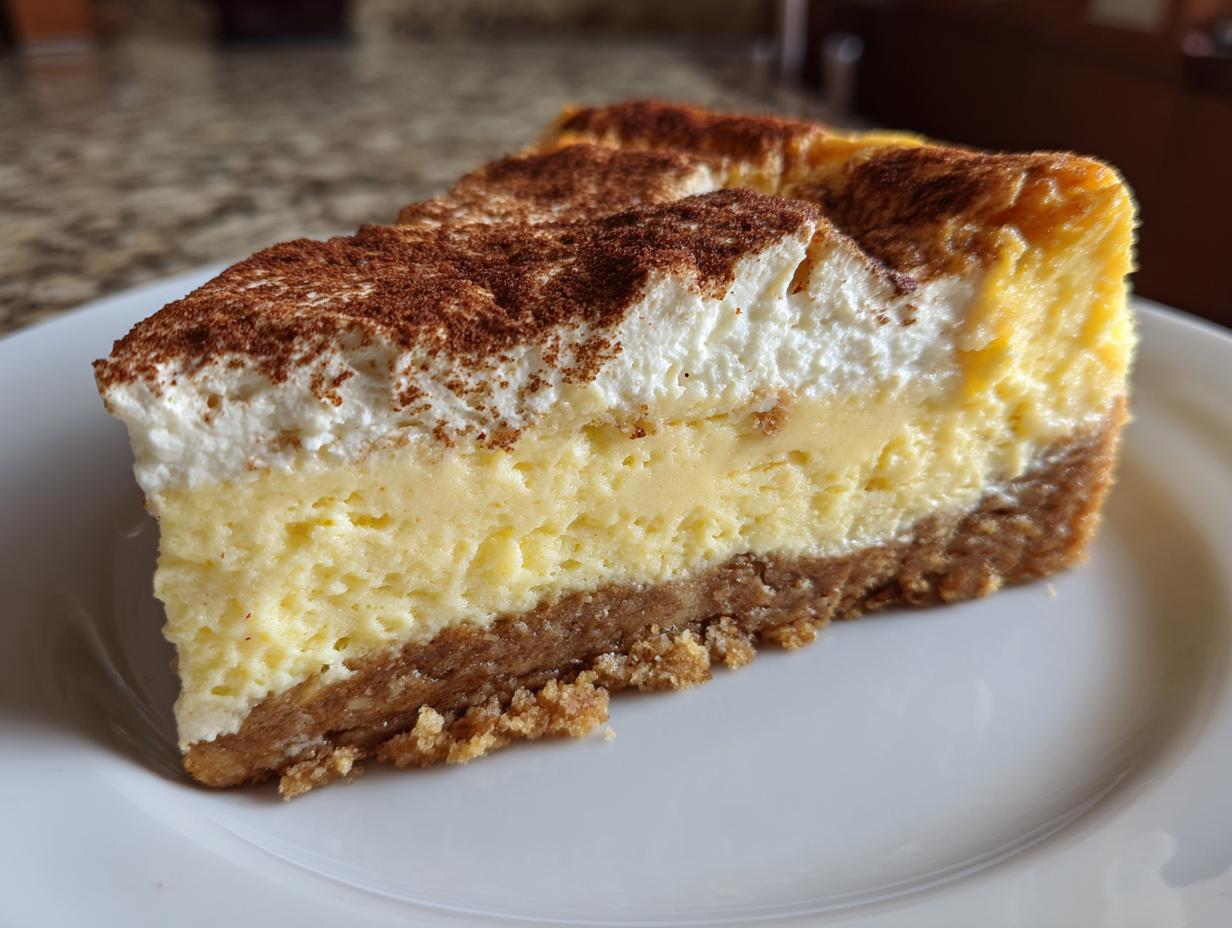
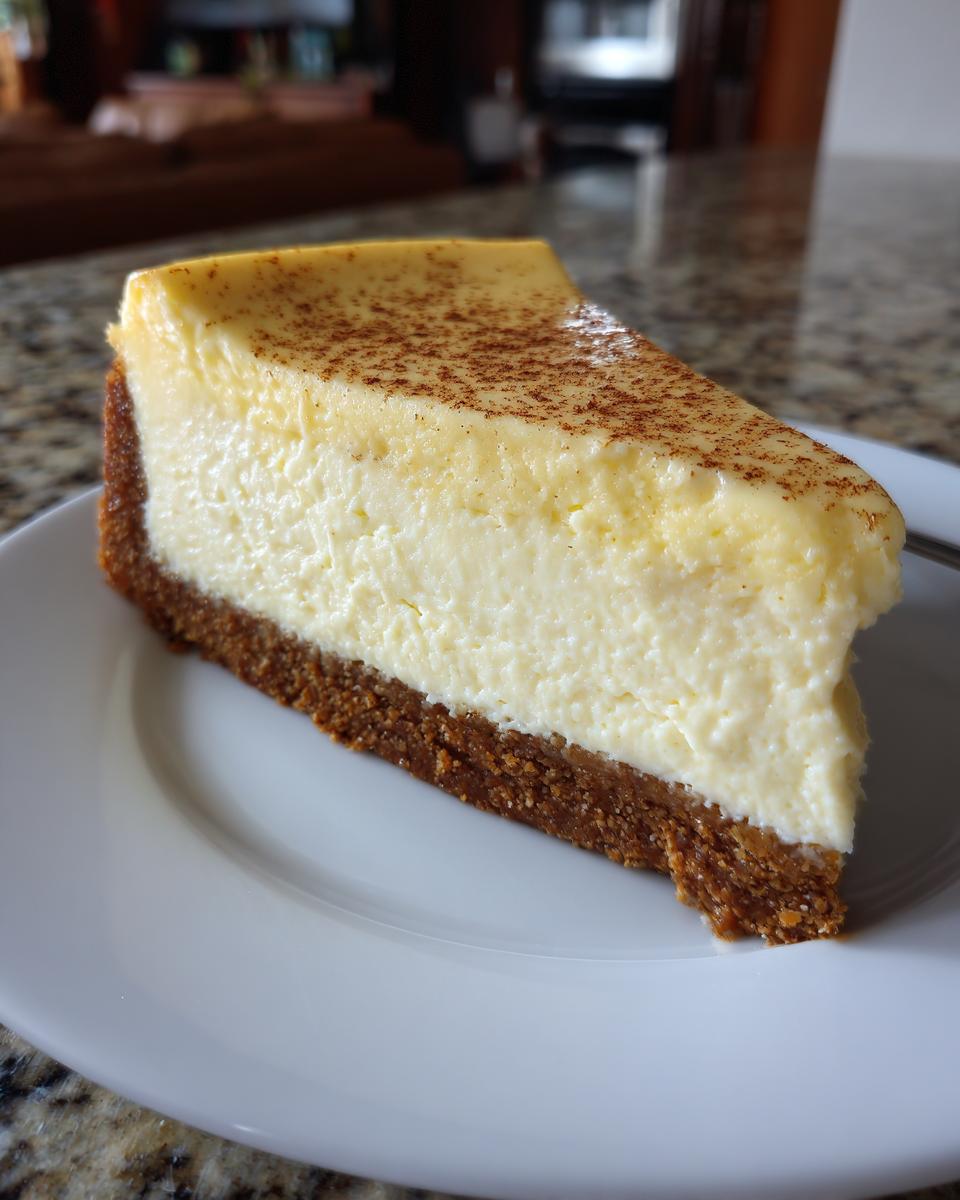
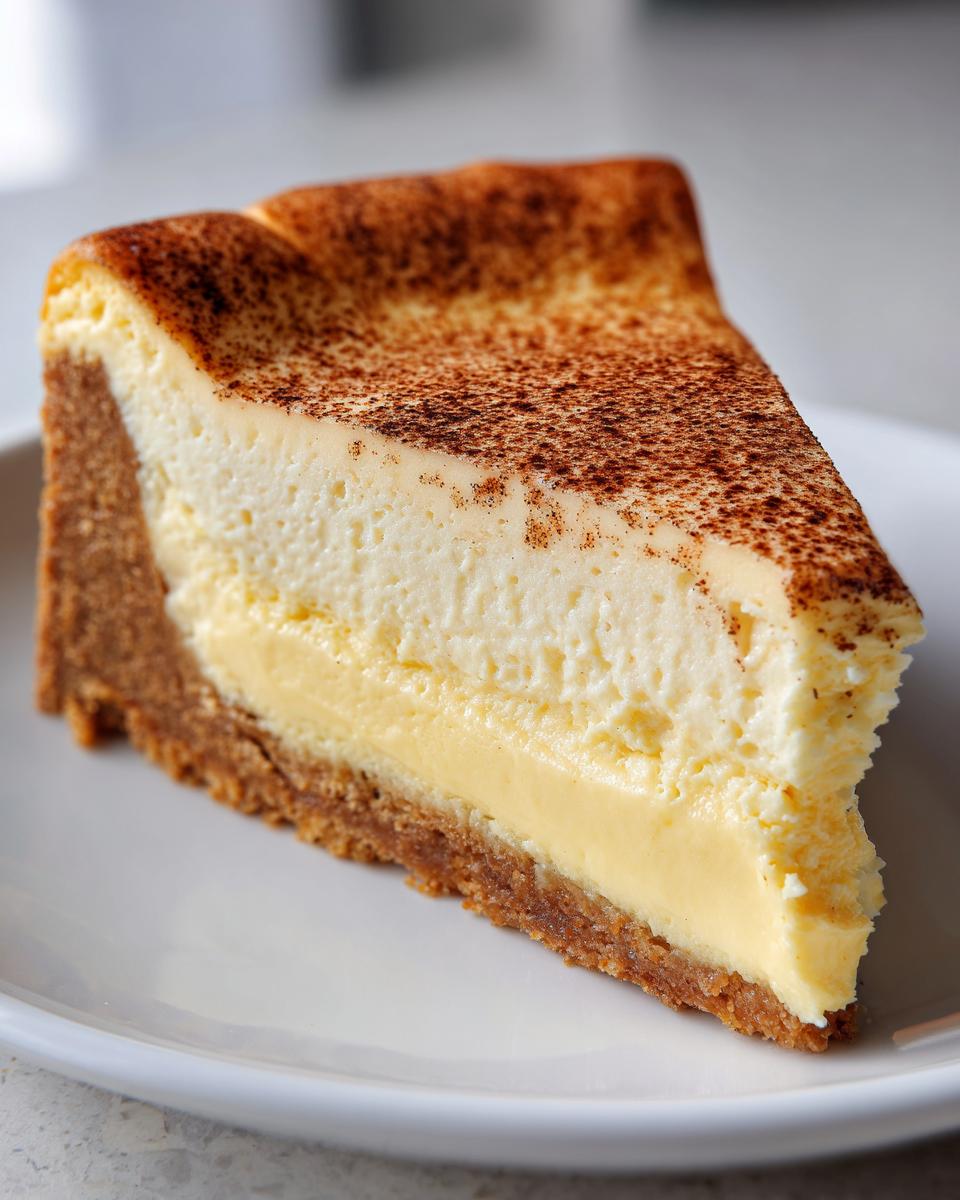
Once you’ve perfected the bake, you need this **Eggnog cheesecake** to look as amazing as it tastes. Presentation matters, especially when you’re dealing with a stunning **Christmas cheesecake ideas** centerpiece! The most important thing I can tell you, Claire’s Golden Rule, is that you cannot rush the chill time. Do not even peek at it before 6 hours, but seriously, overnight is perfection. That long rest firms up the texture so you get those super clean slices.
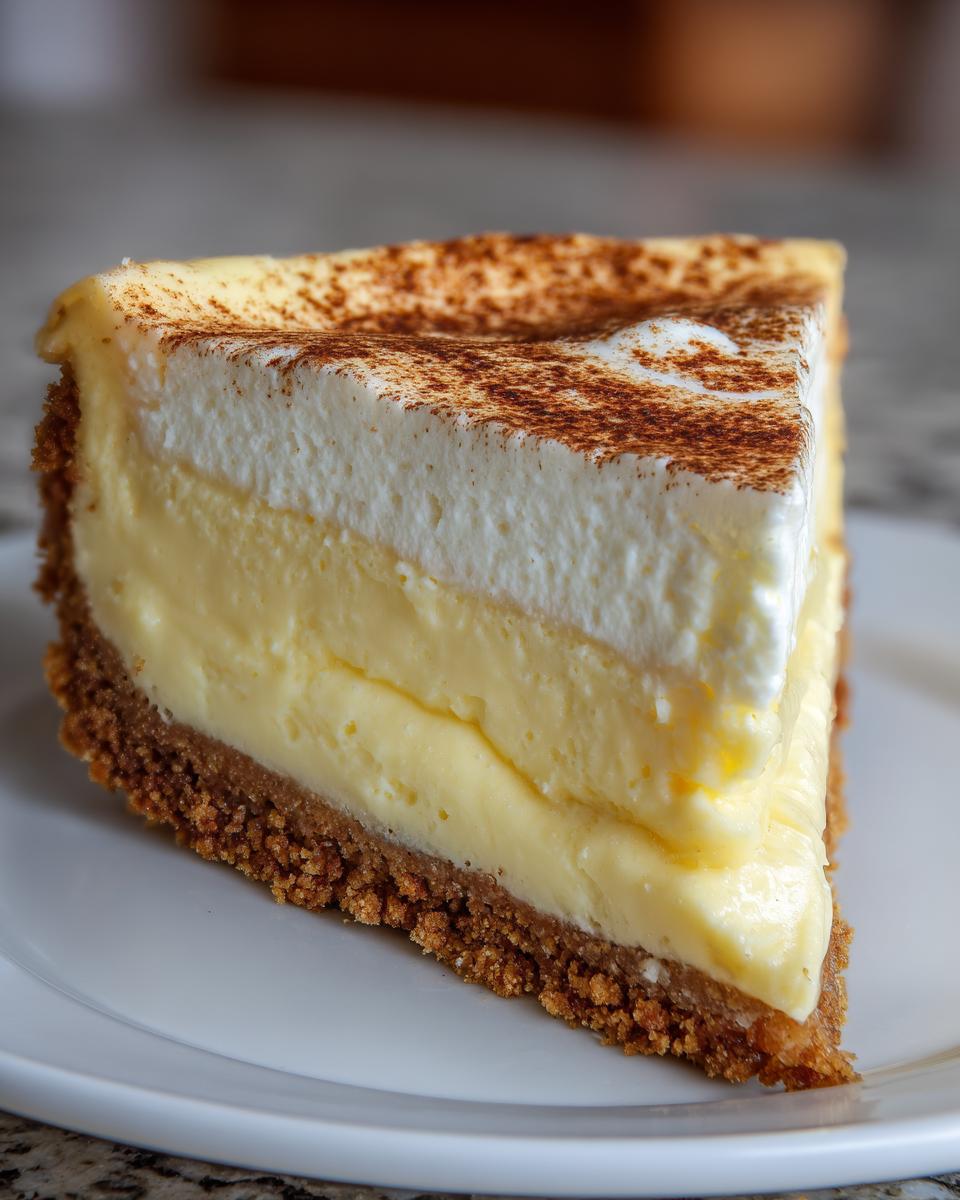
When it comes time to release it from the springform pan, run a thin, warm knife gently around the inside edge *after* it’s fully chilled—this helps ensure it doesn’t stick when you release the collar. For an extra pretty visual pop, here’s a little trick I learned when I was dealing with a somewhat less-than-perfect top on a pumpkin roll cake: I use a fine-mesh sieve to just dust the top lightly with fresh nutmeg—not powdered sugar, which melts weirdly, but ground nutmeg! It makes the whole thing look professionally dressed.
Serving Suggestions for Your Eggnog Cheesecake
Okay, your gorgeous, perfectly chilled **Eggnog cheesecake** is ready to leave the fridge! Presentation is everything during the holidays. We’ve done the hard work making it creamy and flavorful, so now we just need to dress it up a little bit. Remember, the flavor profile is rich and warmly spiced, so we want toppings that enhance that, not fight it.
My go-to is always simplicity. A very light dusting of freshly grated nutmeg right before serving really brings the aroma forward. It looks elegant and underscores that holiday spice! If you want something extra special, grab your mixer and whip up some heavy cream—sweeten it just slightly, maybe with a tiny bit of vanilla bean paste if you have it. A single, perfect dollop on each slice is much prettier than spreading the whipped cream everywhere.
Now, if you’re feeling adventurous and want a little swirl of something decadent, a drizzle of caramel sauce works surprisingly well with the nutmeg notes. You can find my favorite recipe for a little something sweet here: salted caramel latte recipe, but just use the caramel part! It’s a nice little salty-sweet contrast to the creamy cheesecake base. But honestly, even on its own, this cheesecake stands tall. It doesn’t need much fuss to shine!
Storage and Reheating Instructions for Eggnog Cheesecake
One beautiful thing about this **Holiday cheesecake recipe** is that it’s entirely make-ahead friendly! That’s a lifesaver when your kitchen looks like a flour bomb went off right before your guests arrive. The absolute non-negotiable step here is chilling time. I know you’re tempted to sneak a slice after just two hours, but hold off! You need that full minimum of 6 hours, but honestly, wrapping it tightly in plastic wrap and letting it chill overnight in the fridge allows those eggnog flavors to truly meld into that creamy structure.
Once it’s fully firm, it keeps really well, too. Stored properly, wrapped up so it doesn’t absorb any weird fridge smells (that’s why we wrap it tightly!), it should be good for about four to five days in the refrigerator. It’s perfect for enjoying throughout the rest of the holiday week.
Now, let’s talk about reheating, because this is where people often go wrong with cheesecake. You absolutely do not reheat this dessert! Cheesecake just doesn’t reheat well—it gets soupy and sad, losing all that beautiful structure we worked so hard to achieve with the water bath and the slow cooling. Instead, if you want to serve it feeling less icy straight from the fridge, just pull it out about 20 to 30 minutes before you plan on slicing it. Letting it sit on the counter to take the chill off—we call that ‘tempering’—brings out the full flavor of the spices and makes it incredibly easy to slice cleanly. Keep it cool, but not freezer-cold!
Frequently Asked Questions About Eggnog Cheesecake
I get so many lovely emails after the holidays asking for clarification details on this **Eggnog cheesecake**, and that’s totally fine! Baking is all about understanding the little quirks. I want you to feel super confident walking into the kitchen, so here are the things I hear most often when readers are trying to nail this **Christmas cheesecake ideas** dessert. Don’t forget to check out my tips for moist pumpkin muffins if you need another make-ahead holiday bake!
Can I make this Eggnog cheesecake without a water bath?
Oh, I wish I could say yes easily, but I can’t! Look, the water bath—that gentle steam bath—is what keeps the environment inside your oven humid and even. It cooks the sides and the center at the same gentle pace, which is the #1 rule for preventing those dreaded cracks in a baked cheesecake. If you absolutely cannot use a roasting pan large enough for the water bath, you *can* try this less-than-ideal hack: put an empty pan on the oven rack below the cheesecake and fill it with boiling water when you put the cake in. But honestly? It doesn’t provide the same protective pocket of steam. For the best **creamy baked cheesecake tips**, the water bath is your best friend!
How do I get the strongest eggnog flavor in my dessert?
This is a great question because sometimes the eggnog flavor can get a little lost among the cream cheese and spices. My biggest advice is that you must use the thickest, richest eggnog you can find. Don’t use the thin, watery stuff! If you want to punch up the flavor even more, here’s a little trick I use when I want an extra intense **eggnog flavored dessert** experience: start with the recipe as written, but instead of using ½ cup of eggnog and ¼ cup of heavy cream, try using ¾ cup of eggnog and only ¼ cup of heavy cream. Reducing the plain cream concentrates that lovely spice and liquor flavor right into the batter. You’ll get all that holiday magic in every single bite without changing the texture too much!
Estimated Nutritional Data for Eggnog Cheesecake
So, this **Eggnog cheesecake** is definitely on the decadent side, right? We aren’t making diet food here; we are making holiday memories, and those things are rich! I always pull up the nutritional estimates to give everyone a heads-up, but I want to be super clear about how I figure these out.
These numbers are based on using standard, full-fat ingredients like the ones listed in the recipe card. Since everyone’s baking pan size can vary slightly, and the exact brand of cream cheese or eggnog changes things just a little bit, these should really be viewed as a reliable snapshot rather than an exact science. This is just good to know as you plan your holiday table!
- Serving Size: 1 slice
- Calories: 450
- Sugar: 35g (Yes, it’s a holiday dessert!)
- Fat: 30g
- Saturated Fat: 18g
- Carbohydrates: 40g
- Protein: 8g
- Cholesterol: 150mg
See? Pure indulgence! Making this fantastic **holiday cheesecake recipe** means you know exactly what wonderful, rich things you are sharing with your friends and family. If you’re balancing holiday feasting with trying to stick to a specific eating plan, maybe look into alternative keto meal plan delivery services during calmer weeks, but right now? Enjoy every slice of this creamy delight!
Share Your Bliss Batter Creations
Now that you’ve baked a show-stopping, perfectly spiced **Eggnog cheesecake**, I just have to know how it turned out! That’s my favorite part of running Bliss Batter—seeing all of your beautiful creations popping up online. Creating something this special for the holidays deserves a little applause, right?
Seriously, I put so much love into making sure these recipes are foolproof for *your* kitchen, and seeing them succeed in yours is what brings me the most joy. Did the water bath work like a charm? Did everyone ask for the recipe? Don’t keep all that delightful holiday baking a secret!
- Head over to your favorite social media spot and snap a picture of your gorgeous cheesecake.
- Tag us and use the hashtag #BlissBatter so I can see your festive masterpiece!
- If you have a moment, please come back here and leave a rating. Five stars tells me this **Eggnog cheesecake** is officially going into my rotation next year, too. It helps other bakers know exactly what to expect when they jump into this **holiday cheesecake recipe**!
If you’re looking for another easy, fragrant bake to round out your dessert table, you absolutely have to check out my recipe for chai spice cookies. They use similar warm spices and make the whole house smell incredible. Happy holidays, and thank you for baking with me!
PrintHoliday Eggnog Cheesecake
A creamy, baked cheesecake featuring the festive flavor of eggnog, set on a spiced crust.
- Prep Time: 25 min
- Cook Time: 75 min
- Total Time: 100 min
- Yield: 12 servings 1x
- Category: Dessert
- Method: Baking
- Cuisine: American
- Diet: Vegetarian
Ingredients
- 1 1/2 cups graham cracker crumbs
- 1/4 cup granulated sugar
- 6 tablespoons unsalted butter, melted
- 3 (8 ounce) packages cream cheese, softened
- 1 1/2 cups granulated sugar
- 1/4 cup all-purpose flour
- 1 teaspoon vanilla extract
- 1/2 teaspoon ground nutmeg
- 1/4 teaspoon ground cinnamon
- 1/4 cup heavy cream
- 1/2 cup eggnog
- 4 large eggs
- 1 tablespoon dark rum extract (optional)
Instructions
- Preheat your oven to 325 degrees F. Wrap the outside of a 9-inch springform pan tightly with heavy-duty aluminum foil.
- Prepare the crust: Combine graham cracker crumbs and 1/4 cup sugar in a bowl. Pour in melted butter and mix until combined. Press the mixture firmly into the bottom of the prepared springform pan. Bake for 10 minutes. Remove from the oven and let cool slightly.
- Prepare the filling: In a large bowl, beat the softened cream cheese with an electric mixer until smooth. Gradually add 1 1/2 cups sugar and flour, mixing until just combined. Scrape down the sides of the bowl.
- Beat in vanilla extract, nutmeg, and cinnamon. Mix in the heavy cream and eggnog until smooth. Add the rum extract, if using.
- Beat in the eggs one at a time, mixing only until each egg is incorporated. Do not overmix the batter once the eggs are added.
- Pour the filling over the cooled crust. Place the springform pan into a large roasting pan. Carefully pour hot water into the roasting pan until the water reaches halfway up the sides of the springform pan (this is a water bath).
- Bake for 60 to 75 minutes, or until the edges are set but the center still jiggles slightly when gently nudged.
- Turn off the oven, crack the oven door open slightly, and let the cheesecake cool inside the oven for 1 hour. This slow cooling helps prevent cracking.
- Remove the cheesecake from the water bath and foil. Cool completely on a wire rack. Once cool, cover and refrigerate for at least 6 hours, or preferably overnight, before serving.
Notes
- For a perfect, crack-free top, make sure all your dairy ingredients, especially the cream cheese, are truly at room temperature before mixing.
- If you skip the rum extract, increase the nutmeg slightly for a stronger spice flavor.
- This recipe works well as an alternative to traditional meal planning desserts for holiday gatherings.
Nutrition
- Serving Size: 1 slice
- Calories: 450
- Sugar: 35
- Sodium: 250
- Fat: 30
- Saturated Fat: 18
- Unsaturated Fat: 12
- Trans Fat: 0.5
- Carbohydrates: 40
- Fiber: 1
- Protein: 8
- Cholesterol: 150