
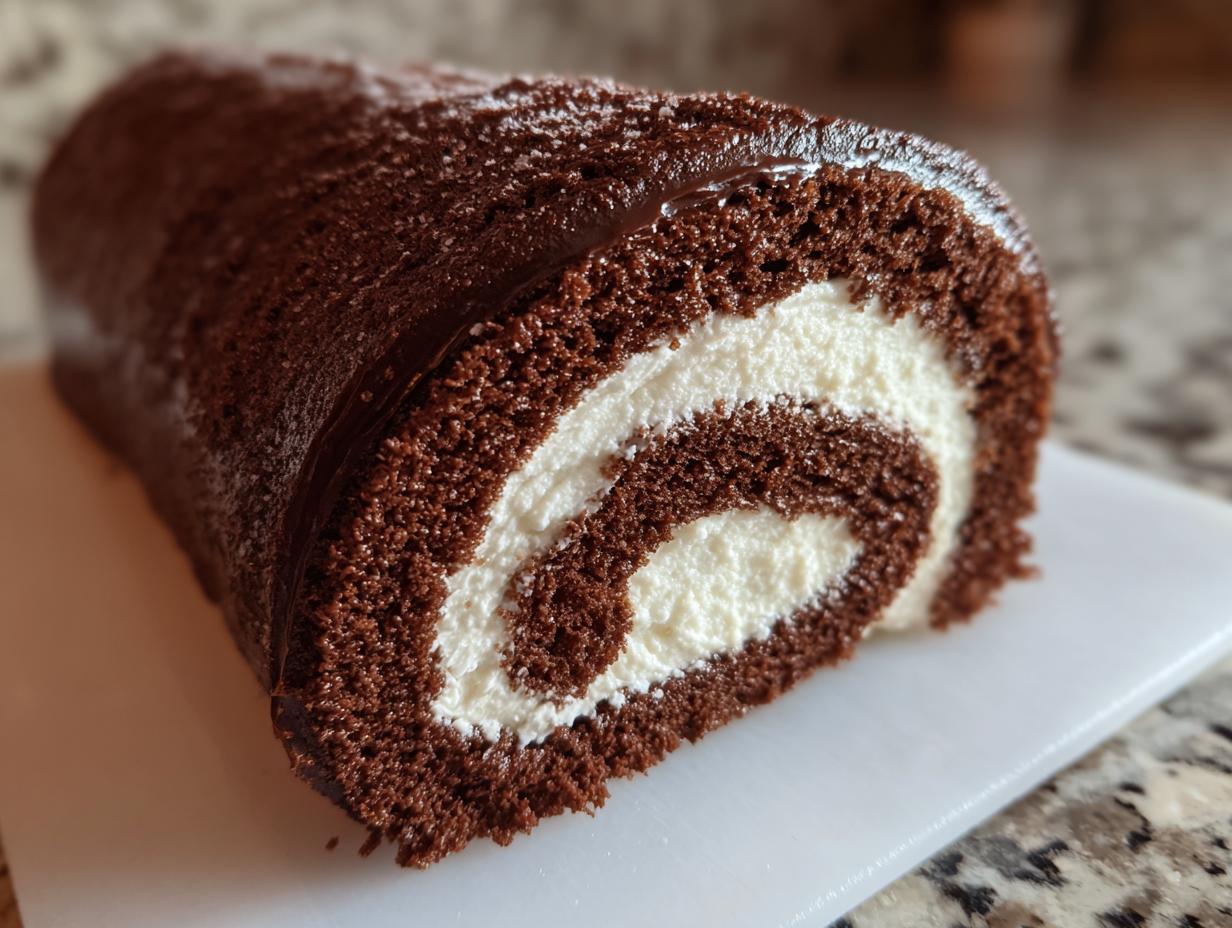
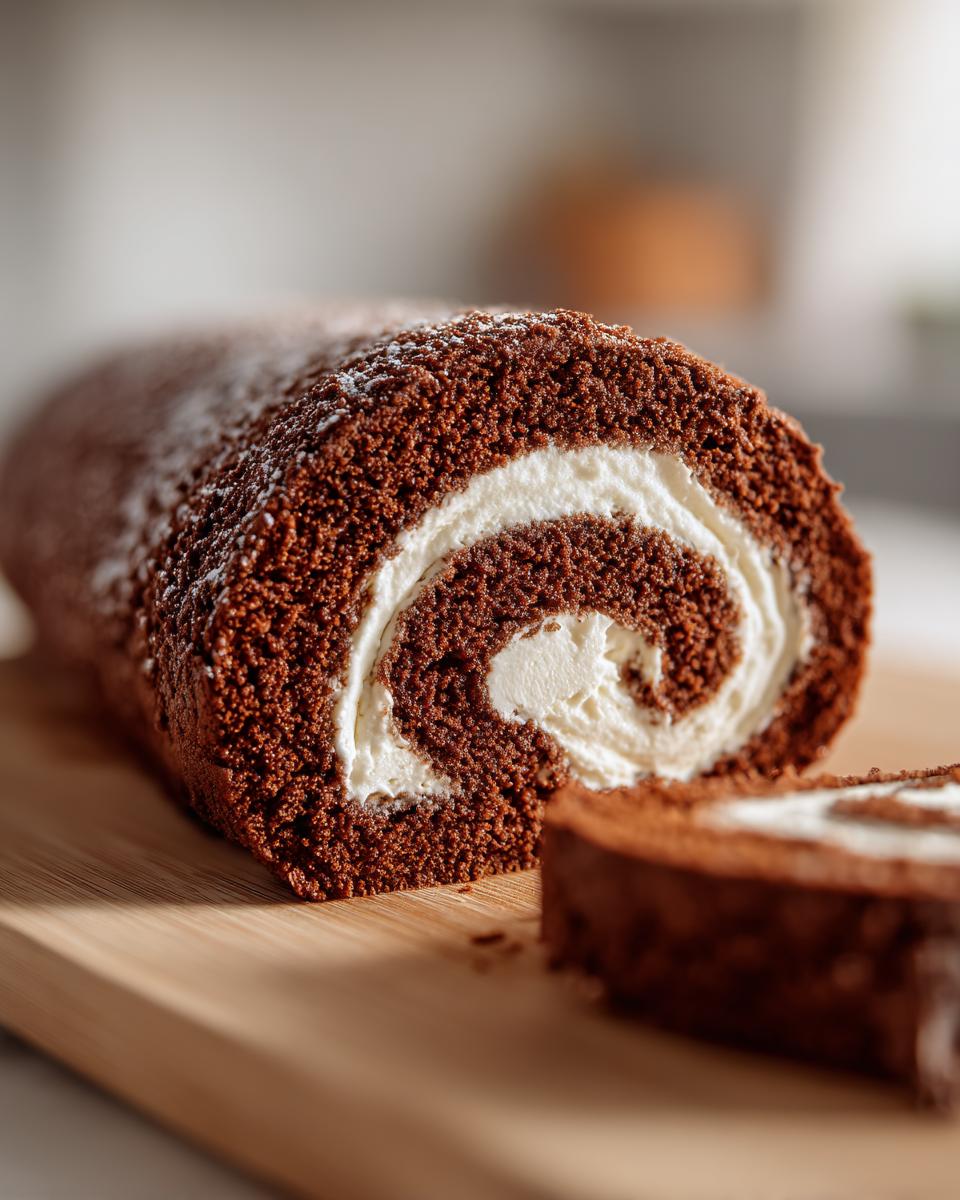
Oh, the holidays! There’s just nothing like that feeling when you pull a truly spectacular dessert out of the oven, right? For me, the official signal that Christmas has finally arrived is the moment I start tackling the ultimate holiday centerpiece: the **Yule log cake**, or the formal Bûche de Noël.
I know what you’re thinking—rolling a cake sounds terrifying! But trust me, after years of planning incredibly detailed events in my corporate life, I brought that same precision to my home kitchen. I have spent years testing every single variable in this recipe. We’ve worked out the kinks so your beautiful chocolate sponge rolls up perfectly, without that dreaded crack down the middle. This isn’t just any cake roll; it’s a tradition waiting in your oven, and I’m going to show you exactly how we make it happen!
- Why This Classic Yule Log Cake is Your Holiday Showstopper Dessert
- Ingredients for the Perfect Yule Log Cake
- Expert Tips for How to Make a Yule Log That Won't Crack
- Step-by-Step Instructions for Assembling the Bûche de Noël Recipe
- Making Your Yule Log Cake Look Like a True Holiday Log
- Ingredient Notes and Substitutions for Your Rolled Chocolate Cake
- Storage and Reheating Instructions for the Christmas Log Cake
- Frequently Asked Questions About the Yule Log Cake
- Estimated Nutritional Data for This Yule Log Cake
- Share Your Holiday Showstopper Dessert Creations
Why This Classic Yule Log Cake is Your Holiday Showstopper Dessert
I get it; you see pictures of the Bûche de Noël and think, “That’s too fancy, I’ll mess up the roll.” Wrong! This recipe is designed to give you that high-end look without the headache. Once you see how simple the sponge is, you’ll feel unstoppable.
Here’s why I know this is the only holiday showstopper dessert you’ll need this season:
- It rolls like a dream because the eggs are whipped perfectly for that pliable texture.
- The dark chocolate flavor is deep, rich, and perfectly balanced with the vanilla cream.
- It looks incredibly impressive, but honestly, the effort is mostly in the frosting texture!
If you want to know more about the philosophy that goes behind making foolproof recipes like this one, check out my story over on my About Page. Now, let’s look at what you need!
Ingredients for the Perfect Yule Log Cake
When you see a list of ingredients, you might feel intimidated, but don’t! Every single item here plays a small but vital role in making sure that chocolate sponge is flexible enough to become a beautiful **rolled chocolate cake**. I always lay mine out before I start mixing, just like using clean measuring cups prevents cross-contamination. It makes tracking everything so much easier!
For the Rolled Chocolate Cake Sponge
- 4 large eggs (make sure these are at room temperature; they whip up so much higher!)
- 1/2 cup granulated sugar
- 1/4 cup all-purpose flour
- 1/4 cup unsweetened cocoa powder
- 1 teaspoon vanilla extract
- 1/4 teaspoon baking powder
- Pinch of salt
For the Cream Filling
- 1 cup heavy whipping cream
- 1/4 cup powdered sugar (for filling)
Remember, you’ll need that heavy cream to be very cold so it whips up into nice, stiff peaks for the filling!
For the Chocolate Bark Frosting
- 1 cup unsalted butter, softened (don’t skip the softening step here, or your frosting will be lumpy!)
- 2 cups powdered sugar
- 1/2 cup unsweetened cocoa powder
- 2 tablespoons milk or heavy cream
- 1 teaspoon vanilla extract
Expert Tips for How to Make a Yule Log That Won’t Crack
Okay, deep breaths! This is where everyone gets nervous about making a **Yule log cake**, but I promise you, success is 100% about quick work and timing here. The secret to getting that flexible sponge that coils nicely around the cream is twofold: whipping those eggs until they are practically standing at attention, and making sure we never, ever overbake.
My personal mantra when baking the sponge is about temperature control. I like to keep my oven rack near the center, but I always check the temperature with a separate thermometer. Sometimes home ovens lie, and even a few degrees too hot means a dry sponge that’s doomed to crack once you start rolling.
Baking the Thin Chocolate Sponge Perfectly
You absolutely must use a 10×15 inch jelly roll pan, nothing smaller! We need that thin layer to bake evenly and quickly. It bakes in just 10 to 12 minutes. As soon as you touch the top lightly and it springs back? Pull it out immediately. If you bake it even two minutes past that point, it loses the flexibility we need for the final beautiful swirl.
The Essential Hot Roll Technique for Your Yule Log Cake
This step is non-negotiable and the reason your **Yule log cake** will look professionally done. As soon as it comes out of the oven, you invert that hot cake directly onto a clean kitchen towel that’s already dusted generously with powdered sugar. Peel off the parchment paper gently—it should come right off if you greased it well!
While it’s still piping hot to the touch, use the towel to help you roll the cake up nice and tight, starting from the short end. Let it cool completely right there, wrapped up like a little present. The towel molds the sponge into that perfect curved shape so when you finally unroll it later to fill it, it remembers how to curve!
If you want to see how I manage this same trick for other rolled cakes, I wrote a whole guide on getting that crack-free swirl—it uses the exact same logic!
Step-by-Step Instructions for Assembling the Bûche de Noël Recipe
Now that your chocolate sponge has cooled completely inside its towel cocoon, it’s time for the fun—and messy—part of putting together this incredible **Bûche de Noël recipe**! Remember, the cake has already been trained into a curve, so this part should be smooth sailing. We’re moving from baking to building!
Preparing the Filling and Frosting
First up, let’s tackle the components we need ready to go. For the filling, take that cold heavy cream and your powdered sugar and whip it up until you get stiff peaks. You want something sturdy enough to hold its shape when you spread it. Don’t turn it into butter, though; stop mixing the second it holds that beautiful shape!
For the chocolate frosting, make sure your butter is room temperature soft—not melted! Beat the butter until it’s really light, then gradually mix in your powdered sugar and cocoa powder, alternating with the small amount of milk or cream until it’s velvety smooth. This frosting needs to be spreadable, so adjust that liquid slightly if you need to. Once everything is prepped, you’re ready to layer!
Assembling and Texturing the Yule Log Cake
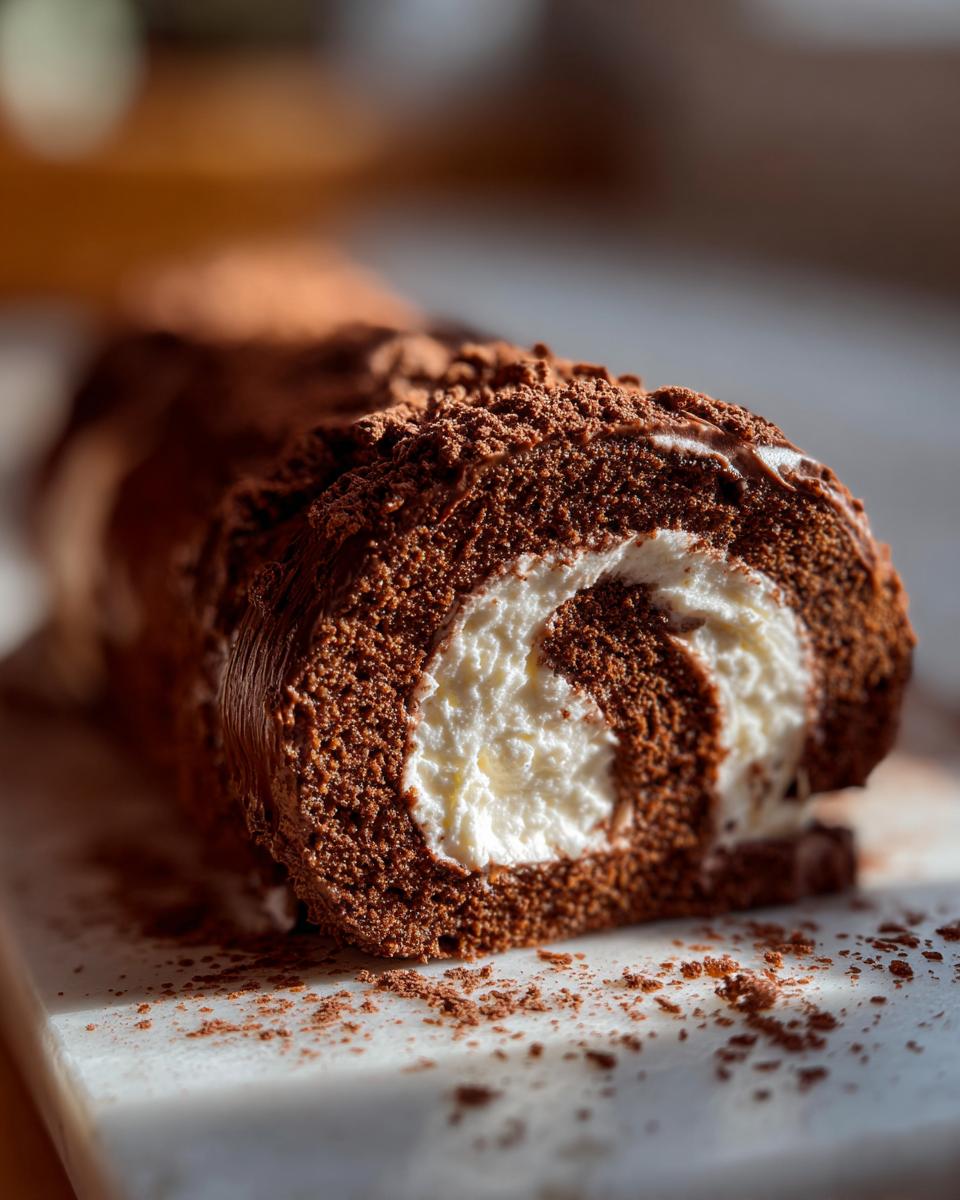
Carefully unroll the cooled cake. Don’t panic if you see some light wrinkles; those will disappear once filled! Spread that lovely whipped cream filling evenly right across the entire surface of the sponge. Make sure you leave about a half-inch border clear on one short edge—this helps keep the filling from squishing way out the when you roll it.
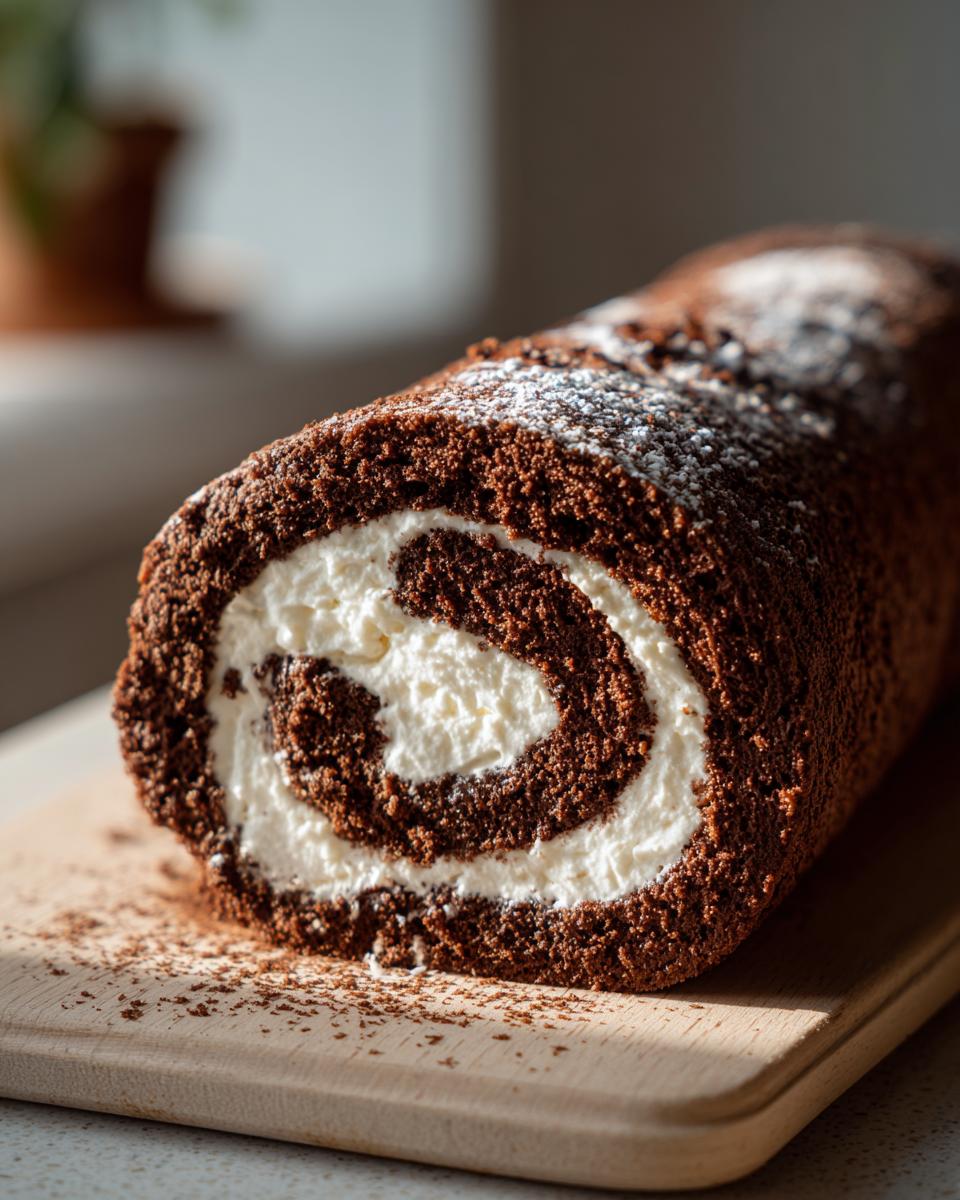
Reroll the cake, nice and tight this time, using your hands to guide it without crushing it. Place it seam-side down on your serving platter. Now, grab that amazing chocolate frosting and cover the whole thing! This is where the magic happens. Use the back of a fork or a knife to rake lines all over the surface. Don’t be neat! Those rugged lines are exactly what we want to look like bark on a **Yule log cake**.
Trim the ends if you want to show off the beautiful swirl inside before chilling it for at least an hour. Head over to the main Dessert Recipes hub if you’re looking for other showstoppers!
Making Your Yule Log Cake Look Like a True Holiday Log
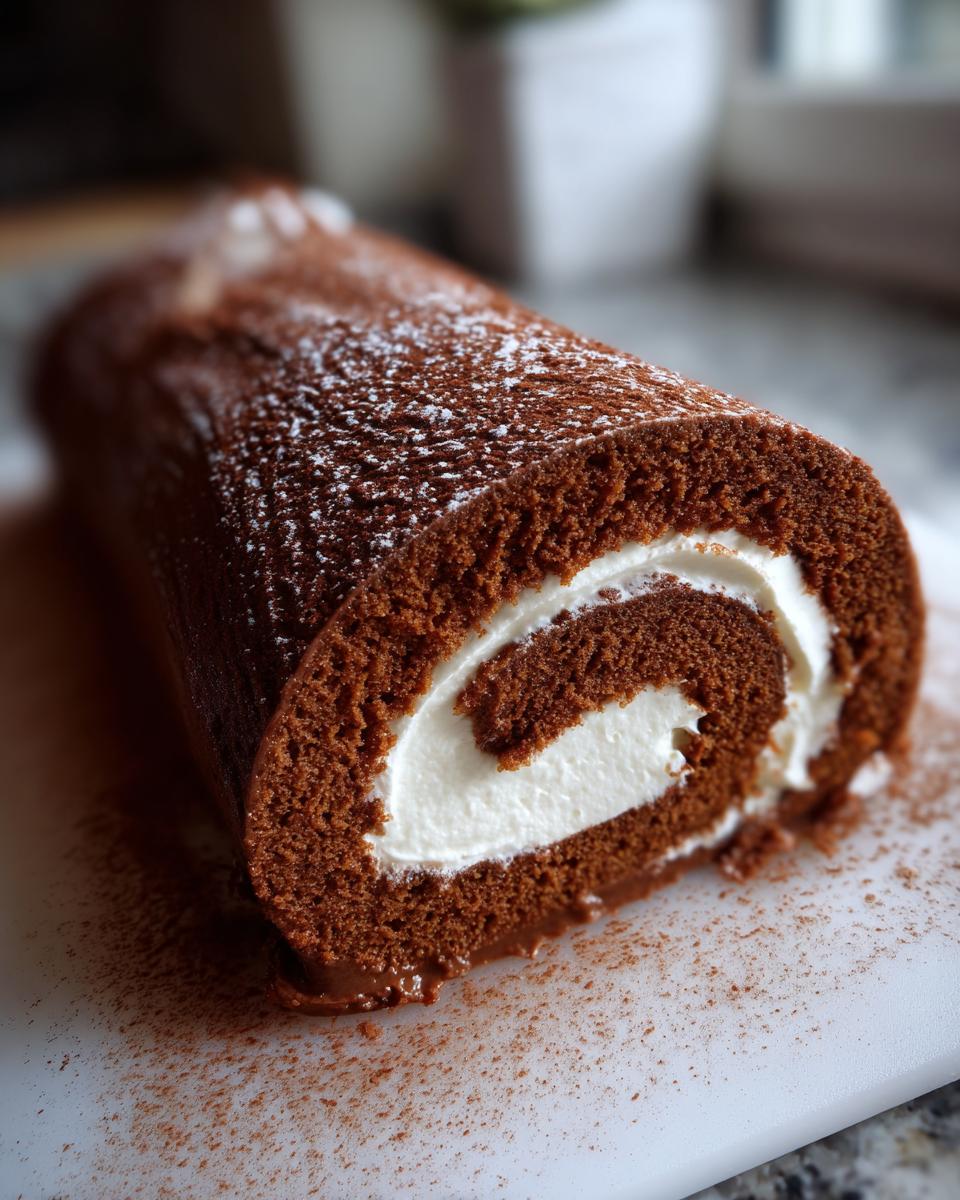
The chilling time is the hardest part, but once that time is up, it’s decoration time! This is where your **Yule log cake** goes from being a delicious cake roll to the centerpiece of your Christmas table. Remember that bark texture we created with the fork? That’s the foundation of the rustic look, and it’s the easiest part!
For a touch of extra magic—and you know I love a little extra magic—I sometimes create little clusters of edible “moss” using finely crushed pistachio nuts mixed with a tiny bit of green food coloring, which I sprinkle gently near the base of the log. It looks totally authentic!
But honestly, the absolute finishing touch that I learned straight from watching my mother decorate hers? Dusting the entire thing lightly with powdered sugar right before serving. It mimics fresh snow beautifully and makes everything look celebratory. Don’t dust it too early, or the sugar will melt into the frosting, so save that step for the last minute!
Ingredient Notes and Substitutions for Your Rolled Chocolate Cake
I’ve gotten a few emails asking if they could swap things out in this recipe, especially when life gets busy around the holidays! Using good quality ingredients is key here, but sometimes you need a little flexibility. We are sticking pretty close to traditional methods, but I wanted to address a couple of common questions about making sure your **rolled chocolate cake** comes out perfectly every time.
If you’re balancing holiday baking with the stress of everyday life, having some easy weeknight meals lined up can be a huge relief. If you’re looking for inspiration to save time on those non-baking nights, I always recommend checking out solutions for easy weeknight dinners!
Substituting Cocoa Powder in the Yule Log Cake
Our recipe calls for standard unsweetened cocoa powder, which is usually natural cocoa. If you happen to only have Dutch-process cocoa powder on hand, you can often swap them one-for-one when making the frosting. However, because the sponge relies on slight acidity to react with the baking powder, staying with what’s written is best if you can manage it!
Also, if you run out of heavy cream for the filling just as you’re whipping it, don’t panic too much. You can usually substitute it with a cream cheese frosting base if you want something firmer, but it does change the light, airy feel that defines this specific **Yule log cake** filling.
Storage and Reheating Instructions for the Christmas Log Cake
Okay, so you’ve put in all that stunning work creating the perfect bark texture on your **Christmas log cake**, and now you’re wondering how to keep it looking fresh until you serve it. This cake really likes the cold, so plan ahead!
First and foremost, chilling is mandatory, not optional. Once you’ve frosted and textured the whole thing, you need to get it into the refrigerator for at least one full hour. That hour is crucial because it firms up that whipped cream filling and lets the chocolate frosting set properly. If you try to slice it early, you’re asking for a blowout, and nobody wants a messy collapse when they’ve worked this hard!
Once it’s nicely chilled, the **Yule log cake** is actually quite stable. You can keep it covered gently (don’t let plastic wrap touch the frosting if you can help it; plastic tends to stick to the texture) in the refrigerator for up to three days. It tastes best if you pull it out about 15 minutes before serving so it loses that deep fridge chill, but the filling and sponge benefit from staying cold.
And just a quick word on flavor—the cream filling tastes freshest and the cake has the best structural integrity when served properly chilled. Resist the urge to leave it out all afternoon! We want that creamy, cool contrast to the rich chocolate sponge every single time.
Frequently Asked Questions About the Yule Log Cake
I figured you might have a few last-minute worries popping into your head before you attempt this stunning dessert. It’s totally normal! Baking something that looks this professional always brings up questions. Here are the things I hear most often about nailing the **Yule log cake** and getting that perfect texture in the **rolled chocolate cake**.
Can I make the Yule log cake ahead of time?
Absolutely, and here’s my pro tip: Make the cake roll, fill it, and unroll it the day before you plan to decorate it. This gives the cake plenty of time to set its curve. I usually do this the day before the party. Then, frost the entire cake the morning of, or even just a few hours before you plan to serve it. Frosting it too early can sometimes dry the edges if you aren’t airtight with the wrapping!
What is the secret to a soft rolled chocolate cake?
The secret is twofold, and we talked about it, but repetition helps! First, you have to beat those four eggs and sugar until they are pale, thick, and look like fluffy ribbon when you lift the whisk—that takes a good 5 to 7 minutes! That volume is pure air, which keeps the sponge soft. Second, do not, under any circumstances, bake it longer than 12 minutes. Overbaking is the number one culprit for that dreaded crack!
Can I use a different filling besides whipped cream in my Bûche de Noël recipe?
Oh, sure thing! While the classic **Bûche de Noël recipe** calls for that beautifully light whipped cream filling, you can certainly swap it for a chocolate or vanilla buttercream if you want something a little richer. My one warning on that front is that buttercream is much heavier than whipped cream. If you use a heavy filling or ganache, you have to be extra gentle when you do that final roll, or you risk squishing out the filling because the denser frosting doesn’t compress as easily.
If you’re looking for other festive ideas for your party spread, I have some fantastic appetizer recipes that are always crowd-pleasers over on my Appetizers and Party Snacks page!
Estimated Nutritional Data for This Yule Log Cake
I always include this section because, while we are baking for joy and celebration, it’s good to have a rough idea of what’s in this incredible **Christmas log cake**. Remember, this isn’t a light snack, it’s a holiday centerpiece, so enjoy every glorious bite!
Please keep in mind that these numbers are just estimates. I calculated them based on the standard amounts of butter, sugar, and cocoa I use in my kitchen. If you decide to switch out ingredients, like maybe using espresso powder in the frosting or using a different kind of fat substitute, your totals will change. This recipe uses standard, good-quality ingredients for testing, so consider these a great starting point!
Here’s the breakdown based on one serving slice:
- Serving Size: 1 slice
- Calories: 450
- Sugar: 45g (Yep, that’s right, it’s a treat!)
- Fat: 28g
- Saturated Fat: 17g
- Carbohydrates: 48g
- Protein: 6g
- Cholesterol: 150mg
- Sodium: 120mg
It’s dense, it’s full of chocolate and cream, and it’s worth every single calorie when it’s sitting on your table looking like a tiny, edible winter scene. Don’t worry about the numbers too much during the holidays; just savor the moment!
Share Your Holiday Showstopper Dessert Creations
Wow! If you’ve made it this far, you’ve successfully conquered baking and assembling the most iconic Christmas cake out there. Seriously, take a moment and give yourself a huge pat on the back. You’ve created a true **Yule log cake**, and I bet it looks absolutely gorgeous displayed on your holiday table.
Now comes the best part: showing it off! I always want to see what you all come up with. Did you go for super dark bark texture? Did you add holly made of frosting? Did you dust it with that perfect snowy layer?
Please, please come back here and leave your feedback!
- I’d be thrilled if you hit that five-star rating button at the top of the page if this **holiday showstopper dessert** met your expectations.
- And if you shared your beautiful creation on Instagram or Facebook, tag us! I live for seeing your cakes twinkling under the Christmas lights.
What are your favorite traditions surrounding dessert at the holidays? Is this **Yule log cake** a new tradition for you, or did you grow up with it? I love hearing about your family’s sweet memories, so drop a comment down below. It truly brings me so much joy to know that one of my tried-and-true recipes is now part of your holiday celebration, year after year.
If you have any behind-the-scenes questions about the process or need to reach out directly about a bake, you can always find me over on the Contact Page. Happy holidays, and happy sharing!
PrintClassic Bûche de Noël (Yule Log Cake)
A traditional rolled chocolate sponge cake filled with cream and frosted to look like a festive log, perfect for a holiday centerpiece.
- Prep Time: 45 min
- Cook Time: 12 min
- Total Time: 57 min
- Yield: 10 servings 1x
- Category: Dessert
- Method: Baking and Rolling
- Cuisine: French
- Diet: Vegetarian
Ingredients
- 4 large eggs
- 1/2 cup granulated sugar
- 1/4 cup all-purpose flour
- 1/4 cup unsweetened cocoa powder
- 1 teaspoon vanilla extract
- 1/4 teaspoon baking powder
- Pinch of salt
- 1 cup heavy whipping cream
- 1/4 cup powdered sugar (for filling)
- 1 cup unsalted butter, softened (for frosting)
- 2 cups powdered sugar (for frosting)
- 1/2 cup unsweetened cocoa powder (for frosting)
- 2 tablespoons milk or heavy cream (for frosting)
- 1 teaspoon vanilla extract (for frosting)
Instructions
- Preheat your oven to 375°F (190°C). Line a 10×15 inch jelly roll pan with parchment paper, letting the paper overhang slightly on the long sides. Lightly grease the paper.
- In a large bowl, beat the eggs and granulated sugar with an electric mixer until the mixture is pale, thick, and triples in volume, about 5 to 7 minutes. This step is key for a flexible sponge.
- In a separate small bowl, whisk together the flour, cocoa powder, baking powder, and salt.
- Gently fold the dry ingredients into the egg mixture in three additions, being careful not to deflate the batter. Fold in the vanilla extract last.
- Pour the batter into the prepared pan and spread it evenly. Bake for 10 to 12 minutes, or until the top springs back lightly when touched. Do not overbake.
- While the cake bakes, lay a clean kitchen towel on your counter and dust it generously with powdered sugar.
- Immediately invert the hot cake onto the prepared towel. Peel off the parchment paper carefully. While the cake is still hot, roll it up tightly starting from a short end, along with the towel inside. Let it cool completely rolled up on a wire rack.
- Prepare the filling: Whip the heavy cream and 1/4 cup powdered sugar until stiff peaks form. Set aside.
- Prepare the chocolate frosting: In a bowl, beat the softened butter until creamy. Gradually add the 2 cups of powdered sugar and 1/2 cup cocoa powder, alternating with the milk/cream, beating until smooth. Mix in the vanilla.
- Once the cake is cool, carefully unroll it. Spread the whipped cream filling evenly over the entire surface of the sponge.
- Reroll the cake tightly, without the towel, starting from the same short end. Place the rolled cake seam-side down on a serving platter.
- Use an offset spatula to cover the entire cake with the chocolate frosting. Use the back of a fork or a knife to create bark-like textures on the top and sides. Trim the ends if necessary to expose the swirl.
- Chill the cake for at least 1 hour before serving. Dust with powdered sugar for a snowy effect before presenting.
Notes
- For a more stable roll, you can dust the warm cake with cocoa powder instead of powdered sugar before rolling it in the towel.
- If you are interested in meal planning for your holiday baking schedule, consider looking into best meal delivery services for easy weeknight dinners.
- To make meringue mushrooms for decoration, pipe small mushroom caps and stems separately, bake until crisp, and then assemble with a dab of frosting.
Nutrition
- Serving Size: 1 slice
- Calories: 450
- Sugar: 45g
- Sodium: 120mg
- Fat: 28g
- Saturated Fat: 17g
- Unsaturated Fat: 9g
- Trans Fat: 0.5g
- Carbohydrates: 48g
- Fiber: 2g
- Protein: 6g
- Cholesterol: 150mg