
Oh, fried pickles! Just thinking about those crispy, tangy bites makes me dream of game days and lazy Sundays. There’s something so satisfying about that salty crunch, right? For years, I’ve loved grabbing a basket of these at my favorite spots, but one day, I just thought, “Why not recreate that magic at home?” It felt like unlocking a delicious secret, and trust me, these Fried Pickles are SO worth the little bit of effort. It’s all about getting that perfect crispy coating and that irresistible zip! Here at Bliss Batter, we’re all about making those restaurant favorites totally doable in your own kitchen, and believe me, we’ve tested these thoroughly (like, seriously tested them!) to make sure they turn out perfectly crispy every single time. Get ready, because you’re about to become the hero of your next get-together!
- Why You'll Love These Fried Pickles
- Gather Your Ingredients for Crispy Fried Pickles
- Essential Equipment for Perfect Fried Pickles
- Step-by-Step Guide to Making Fried Pickles
- Tips for Achieving Ultimate Crispy Fried Pickles
- Serving and Storage for Your Fried Pickle Appetizer
- Frequently Asked Questions About Fried Pickles
- Nutritional Information for Fried Pickles
- Share Your Crispy Fried Pickle Creations!
Why You’ll Love These Fried Pickles
Honestly, what’s not to love?
- Super Easy to Make: Seriously, you can whip these up faster than you can decide what movie to watch!
- That Perfect Crunch: We’re talking shatteringly crisp, golden-brown goodness in every single bite. No sogginess here!
- Irresistible Flavor Combo: The tangy dill pickles paired with that seasoned coating are just pure magic.
- Game Day or Any Day: Perfect for watching the big game, movie nights, or just when you need a fun little snackie. They fly off the plate!
- Restaurant Vibes at Home: Get that amazing pub appetizer feel without leaving your comfy couch.
Gather Your Ingredients for Crispy Fried Pickles
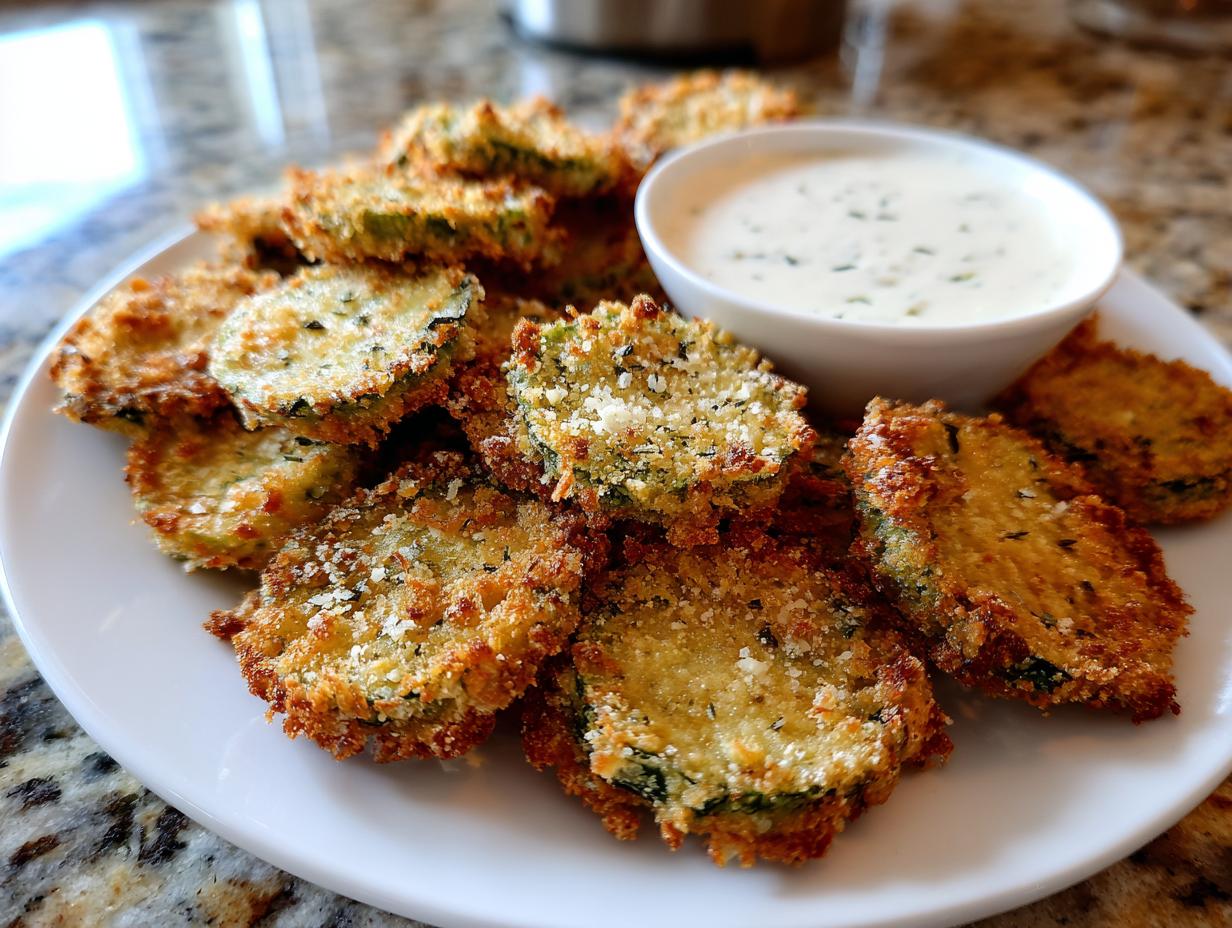
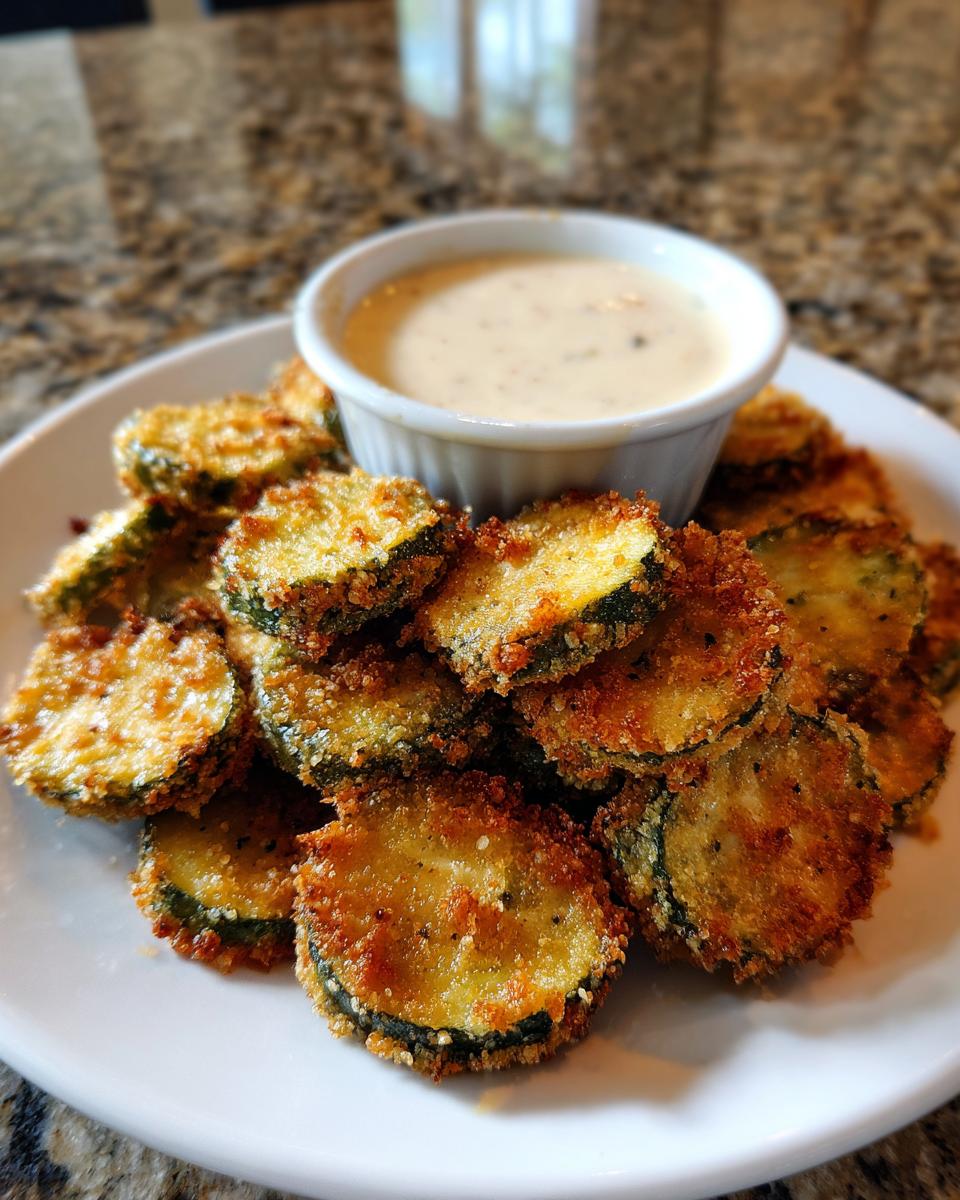
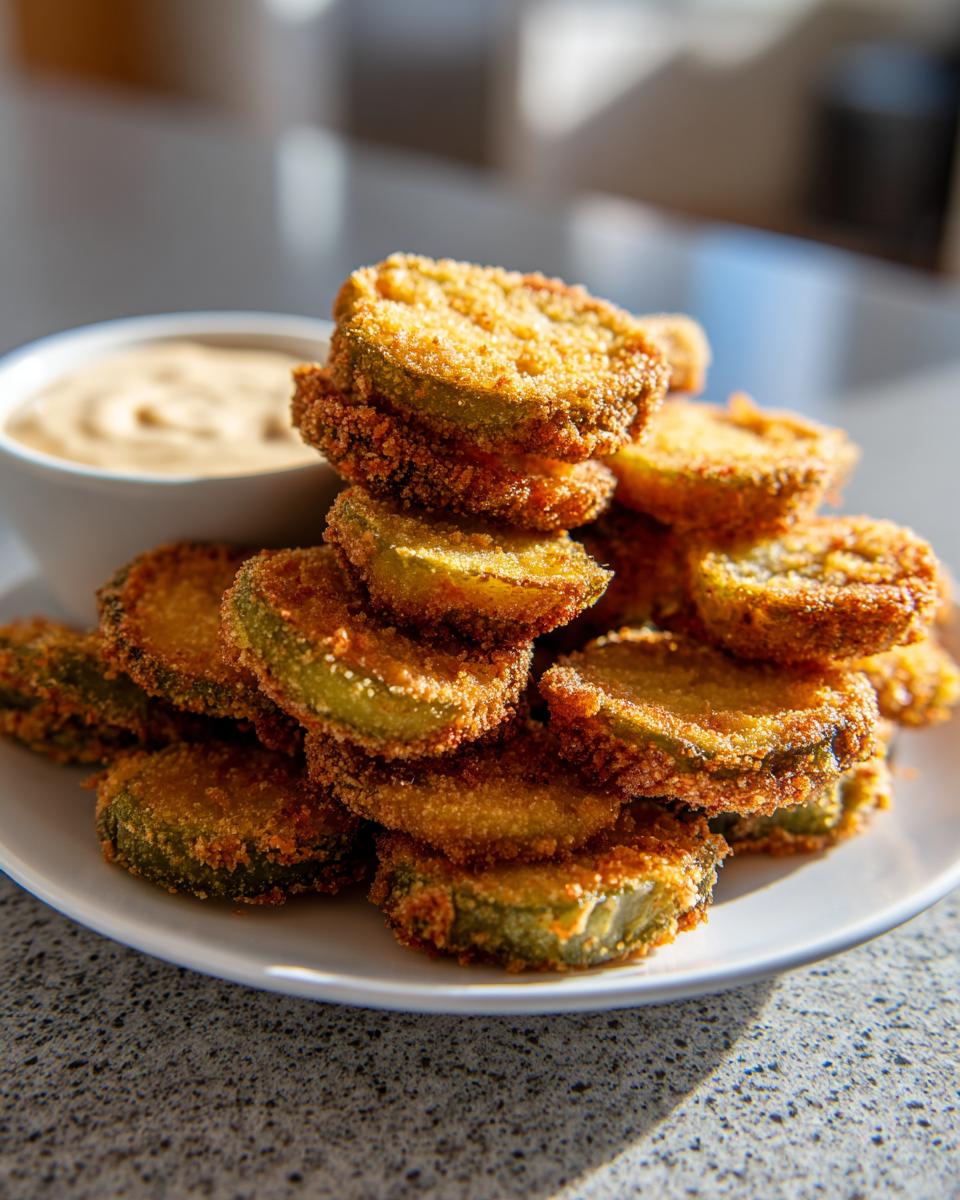
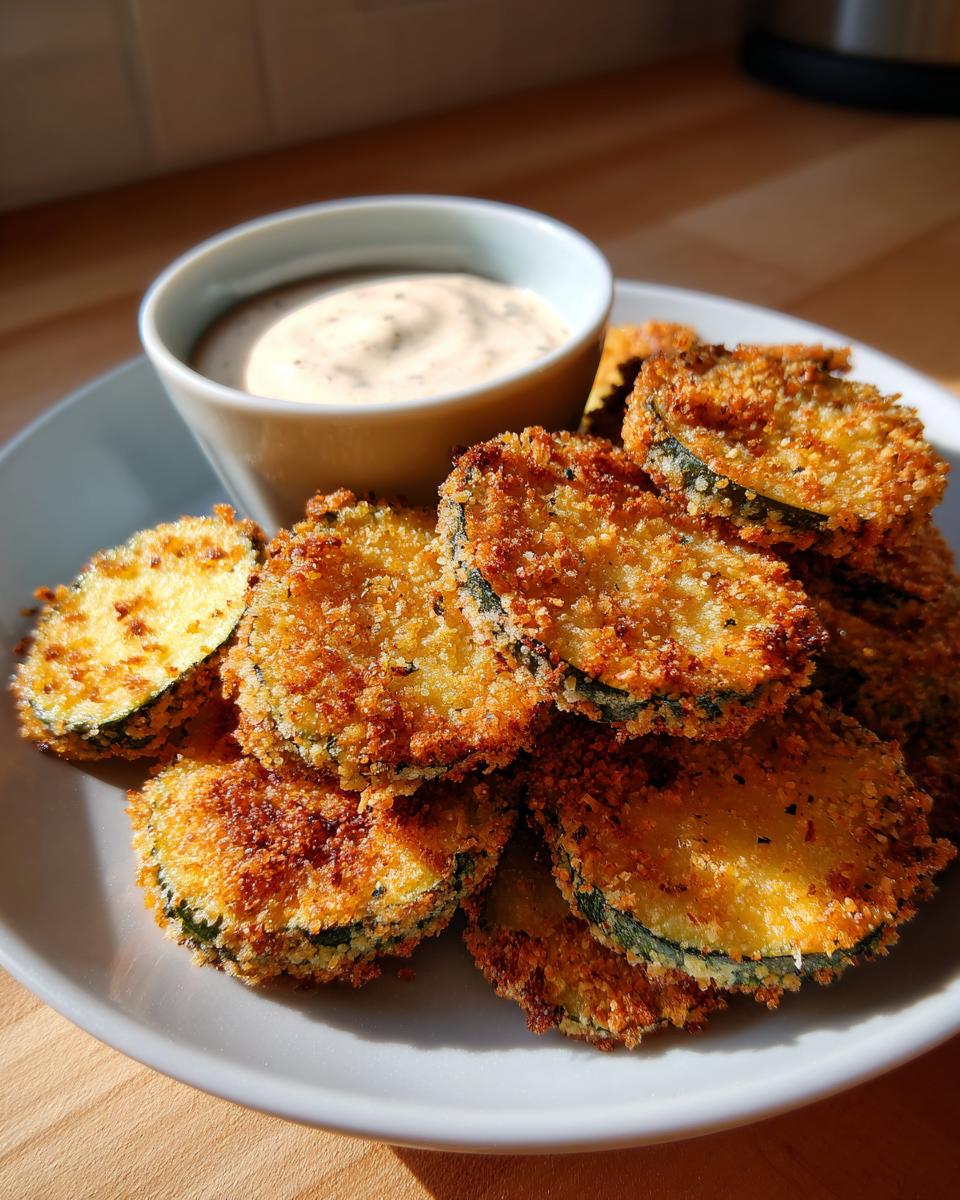
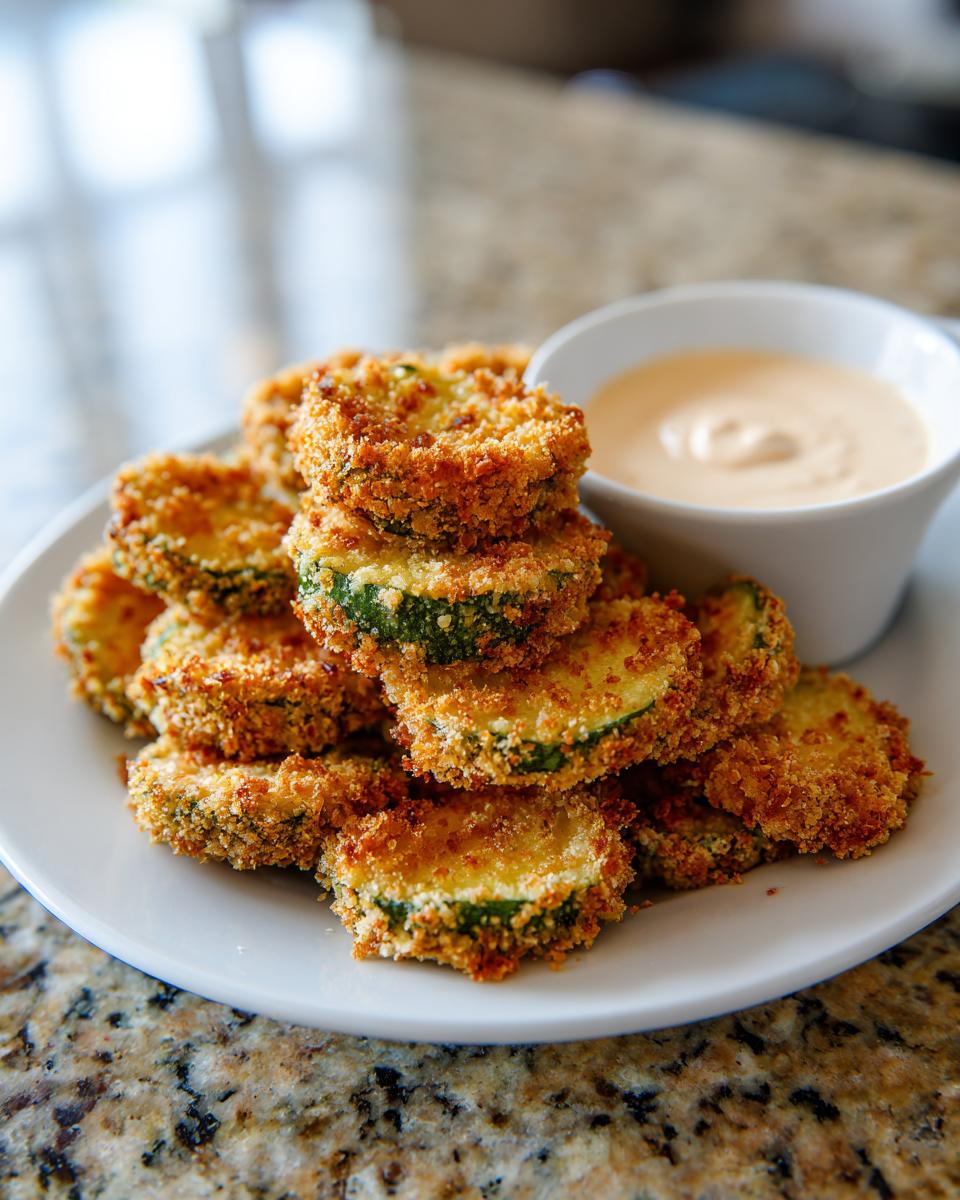
Alrighty, let’s talk about what you’ll need to create these little flavor bombs! First up, the stars of the show: pickles! Make sure you grab about 2 cups of dill pickle slices or spears. The super important secret here, which you’ll see in our notes too, is to pat them *really*, *really* dry with paper towels before you do anything else. This is non-negotiable for ultimate crispiness! Then, we’ll need the coating crew: 1 cup of all-purpose flour seasoned up with 1 teaspoon each of salt and black pepper, plus 1/2 teaspoon of paprika and 1/4 teaspoon of garlic powder. Next, the binder: 2 large eggs, whisked up nice and ready. And for that amazing crunch? Gotta have 1 1/2 cups of panko breadcrumbs. They’re leagues better than regular breadcrumbs for getting that shatter-crisp texture, trust me! For frying, you’ll need a good amount of vegetable oil. Oh, and for the dipping sauce? A dreamy mix of 1/2 cup mayonnaise, 1/4 cup sour cream, 1 tablespoon of fresh dill (chopped!), 1 teaspoon of lemon juice, and another 1/2 teaspoon of garlic powder. Don’t forget a pinch of salt and pepper to taste!
Essential Equipment for Perfect Fried Pickles
Okay, so before we dive into the delicious fray, let’s make sure you’ve got your kitchen arsenal ready to go! You’re going to want a few shallow dishes – think pie plates or even just sturdy bowls – for our dredging station. This makes coating those pickles so much easier without making a huge mess everywhere. Then, for the frying itself, a heavy-bottomed pot or a Dutch oven is your best friend. It holds heat really well, which is key for getting perfect, evenly fried pickles. Lastly, you’ll need a slotted spoon to gently lift those golden beauties out of the hot oil, and a wire rack set over a baking sheet. This is how we let them drain so they stay nice and crispy, not sad and soggy!
Step-by-Step Guide to Making Fried Pickles
Alright, let’s get down to business and turn those pickles into crunchy little delights! It’s a simple three-step coating process, and then the magic happens in the fryer. Don’t worry if it seems like a lot of dishes; it’s totally worth it for that perfect crunch! If you’re a fan of other crispy fried things, you might also love our air fryer zucchini fries or even these crispy air fryer chicken wings – similar vibe, totally delicious!
Preparing the Pickle Coating
First things first, grab those shallow dishes. In the first one, we’ve got our seasoned flour mixture – that’s the flour, salt, pepper, paprika, and garlic powder all whisked together. This is our base layer, giving the egg something to stick to and adding a savory foundation. Next, in the second dish, put your beaten eggs. This is our sticky glue! Finally, the third dish is filled with those glorious panko breadcrumbs. This is what gives us that amazing crunch. Now, take a dry pickle slice, give it a little shake to get rid of extra flour, then dip it thoroughly in the egg, let any excess drip off, and finally, press it firmly into the panko until it’s completely coated. Place these beauties on a plate or a baking sheet and repeat until all your pickles are dressed up and ready for their close-up!
Frying Your Fried Pickles to Golden Perfection
Okay, time for the fun part! It’s crucial to get your oil to the right temperature: 375°F (190°C). I always keep a thermometer handy for this, because too low and they get greasy, too high and they burn before they’re cooked through. Carefully, in batches (don’t crowd the pot, that’s a soggy mess waiting to happen!), add your coated pickles to the hot oil. They only need about 2-3 minutes per side to turn that perfect golden brown and wonderfully crispy. You’ll see them puff up a bit! Use a slotted spoon to gently lift them out and place them on that wire rack over a baking sheet. This setup lets the extra oil drain off, keeping them super crisp. Trust me, resist the urge to dig in *immediately* – give them a minute to cool just enough!
Whipping Up the Zesty Dipping Sauce
While those pickles are doing their thing, let’s whip up a dip that’s going to make them sing! Grab a small bowl and toss in the mayonnaise and sour cream. Then add your fresh dill, lemon juice, and garlic powder. Give it all a good stir until it’s super creamy and combined. Taste it and add a little salt and pepper if you think it needs it. This zesty, creamy sauce is the perfect counterpoint to those tangy, crispy pickles. It’s almost as easy as making our queso or spinach artichoke dip, but totally its own thing!
Tips for Achieving Ultimate Crispy Fried Pickles
Okay, listen up, because I’ve learned a few things from making *loads* of these little guys. The biggest secret weapon? Patting those pickles DRY. Seriously, like you’re trying to win a staring contest with a damp sponge. If they’re wet, your coating won’t stick, and hello, soggy bottom! Also, that oil temperature is your best friend. I always aim for that sweet spot of 375°F (190°C). Get a good thermometer; it’s a game-changer for anything you fry, really. Remember how we talked about panko for extra crunch? It’s true! If you want to get fancy, you could even mix a little bit of Parmesan cheese into the panko – divine! Following these little tricks is like giving your fried pickles a superpower for crispiness. If you love ridiculously crispy things, you absolutely have to check out my tips for keeping eggplant parmesan crispy too, lots of the same principles apply!
Serving and Storage for Your Fried Pickle Appetizer
These crispy fried pickles are best served piping hot, fresh out of the fryer! That zesty dipping sauce we made is divine, but honestly, anything creamy like a good ranch, or even a spicy aioli, would be fantastic. They’re the perfect star for any appetizer spread, alongside things like our 7-layer dip for game day! Now, if by some miracle you have leftovers (I find this hard to believe!), let them cool completely before storing them in an airtight container in the fridge. To reheat, pop them in a toaster oven or a hot conventional oven for a few minutes until they’re crispy again. Microwaving? Nope, that’s a soggy pickle’s best friend, and we don’t want that!
Frequently Asked Questions About Fried Pickles
Got questions about bringing these crispy delights to your table? I’ve totally got you covered! Fried pickles are awesome, but sometimes you just need a little clarification.
Can I use pickle spears instead of slices for my fried pickles?
Absolutely! You can totally use pickle spears! Just make sure they’re fairly uniform in size so they cook evenly. You might need to adjust the frying time slightly, but the process is exactly the same. Spears often give you that extra satisfying crunch!
How do I prevent my fried pickles from being greasy?
This is SO important for that perfect crunch! The biggest culprits for greasy fried pickles are oil that’s not hot enough or crowding the pan. Make sure your oil is at a steady 375°F (190°C) – a thermometer is your best friend here. And fry them in small batches so they have room to bubble and crisp up nicely, rather than steam and get oily. Also, draining them on a wire rack, not paper towels, helps air circulate and keeps them crispy!
Can I make fried pickles ahead of time?
Honestly? Fried pickles are best served right away when they’re piping hot and super crunchy. Like most fried things, they lose a bit of their magic when they sit around. If you absolutely have leftovers, store them in the fridge and reheat them in a toaste
r oven or a regular oven (not the microwave!) to try and revive that crispness. But for the ultimate experience, make them fresh!
Nutritional Information for Fried Pickles
Alright, let’s talk numbers! These fried pickles are a total treat, and while we’re all about deliciousness here at Bliss Batter, it’s good to have an idea of what you’re digging into. Keep in mind these are estimates per serving (about 1/4 of the recipe, so a good handful!), and things can shift a bit based on exactly how you make them. We’re looking at around 350 calories, about 25g of fat, 5g of protein, and 28g of carbohydrates. The sodium is around 800mg, which is pretty typical for a salty snack like this. Enjoy them guilt-free as the amazing appetizer they are!
Share Your Crispy Fried Pickle Creations!
Alright, now that you’ve hopefully made these amazing Fried Pickles, I’d LOVE to hear all about it! Did they turn out super crispy? Did your gang devour them in minutes? Please, drop a comment below and tell me everything! And if you snap a pic, tag us on social media – I can’t wait to see your delicious creations! You can always reach out with questions via our contact page too. Happy snacking!
PrintCrispy Fried Dill Pickles
Make your own crispy fried dill pickles at home, a perfect appetizer for game day or any gathering. This recipe focuses on achieving a satisfying crunch with a seasoned coating and offers a zesty dipping sauce.
- Prep Time: 15 min
- Cook Time: 10 min
- Total Time: 25 min
- Yield: 4 servings 1x
- Category: Appetizer
- Method: Frying
- Cuisine: American
- Diet: Vegetarian
Ingredients
- 2 cups dill pickle slices or spears, patted very dry
- 1 cup all-purpose flour
- 1 teaspoon salt
- 1 teaspoon black pepper
- 1/2 teaspoon paprika
- 1/4 teaspoon garlic powder
- 2 large eggs, beaten
- 1 1/2 cups panko breadcrumbs
- Vegetable oil, for frying
- For the Dipping Sauce:
- 1/2 cup mayonnaise
- 1/4 cup sour cream
- 1 tablespoon chopped fresh dill
- 1 teaspoon lemon juice
- 1/2 teaspoon garlic powder
- Salt and pepper to taste
Instructions
- In a shallow dish, whisk together the flour, salt, pepper, paprika, and garlic powder.
- In another shallow dish, place the beaten eggs.
- In a third shallow dish, place the panko breadcrumbs.
- Working in batches, dredge each pickle slice first in the seasoned flour, shaking off any excess.
- Next, dip the floured pickle into the beaten eggs, ensuring it’s fully coated.
- Finally, press the egg-coated pickle into the panko breadcrumbs, making sure it’s well-covered. Place the coated pickles on a plate or baking sheet.
- In a small bowl, combine all ingredients for the dipping sauce and mix well. Set aside.
- Heat about 2-3 inches of vegetable oil in a heavy-bottomed pot or Dutch oven to 375°F (190°C).
- Carefully add the coated pickles to the hot oil in batches, being careful not to overcrowd the pot.
- Fry for 2-3 minutes per side, or until golden brown and crispy.
- Remove the fried pickles with a slotted spoon and place them on a wire rack set over a baking sheet to drain.
- Serve immediately with the prepared dipping sauce.
Notes
- Patting the pickles very dry before coating is crucial to prevent sogginess.
- For an extra kick, add a pinch of cayenne pepper to the flour mixture.
- If you don’t have panko, regular breadcrumbs can be used, but panko provides superior crispiness.
- Ensure your oil is at the correct temperature for optimal frying. Too low and they will be greasy; too high and they will burn before cooking through.
Nutrition
- Serving Size: 1 serving (approx. 1/4 of recipe)
- Calories: 350
- Sugar: 3g
- Sodium: 800mg
- Fat: 25g
- Saturated Fat: 3g
- Unsaturated Fat: 22g
- Trans Fat: 0g
- Carbohydrates: 28g
- Fiber: 2g
- Protein: 5g
- Cholesterol: 70mg