
When I’m planning a get-together—whether it’s a huge game day crowd or just a chaotic Tuesday night dinner—I need something that brings the wow factor without demanding all my attention. That’s why I absolutely adore this recipe for baked grinder sliders. Seriously, forget complicated assembly! These are, hands down, the easiest and most flavorful version you will ever make.
I’m Claire, and while I love a fancy layered cake, my heart truly sings when I can create something simple and genuinely delicious for sharing. These sliders are my secret weapon. They take classic Italian deli flavors, bundle them up with soft, sweet rolls, and bake them until they are impossibly cheesy and savory. Every single person who tries them asks for the recipe!

- Why You Will Love These Crowd Pleaser grinder sliders
- Gather Your Ingredients for the Best grinder sliders
- Simple Steps to Make Flavorful Baked Deli Meat grinder sliders
- Tips for Success with Your Hawaiian Roll Sliders
- Make Ahead Appetizers: Preparing grinder sliders in Advance
- Serving Suggestions for Game Day Sandwiches
- Storage and Reheating Instructions for leftover grinder sliders
- Frequently Asked Questions About grinder sliders
- Estimated Nutritional Information
- Estimated Nutritional Information
Why You Will Love These Crowd Pleaser grinder sliders
Honestly, these are such fantastic crowd pleaser recipes; I’m always whipping up a batch! I really think you need these in your life right now. They hit every single mark for easy, delicious entertaining.
- They are genuinely quick—ready from start to finish in under an hour!
- Ultimate comfort food: layers of savory meat and gooey melted cheese make them the best party appetizer sliders.
- The sweet Hawaiian Rolls paired with the garlic butter seriously level up the flavor.
- Perfectly bite-sized, which means everyone goes back for a second (or third!) without feeling too full.
- Minimal cleanup! Everything cooks right in one baking dish, which is truly a gift.
Trust me, once you see how easy they are, you’ll be making these all the time!
Gather Your Ingredients for the Best grinder sliders
For these little bites of heaven, we really want to focus on quality because the topping is minimal—it’s all about the flavor burst! Don’t skimp on the seasonings; they are what turn simple butter into pure magic for our grinder sliders. Let’s get everything measured out before we start assembling!
For the Savory Garlic Butter Topping
This glaze is the secret sauce, so make sure you whisk it thoroughly so everything is perfectly distributed over the tops.
- 1/2 cup unsalted butter, melted
- 1 tablespoon dried Italian seasoning
- 1 teaspoon garlic powder
- 1/2 teaspoon onion powder
- 1/4 teaspoon salt
- 1/4 teaspoon black pepper
For the Layered grinder sliders
The rolls are key here! Make sure you find that 12-count package—they fit perfectly in the baking dish. And for the meats, ask your deli counter for them sliced thin!
- 1 (12 count) package sweet slider rolls (like Hawaiian rolls)
- 1/2 pound thinly sliced ham
- 1/2 pound thinly sliced turkey
- 1/2 pound thinly sliced salami
- 1/2 pound thinly sliced pepperoni
- 12 slices provolone cheese
- 12 slices Swiss cheese (optional, for extra melt)
Simple Steps to Make Flavorful Baked Deli Meat grinder sliders
This is where the magic happens with almost no effort! I’ve tested this assembly process so many times, and I promise you, it’s foolproof. That’s one of the best things about these baked deli meat sliders—you put the work in upfront, and the oven does the rest of the heavy lifting. It’s my favorite kind of cooking!
Prepare the Rolls and Preheat
First things first: get your oven warmed up to 350 degrees Fahrenheit. Grab a 9×13 inch baking dish and give it just a light coating of grease. Now, take your slab of sweet rolls and, using a long serrated knife, slice the entire thing in half horizontally. Try your best to keep all twelve rolls connected underneath, like a giant, flat loaf! Place the bottom half, cut-side up, into your prepared dish.
Layering the Meats and Cheeses for perfect grinder sliders
Time to build up those magnificent layers! I like to start with the ham, then the turkey, followed by the salami, and finish with the pepperoni covering the bottom buns completely. Next, lay down all 12 slices of provolone cheese. If you’re feeling extra decadent (and honestly, why wouldn’t you be?), add those 12 optional slices of Swiss cheese right on top of the provolone.

Creating and Applying the Garlic Butter Sliders Glaze
In a small bowl, whisk that melted butter together with all your seasonings—Italian seasoning, garlic powder, onion powder, salt, and pepper. Whisk until it looks like one lovely, fragrant liquid. Now, place the top halves of the rolls gently over your meat piles. Slowly drizzle that amazing garlic butter mixture evenly over the entire top surface. Use a pastry brush to make sure every single corner of every roll gets some of that flavor!

Baking and Resting the Hot Italian Sandwiches
Cover your dish tightly with aluminum foil—this traps the steam and helps those buns get soft and absorb all the yummy butter. Bake it that way for 15 minutes. After the first bake, pull off the foil, and pop them back in uncovered for another 10 to 15 minutes. You’re looking for fully melted cheese and those tops looking beautifully golden brown. The most important step? Let them rest for 5 minutes before you slice them apart. It lets the cheese settle just right so you get clean cuts on your hot Italian sandwiches.
Tips for Success with Your Hawaiian Roll Sliders
I’ve made these Hawaiian Roll Sliders dozens of times for parties, and I’ve learned a few little secrets to make sure they turn out perfectly every single time. The biggest danger with baked sliders is a soggy bottom, but don’t worry—we can beat that! Just make sure you grease that baking dish well, and if you notice the butter isn’t covering the top edges perfectly, gently take a spoon and just push the excess butter from the middle toward the sides before you cover it with foil for the first bake.
Ingredient Notes and Substitutions for Cheesy Sliders Recipe
When it comes to the meat, always try to go for high-quality, thinly sliced deli meats. It really does translate to a better texture when they melt together! If you aren’t huge fans of provolone, you can absolutely swap it out for something else. Mozzarella is a classic melt, but if you want a little kick in your cheesy sliders recipe, pepper jack is fantastic.
For the rolls, if you can’t find the classic sweet Hawaiian rolls, any pull-apart slider bun will work, but remember that the sweetness of the Hawaiian style really balances the salty, savory Italian meats—it’s a perfect pairing!
Make Ahead Appetizers: Preparing grinder sliders in Advance
This is probably my favorite thing about these easy Italian grinder sliders—they are absolutely wonderful as make ahead appetizers! If you’re planning for a busy party day, assemble everything—meats, cheeses, the whole show—in the baking dish, cover it tightly with foil, and stick it in the fridge. You can safely prep them up to four hours ahead of when you plan to bake.
Just remember one little tweak for timing: if they are going straight from the cold fridge into the hot oven, you need to add about 5 to 10 extra minutes to the initial covered baking time. That gives the cold ingredients time to warm up before the cheese really starts to melt! They turn out just as gooey and amazing.
Serving Suggestions for Game Day Sandwiches
These savory, rich Game Day Sandwiches are so satisfying, they really shine when balanced with something fresh or tangy on the side! Because the sliders are so hearty and cheesy, I always lean toward sides that cut through that richness.
I love serving a big bowl of crunchy coleslaw—the vinegar tang is perfect! For parties, instead of a heavy side, offer a big platter of crisp veggie sticks with a creamy but zesty dip. Honestly, if you want to go full game-day comfort, a side of my loaded nachos always disappears lightning fast right alongside these little beauties.

Storage and Reheating Instructions for leftover grinder sliders
Even the best grinder sliders sometimes yield leftovers, which is a delicious problem to have! If you have any remaining, keep them stored in an airtight container—don’t just leave them wrapped loosely on the counter. They’ll last nicely in the fridge for about two or three days.
When you reheat them, please, please skip the microwave if you want that lovely crust back. Pop them on a small baking sheet at about 350 degrees Fahrenheit for, say, 8 to 10 minutes. This brings the cheese back to gooey life, and the tops get a little bit crispy again. Perfect second lunch!
Frequently Asked Questions About grinder sliders
When you’re looking for the best simple lunch recipes or party food, questions always pop up! I put together answers for the most common things I hear about these amazing baked Italian grinder sliders.
What if I can’t find the sweet Hawaiian rolls?
If you can’t find the specific sweet slider rolls, don’t panic! You can absolutely use another brand of small, soft slider buns. Just make sure they pull apart easily when you slice them. The sweetness of the Hawaiian rolls complements the salty meats best, but any soft, white dinner roll will do the trick for these Hot Italian Sandwiches.
Can I add vegetables to these sliders?
Yes, you totally can! People often ask about adding things like pepperoncini, thinly sliced red onion, or even sliced tomatoes. If you add tomatoes, slice them super thin and pat them dry between paper towels first—we don’t want extra moisture causing a soggy bottom. Pickled peppers are fantastic for adding a little zip to your Party Appetizer Sliders!
Are these good for freezing or making ahead?
Absolutely! As I mentioned before, these are fantastic make ahead appetizers. You can assemble the whole thing, cover it, and refrigerate it up to four hours. You just need to add a little extra time to the covered bake. They freeze decently too, but I always find that reheating them from the fridge gives you that superior cheese melt.
Do I need both Provolone and Swiss cheese?
Nope, not at all! The Swiss is totally optional if you want that extra flavor dimension. Provolone is the real MVP here because it has that classic Italian flavor profile we look for in Italian Sliders Recipe. If you only have one type, stick with provolone for the best taste!
Estimated Nutritional Information
Here is a general idea of what’s in one of these irresistible little bites. Remember, these values are estimates based on using the exact ingredients listed, especially depending on the brand of deli meat and cheese you choose for your Easy Weeknight Sliders.
- Serving Size: 1 slider
- Calories: 350
- Sugar: 6g
- Sodium: 950mg
- Fat: 18g
- Saturated Fat: 8g
- Unsaturated Fat: 10g
- Trans Fat: 0.5g
- Carbohydrates: 25g
- Fiber: 1g
- Protein: 22g
- Cholesterol: 55mg
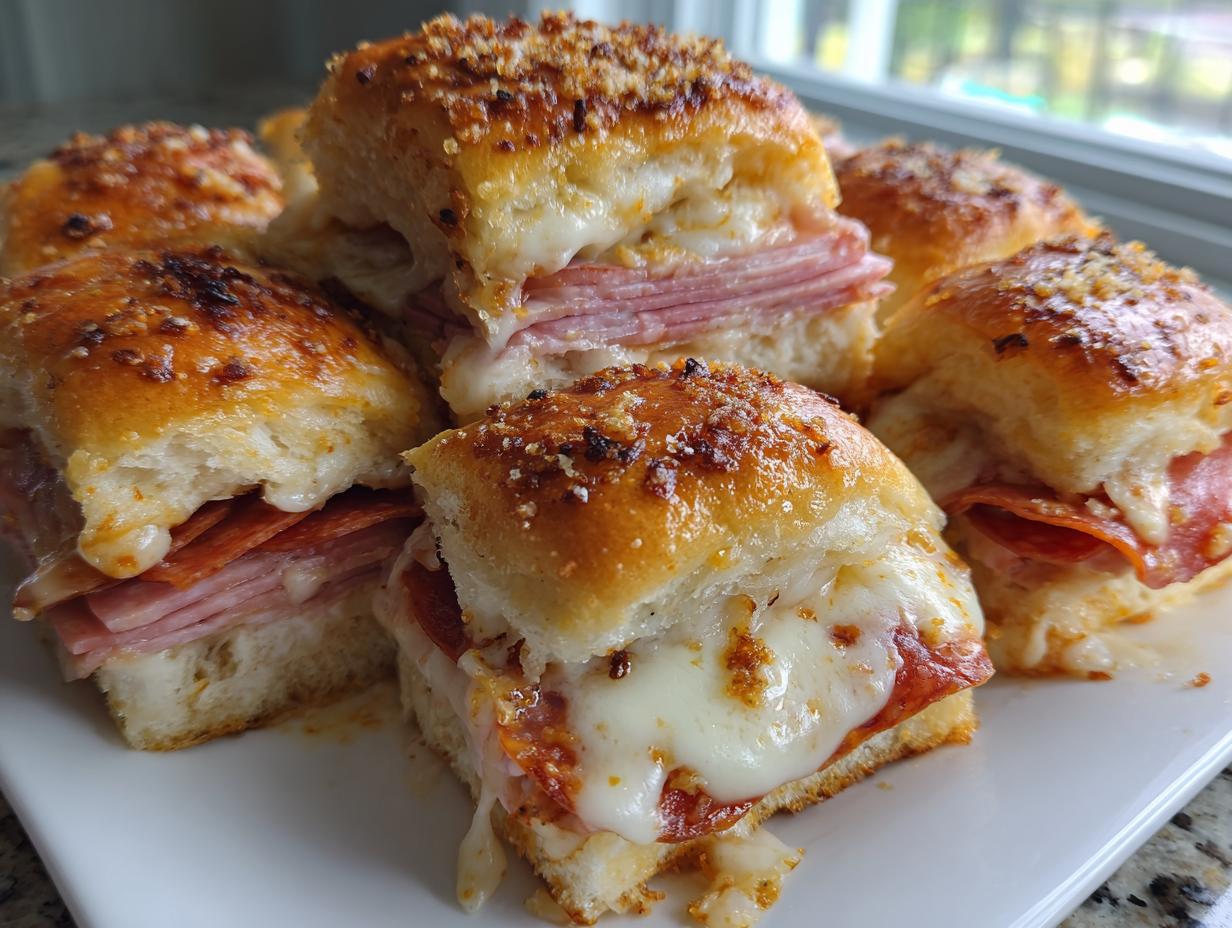
Easy Baked Italian Grinder Sliders

Make these easy baked Italian Grinder Sliders for a crowd-pleasing meal. These bite-sized sandwiches use Hawaiian rolls, deli meats, and provolone cheese, topped with a savory garlic butter glaze.
- Prep Time: 15 min
- Cook Time: 30 min
- Total Time: 45 min
- Yield: 12 servings 1x
- Category: Lunch
- Method: Baking
- Cuisine: American
- Diet: Vegetarian
Ingredients
- 1 (12 count) package sweet slider rolls (like Hawaiian rolls)
- 1/2 cup unsalted butter, melted
- 1 tablespoon dried Italian seasoning
- 1 teaspoon garlic powder
- 1/2 teaspoon onion powder
- 1/4 teaspoon salt
- 1/4 teaspoon black pepper
- 1/2 pound thinly sliced ham
- 1/2 pound thinly sliced turkey
- 1/2 pound thinly sliced salami
- 1/2 pound thinly sliced pepperoni
- 12 slices provolone cheese
- 12 slices Swiss cheese (optional, for extra melt)
Instructions
- Preheat your oven to 350 degrees Fahrenheit. Lightly grease a 9×13 inch baking dish.
- Slice the entire package of slider rolls in half horizontally, keeping the rolls connected if possible. Place the bottom halves of the rolls in the prepared baking dish.
- Layer the meats and cheeses evenly over the bottom layer of rolls. Start with ham, then turkey, salami, pepperoni, provolone cheese, and Swiss cheese if using.
- Place the top halves of the rolls over the meat and cheese layers.
- In a small bowl, whisk together the melted butter, Italian seasoning, garlic powder, onion powder, salt, and pepper.
- Slowly and evenly drizzle the butter mixture over the top of the assembled sliders. Use a pastry brush to spread the mixture to cover all the tops of the rolls.
- Cover the baking dish tightly with aluminum foil.
- Bake for 15 minutes covered.
- Remove the foil and bake for another 10 to 15 minutes, or until the cheese is fully melted and the tops are golden brown.
- Let the sliders rest for 5 minutes before slicing between the individual rolls. Serve warm.
Notes
- For a sharper flavor, substitute some provolone with mozzarella or use pepper jack cheese.
- You can assemble these sliders up to 4 hours ahead of time. Keep them covered in the refrigerator and add 5-10 minutes to the covered baking time.
- Serve these as a great party appetizer or game day sandwiches.
Nutrition
- Serving Size: 1 slider
- Calories: 350
- Sugar: 6
- Sodium: 950
- Fat: 18
- Saturated Fat: 8
- Unsaturated Fat: 10
- Trans Fat: 0.5
- Carbohydrates: 25
- Fiber: 1
- Protein: 22
- Cholesterol: 55