

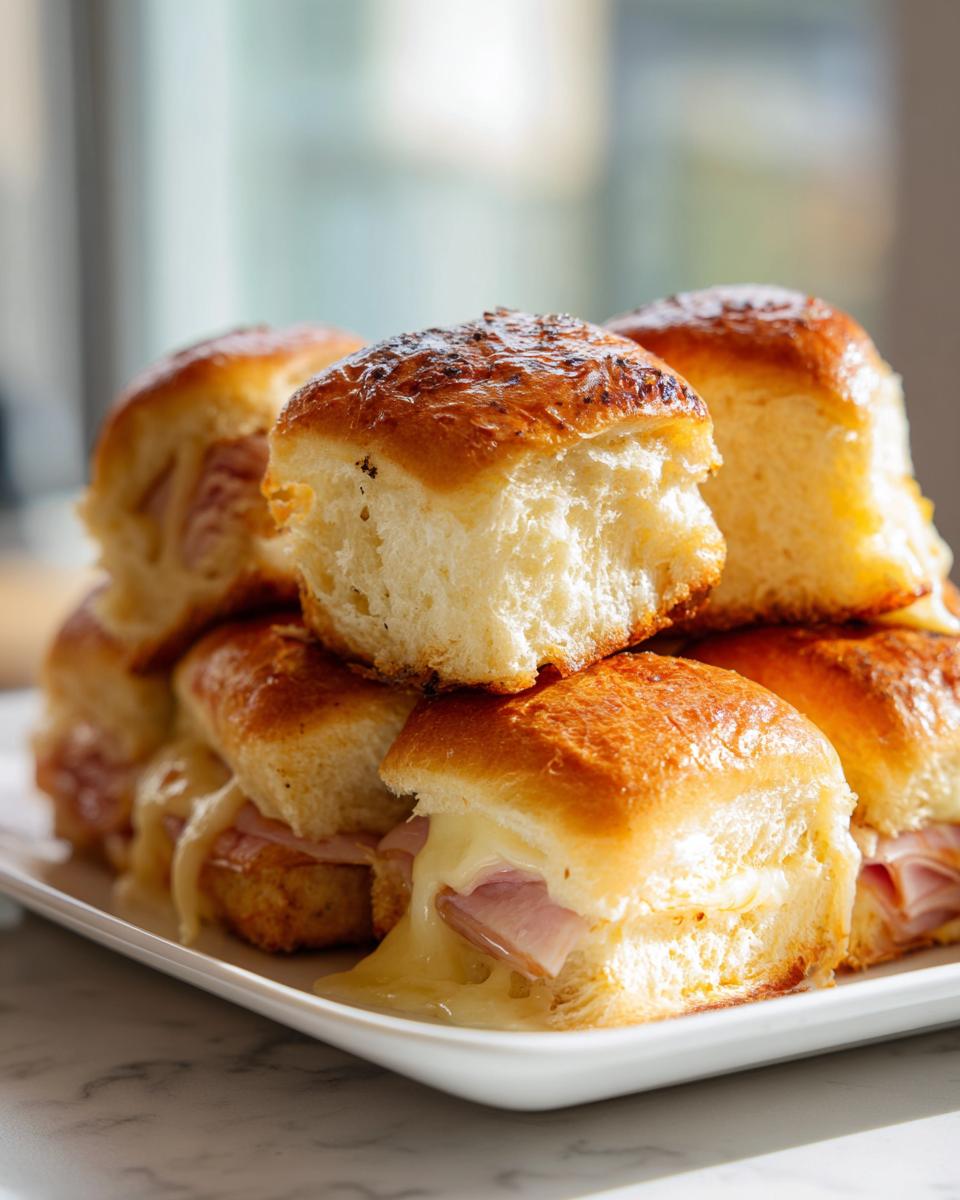
Okay, confession time! If I’m ever hosting a party, especially for a big game or just a casual get-together with friends, these ham and cheese sliders are my absolute go-to. Seriously, they disappear faster than you can say “touchdown!” There’s just something magical about these little pull-apart sandwiches – they’re warm, gooey with cheese, and bathed in this incredible buttery glaze that makes them totally irresistible. They bake all on one tray, which means less cleanup for me, and more time to actually hang out with my guests. Trust me, they’re a guaranteed hit every single time!
- Why You'll Love These Ham and Cheese Sliders
- Ingredients for Perfect Ham and Cheese Sliders
- Crafting Your Ham and Cheese Sliders: Step-by-Step
- Tips for the Best Ham and Cheese Sliders
- Serving Suggestions for Your Ham and Cheese Sliders
- Frequently Asked Questions about Ham and Cheese Sliders
- Nutritional Information
- Share Your Ham and Cheese Slider Creations!
Why You’ll Love These Ham and Cheese Sliders
Seriously, what’s not to love? These little guys are:
- Supremely Easy: You can literally assemble them in minutes.
- Ridiculously Flavorful: That buttery glaze and melty cheese are pure magic.
- Perfect for Crowds: They’re the ultimate pull-apart game day snack!
- Party Winners: They always disappear way too fast, making them a total hit.
Ingredients for Perfect Ham and Cheese Sliders
Alright, let’s talk about what goes into these little flavor bombs! You won’t believe how simple it is to get these ham and cheese sliders just right:
- 12 dinner rolls or slider buns: I love using the soft, slightly sweet ones.
- 12 slices deli ham: Get good quality stuff, it makes a difference!
- 6 slices Swiss cheese: Provolone or cheddar work too, but Swiss gives it that classic flavor.
- 1/2 cup butter, melted: We need this for our amazing glaze.
- 1 tablespoon Dijon mustard: For a little tang!
- 1 teaspoon Worcestershire sauce: Don’t skip this, it adds so much depth.
- 1/2 teaspoon garlic powder: Because garlic makes everything better.
- 1/4 teaspoon onion powder: Just a whisper for extra yum.
- 1 tablespoon poppy seeds (optional): These add a fun little pop and look pretty, but totally fine without them!
Crafting Your Ham and Cheese Sliders: Step-by-Step
Alright, let’s get these amazing baked ham and Swiss sliders made! The best part is how they all come together on one pan, making them super easy to whip up for any party. First things first, get your oven preheating to 350°F (175°C). While that’s warming up, grab your dinner rolls or slider buns and carefully slice them in half horizontally. You want a nice, even cut so everything stacks up perfectly! If you’re a grilled cheese fanatic like me, you’ll appreciate the care here, similar to how we make sure our ultimate grilled cheese is perfectly layered.
Now, line them all up on your baking sheet – the bottom halves go down first. This is where the magic starts to happen! Layer two slices of your deli ham onto each bottom roll half. Don’t be shy with the ham; this is a ham and cheese lover’s dream, after all. Next, pop a slice of Swiss cheese on top of that ham. If your cheese slices are a bit bigger than the rolls, just cut them in half to fit nicely. Then, place the top halves of your rolls right over the cheese. See? They’re already looking like a proper sandwich, sort of like mini versions of our Philly cheesesteak sliders but oh-so-cheesy!
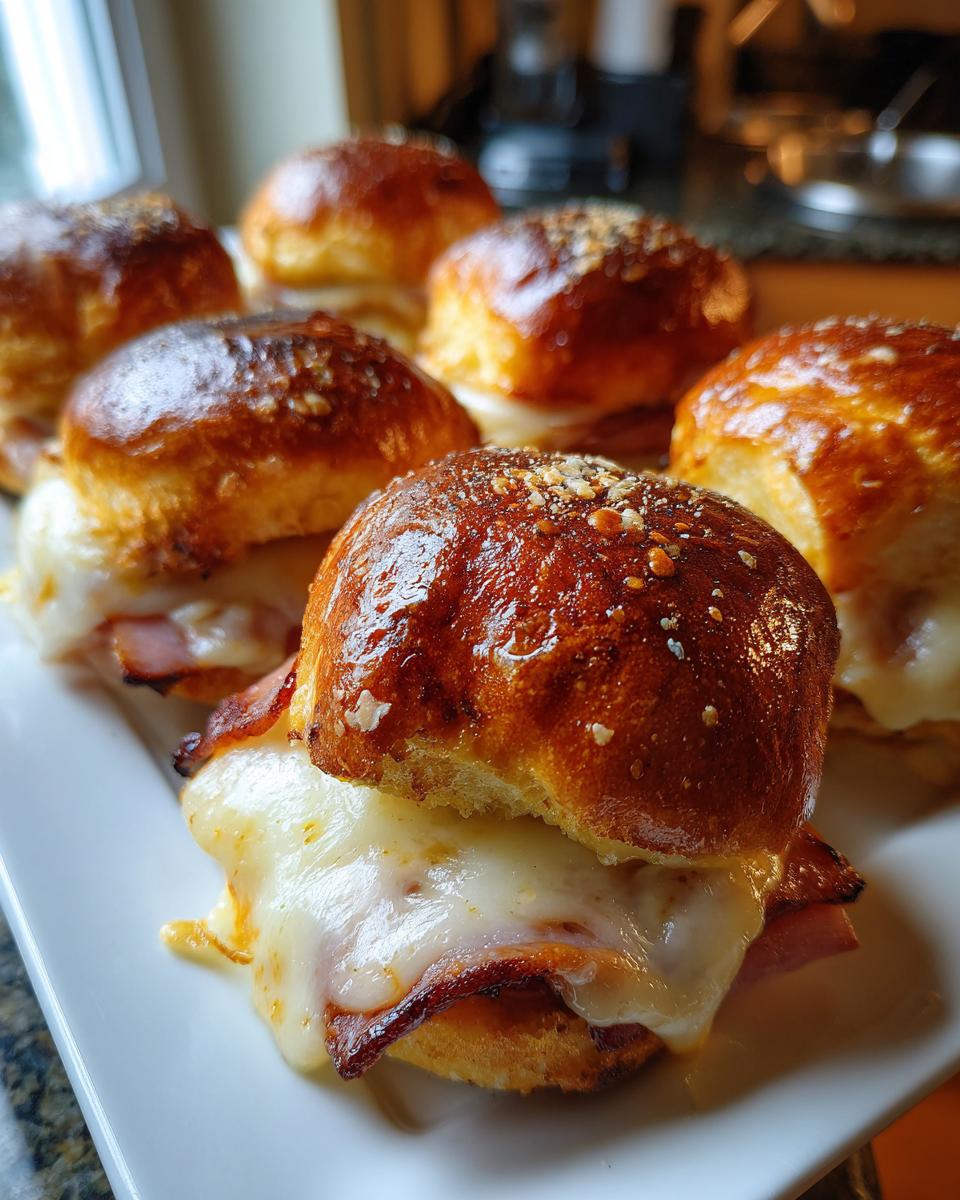
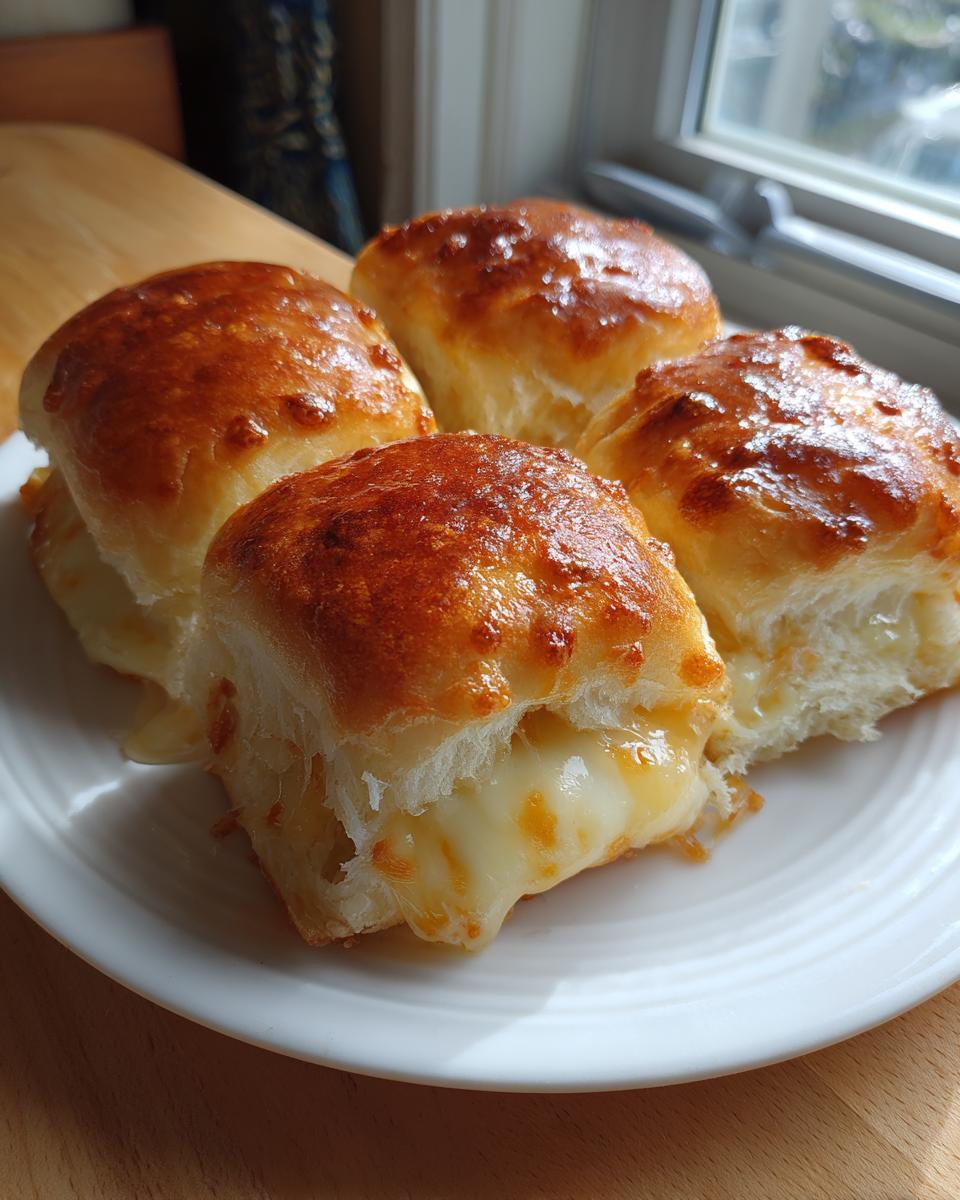
In a tiny bowl, whisk together the melted butter, that zingy Dijon mustard, a dash of Worcestershire sauce (it adds a secret layer of savory goodness!), garlic powder, and onion powder. This buttery mixture is what makes these sliders taste so incredible and keeps them from drying out. Pour this glorious mixture evenly all over the tops of your assembled sliders. It’s going to soak into those buns and make them unbelievably delicious. If you grabbed those poppy seeds, now’s the time to sprinkle them on top – they look so pretty and add a little crunch!
Here’s my little trick: cover the whole baking sheet tightly with aluminum foil. This helps everything steam and melt together beautifully without the tops getting too browned, giving you the most perfect, gooey cheese pull. Let them bake like that for about 15-20 minutes. You’ll know they’re getting there when the cheese is all melty and the rolls are nice and warm. Then, carefully remove the foil and pop ’em back in for another 5 minutes, just to toast those tops until they’re a lovely golden brown. Let them rest for a couple of minutes before you pull them apart – they’re hot and ready to be devoured!

Tips for the Best Ham and Cheese Sliders
You know, a few little tricks can take these sliders from good to absolutely legendary! Since these are my go-to pull-apart game day snacks, I’ve definitely learned a thing or two over the years! For starters, don’t skimp on the quality of your ham and cheese. It really does make a difference in flavor! I also find that using soft, slightly sweet dinner rolls, like Hawaiian sweet rolls or brioche slider buns, really elevates them. They soak up that buttery glaze so perfectly. Remember, the idea is to make these easy and delicious, and a little attention to detail really pays off! They’re fantastic on their own, but pair them with some crispy loaded potato skins or some yummy crockpot BBQ meatballs for the ultimate party spread!
Make-Ahead and Storage
This is my secret weapon for parties! You can totally assemble these sliders a day ahead of time. Just layer everything as directed, but don’t pour the butter mixture over them yet. Cover them snugly with plastic wrap and pop them in the fridge. When you’re ready to party, just pull them out, pour that delicious butter mixture over the tops, sprinkle with poppy seeds if you’re using them, and bake! You might need to add a few extra minutes of covered baking time so they get nice and hot all the way through.
Cheese and Ham Variations
While Swiss is classic, don’t be afraid to play around! Sharp cheddar, provolone, or even a good Monterey Jack are fantastic cheese swaps. For ham, you can use thinly sliced deli ham, or even leftover holiday ham if you have some. Some folks even like to add a thin layer of a good mustard or a bit of cooked bacon to the mix!
Serving Suggestions for Your Ham and Cheese Sliders
These sliders are stars on their own, but they become total showstoppers with the right friends! They’re incredible alongside some cheesy loaded nachos or a big bowl of gooey chili cheese fries. If you’re making a whole spread of party sandwich rolls, they also pair beautifully with some crunchy veggie sticks and dip, or even a light, fresh salad to balance out all that cheesy goodness!
Frequently Asked Questions about Ham and Cheese Sliders
I get asked about these little guys all the time! They’re so popular for game days and parties, it’s no wonder people have questions. I’m happy to clear everything up!
Can I use different bread for these sliders?
Absolutely! While the dinner rolls are classic, feel free to get creative. Soft slider buns, like brioche or Hawaiian rolls, are fantastic. You can even try using mini buttermilk biscuits if you want something a little different. Just make sure whatever you use can hold up to all that delicious filling and glaze!
How do I keep my ham and cheese sliders from getting soggy?
That’s a great question! The key is that wonderful buttery glaze – it actually seals the bread a bit. Also, don’t let them sit too long *after* baking and before serving. They’re best fresh and warm! If you assemble them ahead of time, wait to pour that glaze over them until just before you bake them.
Can I add other ingredients to my ham and cheese sliders?
Oh, you sure can! Some people love adding a thin layer of mustard or even a bit of a sloppy joe mixture underneath the ham for extra flavor. A few thinly sliced pickles or even some caramelized onions can be delicious too, but honestly, they’re pretty perfect just as they are!
Nutritional Information
Okay, these little sliders are truly delicious, but like most good things, they come with a few calories! The nutritional info can really change depending on the exact rolls, ham, and cheese you use, but for one slider, you’re looking at rough estimates of around 250 calories, about 15g of fat, and 12g of protein. It’s good to keep in mind, especially if you’re planning out party snacks!
Share Your Ham and Cheese Slider Creations!
I just *love* seeing what you all make! If you try these delicious ham and cheese sliders, please leave a comment below and let me know how they turned out. And if you snap any photos, tag me on social media – I’d be thrilled to see your creations! It always makes my day to see your baking successes, and you can even read more about the Bliss Batter story on our About Us page or reach out through our Contact form with any questions!
PrintEasy Ham and Cheese Sliders

These pull-apart ham and cheese sliders are a crowd-pleasing appetizer perfect for game days or parties. They bake together on a single tray for a quick and easy, buttery, cheesy treat.
- Prep Time: 10 min
- Cook Time: 25 min
- Total Time: 35 min
- Yield: 12 sliders 1x
- Category: Appetizer
- Method: Baking
- Cuisine: American
- Diet: Vegetarian
Ingredients
- 12 dinner rolls or slider buns
- 12 slices deli ham
- 6 slices Swiss cheese
- 1/2 cup butter, melted
- 1 tablespoon Dijon mustard
- 1 teaspoon Worcestershire sauce
- 1/2 teaspoon garlic powder
- 1/4 teaspoon onion powder
- 1 tablespoon poppy seeds (optional)
Instructions
- Preheat your oven to 350°F (175°C).
- Slice the dinner rolls in half horizontally.
- Place the bottom halves of the rolls on a baking sheet.
- Layer 2 slices of ham on each bottom roll half.
- Top the ham with 1 slice of Swiss cheese, cut in half if needed to fit.
- Place the top halves of the rolls over the cheese.
- In a small bowl, whisk together the melted butter, Dijon mustard, Worcestershire sauce, garlic powder, and onion powder.
- Pour the butter mixture evenly over the tops of the rolls.
- Sprinkle with poppy seeds, if using.
- Cover the baking sheet tightly with aluminum foil.
- Bake for 15-20 minutes, or until the cheese is melted and the rolls are heated through.
- Remove the foil and bake for an additional 5 minutes, or until the tops are lightly golden brown.
- Let stand for a few minutes before serving.
Notes
- You can assemble these sliders ahead of time and refrigerate them. Bake them when you’re ready to serve, adding a few extra minutes to the covered baking time.
- Feel free to substitute cheddar or provolone cheese for Swiss.
- For a touch of sweetness, you can add a tablespoon of honey to the butter mixture.
Nutrition
- Serving Size: 1 slider
- Calories: 250
- Sugar: 5g
- Sodium: 600mg
- Fat: 15g
- Saturated Fat: 7g
- Unsaturated Fat: 8g
- Trans Fat: 0g
- Carbohydrates: 18g
- Fiber: 1g
- Protein: 12g
- Cholesterol: 40mg