
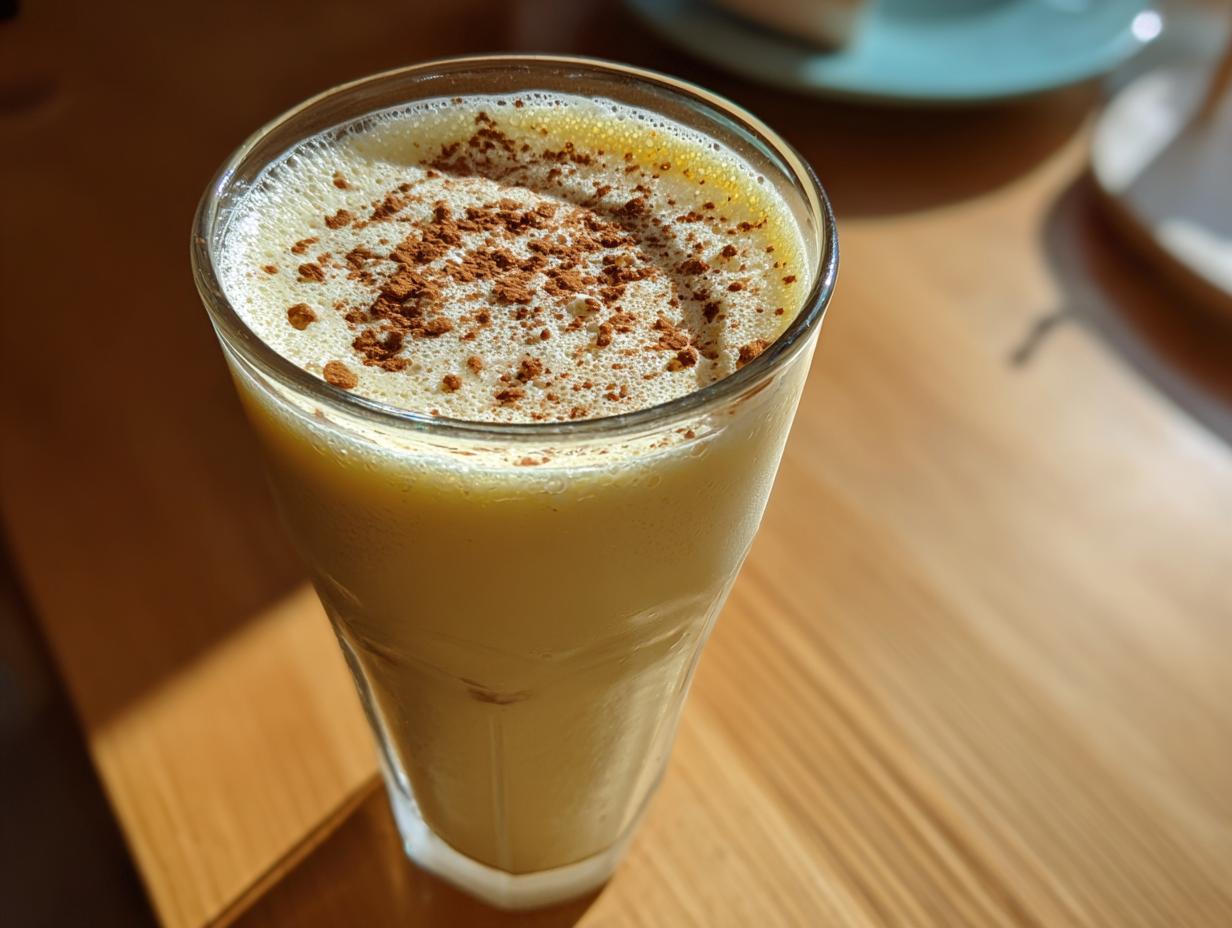
Oh, the very mention of the holidays makes me want to put another log on the fire! For me, the true measuring stick of the season isn’t the twinkling lights, but the moment I pour that first glass of cold, spiced magic. Store-bought versions? They just don’t cut it, honestly. That’s why I’m sharing my celebrated homemade eggnog recipe with you today. This is the rich, creamy comfort I remember from my grandmother’s kitchen, whipped up right here on my stovetop. Trust me, once you taste this silky, perfect holiday drink, you’ll never go back to the carton again. It just tastes like home, doesn’t it? You can read a little more about my philosophy of finding joy in homemade goodness over on my About Page!
- Why This Old Fashioned Homemade Eggnog Recipe is Better Than Store-Bought
- Ingredients for The Best Creamy Homemade Eggnog
- How to Make Eggnog with Tempered Eggs Safely
- Spiked Eggnog Recipe vs. Non Alcoholic Eggnog Easy Options
- Tips for Success with Your Homemade Eggnog
- Serving Suggestions for This Classic Holiday Drink
- Storage and Keeping Your Homemade Eggnog Fresh
- Frequently Asked Questions About Homemade Eggnog
- Estimated Nutritional Data for Homemade Eggnog
Why This Old Fashioned Homemade Eggnog Recipe is Better Than Store-Bought
Honestly, the minute you take that first sip of this old fashioned eggnog recipe, you’ll understand why I insist on making it from scratch every year. Commercial eggnogs are usually thinner and rely on stabilizers just to get through the shipping process. Not ours! We are aiming for that rich velvety eggnog experience. Our mixture browns the competition because we use plenty of egg yolks, which commercial producers often skimp on. This is truly so much better than store bought eggnog; it tastes like pure holiday luxury.
Achieving That Perfect Creamy Homemade Eggnog Texture
The secret sauce, if you can call it that, is the interplay between the yolks and the chilling time. We gently cook those yolks just enough so they thicken the mixture beautifully as they set, resulting in that wonderful density. Then, we let it rest! Chilling overnight is non-negotiable; it gives the fats time to settle and the flavors to marry, creating the silkiest texture you could ever imagine when you finally pour it out. If you like diving deep into creamy recipes, you should check out my Salted Caramel Latte—it has that same dedication to texture!
Ingredients for The Best Creamy Homemade Eggnog
Gathering your ingredients for this homemade eggnog recipe from scratch is half the fun! Since we are focusing on that luxurious, restaurant-quality feel, please don’t skimp on the dairy quality here. Everything we use is simple, but using the best makes all the difference when you’re making a classic holiday drink that features these few main players. I’ve laid everything out clearly so you can get organized before you even turn on the stove. If you want to jump straight to the full recipe card details, you can check it out right here.
Dairy and Base Components for Homemade Eggnog
This is where we build the body, people! For that truly creamy homemade eggnog, you absolutely must use whole milk and heavy cream. Don’t reach for the low-fat stuff, or it just won’t have the mouthfeel we’re aiming for. You’ll need six large egg yolks—separate them gently, we don’t want any shell fragments in there! And for the sweetness, we are sticking to good old granulated sugar, along with a little pinch of salt to wake up all those flavors we develop on the stove.
Spices and Spirits for Your Classic Holiday Drink
Now for the part that makes it smell like Christmas morning! You’ll need pure vanilla extract—the fake stuff just doesn’t sing the right note here. We’re also using aromatic ground nutmeg, and remember, you want extra for garnishing at the end! If you are making this a spiked eggnog recipe, this is where the fun begins. I typically use bourbon because the vanilla notes pair so well, but dark rum or brandy work just as beautifully to enhance your homemade eggnog.
How to Make Eggnog with Tempered Eggs Safely
Okay, this is the part of making homemade eggnog where people get nervous, but I promise you, it’s completely straightforward if you just take it slow. We are talking about cooking eggs here, so knowing how to make eggnog with tempered eggs is the key that unlocks that beautiful, safe, rich velvety eggnog texture. It’s all about temperature control, and we are aiming for 170°F—that’s our goal marker for perfection and safety!
Preparing the Yolk Base and Heating the Dairy
First things first: grab that medium bowl and whisk your six egg yolks, sugar, and salt until they get pale and creamy—it looks like thick, soft ribbons when you lift the whisk. While you’re aggressively whisking that base, heat your milk and heavy cream together in a separate saucepan until it’s steaming nicely. Just steaming, mind you, we do not—I repeat, do NOT—let it boil. Boiling dairy is a cardinal sin in this kitchen!
The Crucial Tempering Step for Creamy Homemade Eggnog
This is the moment of truth! Tempering saves your yolks from turning into scrambled bits floating in milk. You need to take about one cup of that hot milk mixture and very, *very* slowly drizzle it into your egg yolk mixture. You have to whisk constantly while you pour! Think of it like gently introducing two friends who just met but need to become best pals. This slow process brings the temperature of the yolks up without shocking them.
Cooking to Thicken: Achieving Rich Velvety Eggnog
Once your yolks are tempered, pour that warm mixture right back into the saucepan with the rest of the milk. Now, you cook it over medium-low heat, stirring constantly with a wooden spoon. You’re looking for that magic moment when the mixture thickens enough to coat the back of your spoon. If you can run a clean finger across the coated spoon and the line stays put, you’ve hit that perfect 170°F mark. It’s cooked enough to be safe, but not so much that it curdles!
Finishing and Chilling Your Homemade Eggnog
Take it off the heat right away! Stir in your vanilla and nutmeg. If you decided to make it an adult beverage, drop in the liquor now. Then, we strain everything through a fine-mesh sieve; this cleans up any little pieces that might have cooked too much. Cover that beautiful liquid and get it into the fridge for at least four hours, but seriously, overnight is where the creamy homemade eggnog truly shines. You can find quick tips for general kitchen success, like when I made my easy chicken enchiladas, over here!
Spiked Eggnog Recipe vs. Non Alcoholic Eggnog Easy Options
Now, let’s talk about making this the highlight of any holiday party drinks spread! Whether you need a fun, family-friendly option or something to truly warm the grown-ups up, this recipe is adaptable. If you are making a non alcoholic eggnog easy version, just skip the spirits completely and enjoy that rich flavor! You don’t need an extra step, which I love because it keeps my cleanup game easy.
If you’re leaning into the tradition of a spiked eggnog recipe, timing is everything! You add your chosen liquor—be it bourbon, dark rum, or brandy—after you’ve taken the mixture off the heat. You don’t want to boil off those wonderful spirits, and heating them up might change their flavor profile too much. I usually wait until I’ve stirred in my vanilla and nutmeg and the mixture has cooled down just a touch before I pour in my cup. This ensures the alcohol stays strong and the flavor stays beautiful. If you love bourbon touches, you might also enjoy my recipe for a Maple Bourbon Cocktail—it uses that warmth so perfectly!
A little tip: If you are having a party, it’s always best to make two batches—one clearly labeled non-alcoholic and one spiked. Then you can serve both straight from the punch bowl. Everyone gets to celebrate!
Tips for Success with Your Homemade Eggnog
Even though this old fashioned eggnog recipe seems straightforward, I have a few small habits I picked up over the years that make the difference between good eggnog and *amazing* eggnog. Remember, the whole point of making homemade eggnog is to create something truly special, right? We’re sticking to that Bliss Batter promise: foolproof recipes that yield incredible results. Here are my essential secrets for serving up the best christmas beverages this season.
First, I have to talk about the dairy again—use what the recipe calls for! Full-fat milk and heavy cream are crucial here for that rich velvety eggnog you’re dreaming of. If you try to swap in skim milk, you are sacrificing body and richness, and trust me, you will miss that luxurious mouthfeel.
Second tip involves the sugar. The recipe calls for granulated sugar, which is classic, but don’t be afraid to be a little adaptable! If you feel like you want a deeper, almost caramel undertone, you can substitute some of that white sugar for maple syrup—maybe use a half cup of maple syrup instead of three-quarters cup of sugar. It changes the flavor just slightly, which can be fun for a different batch. If you are looking for other flexible ideas, I have a whole page dedicated to easy holiday recipes that encourage little tweaks like this!
My third piece of advice is about spice—fresh nutmeg is a non-negotiable necessity. Pre-ground nutmeg loses all its essential oils so fast. It just sits there tasting dusty. Grate your nutmeg fresh right over the top when you serve it. The aroma alone transports you straight back to the holidays. It is just night and day compared to reaching for the jar.
Finally, when chilling, use an airtight container, or cover the bowl tightly with plastic wrap right against the surface of the eggnog. This prevents that weird, thin skin from forming on top while it rests overnight. We want smooth sailing from the fridge right into the glasses!
Serving Suggestions for This Classic Holiday Drink
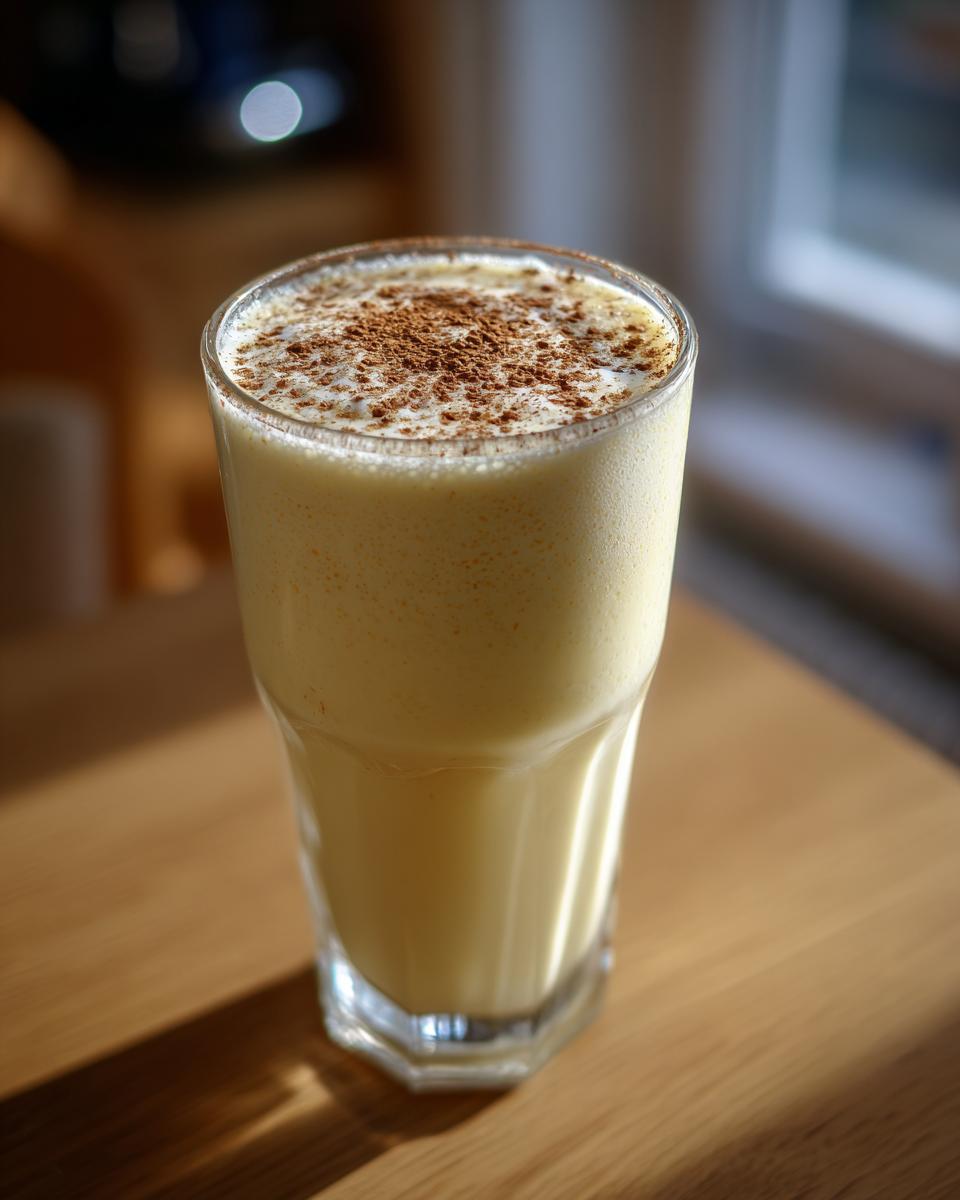
This homemade eggnog isn’t just a drink; it’s the star of the show at any festive gathering! Once your thick, rich velvety eggnog comes out of the fridge after a long, cold rest, it’s time to make it look as incredible as it tastes. We are totally aiming to serve this up as one of your favorite holiday party drinks this year, so presentation matters!
The absolute most important garnish is fresh nutmeg. I mean it. Get a tiny hand grater—the smaller the better—and grate it right over the top of each glass just before serving. The smell is intoxicating, and it hits your nose before the flavor even touches your tongue. That little pop of spice elevates this old fashioned eggnog recipe immediately.
For serving temperature, you want it icy cold. Pour it into chilled mugs or beautiful glass punch cups if you’re feeling fancy. If you want to jazz things up for the adults, consider setting up a small station next to the punch bowl. You can offer little bowls of extras like toasted pecans or a dash of cinnamon. If you’re looking for another fantastic, cozy holiday recipe to round out your menu, check out my recipe for a festive Apple Cider Cocktail!
If you are offering both spiked and non-alcoholic options, make sure to serve them in distinct glassware or use decorative stirrers so guests know exactly what they are pouring. Enjoy the compliments—you’ve earned them by ditching the store-bought stuff for this incredible creamy homemade eggnog!
Storage and Keeping Your Homemade Eggnog Fresh
Making this perfect batch of homemade eggnog is an achievement, so you definitely want to know how to keep it tasting incredible until the last drop! Since we used all those lovely, fresh dairy ingredients and cooked eggs, we have to treat it right in the fridge. This isn’t like that shelf-stable stuff you buy in September; this is real food, made with love.
The best way to store it, which I mentioned before, is in a container that seals tightly. Even better, press a piece of plastic wrap directly onto the surface of the eggnog before you seal the lid. This stops any air from getting in there and forming that disappointing skin on top. You really want that smooth surface ready for grating nutmeg onto!
So, how long does it last? Because we cooked the eggs completely through the tempering process, this homemade eggnog keeps beautifully in the refrigerator for about one week. I always mark the date on the container, just so I know we’re staying within that safe window. If you notice any off smells or the texture separating significantly, it’s time to sadly bid it farewell.
Now about freezing—and I know someone is going to ask this! I really don’t recommend freezing your creamy homemade eggnog. While you certainly could freeze it for months, the texture just doesn’t rebound well once it thaws, especially since we rely on the whole milk and cream for that perfect density. If you try to freeze it, the fat and water content can separate, and you’ll end up with something closer to a slushy than a velvety treat when you reheat it. Trust me, it’s worth making just enough for the week, or sharing it quickly so it doesn’t sit too long!
If you ever find yourself with leftover shells or other bits from your kitchen experiments, you know where I am! Feel free to reach out through my Contact Page if you have any last-minute questions about storing your wonderful holiday creation.
Frequently Asked Questions About Homemade Eggnog
I know when you’re making something as traditional as eggnog, you probably end up with a few lingering questions! That’s totally normal, especially when you’re stepping away from grabbing a carton off the shelf for the first time. That’s what I am here for—to make sure your journey to the best christmas beverages is smooth sailing. If you have additional questions after reading these, please don’t hesitate to reach out when you visit my Contact Page!
Is it safe to consume homemade eggnog without cooking the eggs?
That is the million-dollar question, isn’t it? And the answer for this specific recipe, which aims to be a true classic holiday drink, is absolutely no, you shouldn’t skip the heating step! While some very traditional, raw eggnog recipes exist, I feel strongly that since we are making this homemade, we need to treat our eggs right. Our method—heating the milk mixture, tempering the yolks, and cooking until it hits 170°F—means the eggs are pasteurized right in the pot. This ensures you get that rich velvety eggnog without any worry about raw egg safety!
Can I make this rich velvety eggnog recipe ahead of time?
You certainly can, and honestly, you should! I mentioned this earlier, but I’ll say it again because it’s the secret to the ultimate texture: chilling is mandatory. While technically you could drink it just slightly cooled, the difference between good and truly creamy homemade eggnog happens overnight. The minimum chilling time is four hours, but 12 to 24 hours in the fridge allows the flavors to deepen and the mixture to thicken up perfectly. It’s one of those wonderful easy holiday recipes that tastes better the longer it rests!
What is the best alcohol for spiked eggnog recipe?
This is my favorite part of developing a spiked eggnog recipe! You truly can’t go wrong with any of the three we suggest: bourbon, dark rum, or brandy. If you want a classic, warm, slightly caramel undertone that really complements the nutmeg, go for a good quality bourbon. Dark rum brings a bit more spice and complexity, which is wonderful for cutting through the richness, and brandy gives it that deep, traditional “holiday spirit” flavor. I usually make a big batch of the non-alcoholic base and then spike a separate carafe with bourbon just in case someone wants an extra festive touch!
Estimated Nutritional Data for Homemade Eggnog
It feels a little odd to put numbers next to something that tastes like pure holiday magic, doesn’t it? But, because we believe in transparency here at Bliss Batter, I want to share the general guide for the nutrition content in this homemade eggnog. Remember, I’m a baker, not a nutritionist, so these figures are just estimates based on the ingredients listed above, especially when you factor in the full-fat dairy and optional spirits.
If you’re using the non-alcoholic version, the numbers will be slightly lower, of course, primarily in the fat and energy categories. But even with the liquor included, this is an indulgent treat meant for special moments, so enjoy it guilt-free—that’s my personal advice!
Here’s the breakdown for one standard serving cup of this creamy homemade eggnog:
- Calories: Approximately 450
- Fat: Around 30g (This is where the richness comes from!)
- Carbohydrates: About 38g
- Protein: Roughly 10g
- Sugar: About 35g
- Saturated Fat: About 18g
- Cholesterol: High due to the six egg yolks, around 250mg
This data is based on the recipe as written above, without any substitutions for sugar or alcohol. Think of this as the blueprint for your ultimate classic holiday drink! You deserve this creamy indulgence this season.
PrintThe Best Creamy, Old-Fashioned Homemade Eggnog

Make rich, velvety homemade eggnog from scratch. This classic holiday drink recipe is easy to follow and results in a creamy texture far better than store-bought versions. Includes instructions for making it spiked or non-alcoholic.
- Prep Time: 15 min
- Cook Time: 10 min
- Total Time: 4 hr 25 min
- Yield: 6 servings 1x
- Category: Dessert Drink
- Method: Stovetop Cooking
- Cuisine: American
- Diet: Vegetarian
Ingredients
- 6 large egg yolks
- 3/4 cup granulated sugar
- 1/4 teaspoon salt
- 1 1/2 cups whole milk
- 1 1/2 cups heavy cream
- 1 teaspoon vanilla extract
- 1/2 teaspoon ground nutmeg, plus more for garnish
- Optional: 1 cup bourbon, dark rum, or brandy
Instructions
- In a medium bowl, whisk the egg yolks, sugar, and salt together until the mixture is pale yellow and thick.
- In a medium saucepan, combine the milk and heavy cream. Heat over medium heat until the mixture is steaming but not boiling.
- Temper the eggs: Slowly pour about 1 cup of the hot milk mixture into the egg yolk mixture while whisking constantly. This prevents the eggs from scrambling.
- Pour the tempered egg mixture back into the saucepan with the remaining milk mixture.
- Cook over medium-low heat, stirring constantly with a wooden spoon or heatproof spatula, until the mixture thickens enough to coat the back of the spoon (about 170°F). Do not let it boil. This step cooks the eggs safely.
- Remove the saucepan from the heat. Stir in the vanilla extract and ground nutmeg.
- If making the alcoholic version, stir in your choice of bourbon, rum, or brandy now.
- Pour the eggnog through a fine-mesh sieve into a clean bowl to remove any small cooked bits.
- Cover the bowl and chill the eggnog in the refrigerator for at least 4 hours, or preferably overnight, until it is very cold and thick.
- Serve the rich velvety eggnog cold, garnished with freshly grated nutmeg.
Notes
- For a non-alcoholic easy holiday recipe, simply omit the spirits in step 6.
- If you prefer a thinner consistency, reduce the heavy cream slightly or add a splash more milk before chilling.
- For the creamiest homemade eggnog, use high-quality, full-fat dairy products.
- You can substitute maple syrup for granulated sugar if you prefer a different sweetness profile.
Nutrition
- Serving Size: 1 cup
- Calories: 450
- Sugar: 35
- Sodium: 110
- Fat: 30
- Saturated Fat: 18
- Unsaturated Fat: 12
- Trans Fat: 1
- Carbohydrates: 38
- Fiber: 0
- Protein: 10
- Cholesterol: 250