
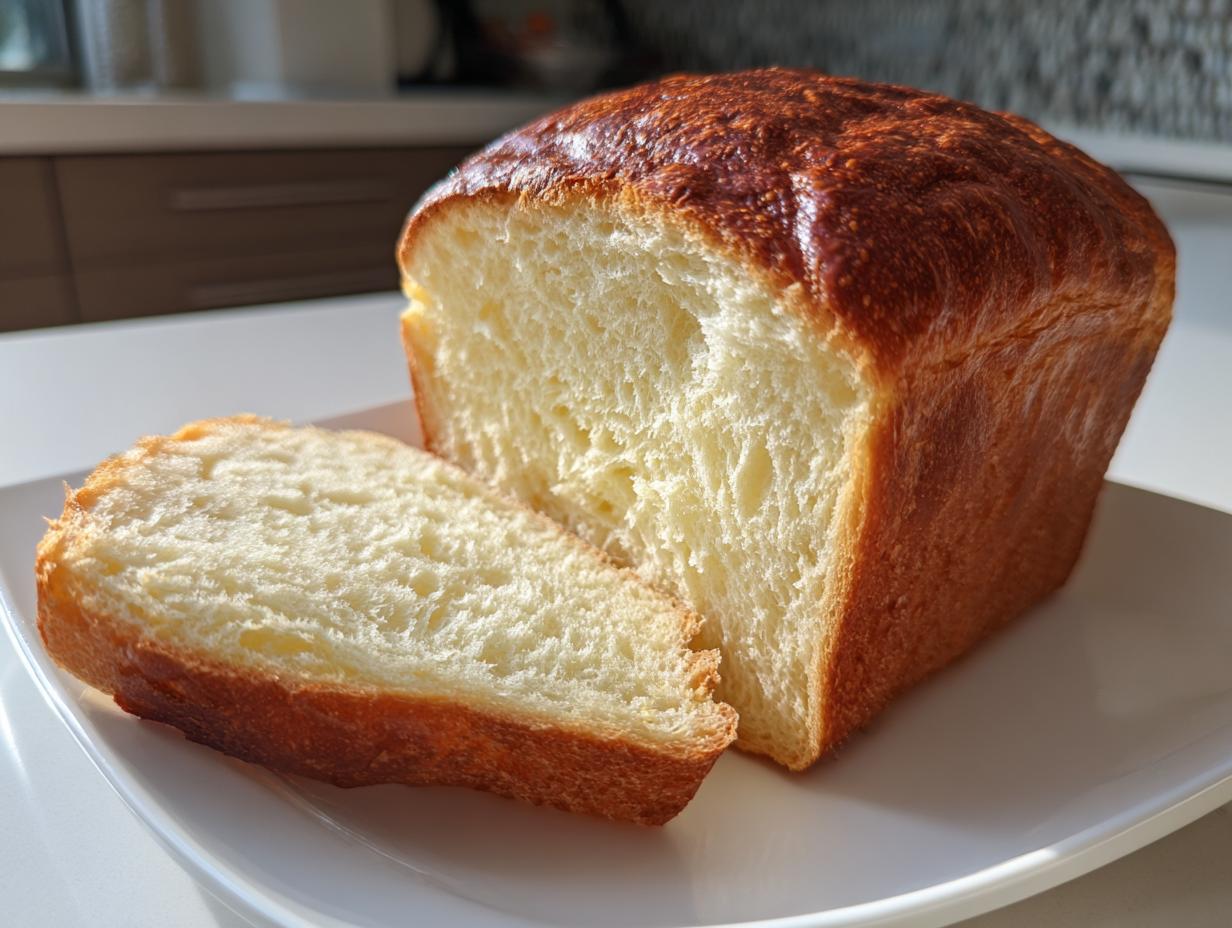
Oh my goodness, are you ready to experience bread that practically floats off the counter? I remember when I first tried to master the cloud-like texture of a real bakery loaf right here in my New England kitchen. It seemed impossible! But trust me, once you unlock this technique, your baking life changes forever. This recipe for authentic japanese milk bread uses the Yudane method, which is my absolute secret weapon for achieving unparalleled fluffiness and a loaf that stays impossibly soft for days. When I finally got that first perfect, pillowy slice, it felt like I unlocked a major culinary superpower. That’s the joy I want to share with you—demystifying the tough stuff so you can bake with confidence!
- Why This Authentic Japanese Milk Bread Recipe Delivers Fluffy Perfection
- Gathering Ingredients for Your Softest Homemade Bread
- Step-by-Step Instructions for Incredible Japanese Milk Bread
- Tips for Success When Making Japanese Milk Bread at Home
- Variations for Your Japanese Milk Bread Dough
- Serving Suggestions for This Buttery Airy Loaf
- Storage and Reheating Instructions for Japanese Milk Bread
- Frequently Asked Questions About Shokupan Recipe
- Nutritional Estimates for Your Japanese Milk Bread Loaf
- Share Your Pillowy Bread Loaf Creations
Why This Authentic Japanese Milk Bread Recipe Delivers Fluffy Perfection
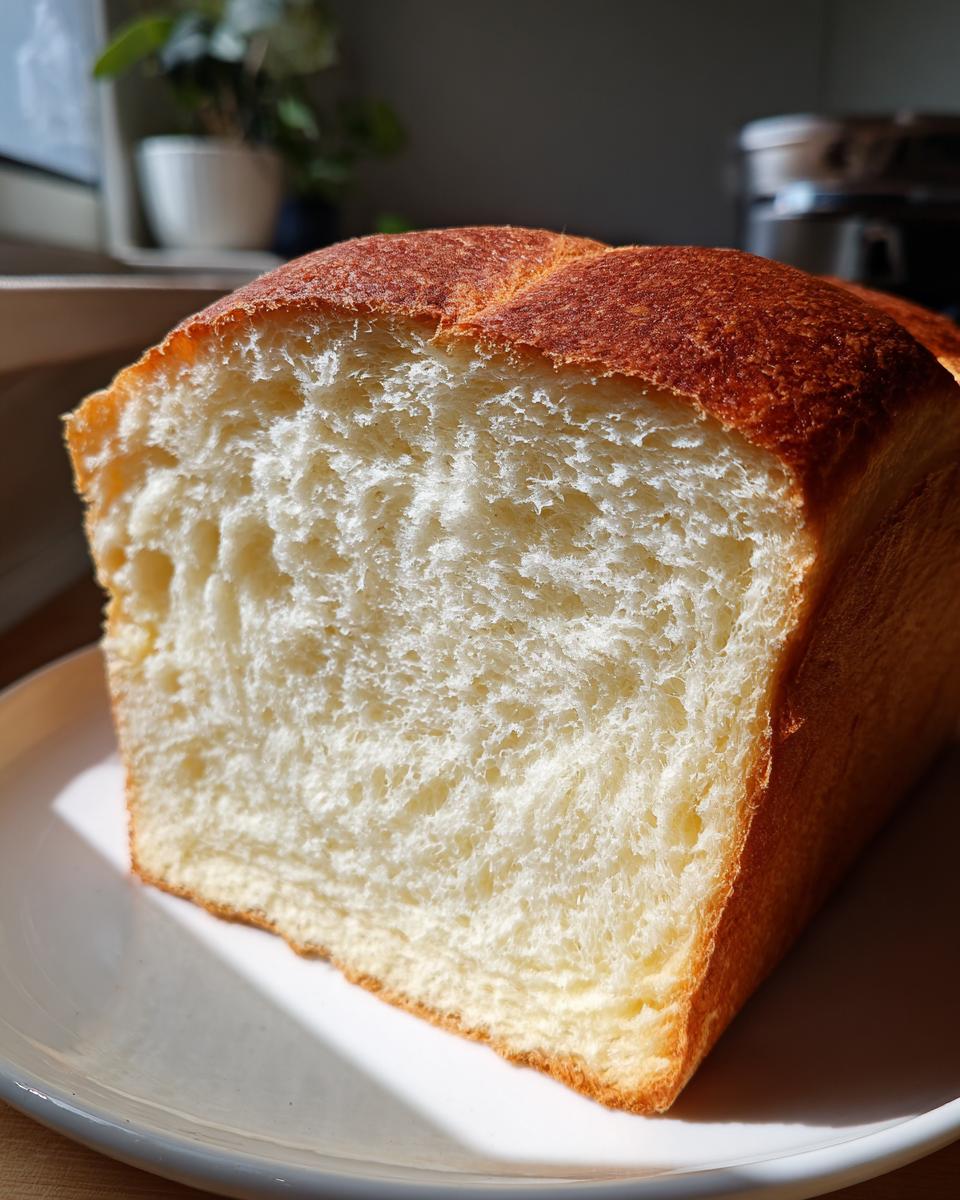
I know you want bread that melts in your mouth, and that’s exactly what we’re making! Honestly, a lot of store-bought bread just can’t compete with the freshness here. My goal is to give you that pillowy bread loaf result every single time. Because I write all my recipes to be incredibly accessible—just like I promised on my About page—you’ll find this bread is easier than you think.
Here’s why this particular version of japanese milk bread is a surefire winner for texture and staying power, even days later:
- It uses the incredible Yudane method, which pre-gelatinizes some of the flour.
- The dough is kneaded properly to build a strong, stretchy gluten network.
- We use rich ingredients like whole milk and butter to provide that silky mouthfeel.
The Magic of the Yudane Bread Method
Okay, this is the big secret for any japanese milk bread that boasts amazing softness—it’s the Yudane! We take a small bit of flour and water and actually cook it into a thick paste before mixing it in. This cooked paste acts like a sponge in the dough. It lets the flour absorb way more water than it normally could. Because the water is locked up like that, the bread stays exceptionally moist and fluffy for days longer than a standard loaf. It’s a game-changer; trust me!
Achieving That Buttery Airy Loaf Texture
While the Yudane handles the moisture, we need structure for that beautiful rise. That means we rely on good quality butter, cold milk, and that one egg to give us richness. The real key, though, is the time spent kneading. We want the dough to be smooth, strong, and elastic. You’ll know you’re done when you can stretch a small piece thin enough to see light through it without tearing—that’s the famous windowpane test needed for this spectacular japanese milk bread.
Gathering Ingredients for Your Softest Homemade Bread
We’re getting down to brass tacks now! Since those fantastic Pinterest results all show how important this bread is, we need to be meticulous with our ingredients to ensure we hit that perfect softness. Don’t panic; the list looks long because we separate the Yudane, but the main dough comes together fast once you have that paste ready. Precision here is what separates a good home loaf from true Japanese bakery style bread!
Ingredients for the Yudane Paste
For this magical moisture-locking component, you only need two things. I measure these out first, even before getting my mixer bowls ready. You absolutely must use Bread Flour for this part—don’t substitute!
- 100g Bread Flour
- 100ml Water
Ingredients for the Main Japanese Milk Bread Dough
Now for the main dough ingredients. These need careful attention to temperature! Remember, we want the milk to be cold because that helps control everything once it mixes with the warm Yudane paste. And please, make sure that egg has been sitting out for about an hour so it’s room temperature.
- 350g Bread Flour
- 50g Granulated Sugar
- 1 teaspoon Instant Dry Yeast
- 1 teaspoon Salt
- 100ml Whole Milk (must be cold!)
- 50g Unsalted Butter (softened, not melted!)
- 1 Large Egg (room temperature)
Step-by-Step Instructions for Incredible Japanese Milk Bread
Alright, let’s get baking! This is where the magic really happens. We’re not just dumping stuff into a bowl and hoping for the best; we are following a precise, tried-and-true path to this unbelievably fluffy white bread. If you’ve ever felt intimidated by these airy loaves, just follow my lead. We’ll start with the Yudane, since that needs dedicated chilling time. If you’re looking for other enriched doughs, you can check out my challah recipe, but for this, patience with the first step is non-negotiable!
Preparing and Cooling the Yudane for Your Japanese Milk Bread
First things first: let’s get that Yudane paste cooked up! Whisk your small amount of bread flour and water right in a saucepan until it looks smooth. Cook that over low heat. You have to stir it constantly—I mean it, constantly!—until it gets thick, kind of like pudding or very thick gravy. Pull it off the heat right away. Then, the crucial part: press plastic wrap directly onto the surface of that paste. Toss it in the fridge for at least two hours, but honestly, overnight is even better. We need it completely cold before the next steps.
Mixing and Kneading the Fluffy White Bread Dough
Once that Yudane is chilled solid, we build the real dough. Get your stand mixer ready! Toss in the main batch of bread flour, sugar, yeast, and salt, and give it a quick mix on low just to combine. Now, add the cold milk, your softened butter, the room temperature egg, and that glorious, fully cooled Yudane paste we made earlier. Start mixing on low until a shaggy blob forms. The real work begins when you bump it up to medium-low speed. You need to knead this dough for a solid 10 to 15 minutes. Keep going until it’s glossy, smooth, and definitely passes the windowpane test. That stretchy gluten is what gives this japanese milk bread its incredible structure!

Proofing and Shaping Your Pillowy Bread Loaf
Time for the waiting game, but this is how we develop flavor and air! Transfer your super smooth dough into a lightly oiled bowl, cover it up, and let it happily proof somewhere warm until it doubles—that usually takes an hour, maybe a bit more. Once it’s doubled, gently punch it down; be tender with it! Divide that dough into three equal pieces. Roll each piece into a tight little ball, cover them, and let them take a little break for 15 minutes—think of it as a quick breather for the gluten. Next, roll each ball out into an oval, roll those ovals up tightly into logs, and place those three logs side-by-side, seam-down, in your greased 9×5 inch loaf pan. Cover it again and let it rise until it’s nearly doubled and peeking about an inch over the pan rim. While it’s doing this final rise, go ahead and preheat your oven to 350°F (175°C) for the last 20 minutes!
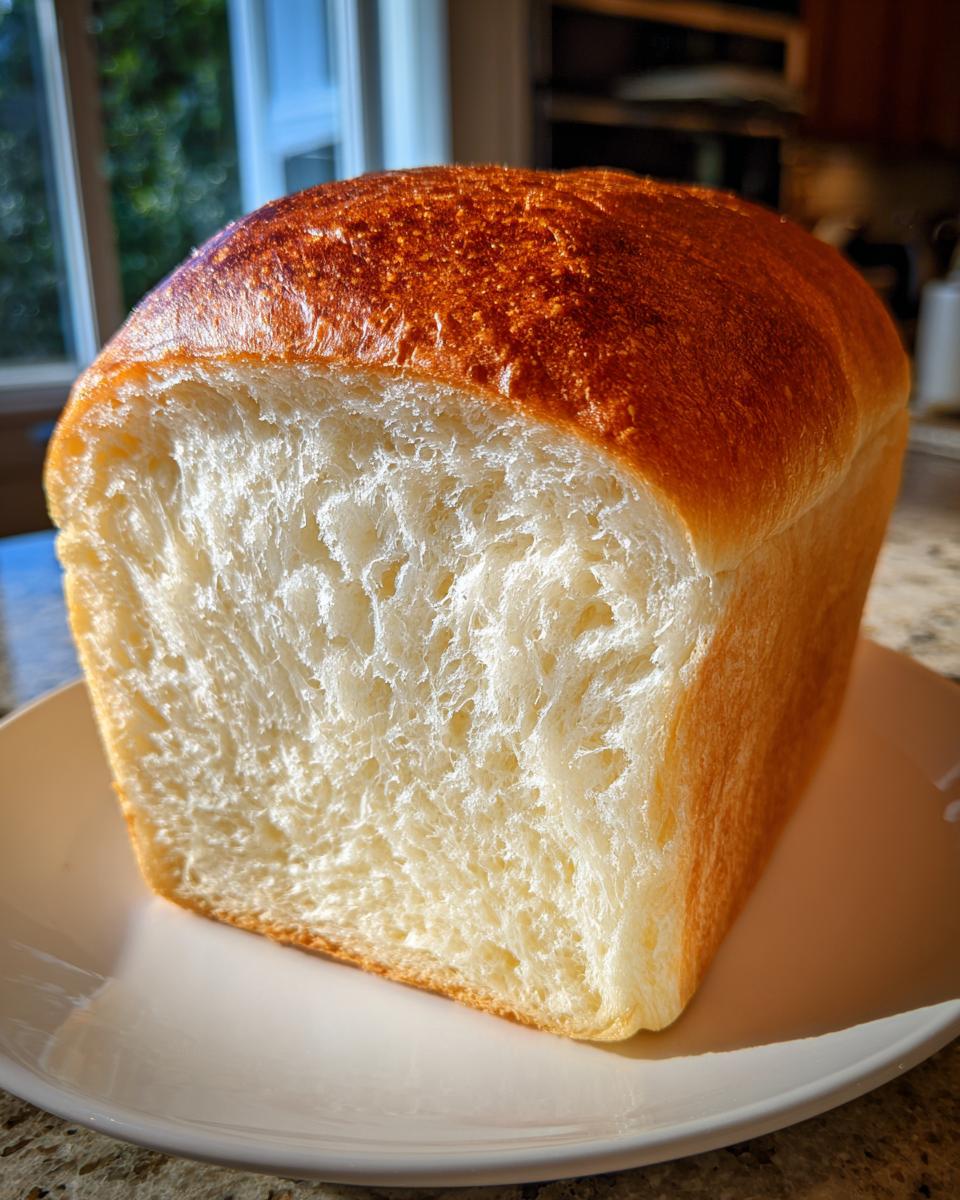
Baking and Cooling the Authentic Japanese Bread
It’s showtime for your japanese milk bread! Slide that beautiful, puffy pan into your preheated 350°F oven and bake it for about 30 to 35 minutes. You’re looking for a nice golden brown top and an internal temperature of 200°F (93°C). If you notice the top getting dark too fast—and this happens—just loosely drape a piece of foil over it for the remaining time. As soon as it’s done, pull it out immediately! Don’t let it sit in that hot pan. Carefully turn the loaf out onto a wire rack to cool completely before you even think about slicing. Cutting it while hot ruins the texture; we need that cooling time to set that airy structure perfectly. For reference on where I learned dough techniques, I always look at great bakers like the one behind this fantastic resource.
Tips for Success When Making Japanese Milk Bread at Home
Now that you’ve nailed the mixing and proofing, I want to give you a few pro pointers that make the difference between a good loaf and truly breathtaking results. If you’ve ever ended up with slightly denser results than you hoped for, it usually comes down to two things: temperature control and being too rough with the dough at the end. Check out my thoughts on pumpkin bread; even simple loaves benefit from careful handling!
Ingredient Temperature Matters for Your Japanese Milk Bread
This is subtle but so important for this japanese milk bread! Remember how we cooked that Yudane paste? That makes the dough warm initially. To keep the yeast activity balanced and prevent everything from over-proofing too fast, we absolutely need the milk to go in *cold*. Conversely, the egg should be room temperature. If the egg is cold, it can seize up the softened butter and create little pockets of fat that don’t incorporate well. Little tricks like these keep our Shokupan airy!
Handling the Soft Dough Gently
Once that long kneading session is done and your dough is that amazing, stretchy pillow, you need to transition into a gentle touch. When deflating and dividing, don’t punch it down hard! We worked so hard to build those air pockets in the kneading stage. When you’re shaping those three little logs to go into the pan, try to keep the surface outside as smooth as possible. If you tear the surface skin while shaping, that’s where the loaf might split unevenly while baking, ruining that perfect, airy dome we want.
Variations for Your Japanese Milk Bread Dough
Once you master the loaf—and I know you will, because the Yudane makes it so much easier to get that japanese milk bread right—you’re going to want to experiment! The beauty of an enriched dough like this is how adaptable it is. We used the three-log shape for that classic tall loaf, but you have so many other options for dinner or breakfast!
If you love the look of individual buns rather than slicing a loaf, that’s a super simple pivot. I do this when I’m making things like sticky buns or sweet rolls, and the dough works perfectly. For loaf pan alternatives, consider trying a square 8×8 pan or even baking them as soft sweet rolls. Find my thoughts on cinnamon rolls for inspiration on how to arrange buns!
Making Milk Bread Rolls Baking
If you want rolls instead of a loaf, that’s easy! Just skip the three-log shaping step. After the first rise and resting, divide the dough into 9 equal pieces instead of 3. Shape each piece into a smooth ball, tucking the edges underneath tightly. Place them close together in a greased 9×5 pan. They will bake up together, but you can pull them apart like perfect dinner rolls. Honestly, check out this rolls recipe for visual guidance on that shaping! You’ll love having these individual portions of fluffy goodness.
Serving Suggestions for This Buttery Airy Loaf
Seriously, the hardest part of this whole process is letting this loaf cool before you slice into it. But once it’s cool—oh my gosh! Because this bread is already slightly sweet and packed with milk and butter flavor, you don’t need to load it up with heavy toppings. In fact, doing so would mask that incredible soft texture we worked so hard to achieve!
We love to keep it simple around here because the bread itself is the star. My favorite way is just slicing a thick piece and spreading it with some good quality, slightly salted butter. Let that butter melt right into the crumb; it’s heaven.
For something a little sweeter, try it toasted lightly—just until the outside catches a little color—and topped with a spoonful of homemade apple butter. Wow! The warm spices in the butter mix perfectly with the milky sweetness of the bread. It’s fantastic for a weekend brunch.
And don’t forget savory uses! Because this bread is sturdy yet tender, it makes the most divine toast points for soaking up egg yolks. It’s also surprisingly wonderful for delicate little tea sandwiches, far superior to standard slicing bread. Just think: a simple cream cheese and cucumber sandwich tastes gourmet when served on this fluffy white bread!
Storage and Reheating Instructions for Japanese Milk Bread
Okay, you’ve made the most beautiful, soft loaf, and now you want it to last! The Yudane method is truly amazing because it keeps this japanese milk bread feeling fresh longer than almost any other dough. But you still need to treat it right.
When it comes to storage, you need to slice it only as much as you plan to eat that day. Never slice the whole thing at once! Wrap the remaining loaf tightly in plastic wrap—I mean really seal it up so air can’t get in—and keep it on the counter at room temperature, not in the fridge. The fridge dries bread out way too fast, even this amazing loaf.
If you have leftovers after a few days, don’t toss them! Reheating is the ticket. You can gently wrap slices in a damp paper towel and microwave them for just 5 to 10 seconds. They come back impossibly soft! Or, for a crispier exterior, pop them in a toaster oven. For more advanced tips on keeping that moisture locked in, check out helpful advice like what they share over here.
Frequently Asked Questions About Shokupan Recipe
I get so many messages asking about the little details of making this bread, and that’s wonderful! It means you’re getting ready to bake. Troubleshooting is part of the fun, and I want you to feel totally confident tackling this shokupan recipe. Here are some of the most common things folks ask me!
Can I use the Tangzhong method instead of Yudane for this Japanese Milk Bread?
Yes, absolutely! Don’t get hung up on the names. While I prefer the precision of Yudane (using just water for the paste), Tangzhong (using milk or water) achieves the exact same goal for your japanese milk bread. It’s all about creating that cooked starch paste that traps moisture. So, yes, feel free to swap them if you see a Tangzhong tutorial you like better!
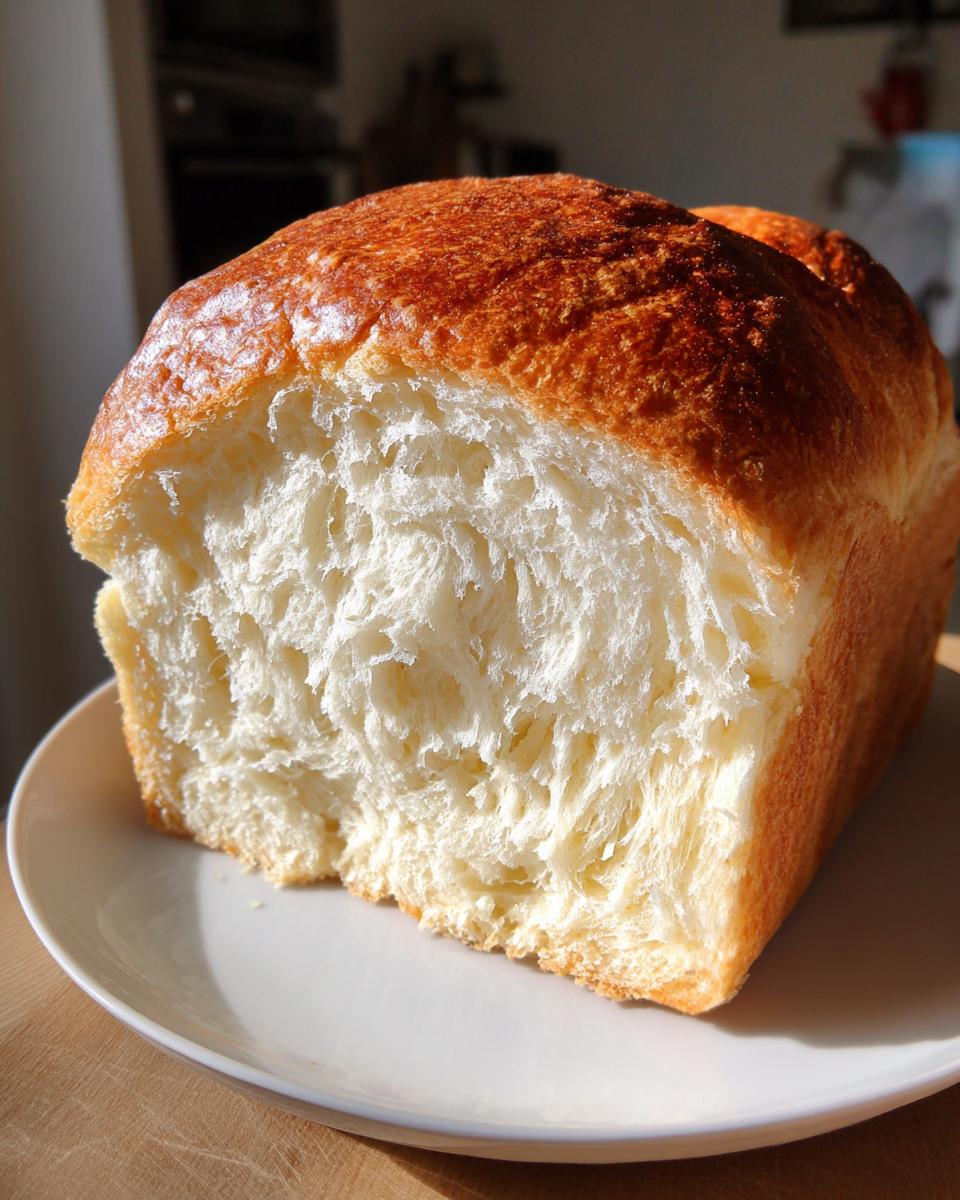
Why is my homemade bread not as soft as bakery style bread?
Usually, if your homemade loaf isn’t as soft as the Japanese bakery style bread you’re dreaming of, it comes down to two things. First: kneading! Did you get that perfect windowpane structure? If the gluten isn’t fully developed, the bread will be crumbly, not pillowy. Second, check your cooling. If you wrap it too tightly or stick it in the fridge too soon, you kill that amazing softness the Yudane built. Remember, this loaf is meant to stay fresh longer because of that paste!
Is this an easy milk bread recipe for beginners?
That’s a great question, and thank you for asking! While the process involves two main stages—making the paste and then kneading—I promise it’s completely achievable. Remember, here at my site, my entire mission is to demystify baking for everyone, no matter your skill level. The Yudane method seems complex, but follow my steps exactly, and you’ll end up with an incredibly soft homemade bread that rivals anything you buy.
If you have tried this recipe and it worked beautifully, please feel free to leave a comment down below, or check out my other savory recipes when you’re done with bread for the day!
Nutritional Estimates for Your Japanese Milk Bread Loaf
Now, I know that some of you are like me, and while we love rich, buttery bread, we also need to keep track of what we’re eating. If you’re following a specific diet plan, this is important information! However, I have to jump in here with a little disclaimer, because I mix all my recipes in my own kitchen with my own favorite brands.
These numbers are my best estimates based on standard ingredient calculations for one slice of the loaf. They are not hard and fast rules, and they might change slightly based on the exact butter or milk you use. Also, if you’re trying to stick to a strict pumpkin bread replacement while dieting, remember this is a richer loaf! Consider enjoying it as a special treat rather than an everyday staple, or simply have a smaller slice.
Based on the recipe provided, here is the likely breakdown per serving:
- Serving Size: 1 slice
- Calories: 180
- Sugar: 8g
- Sodium: 150mg
- Fat: 5g
- Saturated Fat: 3g
- Unsaturated Fat: 2g
- Trans Fat: 0g
- Carbohydrates: 28g
- Fiber: 1g
- Protein: 5g
- Cholesterol: 25mg
Share Your Pillowy Bread Loaf Creations
Oh, I just cannot wait to hear about your baking adventures! Seeing your beautiful, golden loaves of japanese milk bread is genuinely the best part of running this little corner of the internet. Seriously, I live for the triumph you feel when you pull that perfect, airy creation out of the oven!
When you’ve finally let your loaf cool (that’s the hardest part, I know!), please come back here and leave a star rating for the recipe. Even a quick note about how the Yudane worked for you or what you served it with helps so much. It lets me know I’m hitting the mark with these super detailed tutorials!
And please, please, please share photos! Tag me when you post on social media—I love seeing how you finish off your buttery airy loaf. Whether you toast it thick or slice it thin for midnight snacks, I want to see it! If you have absolutely any lingering questions after baking, or if you found a new favorite way to serve this, don’t hesitate to reach out through the contact page. Let’s keep this baking community going strong!
PrintShokupan: The Softest Japanese Milk Bread Loaf

Make authentic Japanese Milk Bread, or Shokupan, using the Yudane method for an incredibly soft, fluffy, and buttery loaf that stays fresh for days.
- Prep Time: 45 min
- Cook Time: 35 min
- Total Time: 185 min
- Yield: 1 loaf 1x
- Category: Bread
- Method: Baking
- Cuisine: Japanese
- Diet: Vegetarian
Ingredients
- 100g Bread Flour (for Yudane)
- 100ml Water (for Yudane)
- 350g Bread Flour (for dough)
- 50g Granulated Sugar
- 1 teaspoon Instant Dry Yeast
- 1 teaspoon Salt
- 100ml Whole Milk (cold)
- 50g Unsalted Butter (softened)
- 1 Large Egg (room temperature)
Instructions
- Prepare the Yudane: Whisk the 100g bread flour and 100ml water in a small saucepan until smooth. Cook over low heat, stirring constantly, until the mixture thickens into a thick paste (about 160°F or 71°C). Remove from heat, cover with plastic wrap directly on the surface, and cool completely in the refrigerator (at least 2 hours or overnight).
- Mix Dry Ingredients: In the bowl of a stand mixer, combine the 350g bread flour, sugar, yeast, and salt. Mix briefly on low speed.
- Add Wet Ingredients: Add the cold milk, softened butter, egg, and the cooled Yudane paste to the dry ingredients.
- Knead the Dough: Mix on low speed until a shaggy dough forms. Increase the speed to medium-low and knead for 10 to 15 minutes. The dough should become very smooth, elastic, and pass the windowpane test. A stand mixer is helpful here.
- First Proof: Place the dough in a lightly oiled bowl, cover, and let it rise in a warm place until doubled in size, about 60 to 90 minutes.
- Divide and Shape: Gently deflate the dough. Divide it into three equal pieces. Shape each piece into a tight ball. Cover and let rest for 15 minutes.
- Final Shaping: Roll each ball into an oval shape. Roll each oval tightly into a log. Place the three logs side-by-side, seam-side down, into a greased 9×5 inch loaf pan.
- Second Proof: Cover the pan and let the dough rise again until it has nearly doubled and crests about 1 inch over the top of the pan, about 45 to 75 minutes. Preheat your oven to 350°F (175°C) during the last 20 minutes of the rise.
- Bake: Bake for 30 to 35 minutes, or until the top is golden brown and the internal temperature reaches 200°F (93°C). If the top browns too quickly, loosely tent it with foil.
- Cool: Immediately remove the bread from the pan and cool completely on a wire rack before slicing. This bread is best enjoyed the day it is baked, but the Yudane keeps it soft for several days, unlike many meal delivery company breads.
Notes
- For an extra shiny crust, brush the top of the loaf with an egg wash (1 egg beaten with 1 teaspoon water) just before baking.
- If you are looking for a recipe that supports weight loss programs, this bread is rich, so enjoy it in moderation.
- This recipe produces a bread that stays fresh longer, making it a great alternative to store-bought options.
Nutrition
- Serving Size: 1 slice
- Calories: 180
- Sugar: 8
- Sodium: 150
- Fat: 5
- Saturated Fat: 3
- Unsaturated Fat: 2
- Trans Fat: 0
- Carbohydrates: 28
- Fiber: 1
- Protein: 5
- Cholesterol: 25