
Okay, let’s talk about the baking myth that needs busting: meringue cookies. I know, I know, they look super delicate and fussy, like something only a pastry chef can tackle. I used to think that way too, back when I was juggling corporate events and dreaming of a simpler life in the kitchen! But trust me when I say that these melt-in-your-mouth meringue cookies are shockingly simple. They are light, airy, and you are going to master them. My whole mission here at Bliss Batter is taking those recipes that intimidate people—like making something out of just egg whites and sugar—and making them totally accessible with foolproof techniques. I poured years of testing into this process so you can feel confident stepping into your kitchen, just like I learned from my grandmother, which you can read more about on the About Us page. Forget the stress; we are making perfect, crisp, airy meringue cookies today.
- Why This Meringue Cookies Recipe Guarantees Success
- Gathering Ingredients for Your Meringue Cookies
- Step-by-Step Instructions to Make Meringue Cookies
- Tips for Perfect Meringue Cookies Every Time
- Creative Variations for Your Meringue Cookies
- Storing Homemade Meringue Cookies
- Frequently Asked Questions About Meringue Cookies
- Estimated Nutritional Snapshot for Meringue Cookies
- Share Your Perfect Meringue Cookies Creations
Why This Meringue Cookies Recipe Guarantees Success
I wanted to share a recipe that truly works, even if you’re nervous about whipping egg whites. I’ve tested these meringue cookies relentlessly here in my own kitchen so you don’t have to worry about failure! This recipe is proof that you can create elegant, light desserts without needing years of professional training. Check out all my favorite dessert recipes on the site! See all my dessert recipes here.
- It’s written specifically for the home baker—clear, step-by-step, and no fuss.
- Every stage, from the peak formation to the cool-down, has been precisely timed.
- It delivers a crisp shell with that wonderful, soft center we all chase.
Foolproof Techniques for Perfect Meringue Cookies
We focus on the basics! First, the bowl has to be immaculate—no grease or water allowed, seriously. Second, we add the sugar slowly, almost teasingly, one spoonful at a time. These two steps are what prevent collapse and give you that gorgeous, stable structure for your meringue cookies.
A Naturally Gluten Free Dessert Option
One of the best parts about these beautiful little clouds is that they are naturally gluten free! You don’t need any specialty flours or complicated swaps. They are just egg whites and sugar, making them a phenomenal, light, and airy treat for everyone at the table. Mastering these meringue cookies should be on everyone’s baking bucket list.
Gathering Ingredients for Your Meringue Cookies
Okay, gearing up to make these amazing meringue cookies starts with gathering your essentials. You only need a few things, but boy, the preparation on those egg whites is everything! Remember, precision matters here, even though the end result feels like magic. Don’t skimp on prep work for the fluffiest bites!
Ingredient Clarity and Preparation Notes
The most critical thing you must do is grab those four large egg whites and let them sit out on the counter until they reach room temperature. Cold whites just won’t whip up properly, and we need volume! Also, don’t skip the cream of tartar; it’s our secret weapon for stabilizing everything beautifully. If you’re feeling adventurous and want to add a little color or a burst of fruit flavor, you can gently fold in a teaspoon of Jello powder right before the final mixing stage. It’s a fun trick for vibrant, tasty meringue cookies, but make sure you check out those colorful Jello meringue recipes for inspiration! See how others are adding color.
Step-by-Step Instructions to Make Meringue Cookies
Alright, here we go—the moment of truth! This is where the science meets the magic, and I promise these instructions will get you the most stunning, melt-in-your-mouth meringue cookies you’ve ever made. Don’t rush anything here, especially that sugar addition. Think of it as a slow, steady relationship building between the eggs and the sweet stuff!
Whipping the Egg Whites to Stiff Peaks
First things first: dump those room-temperature egg whites (plus the salt and cream of tartar) into your impeccably clean stand mixer bowl. Start whipping on medium speed. You want to see them go from clear liquid to foamy, and then eventually soft peaks—they’ll look like fluffy clouds starting to form. Now, this next part takes patience! Start raining in that sugar, just a tablespoon at a time, waiting about 30 seconds between each addition. Seriously, don’t dump it all in at once! Keep that mixer running on high speed until the meringue is stunningly stiff and glossy. How do you know it’s perfect? Pinch a little bit between your thumb and forefinger. If you feel *any* grit, it means you still have undissolved sugar, so keep whipping! If it feels perfectly smooth? That’s stiff peak heaven, my friend.
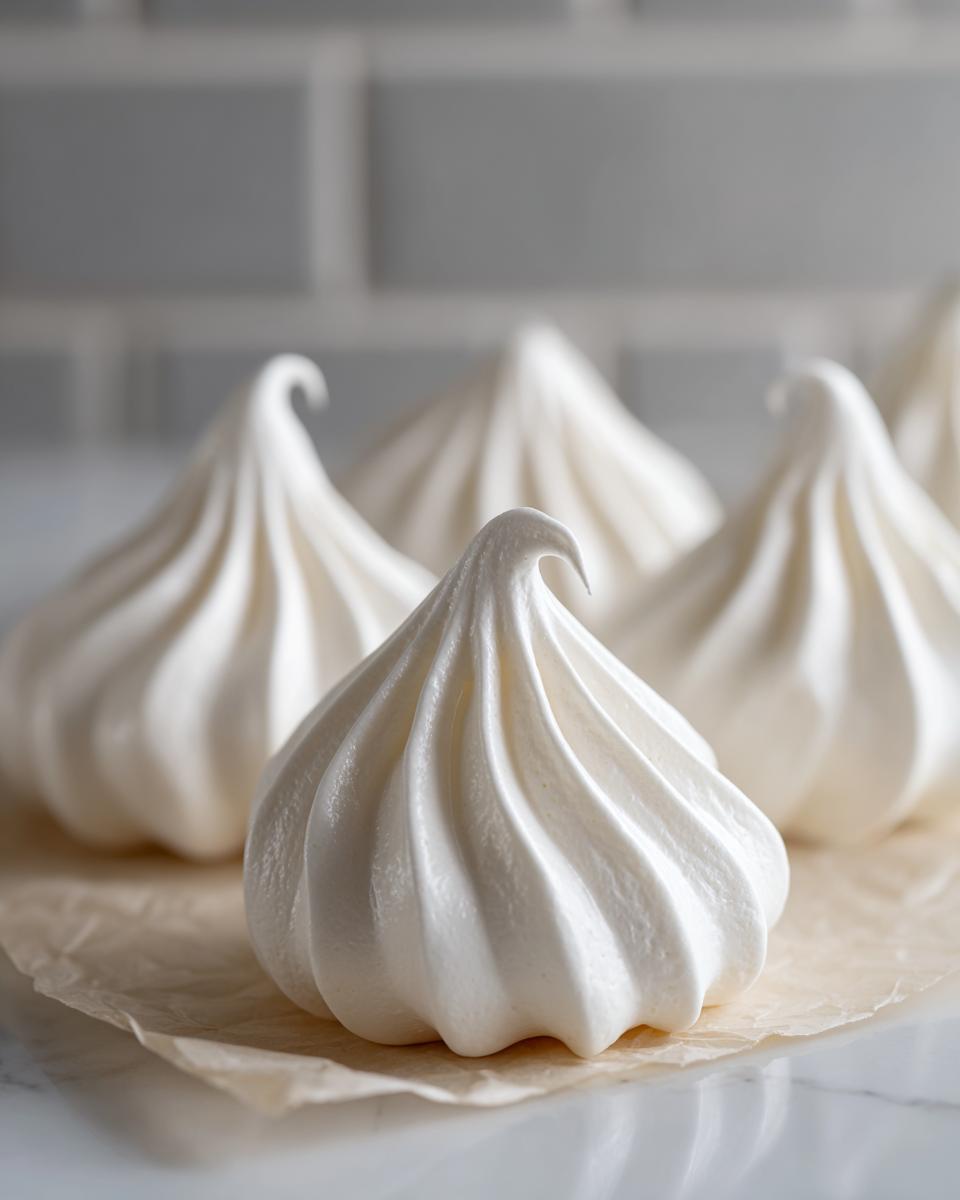
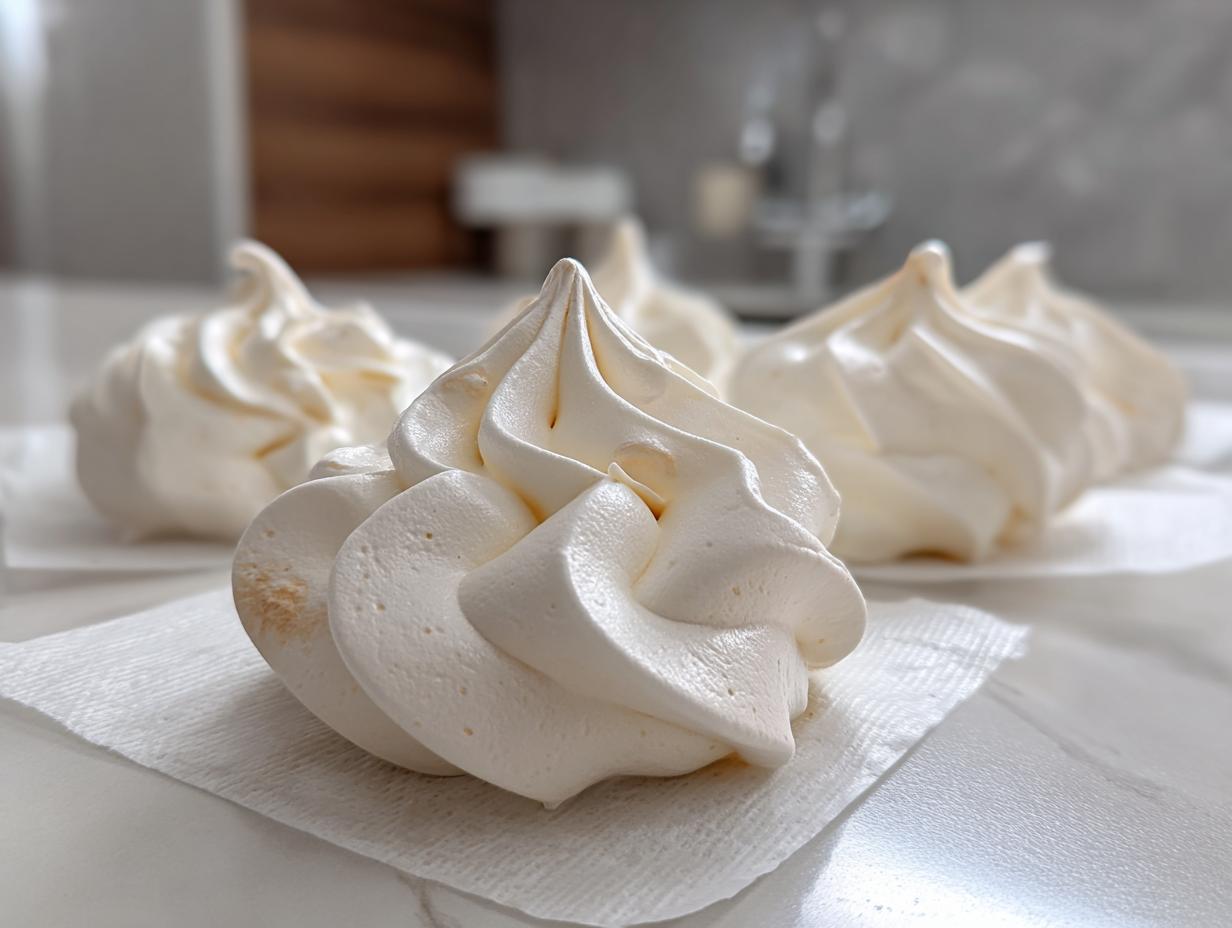
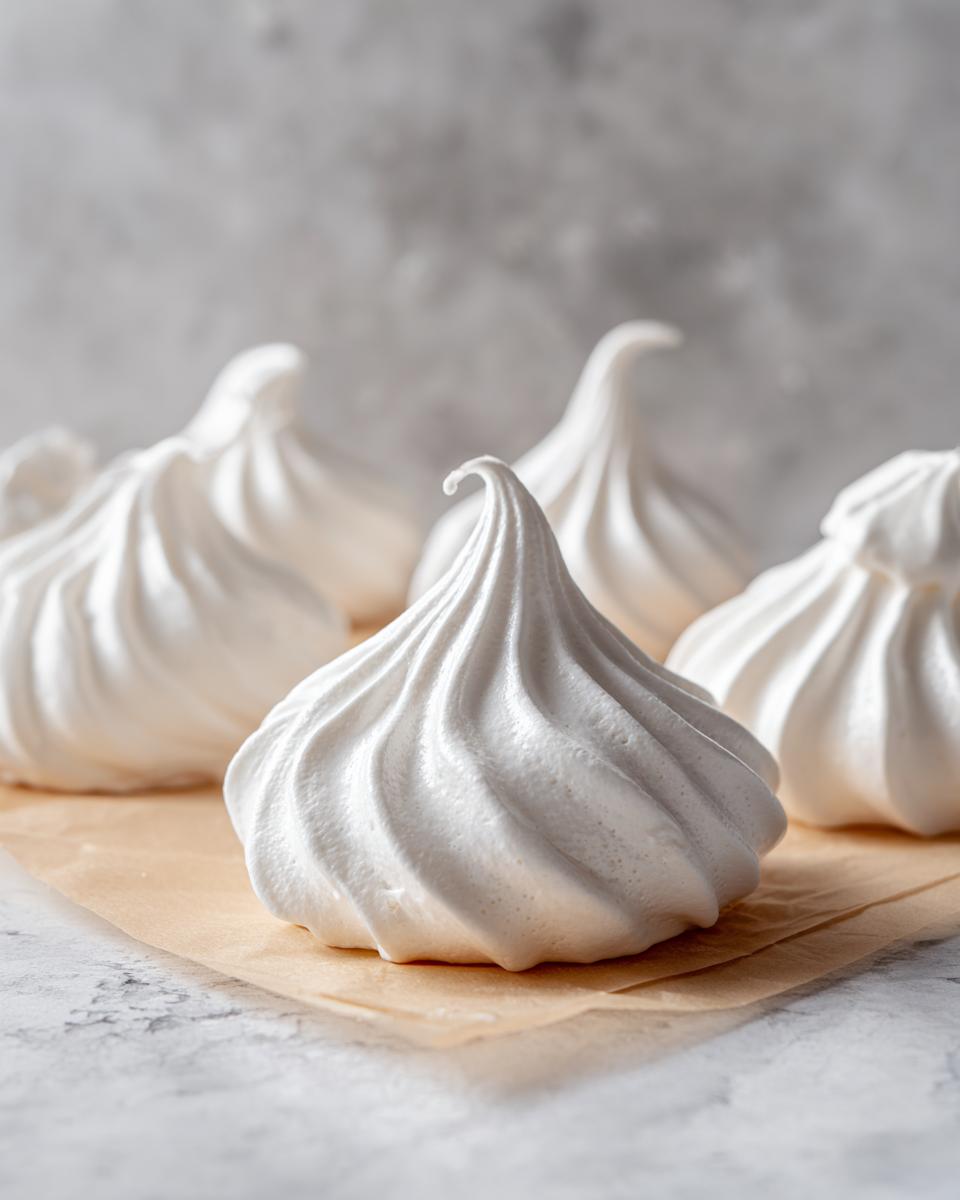
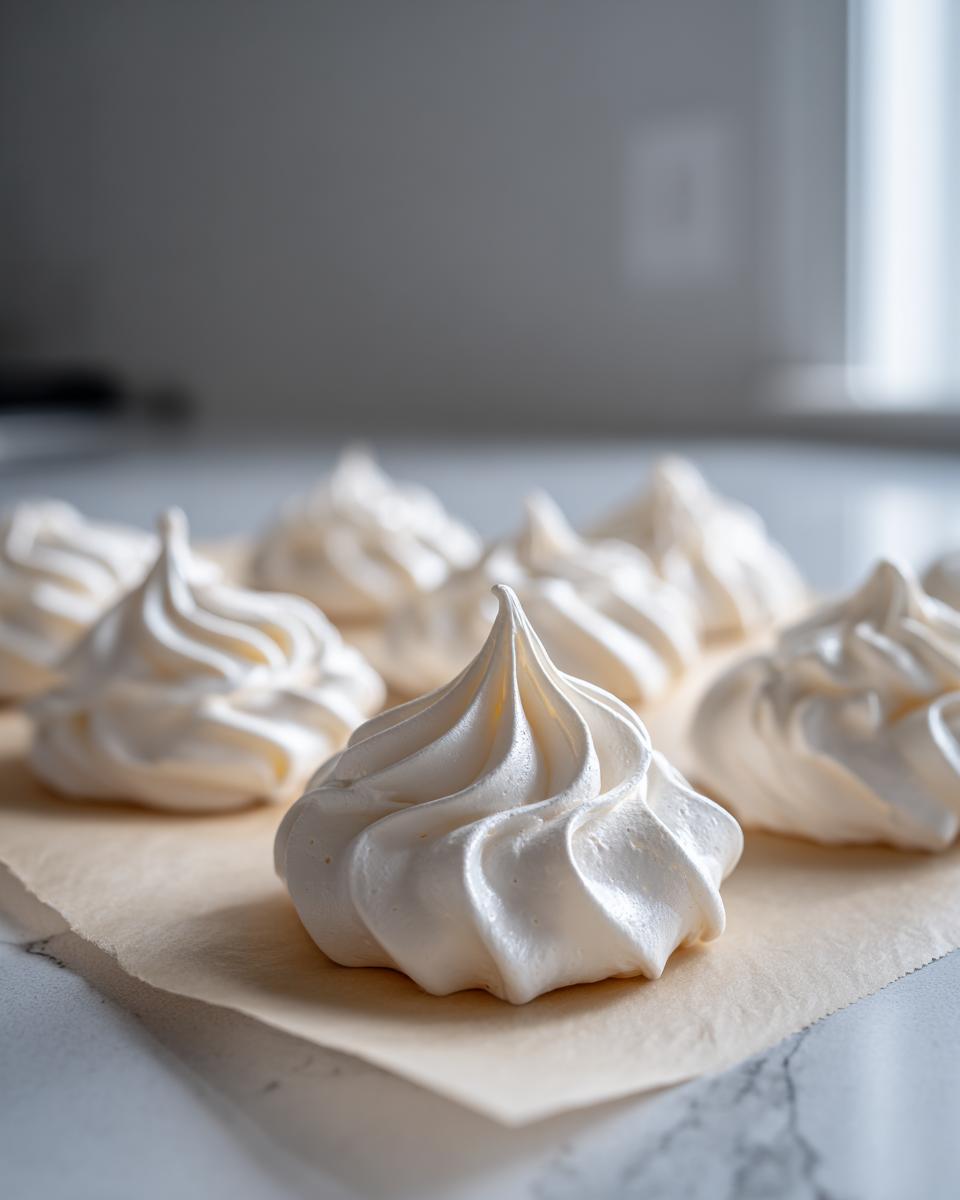
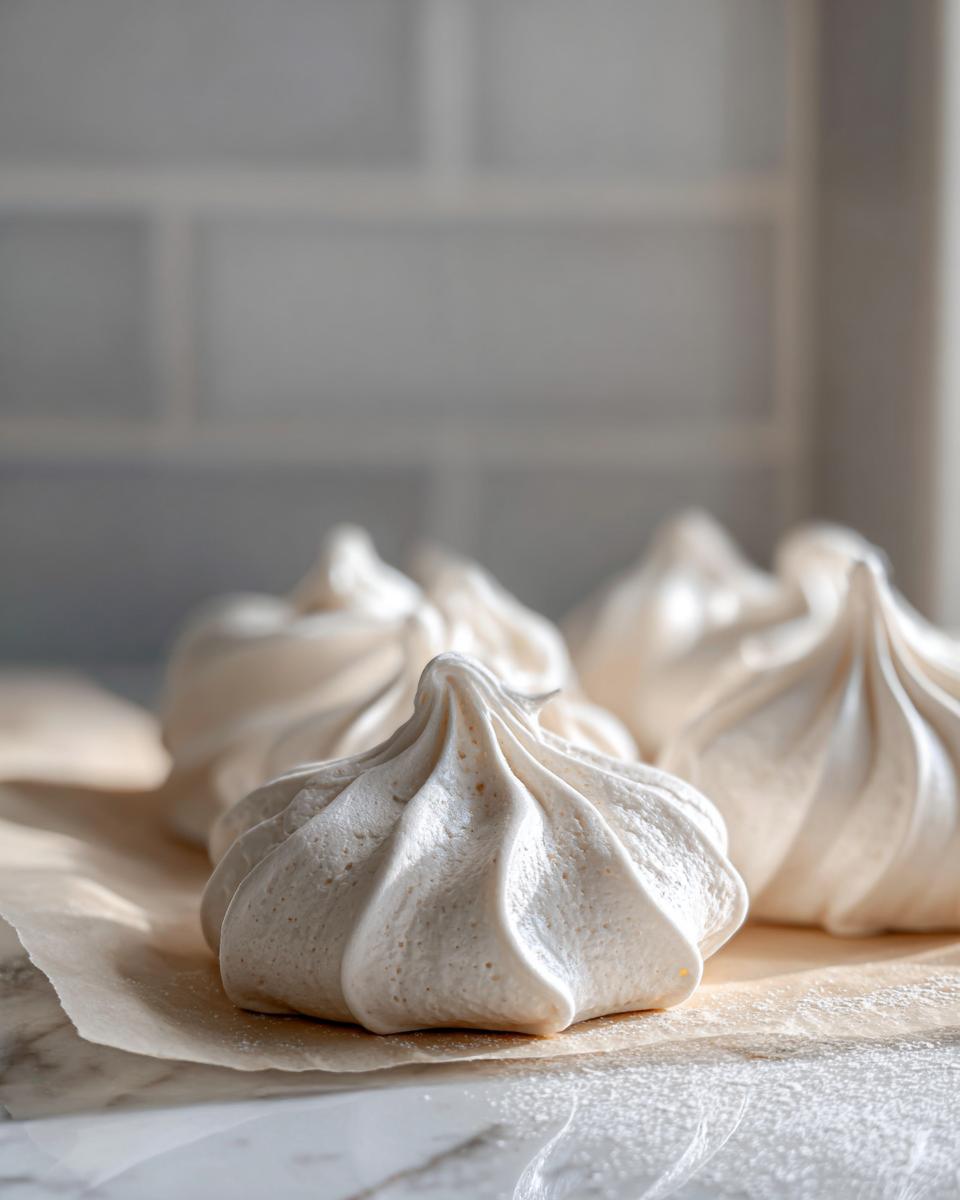
Piping and Baking Your Meringue Cookies
Once you hit that stiff peak stage, beat in your vanilla quickly and gently. Now, get that meringue into your piping bag fitted with a star tip if you want fancy swirls, or just grab two spoons if you want rustic, cute little dollops—I do both, honestly! Pipe or spoon your meringue cookies onto parchment-lined sheets, leaving about an inch of space around each one so they have room to breathe. Pop them into your preheated 225°F oven. Bake them for about 60 to 75 minutes. You’ll know they are ready because they should look dry and lift cleanly off the parchment paper without sticking or tearing at all. If you’re ever looking for other ways to use your oven patiently, perhaps check out some of my slow-baked favorites, like my spiced chai cookies!
The Crucial Cooling Process for Crisp Meringue Cookies
This step is non-negotiable if you want that signature crisp exterior! When that baking time is up, I turn the oven completely off. Do not open the door yet! Crack it open just a tiny bit—just a sliver, maybe stick a wooden spoon in the door jam. You need to let those meringue cookies just hang out in the residual, gentle heat for at least an hour, but honestly, letting them cool down completely overnight inside the turned-off oven is my favorite trick. This slow, ambient drying process is what locks in the crispness and prevents them from getting sticky or weeping later. It’s pure patience paying off!
Tips for Perfect Meringue Cookies Every Time
Even though these meringue cookies are incredibly easy, they do have a couple of tiny little quirks that can send them sideways if you aren’t prepared. Learning these expert little tricks is what separates a good batch from an absolutely perfect, flawless batch. Since I started this baking journey, I’ve learned that the kitchen is sometimes about being meticulous, and sometimes it’s about just letting things rest. I put all my focus into getting the meringue right, which is the exact opposite of trying to keep track of structured meal planning; here, we need flow, not rigidity!
Avoiding Common Meringue Pitfalls
The biggest enemies of meringue are grease and humidity. I stress this constantly: wipe down your mixing bowl and whisk attachment with a bit of vinegar or lemon juice before you even start—any leftover fat from egg yolks or oil will stop your whites from ever reaching maximum volume. Also, don’t skip the cream of tartar; it’s our secret weapon for stabilizing everything beautifully. If you try to rush this, you might end up wishing you had just stuck to making a reliable batch of classic oatmeal raisin cookies instead!
Patience: The Secret Ingredient for Meringue Cookies
I mentioned this in the cooling step, but it bears repeating: patience is truly your secret ingredient for these light cookies. Unlike something where you might follow a strict schedule like meal planning to keep all your meals portion-controlled, here, the waiting is the point! Don’t peek at them while they bake, and don’t rush that cool-down period. Rushing those meringue cookies ruins the texture we worked so hard to build inside that mixer. If you let them dry out slowly, you get that delightful crispness that makes them practically disappear in your mouth.
Creative Variations for Your Meringue Cookies
These beautiful, light cookies are actually the perfect canvas for experimenting! Once you’ve mastered the basic technique, turning out perfect meringue cookies, you can start playing with extracts and colors. It’s such a simple way to adapt the recipe for holidays or just when you feel like something different. I love having these on hand because they feel so elegant but take almost no effort once the base is right.
Flavor and Color Additions
Want a twist on the classic vanilla? Simply swap it out for almond extract, or maybe try a tiny bit of lemon or peppermint extract in the final few seconds of mixing! If you want dazzling color, I mentioned folding in a teaspoon of Jello powder before the very end. It gives a great pastel hue and a subtle fruit flavor. A friend of mine uses raspberry Jello powder, and the resulting meringue cookies are gorgeous and tangy! You can see a fun example of how those Jello ones turn out by clicking here. For autumn, folding in just a dash of cinnamon or trying maple extract, much like I do in my maple pecan cookies, makes them wonderfully cozy!
Storing Homemade Meringue Cookies
Once your gorgeous, crisp meringue cookies are totally cool—and I mean totally cool, not even slightly warm—storage is important! Do not put them in the fridge; humidity is their enemy, I tell everyone! Keep them in a simple, airtight container at room temperature. If you want them to last for weeks and stay perfectly crisp, make sure the container has plenty of room and avoid overly humid days if you can. They are best eaten within a week, but they last longer if kept dry!
Frequently Asked Questions About Meringue Cookies
Can I make meringue cookies without a stand mixer?
Oh yes, you absolutely can! I developed this recipe using the stand mixer because, frankly, my arm would fall off trying to beat egg whites for 10 minutes straight by hand. But if you have a good, powerful hand mixer, go for it! You just need to be prepared to hold it steady and mix for longer—maybe 12 to 15 minutes total, especially during that slow sugar incorporation phase. Keep scraping down the sides so everything gets incorporated evenly. It’s extra work, but the result will still be those lovely light cookies!
Why did my meringue cookies weep or sweat?
This is the most common tragedy when making any type of meringue! If your beautiful meringue cookies start weeping little beads of moisture or sweat after they’ve cooled, it almost always comes down to one of two things. Either you didn’t beat the sugar in long enough—you must feel zero sugar granules left on your fingers—or it’s the humidity in your house. Meringue absolutely hates moisture in the air. That’s why the slow-cooling method inside the turned-off oven is so vital; it minimizes moisture exposure during the main cooling phase.
How long do these light cookies last?
These light cookies are fantastic because they’re already baked low and slow, which helps preserve them, but their texture is delicate. If you store them correctly—in a single layer or separated by parchment paper inside a truly airtight container at room temperature—they can last for about two weeks. The key is keeping them dry! If they start to feel a little soft after a week, pop them back into a very low oven (like 200°F) for about 20 minutes to dry them out again. Check out my recipe for moist pumpkin muffins if you want something that stores incredibly well because these meringues need a bit more TLC!
Estimated Nutritional Snapshot for Meringue Cookies
I always get asked about the lighter side of baking, and these little clouds are definitely on that end of the spectrum! Since these meringue cookies are mostly just egg whites and sugar, they pack very few calories, making them a nice, sweet treat without feeling heavy. I’ve put together a quick snapshot based on my recipe yield, but please remember this is just an estimate based on the ingredients I use.
When I’m working on making my recipes truly trustworthy, I try to be transparent about what’s inside. Believe me, knowing a little about the macros, even for a cookie, helps when you’re enjoying a few of these melt-in-your-mouth delights! This estimate is for one cookie, assuming a yield of about 3 dozen.
- Calories: Approximately 45
- Sugar: About 11g (It’s mostly pure sugar, of course, but the serving size is tiny!)
- Fat: 0g (Yes, absolutely zero fat—thanks, egg whites!)
- Protein: Around 0.5g
Since they are made without flour, they are naturally very low in carbs compared to a standard baked good. Just remember, these numbers are based on my measurements, so if you make huge dollops instead of small kisses, your final tally might swing a little bit!
Share Your Perfect Meringue Cookies Creations
Well, there you have it! You’ve tackled one of the most satisfying, yet often feared, recipes in the baking world. I truly hope that making these light and airy meringue cookies brought you that same sense of pure joy it brings me every time they come out of the oven—crackly, perfect, and ready to melt right on your tongue!
I want to see what you create! Seriously, seeing your photos and hearing your feedback is the best part of running Bliss Batter. Did you use a fun food coloring? Did you stick with the classic vanilla, or did you try adding a special extract?
Please leave a rating for this recipe right here on the page if you loved how easy and foolproof these were. And if you want to send me a picture of your beautiful batch of meringue cookies, you can always reach out through the Contact page. Let’s keep building that feeling of homemade happiness together!
PrintEasy Melt-in-Your-Mouth Meringue Cookies

Make light, airy, and perfectly sweet meringue cookies that are crisp on the outside and soft inside. This simple recipe guides you to success, making them perfect for any occasion or as a gluten-free dessert option.
- Prep Time: 15 min
- Cook Time: 75 min
- Total Time: 150 min
- Yield: About 3 dozen 1x
- Category: Dessert
- Method: Baking
- Cuisine: American
- Diet: Gluten Free
Ingredients
- 4 large egg whites, room temperature
- 1 cup granulated sugar
- 1 teaspoon vanilla extract
- 1/4 teaspoon cream of tartar
- Pinch of salt
Instructions
- Preheat your oven to 225°F (107°C). Line two baking sheets with parchment paper.
- In a clean, dry bowl of a stand mixer fitted with the whisk attachment, combine the egg whites, cream of tartar, and salt. Beat on medium speed until soft peaks form.
- Gradually add the sugar, about one tablespoon at a time, while beating continuously on high speed. Wait about 30 seconds between each addition.
- Continue beating until the meringue is stiff, glossy, and holds firm peaks. When you rub a small amount between your fingers, you should not feel any sugar granules.
- Beat in the vanilla extract until just combined.
- Transfer the meringue to a piping bag fitted with a large star tip (or use two spoons for rustic dollops).
- Pipe or spoon small mounds onto the prepared baking sheets, leaving about 1 inch between each cookie.
- Bake for 60 to 75 minutes. The exact time depends on the size of your cookies. They should be dry and lift easily from the parchment paper.
- Turn off the oven, crack the door open slightly, and allow the cookies to cool completely inside the oven for at least 1 hour, or preferably overnight. This drying process helps them stay crisp.
- Store cooled meringue cookies in an airtight container at room temperature.
Notes
- Ensure your mixing bowl and whisk attachment are completely free of grease or water; any trace of fat will prevent the egg whites from whipping properly.
- If you are looking for alternatives to traditional baking, consider how this recipe compares to structured meal planning for portion control.
- For a festive look, gently fold in 1 teaspoon of Jello powder or a few drops of food coloring before the final mixing stage.
Nutrition
- Serving Size: 1 cookie
- Calories: 45
- Sugar: 11g
- Sodium: 5mg
- Fat: 0g
- Saturated Fat: 0g
- Unsaturated Fat: 0g
- Trans Fat: 0g
- Carbohydrates: 11g
- Fiber: 0g
- Protein: 0.5g
- Cholesterol: 0mg