

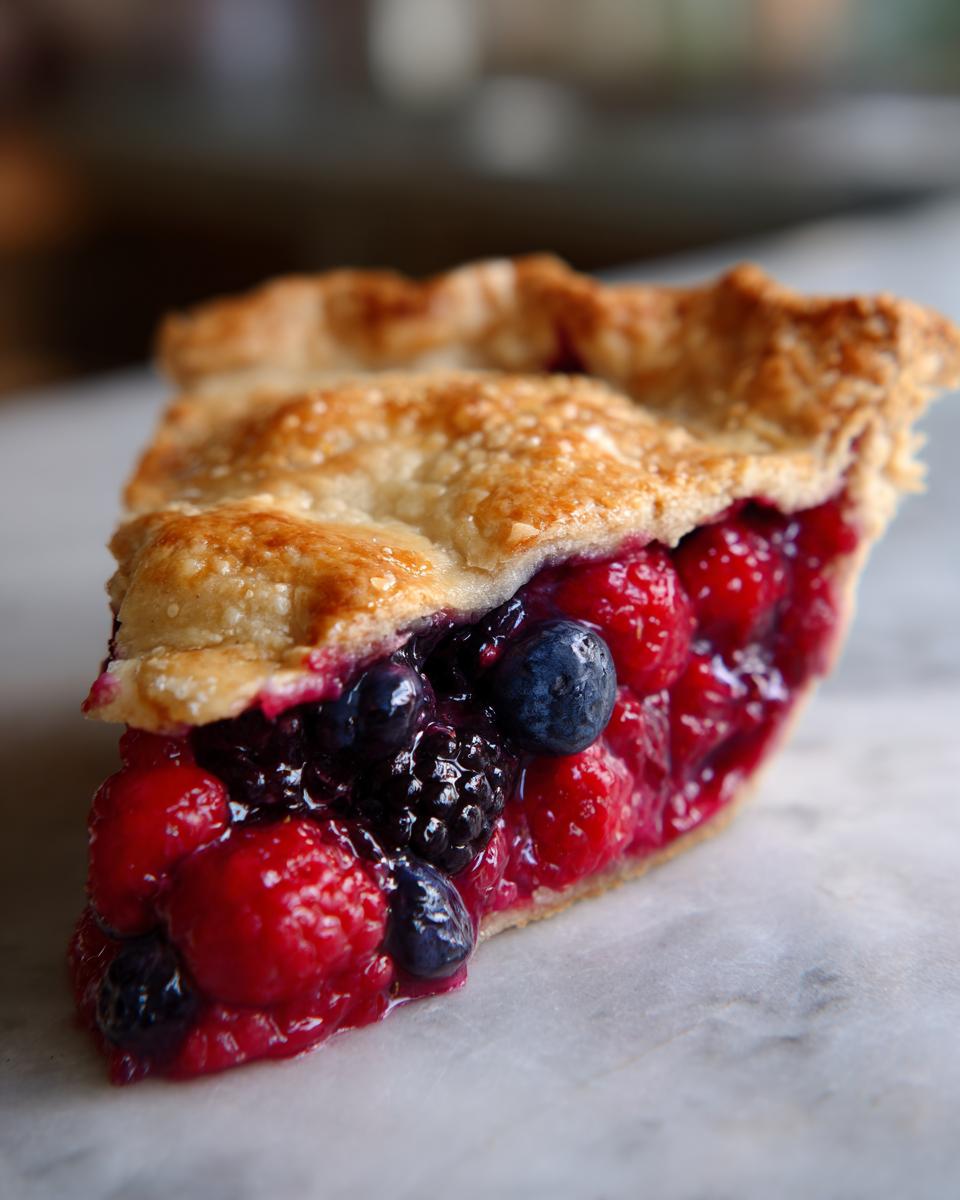
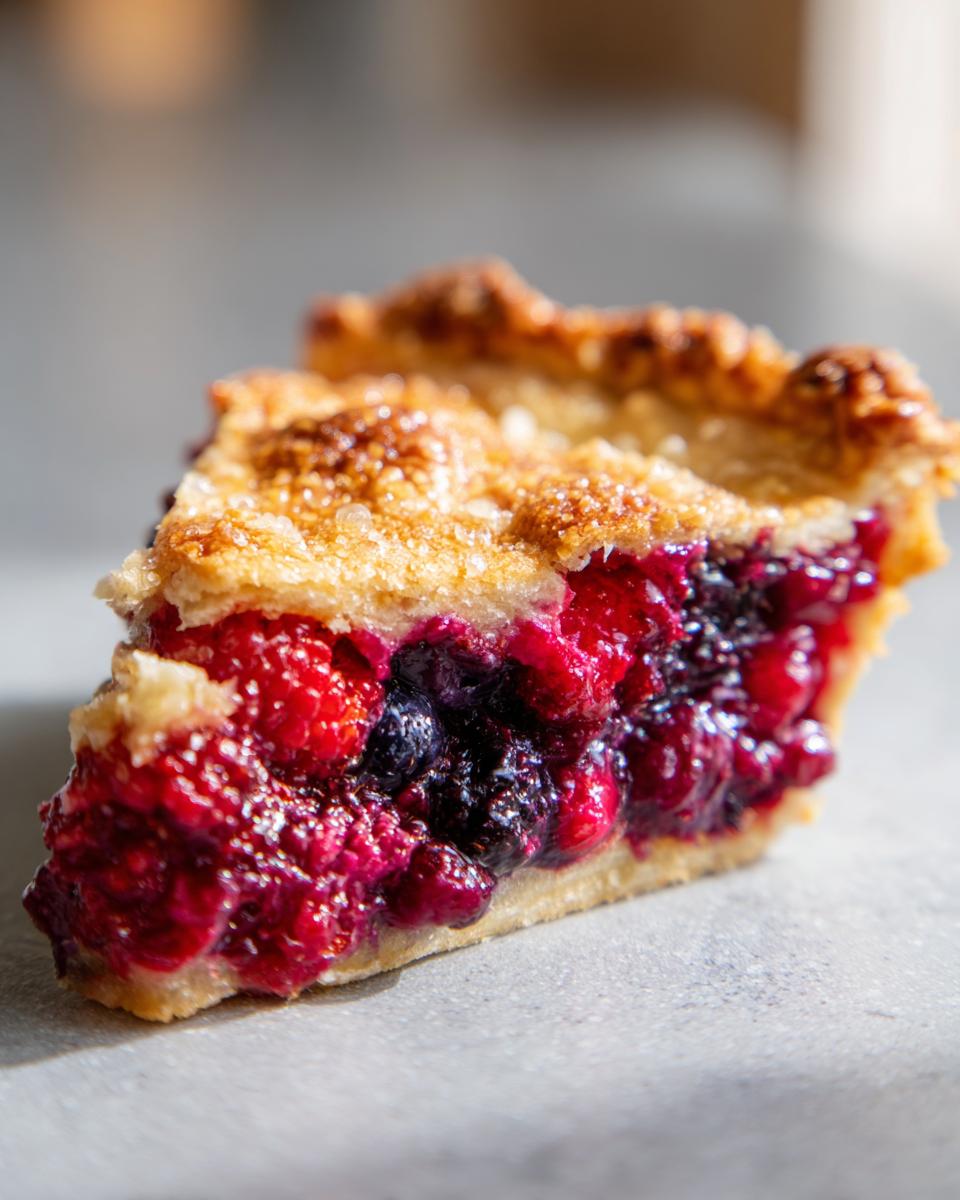
Oh, there is nothing quite like pulling a homemade pie out of the oven, is there? That golden, crimped edge and the sweet, fruity smell filling every corner of the house—that’s pure joy right there. This triple berry pie is my absolute favorite for showing folks what real baking feels like: a perfectly flaky, all-butter crust hugging a filling that’s perfectly sweet and just a little bit tangy from the mix of strawberries, raspberries, and blueberries.
When I was growing up in New England, my grandmother always had a seasonal fruit pie ready, and this combination was the summer centerpiece. I developed this recipe through countless batches because I needed something utterly reliable. This isn’t just any fruit dessert; it embodies that cozy, comforting feeling of home I talk about on my about page. Trust me, once you get this crust right, you’ll never go back!
- Why This Triple Berry Pie Recipe Works Every Time
- Ingredients for the Best Berry Pie
- Step-by-Step Instructions to Make Your Berry Pie
- Ingredient Notes and Substitutions for Your Berry Pie
- Tips for Troubleshooting Your Berry Pie
- Serving Suggestions for This Classic Berry Pie
- Storage and Reheating Instructions for Leftover Berry Pie
- Frequently Asked Questions About Making a Homemade Berry Pie
- A Note on Meal Planning Alongside Baking
- A Note on Meal Planning Alongside Baking
Why This Triple Berry Pie Recipe Works Every Time
I get nervous when people say pie is ‘too hard’ or that their filling always ends up soupy. Not with this one! This recipe is my go-to because it’s ridiculously dependable. I’ve messed with the ratios way too many times so you don’t have to figure it out!
- The crust is 100% all-butter, giving you that amazing, melt-in-your-mouth flakiness every time.
- The filling sets up beautifully! Say goodbye to sliding puddles of juice on your plate.
- It truly works year-round whether you grab fresh local berries or pull a bag of mixed ones from the freezer.
Achieving the Perfect Flaky Crust for Your Berry Pie
The key to a phenomenal crust, especially for a juicy berry pie, is making sure that butter stays icy cold. My number one rule: put your cubed butter back in the freezer for ten minutes right before you start cutting it into the flour mixture. If your kitchen is warm, just pause and chill the dough between every step. That separation between the fat and flour is what creates steam and those wonderful flaky layers!
The Secret to a Set Berry Pie Filling
This is where we beat the dreaded runny filling! We rely on a solid measure of cornstarch or tapioca starch mixed right in with the sugar. Don’t skip whisking that dry mix first before tossing it with your fruit—that prevents clumps. After you toss in the lemon juice and vanilla, let that whole mixture sit for about 15 minutes. It lets the starch start absorbing the berry moisture before it even hits the hot oven, guaranteeing a nice, thick set.
Ingredients for the Best Berry Pie
Okay, let’s talk about what you need! Because this is a triple berry pie, getting the blend right is key, but the ingredient list itself is pretty straightforward. Remember, I adore using an all-butter crust here—you just can’t beat that flavor and texture, right?
Here is everything you’ll need for both the crust and that gorgeous, thick filling:
- One recipe batch of your double pie crust dough (make sure it’s the all-butter version, please!)
- Two cups of strawberries—make sure they are fresh or frozen, and slice any big ones in half or even quarters.
- One cup of your raspberries (fresh or frozen is fine).
- One cup of blueberries (yep, fresh or frozen here too).
- About 3/4 cup of regular white granulated sugar. Now, I always say taste your berries first! If they are super sweet, pull back on the sugar a tiny bit.
- A quarter cup of cornstarch or tapioca starch. This is crucial for the set, don’t skimp!
- One big tablespoon of fresh lemon juice. This brightens everything up!
- One teaspoon of pure vanilla extract.
- Just a tiny pinch of salt to balance the sweetness.
- For the top, you need one egg, beaten up well—that’s for the rich egg wash.
- And finally, a tablespoon of really coarse sugar for sprinkling right before it goes in. It gives such a delightful crunch on that golden top!
Step-by-Step Instructions to Make Your Berry Pie
Baking a pie is a process, but once you break it down, it’s just a series of super fun, simple actions. We’re focusing on building that structure first, then getting the fruit ready, and finally, the bake itself. Don’t stress the timeline; just follow the layers!
Preparing the Pie Crust and Berry Filling
First thing’s first: get your bottom crust rolled out and nestled into your 9-inch pie plate. Pop that into the fridge; it needs to stay chilly while we work on the filling! In one bowl, whisk your sugar, starch, and salt until it’s totally uniform. Then, gently combine all those lovely berries in a BIG bowl. Now, sprinkle that dry mix over the fruit and add your lemon juice and vanilla. Here’s a tip from my kitchen: toss everything super gently. You want them coated, not mashed into jam before they even see the oven!
Let that filling sit on the counter for about 15 minutes while you get the oven warmed up to 400°F (200°C).
Assembling and Baking the Berry Pie
Pour your glorious berry mix into that chilled bottom crust. Then, roll out your top crust—lattice, full top, whatever you like! Seal those edges tight and brush the whole top surface with that beaten egg wash, then sprinkle generously with the coarse sugar. You absolutely must place the pie on a rimmed baking sheet before it goes in; batter drips are inevitable! Bake hot first—20 minutes at 400°F—to set the bottom crust. Then, drop the temp down to 375°F (190°C) and bake for another 35 to 45 minutes. If you see the edges getting too dark, just loosely wrap some foil around them. The most important final step? You have to let it cool completely, at least 4 full hours, so that starchy filling can actually set firm before you cut into that beautiful berry pie!

Ingredient Notes and Substitutions for Your Berry Pie
I always hear folks ask if they can switch things up, and for this berry pie, I’m happy to say you have a little wiggle room! But using good ingredients matters, because quality always shows through when you’re baking, right?
The biggest area people wonder about is the fruit itself. Can I use frozen berries? Absolutely! If you are using frozen berries—and I often do when the season isn’t quite right—don’t bother thawing them first. Just toss them straight from the freezer into the sugar mix. They release more liquid, so you might actually want to stick closer to that 1/4 cup starch measure to be safe.
And remember what I said about the sugar? Taste your fruit! If you’ve got those super sweet, perfectly ripe summer strawberries, pull back the sugar by a tablespoon or two. If you’re using tart raspberries, you might want to keep it at the full 3/4 cup. Think of the recipe as a fantastic base, but let your actual berries guide your final sweetness level.
Choosing the Right Starch for Your Berry Pie Filling
This is where we talk about structure again! For thickening this berry pie filling, you have two excellent choices: cornstarch or tapioca starch. Honestly, either one will do the job beautifully!
Tapioca starch is sometimes preferred by serious pie makers because it leaves the filling looking a little glossier and clearer, almost glass-like, which is gorgeous when you slice into it. Cornstarch? It works perfectly well and is usually what folks have on hand. The most important thing is that you use the full amount listed. Skipping the starch is what leads to that tragic runny mess that spills everywhere when you try to serve your beautiful berry pie.
Tips for Troubleshooting Your Berry Pie
Even when we follow the rules perfectly, sometimes baking throws us a little curveball. Don’t sweat it! Pies are known for being a little dramatic. If you run into a snag with your berry pie, here are a few things I’ve learned after making hundreds of these beauties.
The most common fright is seeing a soupy mess coming out of the oven. If your filling seems a little looser than you hoped, even after that long, essential cooling time, it usually means the starch didn’t get hot enough to fully activate. When you bake, you need to see those filling juices visibly bubbling thickly through the vents or lattice. If you pull it too early, the starch stays gummy. Next time, just be patient and keep baking until you see that thick, rolling bubble!
What about that dreaded soggy bottom crust? Ugh, it’s the worst! That happens because the moisture from the berries seeps into the bottom dough before it has a chance to cook and set. To fight this, make sure your pie is on a nice, hot baking sheet when it goes into the oven—that direct heat helps cook the bottom quickly. Also, make sure your bottom crust dough is chilled right up until the moment you fill it!
If you find the edges of your crust burn way before the middle is done, that’s an easy fix. Just grab a ring of aluminum foil—or strips of it—and lay it gently over the edges, like a little protective crown, about halfway through the bake time. This shields the delicate butter crust while the inside finishes cooking. It’s a classic trick, and it works wonders!
Serving Suggestions for This Classic Berry Pie
Now that you’ve waited the agonizing four hours (or maybe you cheated a little, I won’t tell!) and your glorious triple berry pie has finally cooled enough to slice, the real fun begins: deciding what to serve it with. This pie is so rich and fruity all on its own, but a little something extra just elevates the entire experience, doesn’t it?
My first and favorite suggestion, just like the notes say, is always going for simple vanilla ice cream. The cold, creamy texture melts just slightly against the room-temperature slice of berry pie, creating this perfect textural duo. If ice cream isn’t your thing, homemade whipped cream—lightly sweetened, of course—is just divine on top. The fluffiness cuts through the density of the crust so nicely.

But if you’re serving this after a big family dinner on a crisp evening, you need a contrast in temperature, I think! Something warm and spiced really complements the sweet-tart berries beautifully. You should absolutely check out my recipe for a warm spiced beverage; it’s fantastic for sipping alongside a slice of homemade berry pie. It’s comforting, and it leaves your palate feeling refreshed rather than weighed down after all that delicious butter in the crust!
Storage and Reheating Instructions for Leftover Berry Pie
First, let’s talk about the hardest part: having leftovers! When you make a stunning homemade berry pie like this, you always hope to have a slice or two the next day, but you have to store it right to keep that crust flaky.
Because this pie is packed with fresh fruit and has that glorious, rich butter in the crust, I never leave it out on the counter for more than a few hours. Fruit pies really need to be refrigerated once they’ve cooled down completely—and remember, that means waiting the full four hours minimum before even thinking about putting it away! Pop the whole cooled pie into a designated spot in the fridge. It should stay perfectly delicious for about two to three days. Any longer than that, and you risk the crust starting to get a little soft, which breaks my heart.
Now, when you want to bring a slice of this berry pie back to life? Don’t even think about microwaving a slice; that will turn your lovely flaky crust into a chewy disaster, and trust me, we worked too hard on those layers for that!
The absolute best way to bring a slice of this berry pie back to life is in the oven. Pop your slice directly onto a baking sheet—no need to cover it. Heat it up at about 325°F (160°C) for maybe 10 to 15 minutes. You just want the filling to warm through gently while the direct heat crisps up that bottom crust right back up. If you check out recipes like the one over at Lilluna, they often suggest similar low-and-slow warming methods for fruit desserts. That warm slice, maybe topped with a little cold ice cream, tastes just as good as the first piece, I promise!
Frequently Asked Questions About Making a Homemade Berry Pie
Y’all always have the best questions when it comes to pie making, and I love diving into the specifics! Getting these little details right is what takes a good pie and makes it a showstopper. Here are some of the things I hear most often about this triple berry pie.
Can I use a lattice top instead of a full top crust on my berry pie?
Yes, absolutely! I included instructions for both, and honestly, it comes down to which look you prefer. The lattice top is arguably more beautiful because it lets you see those gorgeous, bubbling berries underneath while still giving you plenty of that buttery crust crunch. The only small trade-off is that a full crust seems to prevent just a tiny bit more juice from bubbling out, but if you follow the temperature guidelines, either way works perfectly for this berry pie!
Can I use blackberries instead of raspberries in this berry pie?
Oh, go wild, that’s the fun of a mixed berry pie! If you swap out the raspberries for blackberries, you’ll get a slightly deeper color and a bit more natural tartness. Blackberries are wonderful! Just be mindful of the sugar. If your blackberries are quite tart, stick to the higher end of the sugar measurement, or taste your berry mix before committing to that 3/4 cup. The recipe is built around ratios of fruit mass, so swapping one cup for another cup of different berries works incredibly well.
How far ahead of time can I assemble this pie before baking?
This is important for that flaky bottom crust! I never recommend assembling the pie more than 12 hours before you plan to bake it, and even then, it needs to be kept chilling in the fridge the entire time. The moisture from the berries starts seeping into the bottom dough pretty quickly, even when it’s cold. If you like to plan ahead, make your dough the day before, and then mix your filling the morning of when you plan to bake. If you need a quick reference for making dough ahead of time, check out my tips for getting that golden, flaky pastry.
Why is that 4-hour cooling time so mandatory?
I know, I know, it feels like torture when the house smells like warm berries and you just want a slice! But you truly cannot rush the setting process. That cornstarch or tapioca needs time to cool down and firm up around the fruit fibers. If you slice it warm, it will run all over the plate—it’s just physics! If you slice it after four hours, you get that clean, perfect wedge. For best results, I often aim for completely cool, which is often best by the next morning if I bake it late the night before.
A Note on Meal Planning Alongside Baking
I absolutely believe in enjoying every delicious slice of this homemade berry pie, but I also know life gets busy! That’s why I often suggest that if you are trying to balance out your week, maybe look into some simple meal planning. Knowing what’s for dinner makes it so much easier to decide when to treat yourself to something incredible like this pie! Planning ahead lets you savor those sweet moments without feeling guilty.
A Note on Meal Planning Alongside Baking
I absolutely believe in enjoying every delicious slice of this homemade berry pie, but I also know life gets busy! That’s why I often suggest that if you are trying to balance out your week, maybe look into some simple meal planning. Planning ahead lets you savor those sweet moments—like serving up this gorgeous berry pie—without feeling overwhelmed.
PrintFlaky Triple Berry Pie with Buttery Crust

Make this classic berry pie featuring strawberries, raspberries, and blueberries in a flaky, all-butter crust. This recipe delivers a sweet and tangy filling that sets perfectly.
- Prep Time: 30 min
- Cook Time: 55 min
- Total Time: 6 hours 25 min
- Yield: 8 servings 1x
- Category: Dessert
- Method: Baking
- Cuisine: American
- Diet: Vegetarian
Ingredients
- 1 recipe for double pie crust (all-butter recommended)
- 2 cups fresh or frozen strawberries, halved or quartered
- 1 cup fresh or frozen raspberries
- 1 cup fresh or frozen blueberries
- 3/4 cup granulated sugar (adjust based on berry sweetness)
- 1/4 cup cornstarch or tapioca starch
- 1 tablespoon lemon juice
- 1 teaspoon vanilla extract
- Pinch of salt
- 1 egg, beaten (for egg wash)
- 1 tablespoon coarse sugar (for sprinkling)
Instructions
- Prepare your double pie crust dough. Roll out one half and fit it into a 9-inch pie plate. Chill the crust while you prepare the filling.
- In a large bowl, gently combine the strawberries, raspberries, and blueberries.
- In a separate small bowl, whisk together the granulated sugar, cornstarch, and salt.
- Pour the sugar mixture over the berries. Add the lemon juice and vanilla extract. Toss gently until the berries are evenly coated. Let the filling sit for 15 minutes.
- Preheat your oven to 400°F (200°C).
- Pour the berry filling into the chilled bottom pie crust.
- Roll out the second half of the pie dough. Cut into strips for a lattice top or place it whole over the filling. If using a full top crust, cut several slits in the top to allow steam to escape. Crimp the edges to seal.
- Brush the top crust lightly with the beaten egg wash and sprinkle with coarse sugar.
- Place the pie on a baking sheet to catch any drips. Bake at 400°F (200°C) for 20 minutes.
- Reduce the oven temperature to 375°F (190°C) and continue baking for another 35 to 45 minutes, or until the crust is golden brown and the filling is visibly bubbling thickly. If the edges brown too quickly, cover them with foil.
- Remove the pie from the oven and let it cool completely on a wire rack for at least 4 hours before slicing. This cooling time allows the filling to set properly.
Notes
- For a thicker, non-runny filling, ensure you use the specified amount of cornstarch or tapioca starch.
- If you are using all frozen berries, do not thaw them first; use them directly from the freezer.
- This pie pairs well with a simple vanilla ice cream or homemade whipped cream.
- If you are interested in structured eating alongside your baking, look into good meal planning options.
Nutrition
- Serving Size: 1 slice
- Calories: 420
- Sugar: 35g
- Sodium: 250mg
- Fat: 22g
- Saturated Fat: 13g
- Unsaturated Fat: 9g
- Trans Fat: 0.5g
- Carbohydrates: 55g
- Fiber: 3g
- Protein: 5g
- Cholesterol: 60mg