
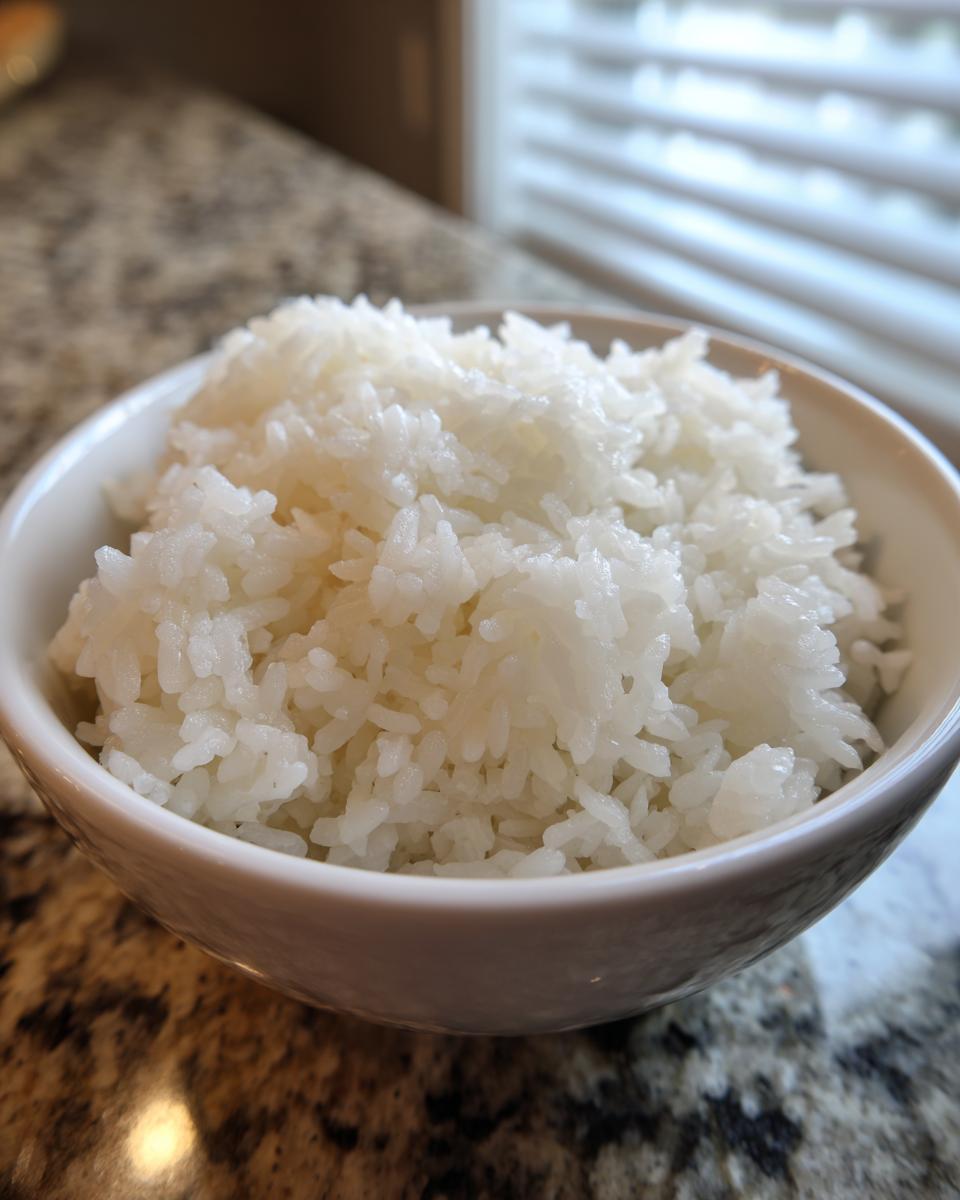
When I was planning big corporate events, everything had to be precise—every napkin fold, every seating chart. But honestly, making that perfect, restaurant-quality sticky rice at home felt just as intimidating! For years, my homemade sushi rolls were… well, let’s just say the rice was either too hard or totally mushy. I was missing the secret sauce, or rather, the secret water-to-rice ratio. That’s why I dedicated serious time to perfecting the definitive method for amazing sushi rice. Forget the stress; this tutorial pulls all the precision I learned from event planning and applies it right here, giving you brilliantly fluffy and perfectly seasoned rice every single time.
- Why Perfect Sushi Rice is the Foundation of Great Rolls
- Essential Ingredients for Flavorful Sushi Rice
- How to Wash Sushi Rice: The Secret to Fluffy Sushi Rice Secrets
- Step-by-Step Instructions: How to Make Sushi Rice Perfectly
- Alternative Method: Sushi Rice Instant Pot Method
- Tips for Perfect Sushi Rice: Achieving Restaurant Flavor
- Storage & Reheating Instructions for Leftover Sushi Rice
- Frequently Asked Questions About Perfect Sushi Rice
- Estimated Nutritional Information for Seasoned Sushi Rice
- Share Your Homemade Sushi Rice Success
- Estimated Nutritional Information for Seasoned Sushi Rice
- Share Your Homemade Sushi Rice Success
Why Perfect Sushi Rice is the Foundation of Great Rolls
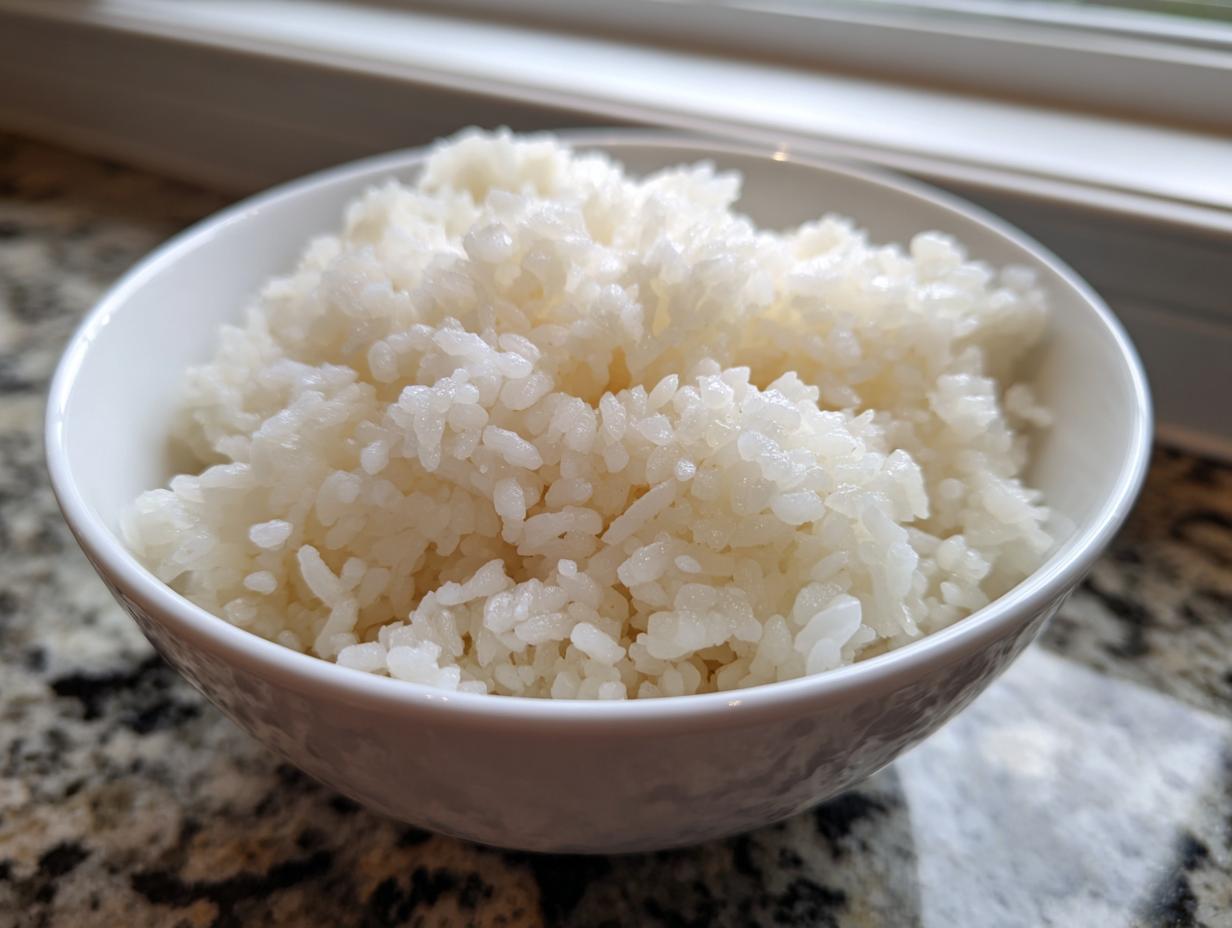
Listen, you can have the freshest fish or the tastiest fillings, but if your rice isn’t right, your whole sushi experience falls flat! We are aiming for that sticky texture that holds everything together but never, ever tastes mushy. That balance is what separates homemade attempts from restaurant perfection. Mastering rice is the biggest hurdle, but once you get these fluffy sushi rice secrets down, you’re practically a sushi master already! If you’re looking for quick meals too, check out my favorites over at easy weeknight dinners.
Selecting the Best Rice for Sushi Rolls
This is non-negotiable, friends: you absolutely must use short-grain Japanese rice. It’s labeled as “sushi rice” for a reason! Long-grain rice, like Basmati or Jasmine, just doesn’t have the necessary starch structure. It ends up tasting grainy or clumpy instead of beautifully sticky. For the best rice for sushi rolls, look specifically for that short-grain goodness—it’s the only way to get that authentic, satisfying chew.
Essential Ingredients for Flavorful Sushi Rice
Okay, let’s talk what you actually need on the counter before you even turn on the stove. When I first started, I thought any bag of rice would do. Oops! Trust me, having the right stuff makes achieving that incredible restaurant flavor so much easier because the ingredients are already built for success. We need structure from the rice and that beautiful sweet-tangy balance from the seasoning. Here is the exact list I swear by for flawless seasoned rice for sushi.
For the Sushi Rice Cooking Base
This part is straightforward, but the measurements have to be followed closely! We need 2 cups of that fantastic short-grain Japanese rice—no cheating here, remember what we talked about regarding long-grain varieties. Always measure your 2 cups of rice out first. Then, you’ll use 2 cups of cold water for the final cooking phase, though remember you need way more cold water for the initial cleaning process, which we get to next!
For the Sushi Rice Vinegar Seasoning
This is where the magic tang comes in! You’ll need half a cup of good quality rice vinegar, 3 tablespoons of regular granulated sugar (yes, we need that sweetness to cut the sourness), and just 1 teaspoon of salt. I always heat this gently together in a tiny saucepan until the sugar and salt melt right into the vinegar. Don’t boil it! Just warm it enough so those crystals disappear. It’s the perfect three-part symphony needed for truly authentic sushi rice vinegar seasoning.
How to Wash Sushi Rice: The Secret to Fluffy Sushi Rice Secrets
If you skip this step, you’re basically setting yourself up for a chewy disaster! I can’t stress enough how important it is to learn how to wash sushi rice properly. It releases all that excess starch that makes rice gummy and heavy. When I first tried making it, I gave it one quick rinse. Big mistake! The result was like wet cement. If you want to read more about rinsing practices, I found this great tip over at the best way to wash rice.
You need to be patient here. Cover the rice generously with cold water in a big bowl and gently swirl it around with your hand—don’t mash it, just swirl! Drain that cloudy water immediately. You have to repeat this draining and refilling process about five to seven times. Seriously, count them! Keep going until the tap water you drain off is running off mostly clear. That cloudy residue is what ruins the texture, so keep rinsing until you see that beautiful, clear water. This dedication is one of the biggest fluffy sushi rice secrets I uncovered!
Once it’s rinsed, drain it really well in a fine-mesh sieve and let it just sit for 30 minutes. This little soak time helps the grains plump up just a tiny bit before they hit the heat. See? It’s all about the quiet details!
Step-by-Step Instructions: How to Make Sushi Rice Perfectly
Alright, now that we’ve washed our rice until our arms were tired and let it soak for that crucial 30 minutes, it’s time for the real show! This section is the heart of our homemade sushi rice tutorial. If you follow this sushi rice step by step guide exactly—especially regarding the timing—you’ll get that incredible texture. When I first tried this, I rushed the resting period, and bam, instant disappointment! Trust me, we really need to respect the resting periods; those aren’t suggestions, they’re laws of the rice universe! You can find some great insights on how to get this right by checking out this guide.
Cooking the Sushi Rice on the Stovetop
Get your soaked and drained rice into a sturdy, heavy-bottomed pot that has a lid that seals tightly—no cheating with a loose lid! I learned that the right pot makes a huge difference in even cooking. Add exactly 2 cups of cold water right in with the rice. Turn the heat up to medium-high and bring it straight to a full boil. The second you see a roaring boil, drop that heat down to the absolute lowest setting your stove offers. Cover it up tight and let it cook for precisely 15 minutes. During this time, do not, under any circumstances, lift that lid. Seriously, keep the lid on! When the 15 minutes are up, kill the heat entirely and let it sit, still covered, for another 10 minutes. That resting period lets the steam finish everything off beautifully.
Preparing and Mixing the Sushi Rice Vinegar Seasoning
While the rice is resting patiently, let’s whip up the flavor bath. Take that rice vinegar, sugar, and salt we mixed earlier and put it in a tiny saucepan. Heat it gently, stirring until you see all those sugar and salt crystals disappear. Remember what I said? We only want it warmed through, not boiling hot! Once the seasoning is dissolved, you’re ready for the mixing part. Transfer the cooked rice into a large, shallow, non-metallic bowl—wood is traditional, but glass or plastic works fine. Drizzle that warm vinegar mix evenly over the top. Now, here’s the technique: use your paddle and gently *slice* down through the rice, then *fold* it over. You’re trying to separate every single grain and coat it, not stir it into a gluey mess! Keep folding and quickly fanning the rice as you go; that fanning helps it cool down fast and gives it that beautiful, glossy finish you see at those amazing sushi spots.
Alternative Method: Sushi Rice Instant Pot Method
Now, I know not everyone has time to babysit a pot on the stovetop, especially when you are trying to get dinner on the table fast! That’s where my trusty Instant Pot steps in. If you’re looking for the absolute easiest way to tackle this, the sushi rice instant pot method is your new best friend. Honestly, once you nail the ratio—which is slightly different than the stovetop—the machine does all the heavy lifting for you. I remember when I first tried it; I was terrified I’d end up with soup, but it was perfect! You can get more tips on making it work in your pressure cooker over at this great guide.
The biggest difference here is the water ratio. Forget the 1:1 volume rule for most foods; we need a precise 1:1 ratio for our very starchy rice: 2 cups of rice to 2 cups of cold water. No more, no less! Make sure your rice is already washed and soaked just like we did for the stovetop version; that preparation is still essential for that fluffy texture.
Once everything is set inside the pot, seal the lid and set it to cook on High Pressure for exactly 4 minutes. That’s it! Four minutes! But here’s the catch: you must let the pressure release naturally (that’s the 10-minute NPR part) before you manually release the rest. If you rush that natural release, the rice grains get shocked and they turn out tougher on one side. After the 10 minutes are up, you can move it to the seasoning stage exactly as described above—slice, fold, and fan! It’s such a reliable method when you need perfect rice without the constant hovering!
Tips for Perfect Sushi Rice: Achieving Restaurant Flavor
Now that you’ve mastered the cooking and the folding—the two trickiest parts of making your initial batch of sushi rice—let’s lock in those last few tips so you can proudly pass this off as an authentic Japanese rice recipe. I remember one time I made a huge batch for a weekend party, and since I had leftovers, I tossed it straight into the fridge overnight, thinking I’d use it for lunch the next day. Big mistake! When I pulled it out, it was so hard and brittle I could have built a little house with it! Never, ever do that.
The structure we built by washing and folding is delicate. Refrigerating it sucks out every drop of moisture and ruins that perfect stickiness. If I have leftover seasoned rice for sushi, I keep it covered *tightly* in a bowl on the counter at room temperature for the rest of the day. That’s it. If you absolutely must save it until the next day, you’ll need to revive it, which involves steaming it very gently with a damp cloth draped over it. But honestly, it’s best made fresh the day you plan to roll!
Using Rice for Poke Bowls and Nigiri Rice Preparation
The best part about achieving this exact texture—fluffy, glossy, and just the right amount of sticky—is that it’s so versatile! When you’re making thick rolls (like a big dragon roll), you want that structure to hold tight, and this rice nails it. But it’s also just fantastic scooped into a bowl for a quick poke bowl night. You might have noticed for delicate nigiri rice preparation, you need it to hold shape but still be light enough to press easily between your fingers. This method creates rice that is cohesive enough not to fall apart when you put the fish on top, but it doesn’t compress into a dense rock. Remember that link I shared earlier about rice readiness? Check out those insights at the rice preparation secrets to see more about how texture changes for different uses.
Storage & Reheating Instructions for Leftover Sushi Rice
So, you made a huge batch because homemade sushi rice is just too good to stop eating? I totally get it! But we talked about how putting this perfectly seasoned rice straight into the fridge turns it into something almost inedible—hard, dry, and sad. That beautiful moisture we worked so hard to maintain just vanishes in the cold. So, what’s the plan when you have leftovers?
The absolute best way to store any extra rice you make is right on the counter, covered tightly. I usually use the same shallow bowl I mixed it in, but I cover it completely with plastic wrap or put a tight-fitting lid on it. It will stay lovely and usable—still soft enough—for maybe 12 hours, tops, especially if your kitchen isn’t super warm. That’s why I always try to make just enough for the meal, but leftovers happen!
If you absolutely must keep it overnight, remember what I told you about my failed experiment? It will harden up a bit. Don’t panic! You can revive it. You don’t need a fancy rice steamer for this, though I do love mine for other things! You can revive it in the microwave. Take the amount you want to eat, put it in a microwave-safe bowl, and drape a slightly damp paper towel right over the top. Think of it like a tiny steam tent. Microwave it in 15-second blasts until it feels soft again. It should steam itself back to life perfectly!
If it’s gotten really hard, a minute or two in a steamer basket works wonders too. Just make sure you are gently warming it back up; we aren’t cooking it again! It’s all about restoring that tender, slightly sticky quality we perfected earlier. Knowing how to manage your leftovers means less waste, which is something I definitely learned from my practical upbringing—you can read a little more about my kitchen philosophy over at the About Page!
Frequently Asked Questions About Perfect Sushi Rice
I always get the same handful of questions when people try to master this for the first time! Making sushi rice sounds complicated because the results have to be so precise, but honestly, most of the confusion comes from skipping one single step. Let’s tackle some of those burning questions so you can approach your next sushi night with total confidence. I’ve gathered the questions I see most often when people are trying this homemade sushi rice tutorial.
Can I really skip washing the rice?
Oh goodness, please don’t! I know it might seem like extra work when you’re trying to get dinner on the table, but skipping the wash is the number one reason people end up with rice that’s too sticky or starchy. That cloudy water you see in the beginning? That is pure excess starch, and if you leave it in, that starch melts when cooking and turns your beautiful grains into one giant sticky clump. We are aiming for fluffy sushi rice secrets, not glue! Washing until the water runs mostly clear is essential for that separation we want.
What happens if I use long-grain rice instead of short-grain?
This is a tough one because sometimes you’re in a pinch! But if you use long-grain white rice—like the kind we usually serve with curry or weeknight chicken—you will never achieve the right texture for rolls. Long grains don’t have the same starch profile. They break apart when they cook and won’t stick together when you try to roll them. Stick to what works! You need that plump, high-starch, short-grain Japanese rice if you want the best rice for sushi rolls. It’s worth the small trip to the Asian market if your local store doesn’t carry it!
How long does perfectly seasoned sushi rice last?
This is the crucial temperature question! The short answer is: not long, and definitely not cold! As I found out the hard way, you cannot refrigerate seasoned rice for sushi. The cold temperature pulls the moisture right out of the starches, turning it hard and unusable. If you have leftovers, keep them covered tightly on the counter for maybe 6 to 8 hours. If you need longer, refer back to my revival tips—the damp paper towel microwave trick works wonders to soften it back up! If you want to see more tips on this, check out the detailed guide on how to make sushi rice!
Can I use a different type of vinegar?
You have to use rice vinegar, my dear! White distilled vinegar is way too harsh and acidic, and apple cider vinegar throws the flavor profile completely off balance, even if you adjust the sugar and salt quantities. Rice vinegar is naturally milder and sweeter, which is exactly what we need for that signature sushi rice vinegar seasoning flavor we’re aiming for. It’s a foundational element for an authentic Japanese rice recipe.
Estimated Nutritional Information for Seasoned Sushi Rice
Since we are using sugar and salt in our seasoning, the nutrition changes a little bit from plain cooked rice, but I wanted to give you a general idea of what you’re looking at for an average serving size of this delicious sushi rice. Remember, these values are just estimates based on the recipe ingredients provided, and of course, they can change based on the exact rice brand you pick up!
Based on a serving size of 1/2 cup cooked rice:
- Calories: 180
- Carbohydrates: 40g
- Protein: 3.5g
- Total Fat: 0.2g
- Sugar: 6g
- Sodium: 150mg
See? Not too bad for something that tastes absolutely heavenly and makes homemade sushi night feel like a real celebration!
Share Your Homemade Sushi Rice Success
I put my heart into testing and re-testing every step so you wouldn’t have to deal with mushy rice disasters like I did in my early home-cooking days! My biggest joy here at Bliss Batter is seeing you all conquer those tricky-sounding recipes. Making perfect sushi rice is a huge milestone, and I want to see your beautiful, glossy grains!
Please leave a comment below and tell me how it went! Did the stovetop work better for you, or did you master the Instant Pot version? Let me know your texture results! If you snap a picture of your perfect rice being used for rolls or maybe tucked into a vibrant poke bowl, tag me on Instagram! I’d love to cheer you on. If you ever need to reach out about a recipe snag, feel free to contact me directly on the Contact Page. Happy rolling!
PrintThe Ultimate Guide to Perfect Sushi Rice: Fluffy and Sticky Every Time
Learn the simple steps to make restaurant-quality seasoned sushi rice at home. This guide covers washing, cooking, and seasoning for the perfect texture for rolls and bowls.
- Prep Time: 30 min (includes soaking)
- Cook Time: 25 min
- Total Time: 55 min
- Yield: About 4 cups cooked rice 1x
- Category: Side Dish
- Method: Stovetop Cooking
- Cuisine: Japanese
- Diet: Vegetarian
Ingredients
- 2 cups short-grain Japanese rice (sushi rice)
- 2 cups cold water (for cooking)
- 1/2 cup rice vinegar
- 3 tablespoons granulated sugar
- 1 teaspoon salt
Instructions
- Measure the rice. Place 2 cups of short-grain rice into a large bowl.
- Wash the rice. Cover the rice with cold water. Gently swirl the rice with your hand. Drain the cloudy water. Repeat this washing and draining process 5 to 7 times until the water runs mostly clear. This step is essential for fluffy sushi rice.
- Soak the rice. Drain the rice completely in a fine-mesh sieve. Let the rice sit for 30 minutes.
- Cook the rice (Stovetop Method). Combine the soaked, drained rice and 2 cups of cold water in a heavy-bottomed pot with a tight-fitting lid. Bring the water to a boil over medium-high heat. Once boiling, immediately reduce the heat to the lowest setting, cover the pot, and cook for 15 minutes without lifting the lid.
- Rest the rice. Remove the pot from the heat and let it stand, covered, for another 10 minutes. Do not lift the lid during this time.
- Prepare the seasoning. While the rice rests, combine the rice vinegar, sugar, and salt in a small saucepan. Heat gently over low heat, stirring until the sugar and salt completely dissolve. Do not boil the mixture. Let the seasoning cool slightly.
- Season the rice. Transfer the cooked rice to a large, shallow, non-metallic bowl (a wooden hangiri is traditional). Pour the seasoning evenly over the rice.
- Fold in the seasoning. Use a rice paddle or wooden spoon to gently slice and fold the seasoning into the rice. Do not stir or mash the grains; you want to separate them while coating them. Fan the rice as you mix to help it cool quickly and give it a glossy finish.
- Cool and use. Continue folding and fanning until the rice is near room temperature. Use immediately for sushi rolls, nigiri, or rice bowls.
Notes
- Use short-grain Japanese rice for the best sticky texture. Do not substitute with long-grain rice.
- For the Instant Pot method, use a 1:1 water-to-rice ratio (2 cups rice to 2 cups water) and cook on High Pressure for 4 minutes, followed by a 10-minute natural pressure release.
- Do not refrigerate sushi rice; it will become hard. Keep it covered at room temperature until ready to use.
Nutrition
- Serving Size: 1/2 cup cooked
- Calories: 180
- Sugar: 6
- Sodium: 150
- Fat: 0.2
- Saturated Fat: 0
- Unsaturated Fat: 0.1
- Trans Fat: 0
- Carbohydrates: 40
- Fiber: 0.5
- Protein: 3.5
- Cholesterol: 0