
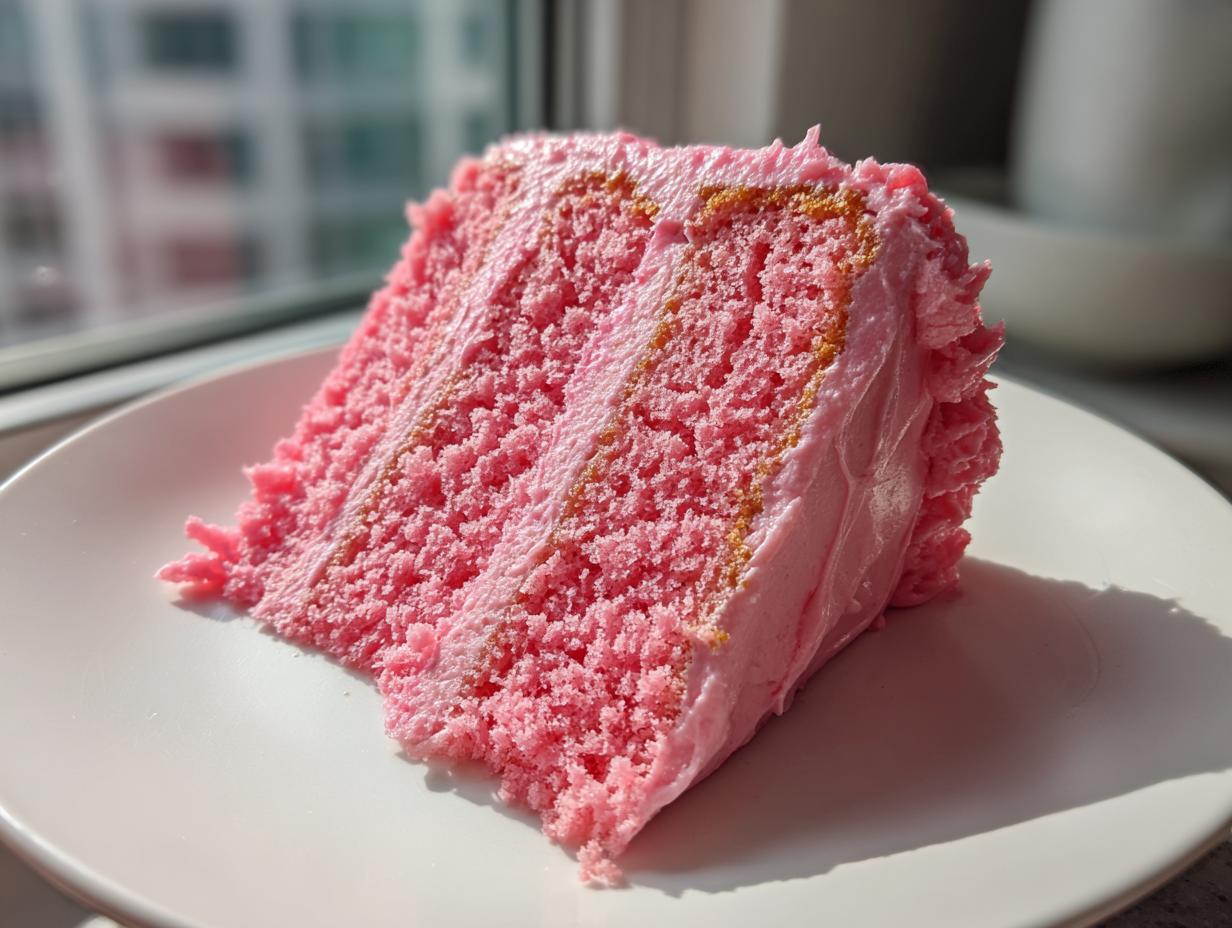
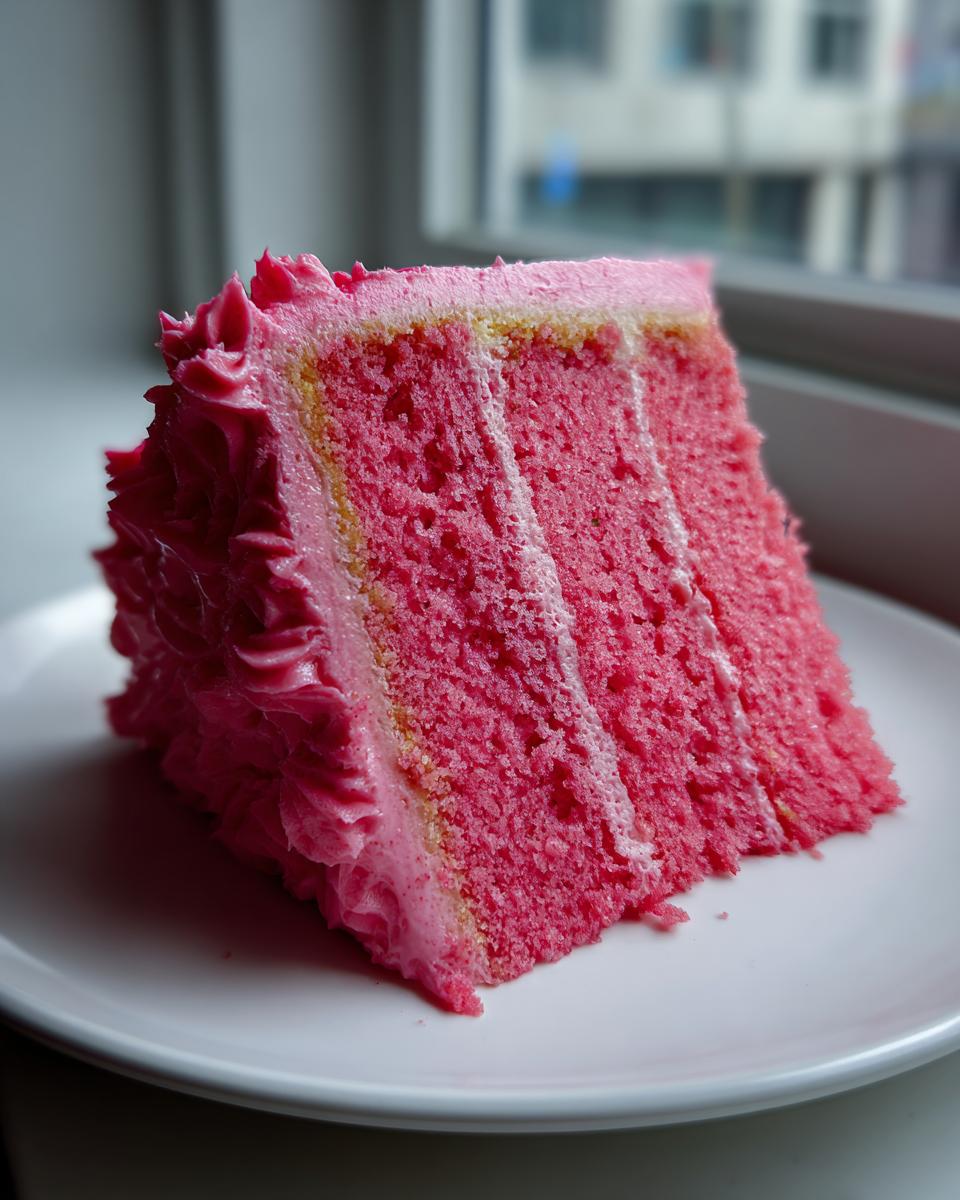
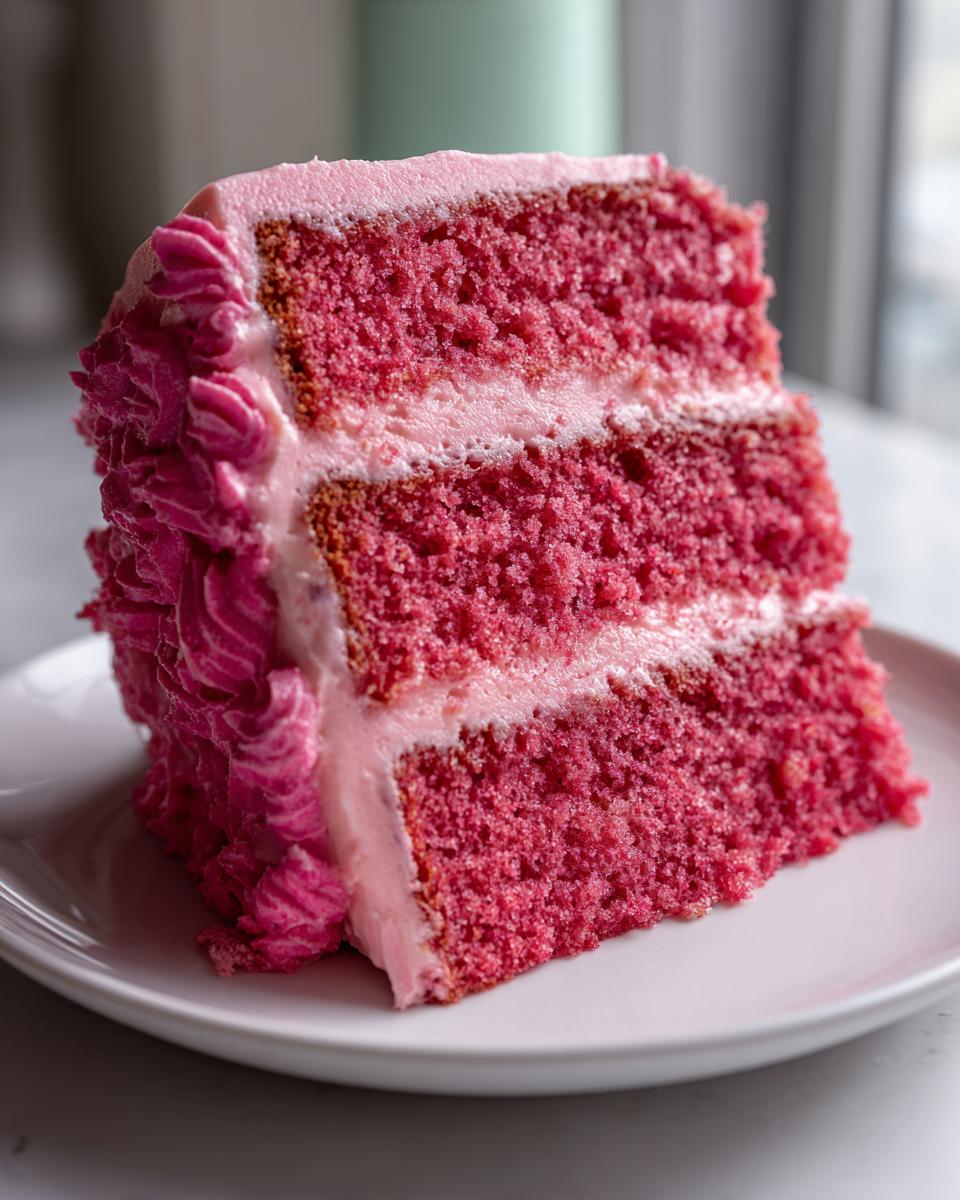
Mother’s Day is right around the corner, and honestly, doesn’t spring just demand something bright and beautiful? I wanted to create a dessert that just screams joy, the kind that perfectly complements those lovely sage green and cream kitchen vibes we all love right now. Well, friends, I finally landed on it! This gorgeous, naturally vibrant **Pink lemonade cake** is intensely tart, wonderfully moist, and seriously foolproof. I spent weeks tinkering with natural colorants to get that perfect shade of rose, and trust me, this recipe is tested and perfected so you can bake with confidence. It’s all about bringing that homemade happiness right to your table!
- Why This Pink Lemonade Cake is Your Perfect Spring Celebration Dessert
- Gathering Ingredients for Your Citrusy Pink Layer Cake
- Step-by-Step Instructions for the Pink Lemonade Cake
- Crafting the Vibrant Hibiscus Powder Frosting
- Assembling and Decorating Your Aesthetic Floral Cakes
- Tips for Success with Your Lemonade Cake with Fresh Berries
- Storing and Serving Your Citrusy Pink Layer Cake
- Frequently Asked Questions About the Pink Lemonade Cake
- Sharing Your Homemade Happiness
Why This Pink Lemonade Cake is Your Perfect Spring Celebration Dessert
When you need a showstopper made with simple ingredients, this cake delivers! It feels so light and celebratory, making it ideal for everything from garden parties to Mother’s Day brunch. It’s not just a cake; it’s truly one of the best spring celebration desserts you can make.
- We get that incredible, natural pink hue from hibiscus powder—no weird food dyes here!
- The flavor is perfectly balanced: bright citrus tang followed by sweet vanilla notes.
- It holds its structure beautifully as a layer cake, which lets you decorate it just perfectly for that aesthetic look.
Gathering Ingredients for Your Citrusy Pink Layer Cake
Okay, let’s get down to the list! Making a truly amazing **Pink lemonade cake** starts long before the oven is preheated. I want you to look at your ingredients and know that quality matters here—especially for that signature tartness. For the cake base, we are using common pantry staples, but pay close attention to the butter; it absolutely needs to be softened, not melted! For the frosting, the star is the hibiscus powder; it brings that gorgeous tone naturally. If you want to check out how I handle citrus in other recipes, I have a fun little article on using fresh citrus juice in glazes!
Cake Batter Components
- 1 1/2 cups all-purpose flour
- 1 1/2 teaspoons baking powder
- 1/2 teaspoon salt
- 1/2 cup unsalted butter, softened (make sure this is room temperature!)
- 1 cup granulated sugar
- 2 large eggs
- 1 teaspoon vanilla extract
- 1/2 cup whole milk
- 1/4 cup fresh lemon juice
- 1 tablespoon lemon juice powder
Hibiscus Powder Frosting Ingredients
- 1 3/4 cups powdered sugar, sifted (we need this fine!)
- 1/2 cup unsalted butter, softened (same temperature rule as above)
- 2 tablespoons whole milk (you might need a tiny splash more, just keep it handy)
- 1 teaspoon hibiscus powder (use the finest grind you can find!)
- 1/4 teaspoon lemon extract
- Fresh berries for garnish
Step-by-Step Instructions for the Pink Lemonade Cake
Alright, let’s get these gorgeous cake layers baked! Getting the timing right on your **Pink lemonade cake** is key to that light, tender crumb we’re aiming for. First things first: set your oven to 350°F (175°C). Don’t trust your oven thermometer; give it a good 15 minutes to actually hit that temperature. Prep is everything, so grease and flour both of your 8-inch pans now. Want a little secret for guaranteeing an easy release? I swear by a quick coat of my homemade cake goop in every nook and cranny!
Preparing the Cake Layers
We start with the dry stuff—just whisk the flour, baking powder, and salt in a bowl and set it aside. Now for the magic: grab your stand mixer (or a very strong arm!). Cream that softened butter and the granulated sugar until it’s genuinely light and fluffy. I mean it, you want fluffy! This process traps the air that makes the cake rise nicely without being too dense. Then, take your time and add those two eggs, one at a time, scraping the bowl down well after each one. Don’t forget the vanilla extract! If you’re curious how creaming affects cakes generally, I talk all about it in my guide to the perfect moist lemon pound cake.
Mixing the Pink Lemonade Cake Batter
Before you even think about mixing, make sure that tablespoon of lemon juice powder is totally dissolved in the milk. If it clumps up, you’ll get little pockets of sourness later, and we don’t want that! This is where you need to be gentle. Remember the alternating trick? Add a third of your dry ingredients, mix until barely combined, then half of your citrusy milk mixture. Repeat this process—dry, wet, dry—ending with dry. Seriously, stop mixing the second you don’t see flour streaks anymore. Overmixing is the enemy of a tender crumb in any great cake, especially a **citrusy pink layer cake** like this one. Divide that perfect batter and get those beauties into the oven for about 28 to 32 minutes. Happy baking!
Crafting the Vibrant Hibiscus Powder Frosting
Now for the part that gives our **Pink lemonade cake** its gorgeous personality—the frosting! This isn’t just any buttercream; we are making a light, fluffy cloud of pink that tastes just as bright as the cake itself. Just like with the cake batter, the temperature of your butter is everything here. It needs to be soft enough to easily mash, but not greasy looking at all. Start by whipping that half-cup of softened butter until it’s pale and creamy. Don’t rush this step; we’re building air!
Next, slowly introduce that sifted powdered sugar. I recommend starting on low speed because powdered sugar flies! Once it’s incorporated, crank it up to medium and let it beat until it’s looking light. This is where the magic happens for our required hibiscus powder frosting: whisk that teaspoon of hibiscus powder with your two tablespoons of milk before adding it to the butter mixture. This stops the powder from creating dry streaks in your frosting. Beat until you hit that gorgeous pink color and fluffy texture. If it seems too thick, add a tiny drop more milk. If it’s too soft—which happens sometimes in summer—just pop it in the fridge for 15 minutes before assembly. It’s going to look stunning! If you want to see my technique for achieving super fluffy results in general, check out my notes on chocolate frosting; the method is the same principle!
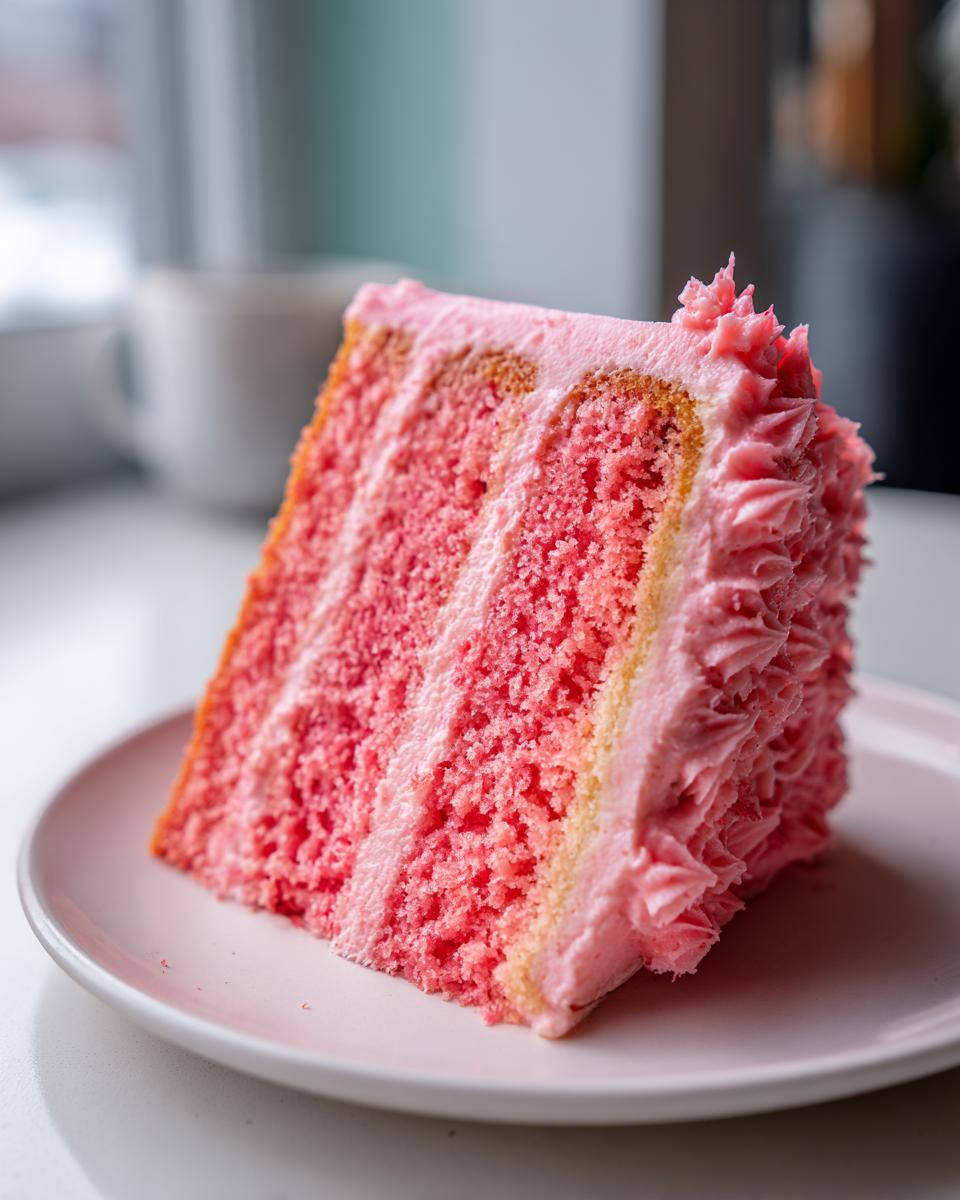
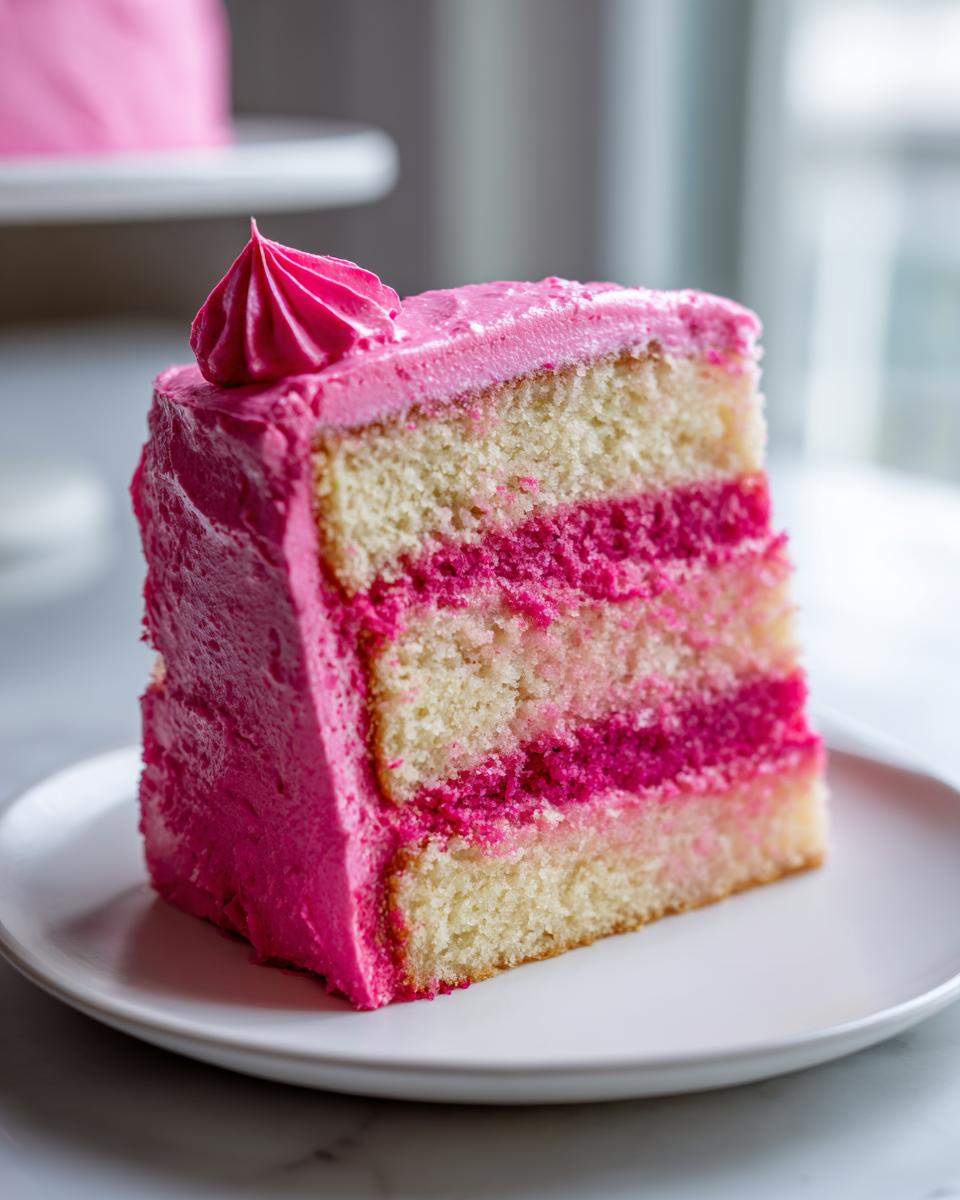
Assembling and Decorating Your Aesthetic Floral Cakes
This is the part I love the most, where our vibrant layers become a true masterpiece! First, make absolutely sure those cake layers are completely, 100% cool. If you try to frost an even slightly warm cake, you’ll end up with a sticky, sliding disaster, trust me! Place your first layer down gently on your cake stand or serving plate. Now, use a good spatula and spread on about a third of that gorgeous hibiscus frosting. It should be thick enough that it holds its shape, but soft enough to spread without tearing the cake.
Carefully place the second layer on top. Now, for that smooth finish that looks so good next to sage green decor—you want a clean look! I always recommend doing a super thin ‘crumb coat’ first. Just smear a tiny bit of frosting all over the whole cake to trap those loose crumbs. Chill it for about 15 minutes. Then, bring it back out and apply your final, beautiful layer of frosting. Keep your spatula flat for slick sides. Finish it off by scattering those fresh berries—I use them everywhere, even in my favorite strawberry cupcakes—right on top. It’s effortlessly elegant; you’ve just created one of the prettiest aesthetic floral cakes!
Tips for Success with Your Lemonade Cake with Fresh Berries
You’ve got the batter mixed, the frosting is pink—fantastic! But before we dive into assembling the final masterpiece, let’s talk troubleshooting. The single biggest key to a beautiful lemonade cake with fresh berries is temperature control, especially while mixing. If your butter is too cold, you won’t get that beautiful aeration when creaming with the sugar, and your cake will be dense. If the butter is too warm, the frosting will be soup!
For the frosting consistency, if you find your hibiscus buttercream is spreading too much when you frost the layers, don’t panic! Just beat it a little longer on medium speed, or chill the whole bowl for ten minutes. Conversely, if it’s breaking or stiff, add milk just one teaspoon at a time until it loosens up; adding it too fast ruins the texture. For maximizing that tart flavor, remember to fully dissolve the lemon juice powder in the milk before adding it into the main batter. It makes a huge difference in flavor distribution! If you want more tips on making sure your lemon bakes stay incredibly moist, check out my thoughts in the tangy lemon loaf post.
Storing and Serving Your Citrusy Pink Layer Cake
Even though this gorgeous citrusy pink layer cake tastes best enjoyed right away, sometimes we have leftovers—which is rarely a problem here! Because the frosting is a stable buttercream, you can absolutely store this cake, covered tightly, at cool room temperature for up to two days. Keeping it in the fridge isn’t necessary unless your kitchen is super warm; cold temps can sometimes make the cake layers firm up a bit.
When you’re ready to serve a slice, letting it sit on the counter for about 30 minutes before cutting is a good idea. And talk about a perfect pairing! This tartness craves something light alongside it. While I have a recipe for a warm drink like my Hot Toddy, for spring, this cake begs for iced sparkling water with a sprig of mint. Simple perfection!
Frequently Asked Questions About the Pink Lemonade Cake
It’s totally normal to have questions when swapping out traditional ingredients for a new, colorful bake like our Pink lemonade cake! I’ve answered the ones I get most often below to make sure your baking experience is as smooth as possible. Trust me, once you see that color pop, you’ll want to make it again next week!
Can I make the Pink Lemonade Cake ahead of time?
Yes, you absolutely can manage this ahead of time, which is great if you’re busy with spring entertaining! I always advise baking the layers the day before you plan to serve them. Wrap those cooled layers tightly in plastic wrap and leave them on the counter—they stay perfectly moist. Then, make the frosting and assemble the whole beautiful cake the morning of your party. If you try to frost giant layer cakes too far in advance, the cut edges can sometimes dry out a bit, but doing it the day of ensures everything looks its absolute freshest!
How do I get the brightest pink color in my frosting?
The key to that intense, cheerful pink color lies entirely with the hibiscus powder! Remember, we want it as finely ground as possible. Think of it like cocoa powder consistency. If you can, look for a brand where the powder looks like dust, not little flakes. Also, be patient when beating the frosting; sometimes the hibiscus needs a good two or three minutes of whipping on medium speed to fully bloom its color into the butter and sugar. If you add a touch too much milk and it gets thin, just beat in an extra tablespoon of powdered sugar to help stiffen it back up while the color deepens!
Sharing Your Homemade Happiness
That’s it—your gorgeous, tangy, and totally pink showstopper is done! I truly hope making this Pink lemonade cake brought you a little spark of joy today. Please, please come back and leave your stars and comments below. Tell me how you garnished yours! If you snap a picture, let me know in the comments or visit my About Page so I can see it! Seeing your beautiful bakes is what the whole Bliss Batter mission is about.
PrintPink Lemonade Layer Cake with Hibiscus Frosting

Make a bright, citrusy pink layer cake perfect for spring celebrations. This recipe uses lemon juice powder for tartness and hibiscus powder for a natural, vibrant pink color in the frosting.
- Prep Time: 25 min
- Cook Time: 30 min
- Total Time: 55 min
- Yield: 10 servings 1x
- Category: Dessert
- Method: Baking
- Cuisine: American
- Diet: Vegetarian
Ingredients
- 1 1/2 cups all-purpose flour
- 1 1/2 teaspoons baking powder
- 1/2 teaspoon salt
- 1/2 cup unsalted butter, softened
- 1 cup granulated sugar
- 2 large eggs
- 1 teaspoon vanilla extract
- 1/2 cup whole milk
- 1/4 cup fresh lemon juice
- 1 tablespoon lemon juice powder
- 1 3/4 cups powdered sugar, sifted
- 1/2 cup unsalted butter, softened (for frosting)
- 2 tablespoons whole milk (for frosting)
- 1 teaspoon hibiscus powder
- 1/4 teaspoon lemon extract
- Fresh berries for garnish
Instructions
- Preheat your oven to 350°F (175°C). Grease and flour two 8-inch round cake pans.
- In a medium bowl, whisk together the flour, baking powder, and salt. Set aside.
- In a large bowl, cream the softened butter and granulated sugar with an electric mixer until light and fluffy.
- Beat in the eggs one at a time, mixing well after each addition. Stir in the vanilla extract.
- In a small bowl, whisk together the milk, lemon juice, and lemon juice powder until the powder dissolves.
- Gradually add the dry ingredients to the wet ingredients, alternating with the milk mixture, beginning and ending with the dry ingredients. Mix until just combined. Do not overmix.
- Divide the batter evenly between the prepared cake pans. Bake for 28 to 32 minutes, or until a toothpick inserted into the center comes out clean.
- Let the cakes cool in the pans for 10 minutes before inverting them onto a wire rack to cool completely.
- To make the frosting, beat the 1/2 cup softened butter until smooth. Gradually add the powdered sugar, mixing on low speed.
- Add the 2 tablespoons of milk, hibiscus powder, and lemon extract. Beat on medium speed until light and fluffy. Add more powdered sugar if the frosting is too thin.
- Once the cakes are completely cool, place one layer on a serving plate. Spread a layer of frosting on top. Place the second layer on top and frost the top and sides of the cake.
- Garnish with fresh berries before serving.
Notes
- For the most vibrant pink hue, ensure your hibiscus powder is finely ground.
- You can substitute fresh lemon zest for the lemon juice powder for a slightly different flavor profile.
- If you want a taller cake, use three 6-inch pans instead of two 8-inch pans, adjusting the baking time slightly.
Nutrition
- Serving Size: 1 slice
- Calories: 380
- Sugar: 45g
- Sodium: 210mg
- Fat: 19g
- Saturated Fat: 11g
- Unsaturated Fat: 8g
- Trans Fat: 0.5g
- Carbohydrates: 50g
- Fiber: 1g
- Protein: 4g
- Cholesterol: 75mg