
Are you staring down a Tuesday night with exactly zero motivation but a serious craving for something that tastes like summer and feels super healthy? Me too! That’s why coming up with truly efficient recipes is my absolute favorite challenge. Remember how I used to plan huge corporate events? Well, that meticulous timing translates perfectly to the kitchen, ensuring we get maximum flavor with minimal fuss. Today, we’re focusing on the ultimate streamlined dinner: the shrimp bowl. This isn’t just another toss-together salad; it’s a perfectly composed, high-protein meal that tastes gourmet but is designed for your busiest nights. Trust me, once you try this grilled version, you’ve earned yourself a permanent spot in my collection of easy weeknight dinners.
- Why This Quick Shrimp Bowl Recipe Is Your New Weeknight Hero
- Gathering Ingredients for Your Perfect Shrimp Bowl
- Step-by-Step Instructions for the Best Shrimp Bowl Recipe
- Tips for Success with Your Grilled Shrimp Bowl Recipe
- Making This Shrimp Bowl Recipe Ideal for Spicy Shrimp Bowl Meal Prep
- Variations: Building Your Customizable Shrimp Bowls
- Serving Suggestions for Your Flavorful Seafood Bowls
- Storage and Reheating Instructions for Leftover Shrimp Bowl Components
- Frequently Asked Questions About Making a Great Shrimp Bowl
- Sharing Your Homemade Shrimp Bowl Creations
Why This Quick Shrimp Bowl Recipe Is Your New Weeknight Hero
I designed this grilled shrimp bowl precisely for those evenings when you’re starving but also trying to eat well. It hits all those sweet spots we look for in a great, dependable dish. It doesn’t require any complicated layering or gourmet techniques, but the flavor payoff is huge!
- Ready in Under 30 Minutes: The Ultimate Quick Shrimp Bowl Recipe: Seriously, the prep is just 15 minutes, and the shrimp cooks in 10. That means you’re sitting down to eat fantastic food in 25 total minutes. That’s faster than delivery, and infinitely better tasting, I promise!
- High Protein and Fresh Flavorful Seafood Bowls: This is one of my favorite simple lunch recipes because it packs a massive protein punch from the shrimp. Plus, we balance that richness with bright, fresh elements—that avocado corn salsa just sings when it meets that creamy garlic drizzle. It’s one of those genuinely healthy shrimp bowl ideas that never feels like a compromise.
Gathering Ingredients for Your Perfect Shrimp Bowl
Okay, so we need to get our prep done efficiently since this whole shrimp bowl comes together in a flash! When I test recipes, I need exact measurements—it’s the event planner in me ensuring zero mess-ups in the heat of the moment. This recipe is fantastic because it uses ingredients you likely have, but how we break them up is key to keeping everything fresh until that final assembly.
For the Grilled Shrimp and Seasoning
We start with one pound of large shrimp—make sure they are peeled and deveined, that saves so much time! Toss those beauties with 2 tablespoons of olive oil, 1 teaspoon of smoked paprika for that gorgeous char color, plus salt and pepper to taste. That’s it for the main protein seasoning!
For the Avocado Corn Salsa Shrimp Bowl Toppings
For the crunch and brightness, grab 1 cup of corn kernels—thawed frozen is totally fine if you’re in a rush. You’ll also need ½ cup of finely diced red onion and ½ cup of diced tomato. Don’t forget your 1 cup of mixed greens for the bottom layer and one beautiful avocado, sliced right before serving.
Crafting the Creamy Sauce Shrimp Bowl Drizzle
This sauce is the MVP! You need ½ cup of mayonnaise, 2 cloves of garlic minced super fine—don’t skimp here—1 tablespoon of fresh lemon juice, and 1 tablespoon of water. If you want it runnier, just slowly add a teaspoon more water until it drizzles perfectly.
The Base for Your Flavorful Seafood Bowls
Finally, for the foundation of your bowl, you need 1 cup of cooked rice or quinoa per bowl. Having this cooked ahead of time truly makes this a weeknight shrimp dinner champion. That’s everything ready to go!
Step-by-Step Instructions for the Best Shrimp Bowl Recipe
This is where the magic happens fast! Remember, we want efficiency, not chaos. Since the prep work is done, we move right into cooking. I always make sure my grill is hot—medium-high is perfect for getting that gorgeous char without overcooking those delicate shrimp. If you’re not grilling, your skillet needs to be ready too!
Seasoning and Grilling the Shrimp
First, make sure your shrimp are coated evenly with the paprika and spice mix. Get your grill screaming hot! Lay the seasoned shrimp down and let them sizzle for just 2 to 3 minutes per side. You’re looking for opaque and pink—no grey gummy shrimp allowed! As soon as they look done, pull them right off the heat and set them aside immediately. We don’t want them hanging around getting tough.
Preparing the Salsa and Creamy Garlic Sauce
While the shrimp rests, do your simple assembly for the other components. In one bowl, just combine the corn, onion, and tomato for your salsa. Easy peasy! Now, grab a smaller bowl for the sauce. Whisk the mayonnaise, garlic, lemon juice, and that tablespoon of water together. Keep whisking until it’s creamy and smooth. If it seems too thick to drizzle nicely over everything, add just a tiny splash more water, one teaspoon at a time. Don’t splash it in all at once, or you’ll end up with soup instead of a drizzle!
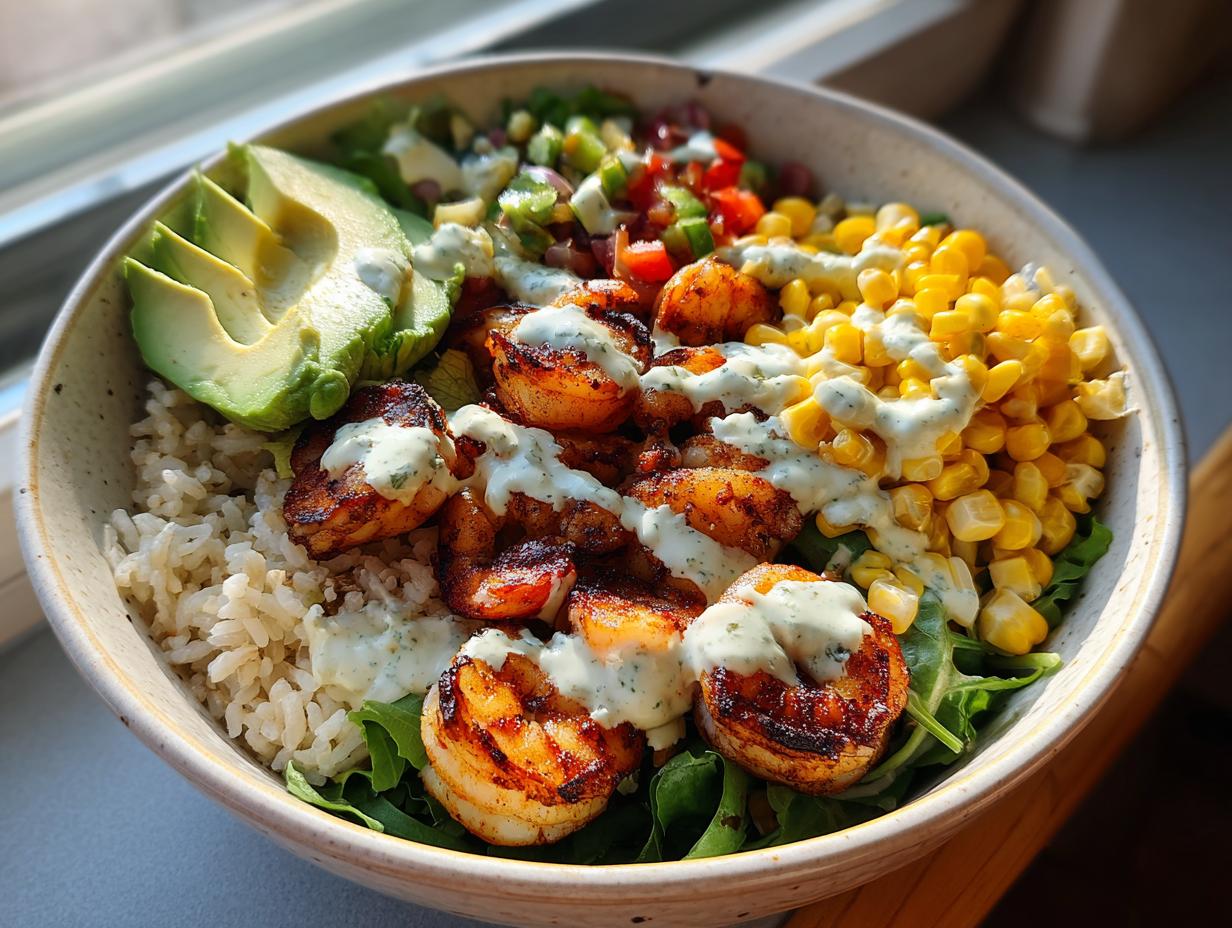
Assembling Your Vibrant Shrimp Bowl
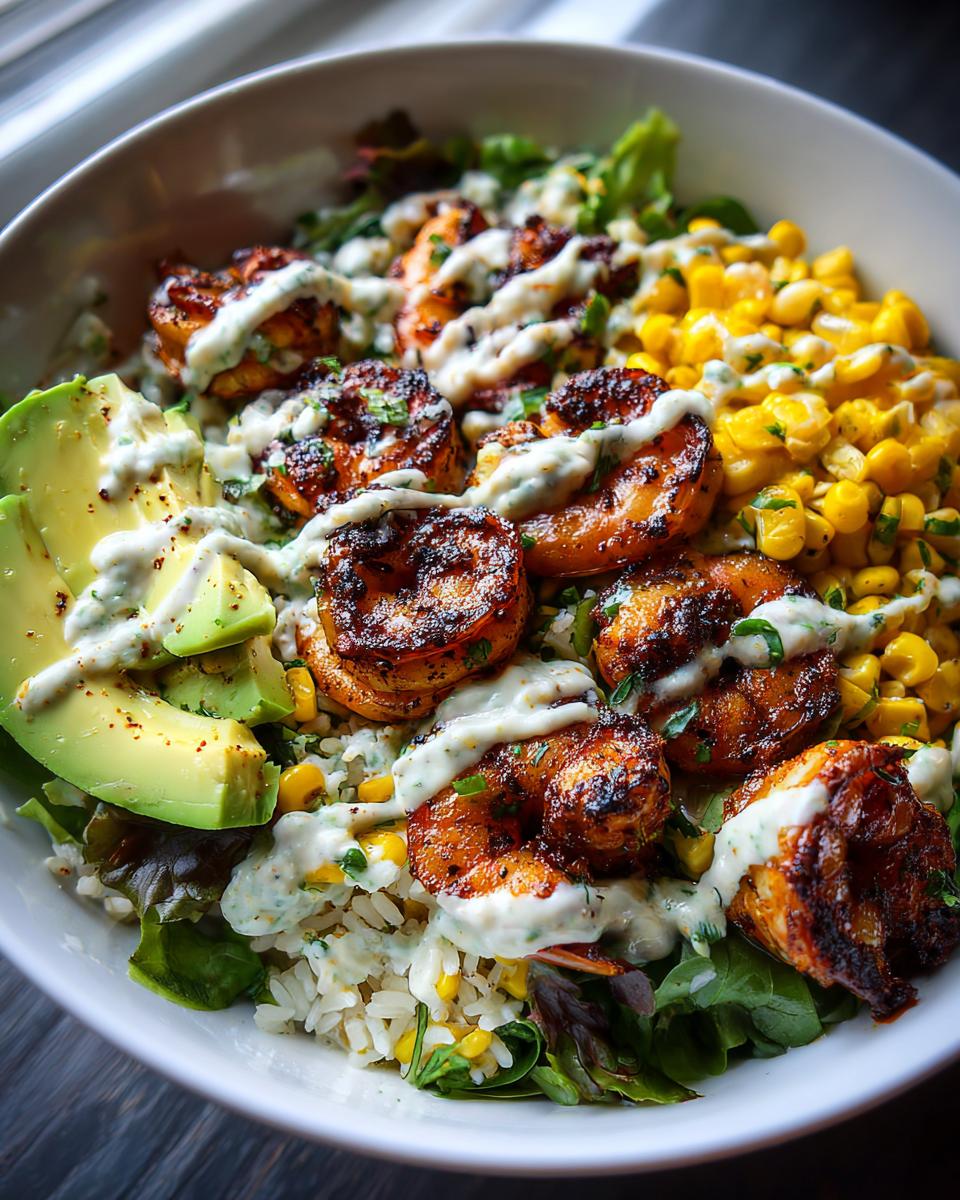
Time to build that gorgeous shrimp bowl! Start with your base—that cup of rice or quinoa goes in first. Then, lay down a bed of your mixed greens. Now, arrange your star players artfully: cluster the grilled shrimp on one side, spoon on that bright corn salsa on another, and don’t forget those gorgeous avocado slices. Finally, take that creamy garlic sauce and drizzle it generously over the whole creation. Seriously, look at that vibrant beauty! You did this in under 30 minutes, which still blows my mind. If you love garlic sauce like I do, you might want to check out my garlic butter shrimp scampi recipe for another easy winner.
Tips for Success with Your Grilled Shrimp Bowl Recipe
Even though this is a super fast recipe, a few small tricks will take your Grilled Shrimp Bowl Recipe from good to absolutely unforgettable. We want that shrimp perfectly tender, not rubbery, and we want those greens crisp! It’s all about timing and separation, which, as you know, is my specialty.
Achieving Perfect Shrimp Texture
The one thing that ruins any speedy seafood idea is overcooked shrimp. They cook so fast! As soon as they curl into a ‘C’ shape and turn opaque pink, they are done. If you see them trying to curl into a tight ‘O,’ you’ve gone too far—oops! If you’re not using the grill, pan-searing works beautifully; just make sure your pan is properly hot before the shrimp hits the oil. Less time cooking means more wiggle room for error, so keep the heat up!
Keeping Components Fresh for Your Easy Dinner Bowls
If you are making these for lunches for the week, remember to never mix everything until you are ready to eat. Store your cooked rice, the shrimp, and the corn salsa all separately. The creamy garlic sauce should be in its own tiny container too. Keeping the sauce off the greens and salsa ensures that wonderful crunch lasts until lunchtime. This is key for anyone trying to enjoy these as easy dinner bowls the next day!
Making This Shrimp Bowl Recipe Ideal for Spicy Shrimp Bowl Meal Prep
One of the best parts about this wonderfully quick shrimp bowl is how perfectly it handles meal prepping. You know I love efficiency, and making lunch ahead saves so much mental energy during the week! This recipe is excellent for putting together those high-protein meals we are aiming for.
Here’s the secret for making this work for your Spicy Shrimp Bowl Meal Prep: Everything needs its own little habitat. Keep the grilled shrimp container separate from the cooked rice or quinoa base. The avocado corn salsa also needs its own airtight container, and don’t forget to put the creamy garlic sauce in a very small, sealed jar. When everything is stored separately like this, your greens stay crisp, your shrimp stays tender, and the flavor payoff when you finally assemble it the next day is just as good as when it was fresh!
Variations: Building Your Customizable Shrimp Bowls
Part of the joy of making a great base recipe like this shrimp bowl is knowing you can twist the flavors almost infinitely! We are building on simplicity here; swapping out one key flavor component can turn this smoky grilled profile into something totally different. If you loved my honey garlic salmon recipe, you’ll appreciate how easily we can apply that sweet-savory profile here, too. Don’t feel like you have to stick to just one version!
Switching to a Chipotle Shrimp Bowl Flavor
If you’re craving some warmth and smokiness that goes beyond paprika, turning this into a full-blown Chipotle Shrimp Bowl is so easy. You could sneak some chipotle powder right into the marinade when you toss the shrimp—maybe half a teaspoon to start. Or, my favorite trick? Whisk a teaspoon of adobo sauce (that’s the stuff that comes in the can with the chipotle peppers) right into your creamy garlic sauce. That turns your drizzle into a spicy, creamy kick that is just divine over the corn salsa.
Trying a Honey Garlic Shrimp Bowl Glaze
On the total opposite end of the heat spectrum, maybe you need something sweeter tonight! This is where we can pivot toward a Honey Garlic Shrimp Bowl vibe. You won’t want to use the creamy garlic sauce for this one; you’ll want a simple glaze instead. Just whisk together 2 tablespoons of honey, 1 tablespoon of soy sauce (or tamari!), and 1 teaspoon of minced garlic. Once your shrimp are grilled and off the heat, toss them right back into a clean skillet with that glaze for about 30 seconds until it bubbles and clings to the shrimp. Drizzle that sticky goodness right over your rice and toppings—wow. It’s incredibly satisfying and a totally different experience!
Serving Suggestions for Your Flavorful Seafood Bowls
Even though this shrimp bowl is designed to be a complete meal itself—protein, grain, fat, and veggies all accounted for—sometimes you just want a little something extra on the side, right? When I’m planning out a satisfying meal spread, I think about texture and temperature contrast. Since the shrimp is warm and the salsa is cool, we want sides that complement that.
If you’re feeling like you need a bit more green, a simple, very lightly dressed side salad works wonders. Forget heavy dressings! Just some arugula tossed with a tiny drizzle of high-quality olive oil and a sprinkle of flaky sea salt. The peppery bite of the arugula cuts through the richness of our creamy garlic sauce beautifully. Keep it light so it doesn’t overpower the main bowl!
And what about drinks? Since this has a little bit of a smoky, vibrant flavor profile, a crisp, slightly acidic pairing is perfect. If you’re looking for a fantastic grown-up pairing, I have a wonderful maple bourbon cocktail recipe that actually balances creamy and bright notes really well, making it a surprisingly great match for seafood. If cocktails aren’t your thing, try a very crisp Sauvignon Blanc or even just sparkling water with lots of fresh lime squeezed in. Anything too heavy will just weigh down the lightness of this gorgeous flavorful seafood bowl!
Storage and Reheating Instructions for Leftover Shrimp Bowl Components
I know we planned this for a weeknight dinner, but honestly, the leftovers from a great shrimp bowl often taste even better the next day once the flavors have had a chance to hang out together—as long as you store them right! This is where being meticulous about separation really pays off. Remember how we separated everything for meal prep? We are going to treat leftovers the same way.
You need four distinct containers, just like when you prepped it: one for the base (rice/quinoa), one for the shrimp, one for the avocado corn salsa, and one tiny one for that divine creamy garlic sauce. Keep everything refrigerated. The shrimp, honestly, will hold up beautifully for about three days this way.
When you’re ready to eat the next day, please, please, please, do not microwave the whole thing assembled! That just invites soggy greens and rubbery shrimp. Reheat only the shrimp and the base together—either in a microwave for a quick 30 to 45 seconds, or gently warmed in a small skillet over low heat. You want them just warm, not hot.
Then, assemble fresh! Put your warm rice down, add your fresh, crisp greens, spoon on the cold corn salsa, top with the warm shrimp, and *then* pour over the cold creamy garlic sauce. That contrast of warm and cold is what makes this such a satisfying meal, and keeping the components separate keeps that texture perfect!
Frequently Asked Questions About Making a Great Shrimp Bowl
I always love hearing your questions! It shows me how much you’re putting thought into creating the best shrimp bowl possible. Just like I obsess over the perfect crumb in a cake, I obsess over making sure these bowls fit seamlessly into your life. Here are a few things I hear most often when people are trying out this quick shrimp bowl recipe. For even more flavor depth, maybe check out my secrets for my best guacamole to serve alongside!
Can I use frozen shrimp in this shrimp bowl recipe?
Oh absolutely, you can! But please don’t just toss them straight onto the hot grill, or you’ll end up with sad, unevenly cooked shrimp. If you’re using frozen shrimp, you need to thaw them properly first—I usually move them to the fridge the night before, or if I’m in a pinch, I pop the sealed bag into a sink of cold water, changing the water every 20 minutes until they’ve softened up. Pat them super dry after thawing—dry shrimp crisp up when cooking, wet shrimp steam!
What is the best base besides rice for a healthy shrimp bowl?
If you’re looking for healthy shrimp bowl ideas and want to keep the carbs down, you have some fantastic choices! My go-to low-carb swap is cauliflower rice—it soaks up all that amazing creamy garlic sauce! Another great option, especially if you’re leaning towards a pure salad vibe, is just doubling up on the mixed greens and adding in some shredded cabbage for extra texture. Either way, make sure whatever base you pick is cold or room temperature when you assemble the bowl!
How can I make the creamy sauce dairy-free for this shrimp bowl?
That’s a great question for anyone managing dietary needs! Since the sauce is mayo-based, you can easily swap that out. The best move is finding a good quality vegan mayonnaise—the texture is usually very close to traditional mayo, so your sauce consistency stays perfect for that drizzle. If you prefer yogurt-based sauces, Greek yogurt is technically dairy, so if that’s okay, you can substitute the mayo with thick, plain Greek yogurt and add a tiny bit more lemon juice to thin it out. It makes a slightly tangier, but still delicious, sauce for your creamy sauce shrimp bowl!
Sharing Your Homemade Shrimp Bowl Creations
Alright, you’ve managed to whip up an absolutely gorgeous, speedy, and high-protein shrimp bowl! I’m so incredibly proud of you for getting this delicious meal on the table faster than you thought possible. Now, while I love developing these recipes for you, the real joy for me comes from seeing them come to life in your kitchens!
So, please, don’t be shy! If you tried this recipe, I would be so thrilled if you’d leave a quick rating right here on the page. Did the creamy garlic sauce come out just right? Did the grilling give you that smoky char you were hoping for? Let me know in the comments below so I can cheer you on—and also use your feedback to make sure future recipes are even better.
And if you snap a picture of your finished, vibrant masterpiece—maybe one with that gorgeous avocado corn salsa sparkling in the light—tag me on social media! Seeing your work and knowing I helped make your weeknight dinner easier is truly why I started this entire venture. If you have any last-minute questions or just want to say hello, you can always reach out directly through my contact page. Happy eating, and I hope this grilled shrimp bowl becomes a regular favorite for you!
PrintQuick and Healthy Grilled Shrimp Bowl with Creamy Garlic Sauce
Create this flavorful grilled shrimp bowl featuring smoky shrimp, bright avocado corn salsa, and a rich, creamy garlic sauce. It is a satisfying, high-protein meal ready fast for your weeknight dinner.
- Prep Time: 15 min
- Cook Time: 10 min
- Total Time: 25 min
- Yield: 2 servings 1x
- Category: Dinner
- Method: Grilling
- Cuisine: American
- Diet: Low Fat
Ingredients
- 1 pound large shrimp, peeled and deveined
- 2 tablespoons olive oil
- 1 teaspoon smoked paprika
- 1/2 teaspoon salt
- 1/4 teaspoon black pepper
- 1 cup cooked rice or quinoa (for base)
- 1 cup mixed greens
- 1 cup corn kernels (fresh or thawed frozen)
- 1/2 cup diced red onion
- 1/2 cup diced tomato
- 1 avocado, sliced
- For Creamy Garlic Sauce: 1/2 cup mayonnaise
- 2 cloves garlic, minced
- 1 tablespoon lemon juice
- 1 tablespoon water (or more, for thinning)
Instructions
- Prepare the shrimp: In a bowl, toss the shrimp with 1 tablespoon of olive oil, smoked paprika, salt, and pepper.
- Grill or pan-sear the shrimp over medium-high heat for 2-3 minutes per side until pink and cooked through. Set aside.
- Prepare the corn salsa: In a separate bowl, combine the corn kernels, diced red onion, and diced tomato. Mix well.
- Make the creamy garlic sauce: Whisk together the mayonnaise, minced garlic, lemon juice, and water until smooth. Adjust water for desired consistency.
- Assemble the bowls: Divide the cooked rice or quinoa between serving bowls. Top with mixed greens.
- Arrange the grilled shrimp, corn salsa, and sliced avocado over the greens in each bowl.
- Drizzle generously with the creamy garlic sauce before serving immediately.
Notes
- For meal prepping, store the shrimp, salsa, rice, and sauce in separate containers. Assemble just before eating to keep the greens crisp.
- You can substitute the grilled shrimp with pan-seared shrimp if you prefer not to grill.
- This recipe works well with a chipotle lime marinade for a spicy shrimp bowl variation.
Nutrition
- Serving Size: 1 bowl
- Calories: 550
- Sugar: 6
- Sodium: 750
- Fat: 30
- Saturated Fat: 5
- Unsaturated Fat: 25
- Trans Fat: 0
- Carbohydrates: 35
- Fiber: 6
- Protein: 40
- Cholesterol: 250