

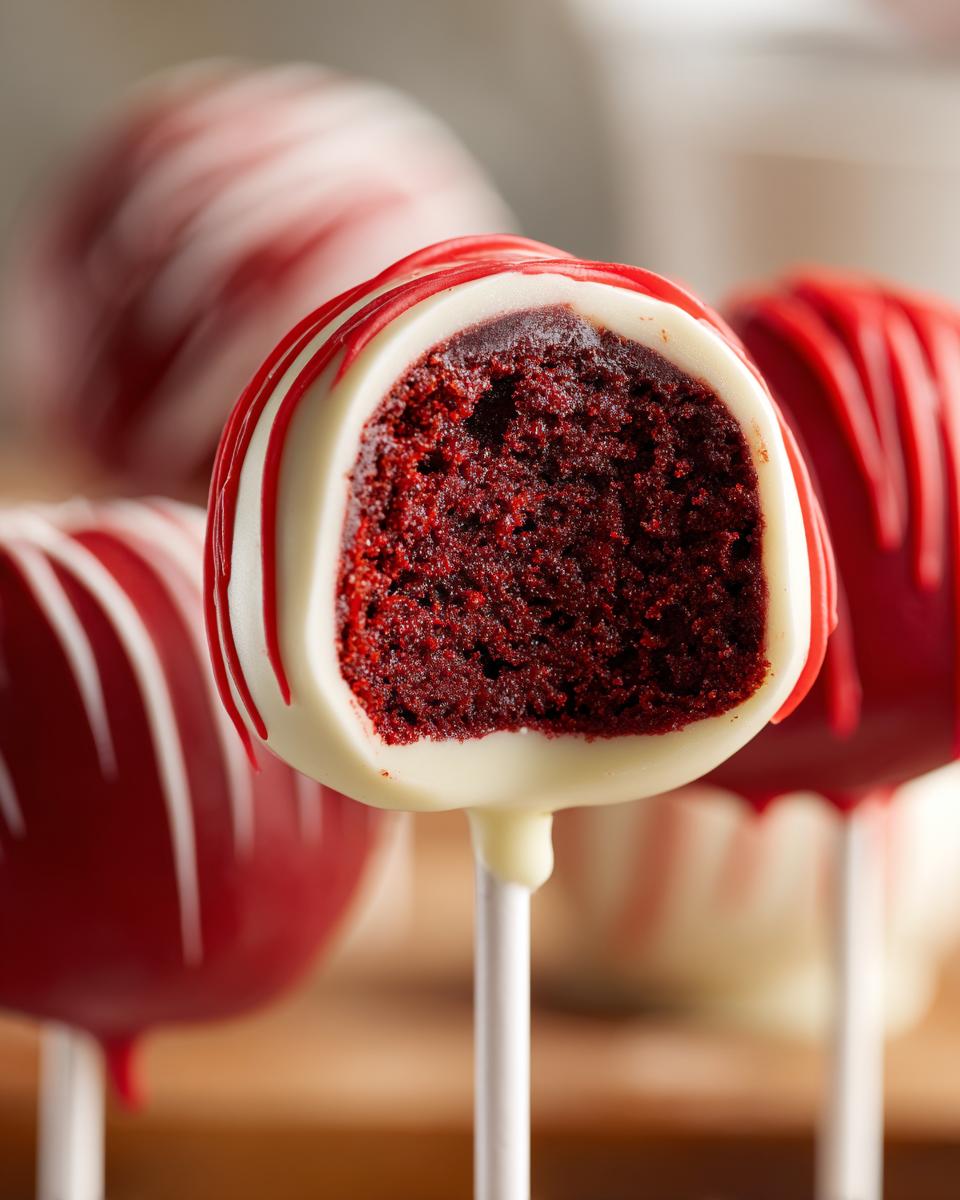
Isn’t there just something magical about a perfect little bite of dessert? They’re so fun to set out at parties, and honestly, sometimes you just want a tiny taste without committing to a huge slice of cake. That’s exactly why I know you are going to fall head-over-heels for these **ULTRA Moist Red Velvet Cake Pops**! My whole mission here at Bliss Batter, just like Claire strives for in our story when she talks about slowing down and finding peace, is to take treats that seem intimidating and make them totally achievable for everyone.
The secret sauce for these gorgeous little spheres is using that tangy cream cheese filling right in the center, and trust me, it keeps everything wonderfully fudgy. Forget dry, crumbly cake balls; these red velvet cake pops are proof that accessible baking can still deliver big, decadent flavor every single time.
- Why This Is the Ultimate Recipe for Red Velvet Cake Pops
- Gathering Ingredients for Perfect Red Velvet Cake Pops
- Step-by-Step Guide to Making Red Velvet Cake Pops
- Tips for Perfect Red Velvet Cake Pops Every Time
- Creative Red Velvet Cake Pops Decorating Ideas
- Storage and Make-Ahead Tips for Red Velvet Cake Pops
- Variations on Classic Red Velvet Cake Pops
- Serving Suggestions for Your Red Velvet Cake Pops
- Frequently Asked Questions About Making Red Velvet Cake Pops
- Nutritional Estimates for Red Velvet Cake Pops
- Share Your Bite Sized Red Velvet Desserts
Why This Is the Ultimate Recipe for Red Velvet Cake Pops
Listen, I know the fear! You spend all that time rolling little balls, only to have them crack the minute they touch hot chocolate. No thank you! This recipe is my go-to because it specifically solves those major pain points. We aren’t messing around when it comes to texture; these are guaranteed to be some of the moist red velvet cake pops you’ve ever made.
What makes them so foolproof?
- The secret lies in the binder—we aren’t just using standard frosting!
- They stay perfectly smooth when dipping, which is half the battle.
- They look professional enough for a fancy event but are secretly super easy!
If you want that decadent texture without hours of work from scratch, keep reading. You can even see how our salted caramel brownies follow a similar path of turning simple components into rich treats!
Achieving Ultra Moist Red Velvet Cake Pops Texture
The number one reason people end up with dry cake pops is the binder. But here, we are locking in all that wonderful flavor! When you bake the cake base, try swapping some of the liquid for buttermilk—it keeps the crumb tender. But the real MVP is that center of awesome: the cream cheese red velvet cake pops structure relies on that slightly tangy, soft frosting to hold everything together without drying it out once chilled.
Simple Assembly: Perfect for Parties and Gifts
We love using high-quality box mix here because it cuts down on time without sacrificing flavor! This means you can whip up a huge batch of these beautiful red velvet party treats in no time. Once chilled, dipping is fast, and you can get them set up on sticks almost instantly. They are just as fantastic for gifting as they are for a big celebration!
Gathering Ingredients for Perfect Red Velvet Cake Pops
Okay, let’s get organized! Before we start mixing and baking, you need to have everything laid out, just like I do when I prep my kitchen. Having the right components is what separates a good batch from a truly show-stopping batch of red velvet cake pops. Remember, it’s all about that quality check throughout the process to make sure we nail the texture this time!
Cake Base and Cream Cheese Binder
For the cake, grab yourself one standard box, that’s 15.25 ounces, of red velvet cake mix. Follow the box directions for the liquids, but for maximum moisture, I always like sneaking in a little buttermilk if I have some on hand! The real star, the binder, needs to be 1 cup of cream cheese frosting. Make sure that frosting is nice and softened—whether it’s your homemade favorite or store-bought, bringing it to room temperature helps it blend seamlessly with those cake crumbs.
The Best Chocolate Coating for Cake Pops
You absolutely must use proper melting wafers here, not standard chocolate chips. I use 1/2 cup of white chocolate wafers for the main dip, and then I keep about 1/4 cup of dark chocolate handy for drizzling later on, but you can stick to all white or all dark if that’s your preference! Here’s a pro tip for the smoothest experience: keep about a tablespoon of vegetable shortening nearby. If your chocolate seems too thick when it melts—and sometimes it does—a tiny bit of that shortening thins it out perfectly for that beautiful, thin coating layer we are aiming for.
Step-by-Step Guide to Making Red Velvet Cake Pops
Now for the best part: turning those ingredients into adorable, perfectly shaped little treats! This is where you get to bring all that careful measurement together. Don’t let nerves scare you off; just follow these steps exactly, and you’ll be amazed at your handmade red velvet cake pops. If you’re looking for other simple things for busy nights, I have some great easy weeknight dinner ideas too, but today, we focus on dessert!
Baking and Creating the Moist Cake Crumb Base
First things first, prepare your cake according to the box instructions, but listen for my moisture trick: when the box calls for water, try replacing half of it with buttermilk. It makes a huge difference in the tenderness! Bake it flat in that 9×13 pan as directed. Once it’s out, you have to, absolutely have to, let it cool completely. I mean stone cold. If it’s even slightly warm, it’ll turn your binder into soup, and that means messy balls!
Mixing, Rolling, and Chilling the Red Velvet Cake Pops Dough
Once cooled, crumble that cake finely into a large bowl. Now, mix in the cream cheese frosting. Use your hands—seriously, it’s the best way to feel when it’s right. You are mixing until it looks like thick, dark red cookie dough, and you should be able to squeeze a piece and have it hold its shape perfectly. Roll these into uniform balls, place them on parchment paper, and they MUST chill for at least one full hour. If you dip warm dough, they will totally crack when they hit the hot chocolate!
Mastering the Chocolate Dipping Technique
This is what separates the pros from the beginners! Once the balls are firm, dip the tip of your cake pop stick just a tiny bit into the melted chocolate and insert it into the chilled ball. Pop the tray back in the fridge for 10 minutes. This locks the stick in place so it doesn’t wiggle when you dip the whole thing. When you dip the entire pop, use a slow, smooth motion, and when you pull it out, gently tap the stick against the side of the bowl. That tapping lets the excess coating drip off, giving you that lovely, smooth shell we all want!
Tips for Perfect Red Velvet Cake Pops Every Time
Look, making pretty red velvet cake pops isn’t rocket science, but there are definitely little tricks I’ve learned over the years that stop disaster strikes! I’ve poured over my notes so you don’t have to learn the hard way, because I want to make this process super accessible for everyone learning how to make cake pops for beginners. You want that professional finish without all the frustration!
Troubleshooting Common Red Velvet Cake Pops Issues
The biggest issue is cracking, right? That almost always happens when your cake balls aren’t cold enough when you dip them. They need to be rock hard! If the chocolate coating feels too thick, you might accidentally pull some of the cake with it, causing those awful cracks. Remember that little bit of shortening I told you to keep nearby? If your chocolate seizes up or gets too stiff in the bowl while you’re working, just thin it slightly with that shortening until it flows like paint. That thin coat is much less likely to crack as it sets.
Ingredient Adjustments for Flavor Balance
While the cake mix gives us that great color and easy start, the true flavor hero is the binder. If you love a less sweet dessert, trust me on this: use a tangier cream cheese frosting instead of a standard buttercream. That slight zip cuts through the richness of the red velvet beautifully. It keeps the final product tasting decadent but not heavy. If you’ve ever tried the recipe and thought, “Wow, that’s a little too sweet,” switching to a sharper cream cheese binder fixes it right up for perfect cream cheese red velvet cake pops.
If you want to see another recipe where small ingredient tweaks make a huge difference in moisture, check out my guide on moist chocolate chip pumpkin muffins—same principle applies!
Creative Red Velvet Cake Pops Decorating Ideas
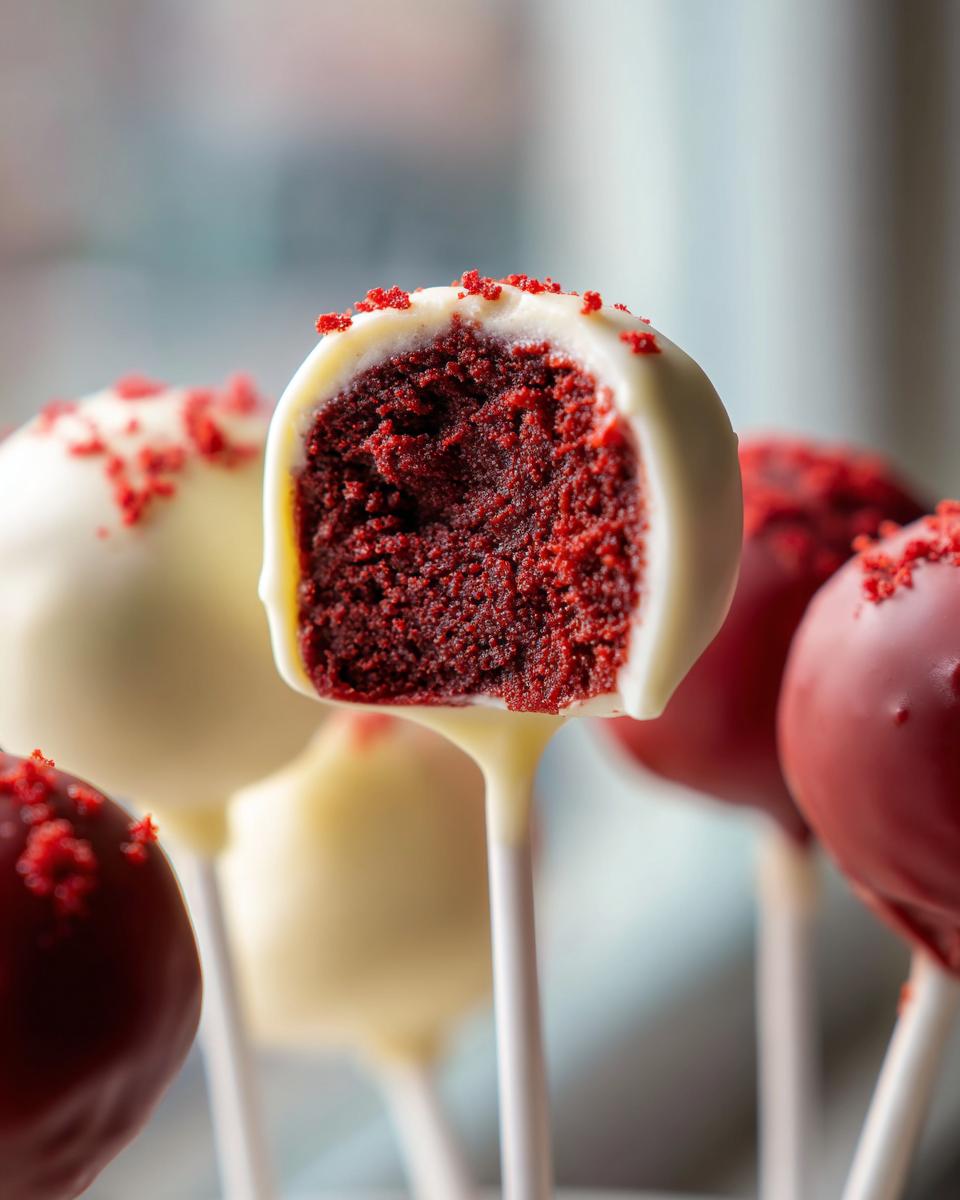
Honestly, once you nail the dipping technique, the fun really begins! These red velvet cake pops are already so vibrant, which makes decorating them a breeze. They are just fantastic for any celebration, whether you’re prepping for a big birthday bash or something more intimate. I always grab a container of bright sprinkles just because they catch the light so beautifully. It’s all about having fun with your cake pop decorating ideas!
You don’t need fancy tools to make them look like real showstoppers. A simple contrasting drizzle makes a huge impact against that deep red interior peaking through the white or dark chocolate shell.

Decorating Red Velvet Cake Pops for Valentines Day Treats
If you are making these around February, you have to lean into the romance! These fit right in with my other Valentine’s Day treats. After you dip them in white chocolate, wait until it’s almost set, then take your melted dark chocolate—or even pink-tinted white chocolate—and drizzle thin zig-zags across them. For birthdays, try using bold primary colors or metallic sprinkles. Remember, even the simplest decoration elevates these into those gorgeous, decadent bite sized desserts!
Storage and Make-Ahead Tips for Red Velvet Cake Pops
I always tell people these are great because you can totally make them ahead of time, which is a lifesaver when you’re hosting! You can definitely bake the cake layer the day before, let it cool completely, crumble it, and mix it with the frosting. Keep that cake pop “dough” tightly wrapped in plastic wrap in the fridge overnight. It actually makes rolling them a tiny bit easier the next day!
For the finished red velvet cake pops, they look best at room temperature, but if your kitchen is really warm, the chocolate might soften. They are fine sitting out on the counter in an airtight container for about 24 hours. If you need them to last longer, pop them into the fridge, but you must let them sit on the counter for about 20 minutes before serving so the chocolate coating isn’t rock hard. If you need make-ahead ideas for breakfast too, check out my overnight french toast casserole!
Variations on Classic Red Velvet Cake Pops
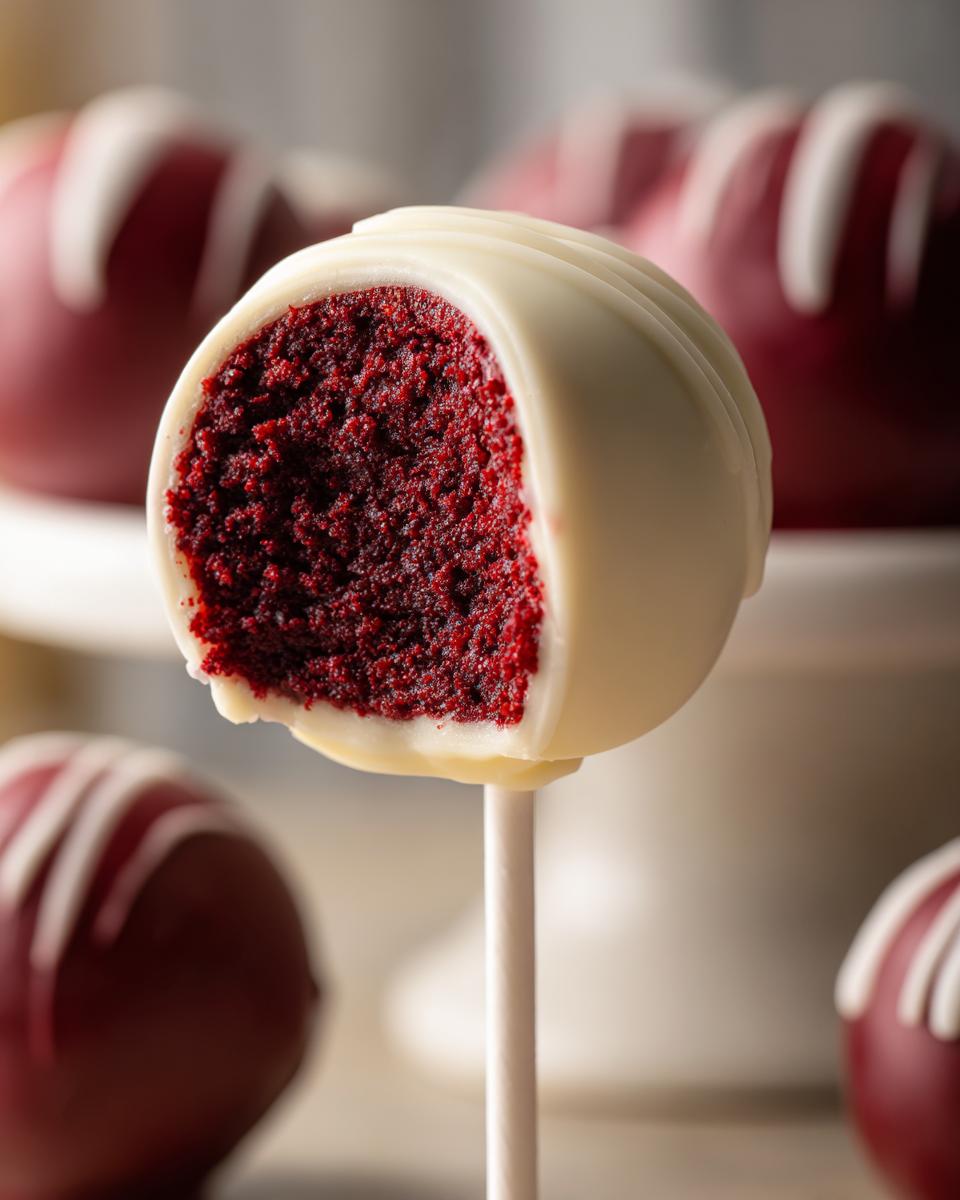
Once you have the formula down for these moist little wonders, you can start having some real fun! While the classic white chocolate shell is gorgeous, switching up the dipping chocolate is the fastest way to change the whole look. You could skip white chocolate entirely and dip them in dark chocolate—it really makes that red interior pop, transforming them into true decadent bite sized desserts.
Or, if you’re making these for a specific theme, let’s talk coatings! For my Black Forest inspired recipes, like that awesome gothic looking cake, I use a dark chocolate base and then add crushed nuts or dark cherries on top, which would be amazing on these pops too.
You can also try replacing the standard white chocolate chips with peanut butter melting wafers or even colored candy melts for specific holiday palettes. Don’t be afraid to experiment a little; the inside is already so perfectly moist and delicious, so almost any coating upgrade just makes them better!
Serving Suggestions for Your Red Velvet Cake Pops
I love how these little spheres automatically turn any table setting into a party! For real impact, presentation is everything. Forget just laying them on a platter. You absolutely need a tiered cake stand to show off the gorgeous red color against that smooth chocolate coating. These are definitely my go-to for fun festive dessert ideas.
They are absolutely divine served next to a warm mug of coffee—don’t forget to check out my recipe for that super moist coffee cake! The richness of the coffee just pairs so well with the mild cocoa flavor in the red velvet base.
Frequently Asked Questions About Making Red Velvet Cake Pops
It’s totally normal to have a few questions when you’re trying a new recipe, especially for something as fun as cake pops! I’ve gathered the questions I get asked most often in the comments section below my most popular recipe posts. Knowing these little answers helps make sure your homemade cake pops guide turns out flawless.
Can I make red velvet cake pops without baking?
That’s a great question, and it deals with a common confusion about red velvet cake balls tutorial! While the assembly process—mixing, rolling, chilling, and dipping—is totally no-bake once the cake is done, you do need a baked cake base for this specific recipe. You bake the mixture in a 9×13 pan, cool it, and then crumble it up. This baking step is what gives us that signature moist red velvet crumb we crave. If you’re really after a true no-bake dessert, that usually involves crushing Oreos or graham crackers, but for that classic flavor, baking that initial layer is necessary!
What is the best way to store homemade cake pops?
Storage is simple, and it’s important to protect that beautiful chocolate shell! For short-term enjoyment (like the day of the party), they are perfectly happy sitting out on the counter on a stand or in a styrofoam block in a cool room for about 24 hours. If you have leftovers, an airtight container in the refrigerator works best. Just remember this one critical step: the chocolate will get really hard in the fridge! You need to pull them out about 20 to 30 minutes before serving so the coating softens up. This ensures you get that lovely texture contrast we talked about!
Do I have to use cream cheese frosting in my red velvet cake pops?
I totally get it if you don’t love the tang of cream cheese, but for this particular recipe, I really, really suggest it! The red velvet cream cheese frosting for pops acts as the perfect binder and adds that essential moisture we are striving for. Look, you could use a standard vanilla buttercream instead for the binding agent, but the final product will be noticeably sweeter and might feel a little more dense or stiff once chilled. If you are seeking those moist red velvet cake pops with that signature balanced red velvet flavor, stick to the cream cheese!
If you have any other burning questions about proportions or chocolate temperatures, please don’t hesitate to send me a message over on my contact page! Let’s make sure your next batch is the best yet.
Nutritional Estimates for Red Velvet Cake Pops
Now, I know we aren’t making these for health food awards, right? They are decadent, they are fun, and they are totally worth it! But just so you have an idea for those of you tracking things—maybe managing portions or trying to stick to a specific keto meal plan delivery plan in general—here are the approximate numbers per pop. Don’t forget to label these as bite sized red velvet desserts when you serve them!
Serving Size: 1 pop | Calories: 180 | Sugar: 18g | Fat: 10g | Protein: 2g
The fat content is mostly from that rich chocolate coating and the cream cheese binder, which gives you that wonderful mouthfeel. Enjoy them responsibly!
Share Your Bite Sized Red Velvet Desserts
I truly hope these instructions helped you whip up a batch of the most perfect, moist red velvet cake pops! Seeing what all of you create using the recipes here at Bliss Batter is honestly my favorite part of the day. It brings me right back to that feeling Claire Sterling talks about—that simple, pure bliss of making something wonderful with your own hands.
If you loved how easy and moist these turned out, please do me a huge favor and leave a quick rating right here on the page. Did you try the buttermilk trick? Did you go wild with the sprinkles?
Tell me all about your decorating successes in the comments below! I absolutely love seeing photos of your holiday treats, birthday creations, and everyday indulgences. Tag us on social media when you share those gorgeous vibrant pops! The goal here is always to bake together and create something beautiful and delicious, and I can’t wait to see your results.
Now go enjoy one (or three!). If you’re looking for another celebration worthy bake, you should absolutely check out my pumpkin cheesecake recipe next—it’s another classic that always impresses!
PrintULTRA Moist Red Velvet Cake Pops with Cream Cheese Filling

Create perfectly moist, bite-sized red velvet cake pops using a simple method with a cream cheese filling, coated in smooth chocolate. These are ideal for parties and celebrations.
- Prep Time: 45 min
- Cook Time: 30 min
- Total Time: 1 hour 45 min
- Yield: 28 pops 1x
- Category: Dessert
- Method: No-Bake Assembly
- Cuisine: American
- Diet: Vegetarian
Ingredients
- 1 box (15.25 oz) red velvet cake mix (plus ingredients listed on box, usually eggs, oil, water)
- 1 cup cream cheese frosting (store-bought or homemade)
- 1/2 cup white chocolate melting wafers
- 1/4 cup dark chocolate melting wafers
- 1 tablespoon vegetable shortening (optional, for thinning coating)
- Cake pop sticks
- Optional decorations: sprinkles, colored drizzle
Instructions
- Prepare the cake according to the box directions, substituting the required liquid with 1/2 cup of water and 1/2 cup of buttermilk for extra moisture, if desired. Bake the cake in a 9×13 inch pan.
- Let the cake cool completely on a wire rack.
- Crumble the cooled cake into fine crumbs in a large bowl. Discard any hard edges or burnt pieces.
- Add the 1 cup of cream cheese frosting to the cake crumbs. Mix thoroughly with your hands or a sturdy spoon until a uniform, dough-like consistency forms. This mixture must hold together when squeezed.
- Roll the mixture into uniform balls, about 1 to 1.5 inches in diameter. You should get about 24 to 30 balls.
- Place the rolled balls on a parchment-lined baking sheet. Chill in the refrigerator for at least 1 hour, or until firm. This step prevents cracking when dipping.
- Prepare the coating: Melt the white chocolate wafers in a microwave-safe bowl in 30-second intervals, stirring well after each interval until smooth. Stir in 1/2 tablespoon of shortening if the chocolate is too thick.
- Dip the tip of a cake pop stick into the melted white chocolate and insert it about halfway into a chilled cake ball. Return the sheet to the refrigerator for 10 minutes to set the stick in place.
- Dip the entire cake ball into the melted white chocolate, rotating it to coat completely. Gently tap the stick against the side of the bowl to remove excess coating.
- Immediately decorate with sprinkles or colored drizzle while the coating is wet.
- Place the finished cake pop upright in a styrofoam block or cake pop stand to dry completely.
- Melt the dark chocolate wafers separately (with shortening, if needed) for any additional drizzling or dipping variations.
Notes
- For the moistest cake, do not overbake the initial cake layer. Remove it from the oven when a toothpick inserted near the center comes out with moist crumbs attached.
- If you prefer a less sweet pop, use a slightly tangy cream cheese frosting as the binder instead of traditional buttercream.
- If you are planning a large party, consider this recipe as a great alternative to complex meal planning; these are perfect bite sized red velvet desserts.
- To achieve a professional finish, ensure your melted chocolate is thin enough to coat easily without pulling crumbs.
Nutrition
- Serving Size: 1 pop
- Calories: 180
- Sugar: 18
- Sodium: 150
- Fat: 10
- Saturated Fat: 6
- Unsaturated Fat: 4
- Trans Fat: 0.1
- Carbohydrates: 22
- Fiber: 0.5
- Protein: 2
- Cholesterol: 25