
Oh my gosh, I love recipes that hit that perfect spot right between sweet and savory—they just satisfy something deep in your soul, don’t they? If you’ve been scrolling around online lately, you’ve definitely seen the buzz about making garlic bread from King’s Hawaiian rolls. Trust me, this Cheesy Pull-Apart Hawaiian Roll Garlic Bread isn’t just a passing trend; it’s a legitimately fantastic, under-20-minute side dish!
Here at Bliss Batter, we firmly believe that true joy in the kitchen comes from simple, comforting food that always works out. That’s why I’ve tested and tweaked this recipe until it’s foolproof. Whether you need a last-minute appetizer for a potluck or a ridiculously easy dinner side, having this buttery, cheesy goodness on your table means guaranteed smiles. This recipe is the real deal, tried and perfected in my home kitchen, just like my grandmother taught me to value consistency. You can read more about my mission to make baking accessible on the About Page.
- Why This Cheesy Hawaiian Roll Garlic Bread Stands Out (E-E-A-T)
- Gathering Ingredients for Your hawaiian roll garlic bread
- Step-by-Step Instructions for Cheesy hawaiian roll garlic bread
- Tips for Making the Best Buttery Garlic Rolls
- Serving Suggestions for Your hawaiian roll garlic bread
- Storage and Reheating Instructions for hawaiian roll garlic bread
- Frequently Asked Questions About hawaiian roll garlic bread
- Estimated Nutritional Information for hawaiian roll garlic bread
- Share Your Sweet and Savory Creations
Why This Cheesy Hawaiian Roll Garlic Bread Stands Out (E-E-A-T)
Honestly, there are a thousand ways to make garlic bread, but this version truly shines because it takes nearly zero effort and delivers maximum flavor payoff. This isn’t the tired old loaf slice; it’s an upgrade! We’re taking those famously soft rolls and turning them into something spectacular that everyone will beg for again.
Here’s why this cheesy roll hack beats the alternatives:
- It’s lightning fast! We’re talking about a main dish side that’s ready to serve in under 30 minutes total—seriously!
- The famous sweet factor balances out the savory garlic perfectly. It’s addictive!
- The cheesy, gooey result means you get that satisfying, messy pull-apart experience that makes comfort food the best food.
Quick Preparation for a 20 Minute Side Dish
You know those nights when you realize you forgot a side dish entirely? That used to stress me out, but not anymore! Because we keep the rolls connected, you skip all that awkward slicing and buttering of individual pieces. You just drizzle, sprinkle, and bake. It flies out of the oven so fast, making it the easiest *Quick Dinner Side Dish* I keep in my back pocket when things get hectic.
The Perfect Sweet and Savory Flavor Profile
This is the secret sauce, or rather, the secret butter! The sweetness of the rolls is meant to contrast with salt, garlic, and cheese. It hits all those notes at once. Every bite of this *hawaiian roll garlic bread* has that complex sweet and savory profile that makes you go back for just one more roll.
Achieving Ultimate Pull Apart Garlic Bread Texture
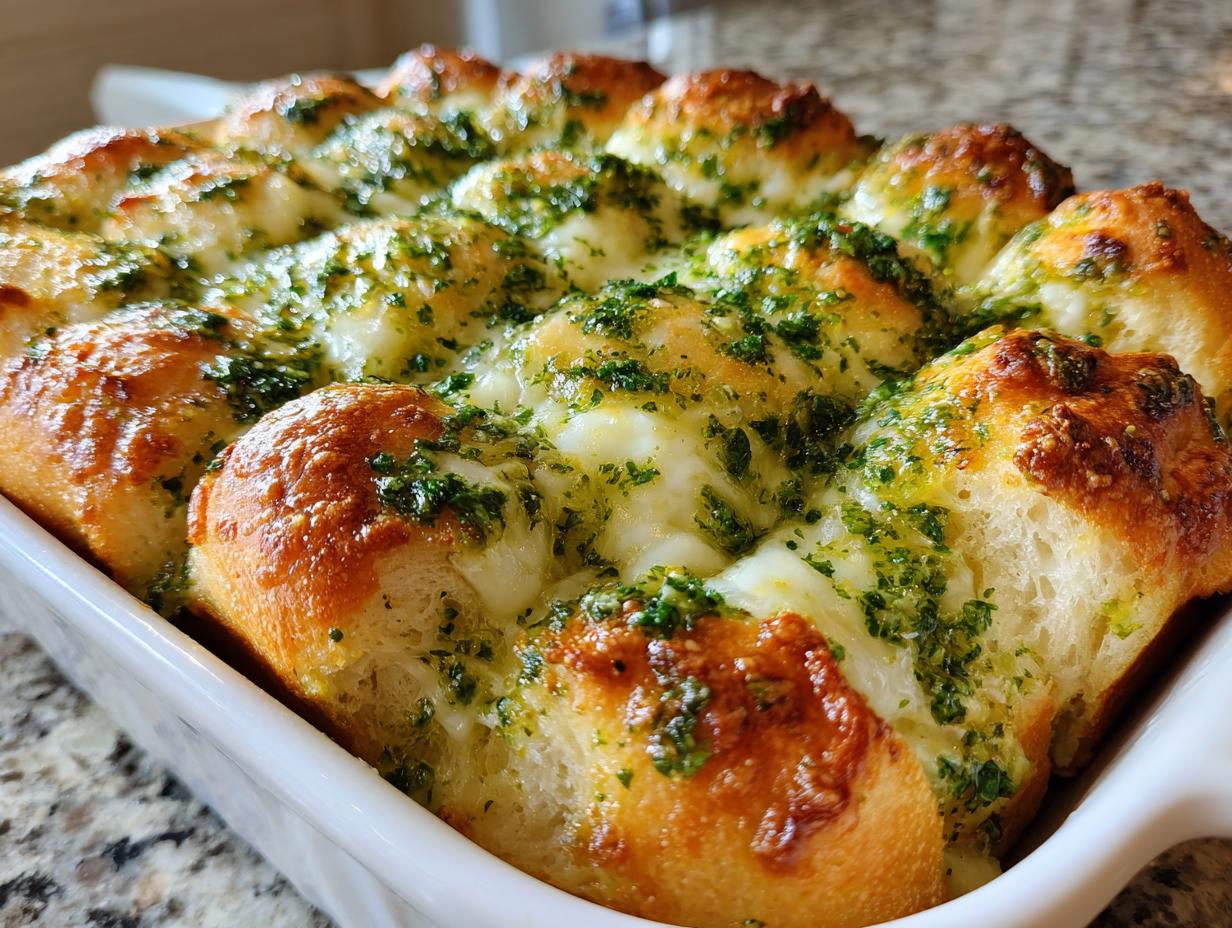
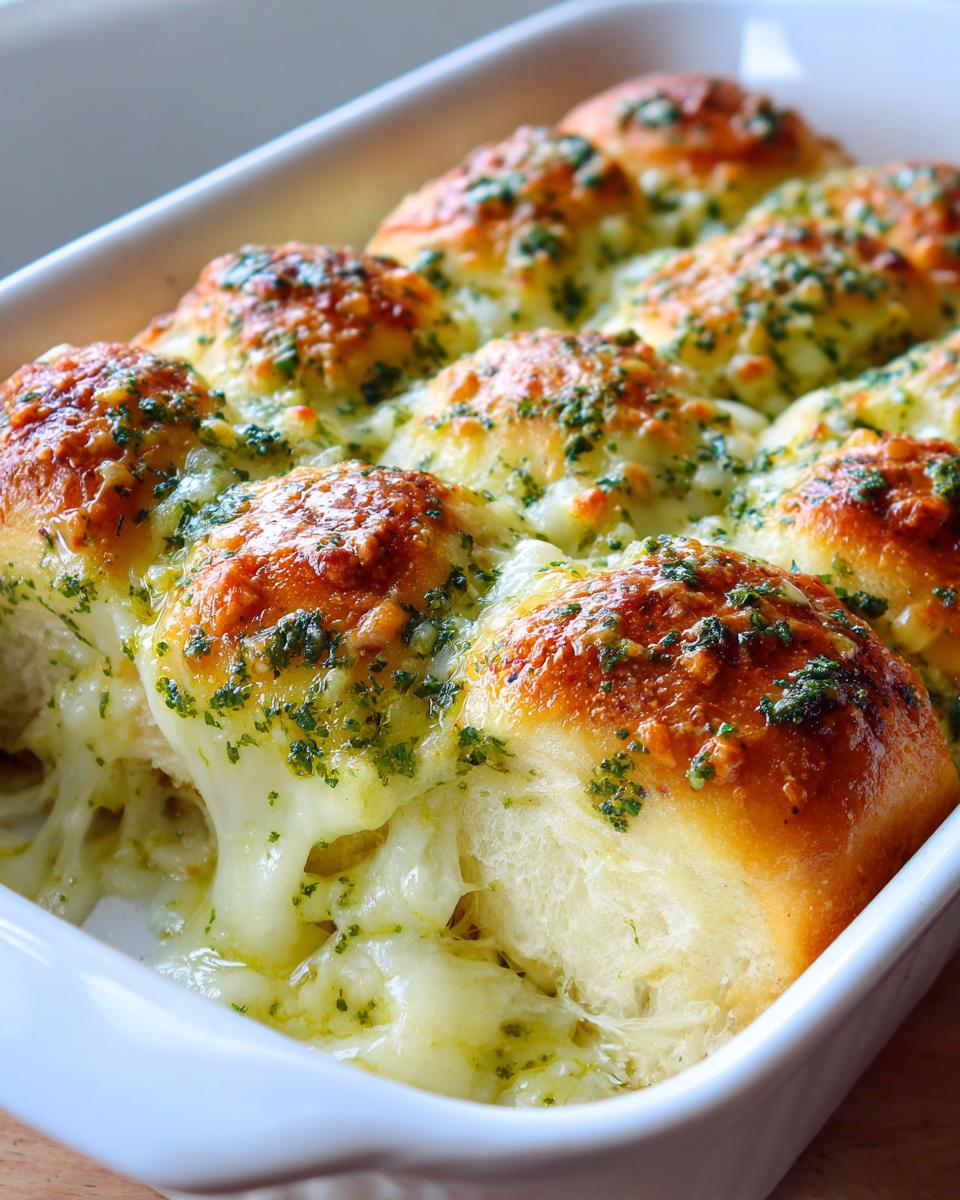
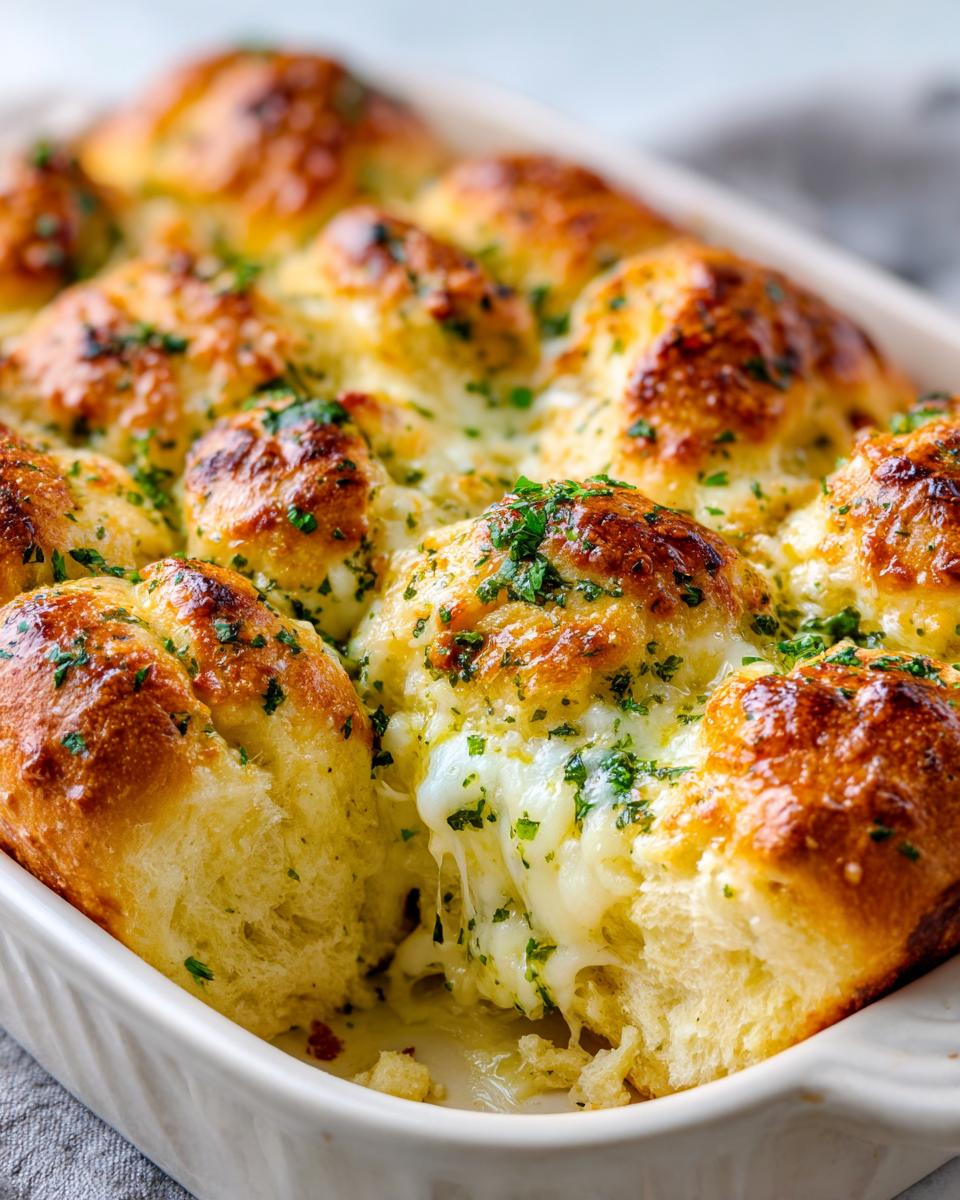
The best part, hands down, is the texture. Because we bake the rolls together in a dish, the centers stay ridiculously soft and steamy even when the cheese on top gets bubbly and golden. When you reach in to pull one out, you get that perfect gooey cheese stretch. It’s everything you want in a *Pull Apart Garlic Bread*!
Gathering Ingredients for Your hawaiian roll garlic bread
Okay, look, this recipe is famous precisely because it uses basic pantry staples, but I need to be honest with you: using quality starting ingredients really makes the difference here. Even though it’s simple, bumping up the quality makes these rolls go from good to *absolutely unforgettable*. This recipe yields 12 delicious, cheesy rolls, and you can prep the whole thing in just about 10 minutes—it’s so fast!
When I’m whipping up a batch for an impromptu gathering, I always make sure my pantry is stocked for this. If you’re planning your weeknight menu, this is the kind of side that needs almost zero input, leaving you free to focus on your main course. Check out some of my other super easy main dishes that pair perfectly in my easy weeknight dinners roundup!
Ingredient Notes and Substitutions
Let’s talk specifics, because little details count when you are combining flavors this strongly. First up: butter. You absolutely want to use unsalted butter here, melted, because we are adding salt separately. This gives us control over the final seasoning, which is important when you have salty cheese involved later!
When it comes to the rolls, listen, I can only speak for the best experience, and that means buying the actual King’s Hawaiian sweet rolls. Their signature fluffiness and slight sweetness are non-negotiable for this flavor profile. If, heaven forbid, you ran completely out of fresh parsley, you can definitely swap it for about a teaspoon of dried parsley flakes, but I really love the bright green pop of fresh herbs!
Step-by-Step Instructions for Cheesy hawaiian roll garlic bread
Alright, now for the fun part where we turn simple rolls into actual magic! First things first, give your oven a shout-out by setting it to 350°F (175°C). I usually grab my 8×8 inch baking dish and give it a quick little grease—just so we don’t have any sticky situations later. The most important thing here, and please listen to me on this: do NOT separate your rolls! Pulling them apart now just makes a mess when you try to pour the butter over them.
Keep them sitting together like they are still stuck on the original tray. This is what makes it true *Pull Apart Garlic Bread*. Find the small bowl we talked about, because it’s time to build that killer flavor base. Head over to my guide on appetizers and party snacks if you need more easy ideas, but focus on this butter first!
Preparing the Buttery Garlic Mixture
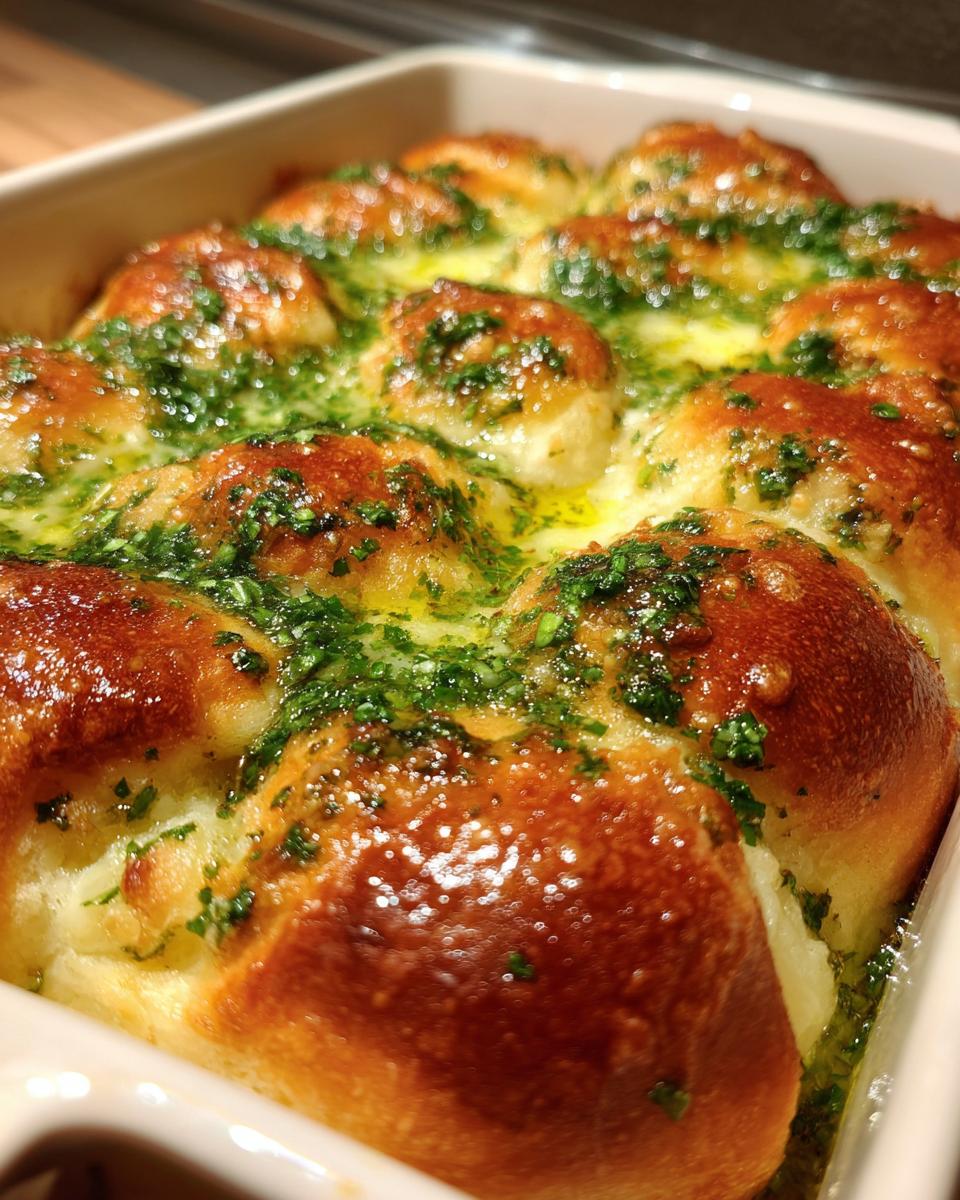
This is where we infuse the flavor! Take that melted butter—make sure it’s fully liquid, not just soft—and toss in your minced garlic. I insist on mincing it yourself because the pre-chopped stuff just doesn’t have the same zing. Add in your salt, pepper, and the fresh parsley. Stir it all together gently until everything is beautifully suspended. You want that butter to smell incredible right away. Pour this gorgeous mixture *evenly* over the top of the connected rolls. Be generous!
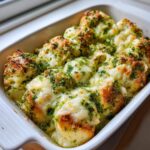
Baking the hawaiian roll garlic bread to Perfection
Now that the rolls are drenched, it’s time for the cheese layer. Sprinkle that mozzarella and Parmesan right over the top; make sure you get good coverage. Here’s the trick for the amazing soft interior: cover your dish loosely with foil. Bake it just like that for 12 minutes at 350°F. This steams the bread slightly, keeping it super soft. Then, ditch the foil! Pop it back in for another 3 to 5 minutes until that cheese is bubbly and starting to get those delicious golden-brown spots. Let them sit for five minutes before anyone attacks the pan—that resting time helps the cheese set just enough so it stretches perfectly when you pull a roll away!

Tips for Making the Best Buttery Garlic Rolls
I’ve made this recipe so many times, and I’ve definitely learned a couple of things the hard way! If you want to take this crowd-pleaser from great to spectacular, you have to focus on how that garlic butter sinks in before the cheese goes on top. I remember the very first time I made these; I just poured the butter and ran to preheat the oven, and the tops turned out perfectly golden, but the bottom half tasted kind of plain. Oops! That taught me you need to be a bit intentional here.
Once you pour that melted butter mixture all over the unseparated rolls, don’t just walk away! Give the dish a gentle shake, or even better, press down lightly all over the tops of the rolls with your clean hand or the back of a spatula. You’re basically helping that garlicky goodness seep down into all those soft little crevices between the rolls. It ensures every single bite of your hawaiian roll garlic bread is just as buttery as the last one.
Ensuring Deep Flavor Penetration in Your hawaiian roll garlic bread
That gentle press I mentioned? It’s non-negotiable if you want truly deep flavor. Think of the rolls like little sponges—they hold so much flavor, but you have to help the liquid get past the crusty top layer. After pressing down a couple of times, I let the rolls sit for a good five minutes before adding the cheese. This resting period allows the butter to soak in before the cheese creates that beautiful, solidifying blanket during baking. It makes a huge difference in the final softness and flavor saturation!
Variations: Garlic Parmesan Rolls and More
While the mozzarella keeps things wonderfully gooey, if you are looking to lean into that savory vibe, you have to try turning them into Garlic Parmesan Rolls! I’m always tinkering with the spice mix, and I highly suggest adding about half a teaspoon of Italian seasoning right into your butter mixture with the parsley. It just amps up that classic savory flavor profile.
If you happen to love a little smokiness (I know I do!), a tiny pinch of smoked paprika mixed into the butter is surprisingly delicious. It adds complexity without changing the gooey texture at all. And speaking of texture, if you want more tips on getting that perfect crust on other breads, you can check out my thoughts on my rustic pumpkin beer bread recipe!
Serving Suggestions for Your hawaiian roll garlic bread
Because this bread has that unique little hint of sweetness that comes from those gorgeous rolls, it really shines next to intensely savory or deeply seasoned main courses. It’s the perfect vehicle to soak up any amazing sauce or rich gravy you might have on your plate! I find it’s just too much richness if you pair it with something already sweet, so I always think contrast.
This is genuinely the ultimate accompaniment for a hearty spaghetti night, of course. But seriously, try serving this on a cool evening next to something slow-cooked and rich. It balances beautifully against deep, meaty flavors.
If you are looking for a main dish that absolutely begs for a side of buttery, cheesy bread, you have to try a slow-cooked meat recipe! I’ve got a fantastic recipe for braised short ribs that has an amazing savory pan sauce that these rolls will devour in seconds. It turns a regular weeknight meal into something that tastes like it cooked all day long. It’s seriously one of my favorite pairings when I want to feel cozy!
Storage and Reheating Instructions for hawaiian roll garlic bread
Nobody ever plans on having leftovers of this stuff, right? But when you do—because honestly, sometimes even I can’t eat the entire dish by myself—you need to know how to store it so that amazing melt-in-your-mouth texture sticks around. The biggest challenge with any soft roll like this is preventing it from drying out or getting soggy thanks to all that delicious butter and cheese.
When you have cooled leftovers, your goal is to keep all that buttery moisture locked in. Don’t just leave them out on the counter exposed! You need to store them in an airtight container at room temperature for up to two days. Believe it or not, the King’s Hawaiian bread structure tends to hold onto that softness quite well, even with all the garlic butter in there.
Now, reheating is where we get serious about texture. If you try the microwave, you’ll get soft rolls again, sure, but you’ll lose that lovely, slight crispness we achieved on the top cheese layer. If you’re in a major hurry—say, you need an ultra-quick snack—a short 15 seconds in the microwave is fine for convenience.
But for the absolute best flavor and texture restoration, the oven is your friend! Preheat your oven—I keep it low, around 300°F—and place the rolls (still attached if possible) on a baking sheet. Cover them loosely with foil, just like we did the first time we baked them. Give them about 8 to 10 minutes. The foil keeps the inside steamy and soft, while the gentle oven heat warms everything through evenly. When you pull off that foil for the last minute, the cheese wakes right up! These are just as good reheated as they are fresh, provided you follow the foil trick.
Frequently Asked Questions About hawaiian roll garlic bread
I know when I find a new favorite recipe, I always have a million little questions floating around before I jump in. It’s totally normal! Especially when you’re taking a simple item, like those sweet rolls, and transforming it into something completely different, like this savory goodness. I get asked a lot about swapping ingredients or what to do when you have a few rolls left over. Here are the most common things I hear!
Can I make this *Pull Apart Garlic Bread* without cheese?
Oh, absolutely you can! That cheese layer is fantastic and definitely what pushes this over the top into guaranteed *Crowd Pleasing Side* territory, especially for parties or game day. But hey, sometimes you’re out of mozzarella, or maybe you just want to focus entirely on that garlicky butter infusion. If you skip the cheese, just make sure you give the rolls an extra minute or two under the foil when they bake, because the cheese usually helps trap some moisture. You’ll still get amazing flavor from the butter, but it will be less gooey, of course!
What is the best way to reheat leftover *Buttery Garlic Rolls*?
I covered this a bit in the storage section, but let’s be clear: the oven is your absolute best friend here! If you try to microwave them, they soften up instantly, which is fine if you’re starving, but they lose that little bit of crispness we fought so hard to get on the top. For the best results and to bring back that glorious, slightly chewy texture, wrap those leftover rolls loosely in foil and warm them at about 300°F for around ten minutes. It gently heats the butter back into the bread without making them tough. If you’re looking for other amazing things to make with leftover rolls, you might enjoy checking out my take on a fun gourmet grilled cheese!
Do you have another question about making this the perfect *Easy Garlic Bread Recipe*? Drop it in the comments below—I love hearing from you!
Estimated Nutritional Information for hawaiian roll garlic bread
Just like any homemade treat, these numbers are based on the specific ingredients and measurements called for in this recipe. Since we are dealing with King’s Hawaiian rolls, which are already naturally sweet, and adding quite a bit of butter and cheese, they are definitely a rich side dish! Don’t stress too much about hitting exact macros—this is comfort food, after all!
This information is calculated based on yielding 12 rolls, so keep that serving size in mind when you calculate your plate!
- Calories: Roughly 180 per roll. A great little boost for just a few bites!
- Fat Content: We’re looking at about 11 grams of total fat per roll, mostly coming from that gorgeous melted butter and those two kinds of cheese.
- Carbohydrates: Expect around 16 grams of carbs per roll, which is where the sweetness of the rolls comes in.
- Protein: You get about 5 grams of protein per roll, thanks to that generous sprinkle of Parmesan and mozzarella.
Remember, these are *estimates* based on the best data I have available for this specific recipe. If you start adding extra Parmesan or using a different type of roll, those numbers will shift a little bit. But honestly, when they come out smelling like heaven, who’s counting that closely?
Share Your Sweet and Savory Creations
Now that you’ve made the best batch of cheesy bread your family has ever tasted, I truly want to know how it went! Sharing kitchen successes is my favorite part of running this blog, and seeing your bakes always makes me so proud.
If you tried this Cheesy Pull-Apart hawaiian roll garlic bread, please, please come back and tell me! Drop a rating right below the recipe card—four or five stars means I’ve done my job right! Did you use the Italian seasoning variation? Did the kids devour them before dinner was even ready?
Leave a comment sharing your thoughts on this *Easy Garlic Bread Recipe*! And if you snapped a picture of that beautiful, cheesy pull-apart moment, tag me on social media—I love seeing your creations! Happy baking, everyone, and thank you for making this little corner of the internet feel like home.
PrintCheesy Pull-Apart Hawaiian Roll Garlic Bread
Make this quick, crowd-pleasing side dish using sweet Hawaiian rolls, garlic butter, and melted cheese. It is ready in under 20 minutes.
- Prep Time: 10 min
- Cook Time: 17 min
- Total Time: 27 min
- Yield: 12 servings 1x
- Category: Side Dish
- Method: Baking
- Cuisine: American
- Diet: Vegetarian
Ingredients
- 1 package (12 count) King’s Hawaiian Sweet Rolls
- 1/2 cup unsalted butter, melted
- 4 cloves garlic, minced
- 1/4 cup fresh parsley, chopped
- 1/2 teaspoon salt
- 1/4 teaspoon black pepper
- 1 cup shredded mozzarella cheese
- 1/2 cup grated Parmesan cheese
Instructions
- Preheat your oven to 350°F (175°C). Lightly grease an 8×8 inch baking dish.
- Keep the Hawaiian rolls connected in the package or arrange them closely together in the prepared baking dish. Do not separate them.
- In a small bowl, combine the melted butter, minced garlic, chopped parsley, salt, and pepper. Mix well to create the garlic butter.
- Pour the garlic butter mixture evenly over the top of the rolls, making sure the butter seeps down into the crevices between the rolls.
- Sprinkle the mozzarella cheese and Parmesan cheese evenly over the top of the buttered rolls.
- Cover the dish loosely with aluminum foil.
- Bake for 12 minutes.
- Remove the foil and bake for an additional 3 to 5 minutes, or until the cheese is melted, bubbly, and lightly golden brown.
- Let the bread cool for 5 minutes before serving. You can pull the rolls apart easily.
Notes
- For extra flavor, you can add a pinch of dried Italian seasoning to the butter mixture.
- If you are serving this as a side dish for a large group, consider doubling the recipe and using a 9×13 inch pan.
- This bread pairs well with pasta dishes or as an appetizer before a main course. If you are looking for alternatives to traditional sides, consider using a meal planning service for your main course.
Nutrition
- Serving Size: 1 roll
- Calories: 180
- Sugar: 7
- Sodium: 350
- Fat: 11
- Saturated Fat: 6
- Unsaturated Fat: 5
- Trans Fat: 0.2
- Carbohydrates: 16
- Fiber: 1
- Protein: 5
- Cholesterol: 25