
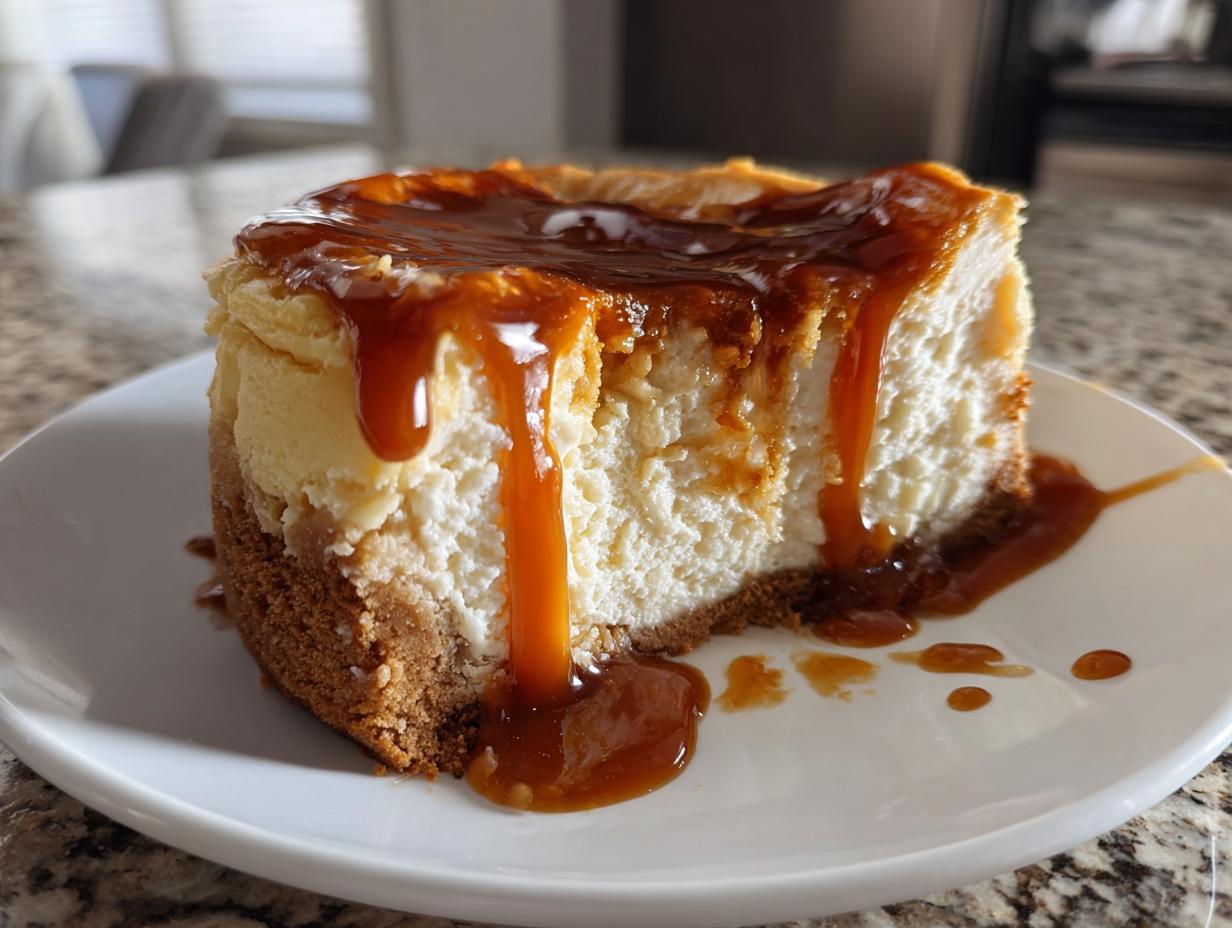
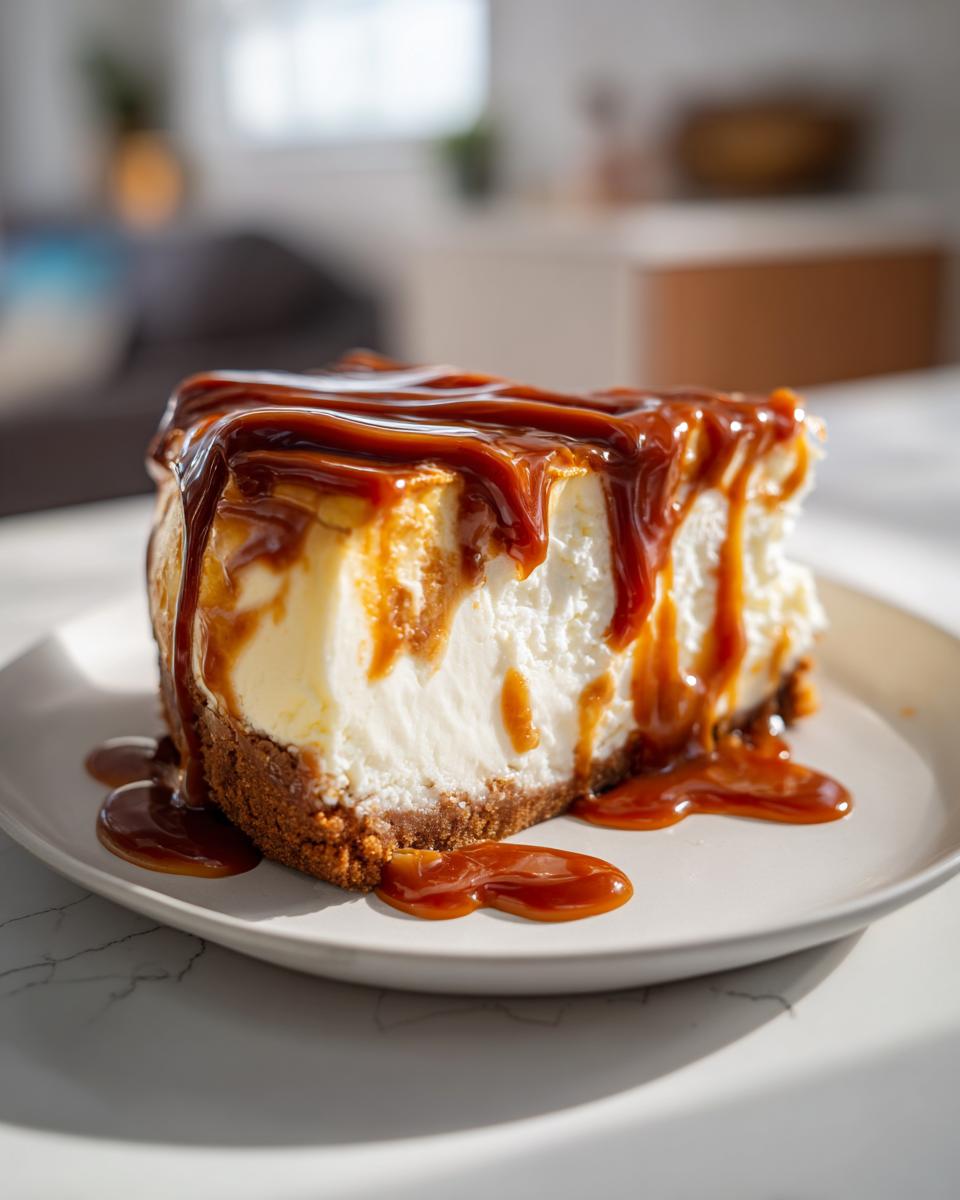
Forget those fussy, intimidating desserts that only show up at fancy bakeries. Here at Bliss Batter, my entire goal as Claire Sterling is to get you rolling up your sleeves and creating pure magic right in your own oven. Because life is too short not to mix up something truly decadent looking! That’s why I’m so thrilled to share this **salted caramel cheesecake** recipe with you today. We’ve taken everything amazing about a rich, creamy baked cheesecake and paired it with an irresistibly crunchy Biscoff crust and that perfect sweet-and-salty drizzle. If you love the flavor combo in our salted caramel latte recipe, you are going to adore this! Trust me, this gorgeous dessert is surprisingly easy to master, and it’s ready to become your new favorite showstopper.
- Why This Salted Caramel Cheesecake is Your New Favorite Showstopper Dessert
- Gathering Ingredients for Your Salted Caramel Cheesecake
- Step-by-Step Baked Cheesecake Instructions
- Crafting the Best Cheesecake Toppings: Homemade Salted Caramel
- Tips for Success with Your Salted Caramel Cheesecake
- Storage and Reheating Instructions for Your Salted Caramel Cheesecake
- Serving Suggestions for This Rich Creamy Dessert
- Frequently Asked Questions About Making Salted Caramel Cheesecake
- Estimated Nutritional Data for Salted Caramel Cheesecake
Why This Salted Caramel Cheesecake is Your New Favorite Showstopper Dessert
I know what you’re thinking: cheesecake is complicated. Right? Well, not this one! I’ve tested this recipe over and over right here in my home kitchen so that you get that perfect texture without all the fuss. When you try this **homemade cheesecake**, you’ll see why it’s going into heavy rotation for your holidays and special occasions. It’s truly foolproof!
- That perfect balance of sweet and salty hits just right.
- The crunchy Biscoff crust makes everyone ask for the recipe.
- It bakes up absolutely crack-free because we use the water bath method!
If you are browsing for amazing dessert recipes, save this one right now. You won’t regret it.
Key Attributes of Our Creamy Dessert Recipes
What elevates this beyond just a good dessert? It’s all about the layers, honey. We deliver those rich, creamy layers that melt in your mouth. It achieves that decadent feel without ever tasting heavy because the caramel and salt cut through the richness perfectly, making it one of my top **sweet and salty treats food** finds! It’s gourmet flavor made accessible for every home cook.
Gathering Ingredients for Your Salted Caramel Cheesecake
Okay, let’s get serious for a minute about ingredients because this is where we win the battle against a lumpy, under-baked disaster. For the best final result, we need clarity, especially since this is a **Caramel Cheesecake Recipe** that requires some specific items. I’ve laid everything out by component below, so you can shop easily. I even linked out to my buttermilk biscuits recipe if you need more home baking inspiration later!
For the Biscoff Crust, you’ll need about 1 1/2 cups of crumbs, that quarter-cup of sugar, and 6 tablespoons of melted butter. Simple, right? The main event is the filling, remember we need 3 (8 ounce) packages of full-fat cream cheese, and they absolutely must be softened to room temperature—I can’t stress that enough for that beautiful texture! We also layer in 1 1/2 cups of sugar, flour, salt, sour cream, 3 room-temperature eggs, and that gorgeous 1/2 cup of salted caramel sauce swirled right in.
Finally, for the topping that makes this a true decadent fall dessert: you’ll be making a quick caramel with 1 cup of sugar, a bit of water, hot heavy cream, butter, and your sea salt finisher.
Ingredient Notes and Substitutions for Your Salted Caramel Cheesecake
If I could shout one thing from the rooftops, it’s THIS: room temperature cream cheese, sour cream, and eggs are non-negotiable for achieving those ultra **rich creamy desserts** we’re aiming for. Cold ingredients will give you lumps, and we don’t do lumps here at Bliss Batter! If you happen to run out of Biscoff cookies for the crust—oops!—graham crackers work okay as a substitute. Just know that using graham crackers means you lose that subtle, spicy cookie foundation that compliments the caramel so beautifully. It’s still good, but the Biscoff version is what really takes this over the top!
Step-by-Step Baked Cheesecake Instructions
Alright, it’s time to put the pieces together for this amazing **Salted Caramel Cheesecake**! Don’t let the steps scare you; we’re moving slowly and precisely because cheesecake rewards patience. Remember, we are shooting for those decadent, showstopper results, so stick closely to the timing, especially when it comes to cooling. If you ever wondered how to get those smooth tops, the water bath is our secret weapon for **homemade cheesecake**. If you love the look of a classic, check out my guide on New York Cheesecake creamy baked with crust for another great baked treat!
Preparing the Biscoff Crust Recipe
First things first: get that oven to 325 degrees F and wrap your springform pan tight—and I mean tight—with heavy-duty foil. We need that foil to repel water! Mix your Biscoff crumbs, sugar, and that melted butter until everything looks uniformly wet. Then, take your time pressing that mixture firmly into the bottom of the pan. We want a solid base! Pop that beauty in for 10 minutes to set up while you mix the filling. This initial bake locks everything in place.
Achieving a Smooth Filling for Your Salted Caramel Cheesecake
This is where we build that unbelievably **creamy dessert** texture. Start by beating your softened cream cheese until it’s silky smooth. No lumps allowed! Next, gently mix in the sugar and flour until *just* combined. Now, the sour cream, vanilla, and salt go in next. Here’s the most important part: add the eggs one at a time, and I mean set your mixer to low speed! You want them incorporated, not whipped into the batter. Over-mixing the eggs brings in too much air, which leads to cracks later. Once the eggs are in, gently fold in that half-cup of caramel sauce—just a few folds to create those beautiful, loose swirls.
The Water Bath Technique for Easy Cheesecake Baking
This step prevents cracks, plain and simple! Once your filling is in the crust, place your foil-wrapped pan inside a bigger roasting pan. I always boil my water ahead of time so it’s ready to go. Carefully pour that boiling water into the roasting pan until it comes halfway up the sides of your cheesecake pan. Why the fuss? That steam creates a gentle, humid baking environment, which stops the edges from setting faster than the middle. It keeps everything unbelievably moist, which is just what we want in the end!
Crafting the Best Cheesecake Toppings: Homemade Salted Caramel
The cheesecake itself is already a superstar thanks to that Biscoff base and creamy filling, but we can’t send out a **Salted Caramel Cheesecake** without its crowning glory, right? Making your own salted caramel sauce is surprisingly fast, and it tastes a million times better than anything store-bought. This is where we really lean into those rich, **gourmet caramel desserts** vibes. Before you start, please warm up your heavy cream—it makes blending so much easier later on. I have a super fun recipe for caramel apples county fair classic where I talk more about using warm cream in caramel, too!
In a medium saucepan, we’re going to melt the cup of sugar with a quarter cup of water. Stir it gently until the sugar dissolves, but then—this is important—stop stirring! Let the mixture cook until it turns a deep, beautiful amber color. It’s going to smell amazing, like toffee!
Now, buckle up, because this next part requires your full attention for about two seconds. Take the pan completely off the heat. Carefully pour in your warm heavy cream. I mean it, be careful! The mixture is super hot, and it will bubble up and steam violently when the cream hits it. It’s totally normal, but it scares every new baker the first time. Whisk it constantly until everything is smooth again. Once it’s integrated, whisk in those chunks of room-temperature butter until they melt right in. Finally, stir in your sea salt until it dissolves into that sweet goodness.
We don’t want to pour hot sauce on a chilled cheesecake, or it just melts right off! Let this amazing topping cool down on the counter until it thickens slightly—you want it syrupy enough to drizzle heavily over the top of your chilled masterpiece.
Tips for Success with Your Salted Caramel Cheesecake
You’ve baked this magnificent **Salted Caramel Cheesecake**, now let’s talk about the final steps that guarantee perfection, not panic! Remember how I stressed room temperature ingredients earlier? That rule applies to cooling, too. The number one thing people mess up is pulling the cheesecake out of the oven too fast! You absolutely need that slow, gradual cool-down. Turn the oven off, prop the door open a tiny crack while it’s still in the water bath, and let it hang out in there for a full hour.
After that hour, move it to the counter, still in the roasting pan, until it’s completely room temperature. Then, the hard part: chilling! This dessert needs time to firm up into its final, utterly **creamy dessert** structure. You must cover it and chill it for a minimum of 6 hours, but honestly? Overnight is when the magic truly crystallizes. If you’re planning ahead for a party, this easily becomes one of the best holiday cheesecake ideas because it tastes even better the next day!
Storage and Reheating Instructions for Your Salted Caramel Cheesecake
You’ve made the most incredible dessert, and now you need to guard that beauty until serving time! Because this is a baked cheesecake, proper storage is key to keeping those rich, creamy layers pristine. The general rule for any leftover **Salted Caramel Cheesecake** is that it needs to stay chilled. Once it’s fully set after its overnight rest in the fridge, cover the entire pan tightly with plastic wrap or foil. This prevents it from picking up any weird smells from the fridge—nobody wants onion-flavored cheesecake, trust me!
It holds up beautifully in the refrigerator for about 4 to 5 days. Seriously, if you think one slice is good, wait until Day Two; they always taste even better once they’ve fully merged their flavors!
What about that extra caramel topping you made? Always store any leftover homemade sauce in a small, sealed jar in the fridge, too. It will solidify quite a bit once cold. If you plan to serve more later, just set that jar out on the counter about 30 minutes before you want to drizzle it, or give it a very brief zap—maybe 10 seconds—in the microwave to bring it back to a nice, pourable consistency. Never try to reheat a slice of the cheesecake itself; that will just turn it into soup, and we worked way too hard for that!
Serving Suggestions for This Rich Creamy Dessert
Now that you’ve wrestled the patience game and mastered your gorgeous, chilled **Salted Caramel Cheesecake**, you need to know how to present this masterpiece! Because this is such a showstopper, it feels right at home on any holiday table, whether you’re prepping for Thanksgiving or just having people over for a big family dinner. This is exactly the kind of dessert you bring out when you want someone to ask, “Wait, you *made* this?”
Always serve this straight from the fridge; that cold temperature locks in all that density and creaminess we worked so hard to achieve. If it sits out for too long, it might get a little too soft, and we want firm, cool slices!
To complement that salty-sweet profile, think about simple, clean flavors that won’t fight the caramel. A small scoop of really good French vanilla ice cream is always a winner—the cold contrast against the chilled cheesecake is delightful. If you want to lean into that sweet and salty treats food profile, try adding just a tiny pinch of flaky sea salt right on top of the caramel drizzle just before it hits the table; the extra crunch is addictive!
Also, if you’re looking for more ideas for baking when the calendar gets busy, make sure you check out my collection of holiday cheesecake ideas! This particular cake is always a huge hit because it’s rich but feels appropriate for nearly every celebration.
Frequently Asked Questions About Making Salted Caramel Cheesecake
I know you probably have a few questions swirling around after reading all those details on making a perfect **homemade cheesecake**! Cheesecake baking can feel intimidating, but I promise, once you know these secrets, you’ll be baking these stunning desserts all the time. If you want a cheat sheet for a version that skips the oven entirely, check out my guide for a no-bake pumpkin cheesecake recipe!
Can I skip the water bath for this baked cheesecake?
Listen, I really, truly don’t recommend it if you want that perfect, silky texture. The water bath is honestly the number one way we guarantee those **rich, creamy desserts** and prevent the dreaded surface cracks. It stabilizes the temperature so the edges don’t cook faster than the center. If you skip it, you risk ending up with a slightly dry top layer, and we want nothing less than pure indulgence!
Can I turn this into a No Bake Caramel Cheesecake?
You absolutely can switch to a no-bake format, but it changes the whole dessert significantly! This particular recipe relies on eggs and that structured bake time for its dense, creamy texture. A no bake caramel cheesecake uses gelatin or stabilizers and will result in a lighter, mousse-like consistency rather than the deep, luxurious feel of this baked version. If you want true **Gourmet Caramel Desserts**, stick to baking this one!
What is the absolute best way to prevent cracks?
It’s a two-part secret, really. Part one is the water bath we discussed, which controls the heat. Part two is the slow cooling process. Never take your finished cheesecake directly from a hot oven to a cool counter! You must let it cool down gradually inside the turned-off oven with the door propped open for at least an hour. This prevents that sudden temperature shock that shrinks and cracks the top. Patience is your hidden ingredient here!
What if I don’t have Biscoff cookies for the crust?
No Biscoff? No problem! As I mentioned, graham crackers are the classic go-to substitute when making a **Caramel Cheesecake Recipe** crust. You can use them exactly as written—1 1/2 cups of crumbs, the sugar, and the melted butter. It’s still going to be a wonderfully crunchy base for our creamy filling. You’ll just miss that lovely hint of spice that only Speculoos cookies bring!
Estimated Nutritional Data for Salted Caramel Cheesecake
Okay, my friends, let’s talk numbers for a second. I always want us to be realistic when we’re diving into something this decadent, right? This **Salted Caramel Cheesecake** is absolutely a treat, and we are leaning into that luxury! I’ve put together the estimated nutritional breakdown below based on the recipe ingredients for a standard slice. Now, remember—this is straight from the book, and exact numbers will shift a tiny bit depending on which brand of cream cheese you splurge on or how heavy you drizzle that glorious homemade caramel topping! It’s a good guideline to have for when you’re planning that perfect gathering.
Because this is a full-fat, baked dessert featuring a butter crust and decadent sauce, it certainly lands on the higher end for sugar and fat, but wow, is it worth every beautiful, creamy bite! This is meant for celebration, after all, not for Tuesday night dessert.
- Serving Size: 1 slice
- Calories: 550 (Wow, that’s a rich slice!)
- Fat: 35g
- Saturated Fat: 20g
- Carbohydrates: 58g
- Sugar: 55g (The caramel and the filling certainly add up!)
- Protein: 8g
- Sodium: 350mg
- Cholesterol: 120mg
Easy Baked Salted Caramel Cheesecake with Biscoff Crust
Create a rich, creamy, and decadent homemade cheesecake featuring a crunchy Biscoff cookie crust and a sweet and salty homemade salted caramel topping. This baked cheesecake recipe is accessible for home cooks.
- Prep Time: 30 min
- Cook Time: 75 min
- Total Time: 105 min
- Yield: 12 servings 1x
- Category: Dessert
- Method: Baking
- Cuisine: American
- Diet: Vegetarian
Ingredients
- For the Biscoff Crust:
- 1 1/2 cups Biscoff cookie crumbs (about 25 cookies)
- 1/4 cup granulated sugar
- 6 tablespoons unsalted butter, melted
- For the Cheesecake Filling:
- 3 (8 ounce) packages full-fat cream cheese, softened to room temperature
- 1 1/2 cups granulated sugar
- 1/4 cup all-purpose flour
- 1 teaspoon vanilla extract
- 1/4 teaspoon salt
- 1/2 cup sour cream, room temperature
- 3 large eggs, room temperature
- 1/2 cup salted caramel sauce (homemade or store-bought)
- For the Salted Caramel Topping:
- 1 cup granulated sugar
- 1/4 cup water
- 1/2 cup heavy cream, warmed
- 4 tablespoons unsalted butter, cut into pieces
- 1 teaspoon sea salt (or to taste)
Instructions
- Prepare the oven and pan: Preheat your oven to 325 degrees F. Wrap the outside of a 9-inch springform pan tightly with heavy-duty aluminum foil. You will use this for a water bath later.
- Make the Biscoff crust: In a medium bowl, combine the Biscoff cookie crumbs and 1/4 cup sugar. Pour in the melted butter and mix until the crumbs are evenly moistened. Press the mixture firmly and evenly into the bottom of the prepared springform pan. Bake the crust for 10 minutes. Remove from the oven and let it cool slightly while you prepare the filling.
- Prepare the water bath: Boil water for the water bath. Place the foil-wrapped springform pan inside a larger roasting pan.
- Make the cheesecake filling: In a large bowl using an electric mixer, beat the softened cream cheese on medium speed until smooth. Scrape down the sides of the bowl.
- Add the sugar and flour to the cream cheese mixture and beat until just combined. Mix in the vanilla extract and salt.
- Beat in the sour cream until smooth. Add the eggs one at a time, mixing on low speed after each addition until just incorporated. Do not overmix the batter once the eggs are added.
- Gently fold in the 1/2 cup of salted caramel sauce into the batter until lightly swirled.
- Pour the filling over the cooled crust in the springform pan.
- Bake the cheesecake: Carefully place the roasting pan with the cheesecake into the preheated oven. Pour the boiling water into the roasting pan until it reaches about halfway up the sides of the springform pan.
- Bake for 60 to 75 minutes, or until the edges are set but the center still has a slight wobble.
- Cool the cheesecake: Turn off the oven, prop the door open slightly, and let the cheesecake cool inside the oven for 1 hour. This slow cooling prevents cracking.
- Remove the cheesecake from the water bath and foil. Let it cool completely on a wire rack. Once cool, cover and refrigerate for at least 6 hours, or preferably overnight.
- Make the salted caramel topping: In a medium saucepan over medium heat, combine the 1 cup sugar and 1/4 cup water. Stir gently until the sugar dissolves, then stop stirring. Cook until the mixture turns a deep amber color.
- Remove the pan from the heat. Carefully pour in the warm heavy cream (the mixture will bubble vigorously). Whisk until smooth.
- Whisk in the butter pieces until fully melted and incorporated. Stir in the sea salt. Let the sauce cool slightly until it thickens to a drizzling consistency.
- To serve: Remove the cheesecake from the springform pan. Drizzle the cooled salted caramel topping generously over the top before slicing and serving your creamy dessert.
Notes
- For the creamiest texture, bring your cream cheese, sour cream, and eggs to full room temperature before starting.
- If you prefer a cleaner topping, reserve the caramel sauce until just before serving to drizzle it on top.
- If you do not have Biscoff cookies, you can substitute graham crackers for the crust.
Nutrition
- Serving Size: 1 slice
- Calories: 550
- Sugar: 55
- Sodium: 350
- Fat: 35
- Saturated Fat: 20
- Unsaturated Fat: 15
- Trans Fat: 0
- Carbohydrates: 58
- Fiber: 1
- Protein: 8
- Cholesterol: 120