
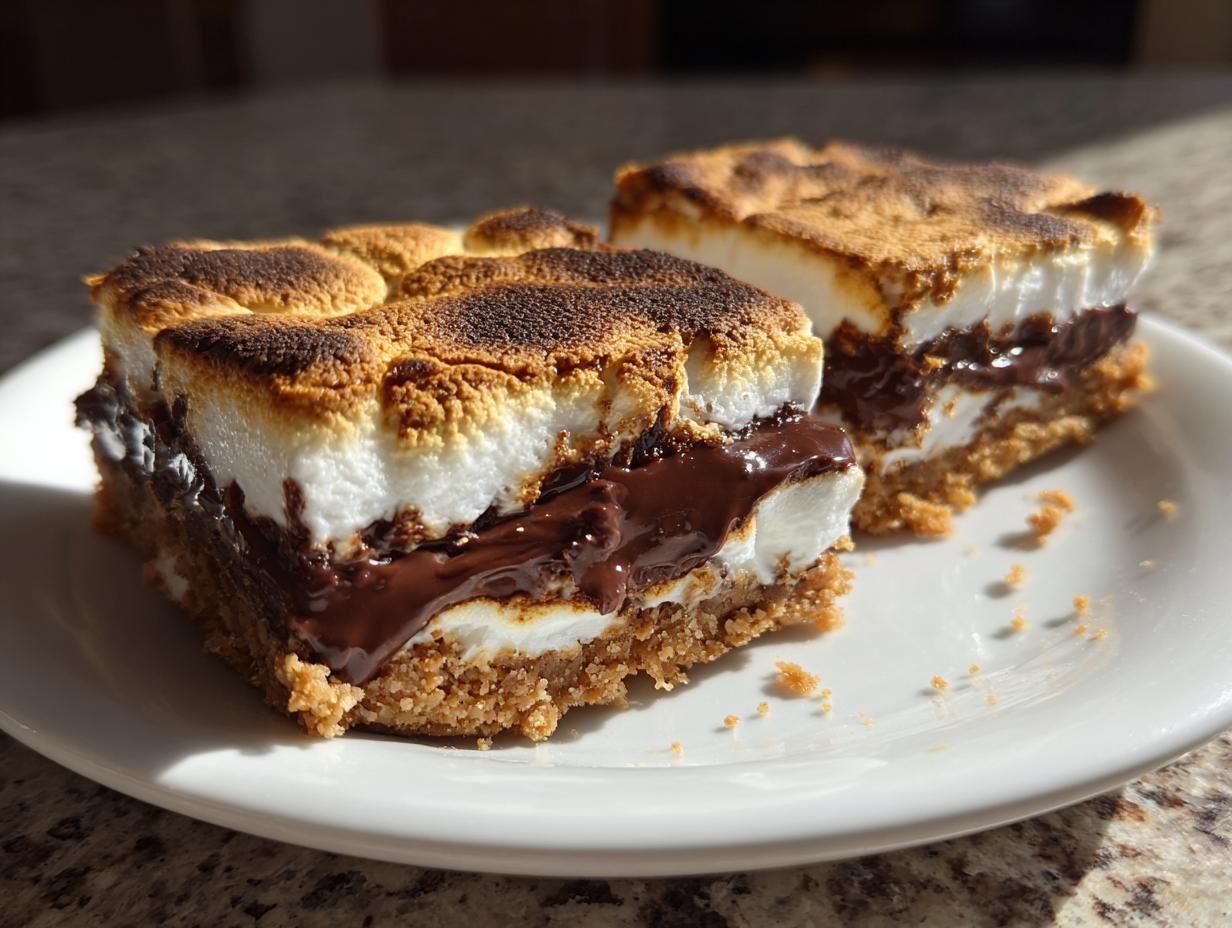
Oh, nothing beats the memory of roasting marshmallows over a crackling campfire, right? That sweet, smoky char, the ooey-gooey marshmallow stretching for miles, and that melty chocolate all hugged by crunchy graham crackers – pure magic! But let’s be real, we don’t always have a campfire handy, especially when those cravings hit in the middle of a cozy fall evening. That’s exactly why I dreamt up these incredible S’mores Bars! They capture all that nostalgic summer flavor you adore, bringing it right into your kitchen, mess-free and oh-so-easy to serve. I remember trying to recreate that campfire magic for friends, and after a few tries, this perfected recipe was born, straight from my kitchen to yours, proving you don’t need a fire pit to get that legendary gooey, chocolatey, marshmallowy goodness in a sliceable bar. This recipe is meticulously tested and perfected, just like all the treats here at Bliss Batter!
- Why You'll Love These S'mores Bars
- Ingredients for Perfect S'mores Bars
- Essential Equipment for Making S'mores Bars
- How to Make S'mores Bars: Step-by-Step
- Tips for Perfectly Gooey S'mores Bars
- Ingredient Notes and Substitutions for S'mores Bars
- Storage and Reheating Instructions for Baked S'mores Squares
- Frequently Asked Questions About S'mores Bars
- Estimated Nutritional Information for S'mores Bars
- Share Your Indoor S'mores Dessert Creations!
Why You’ll Love These S’mores Bars
Seriously, what’s not to love? These bars are:
- Super Easy: You can whip them up in under an hour, perfect for those anytime cravings!
- Totally Gooey: We’re talking that perfect ooey-gooey marshmallow and melty chocolate combo.
- Crowd-Pleasers: Everyone adores s’mores, and these bars disappear fast at parties!
- Indoor Magic: Get all that campfire flavor without the campfire!
Ingredients for Perfect S’mores Bars
Okay, let’s talk about what you’ll need to make these dreamy S’mores Bars. It’s a pretty straightforward list, and trust me, using good quality ingredients really makes a difference. I’ve found that using this exact lineup gives you that perfect balance of crumbly, chocolatey, and wonderfully gooey.
Here’s what you’ll want to gather:
- 1 cup (2 sticks) unsalted butter, melted: Melting it makes it super easy to mix into our crust.
- 2 cups graham cracker crumbs (about 14 full graham crackers): You can crush them yourself in a food processor or by putting them in a bag and giving them a good whack! We want them pretty fine for a nice, even crust.
- 1 1/2 cups granulated sugar: We actually split this between the crust and the marshmallow topping to get the right sweetness and texture.
- 1 teaspoon vanilla extract: Just a little hint of cozy flavor that ties everything together.
- 1/2 teaspoon salt: Don’t skip this! It really wakes up all those sweet flavors.
- 2 cups semi-sweet chocolate chips: Milk chocolate works too if you’re a fan, but semi-sweet gives you that classic s’mores taste without being too sweet.
- 2 cups mini marshmallows: These are perfect for an even layer of gooey goodness!
Essential Equipment for Making S’mores Bars
Alright, let’s talk tools! You don’t need anything fancy, just some trusty kitchen basics to get these S’mores Bars made. Having these ready before you start will make everything smooth sailing. You’ll want a trusty 9×13 inch baking pan – this is perfect for getting that classic bar shape and thickness. Make sure it’s greased and floured, or lined with parchment paper, so your bars don’t stick! Grab a medium mixing bowl for your crust ingredients and another bowl for your marshmallow topping. And of course, a sturdy spatula or mixing spoon will be your best friend for getting everything combined and spread evenly.
How to Make S’mores Bars: Step-by-Step
Alright, let’s get baking! Making these S’mores Bars is honestly one of the easiest ways to get that campfire magic right in your kitchen. Just follow along, and you’ll have these gooey, chocolatey delights ready in no time. Think of it like building a delicious, edible layer cake, but way simpler and less fussy!
Preparing the Graham Cracker Crust
First things first, let’s get that base ready. Go ahead and preheat your oven to 350°F (175°C). While it’s warming up, grab your 9×13 inch baking pan and give it a good grease and flour, or line it with parchment paper if you prefer. Trust me, parchment makes cleanup a breeze! Now, in a medium bowl, mix together your melted butter, graham cracker crumbs, 1 cup of the sugar, vanilla extract, and that pinch of salt. Give it a good stir until everything is nicely combined and looks like wet sand. Press this mixture evenly into the bottom of your prepared pan. You want a nice, solid layer – really push it down! Pop this crust into the oven for just 10 minutes. This gives it a little head start to get firm so it doesn’t crumble apart later.
Adding the Chocolate and Marshmallow Layers
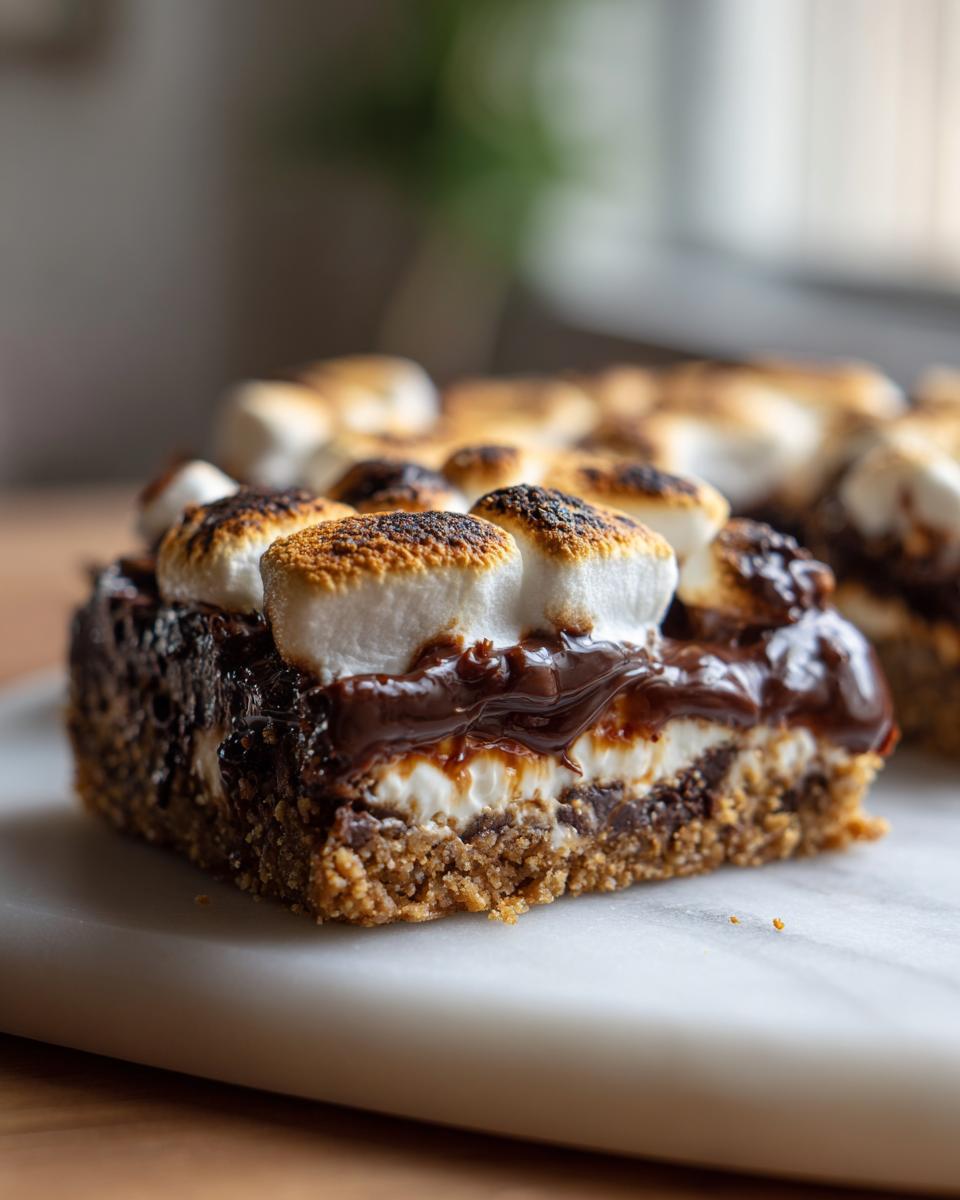
Once the crust has had its quick bake, carefully take it out of the oven. Now for the fun part! Sprinkle those chocolate chips evenly all over that warm graham cracker crust. You want good coverage, so every bite gets that chocolatey goodness. Next up, the marshmallows! In a separate little bowl, toss your mini marshmallows with the remaining 1/2 cup of granulated sugar. This little trick helps them get super gooey and slightly caramelized when they bake. Spread this marshmallow mix evenly right over the chocolate chips. Try to get a good, even layer so you get marshmallow in every piece. It might look like a lot, but it will melt down into magic!
Baking and Cooling Your S’mores Bars
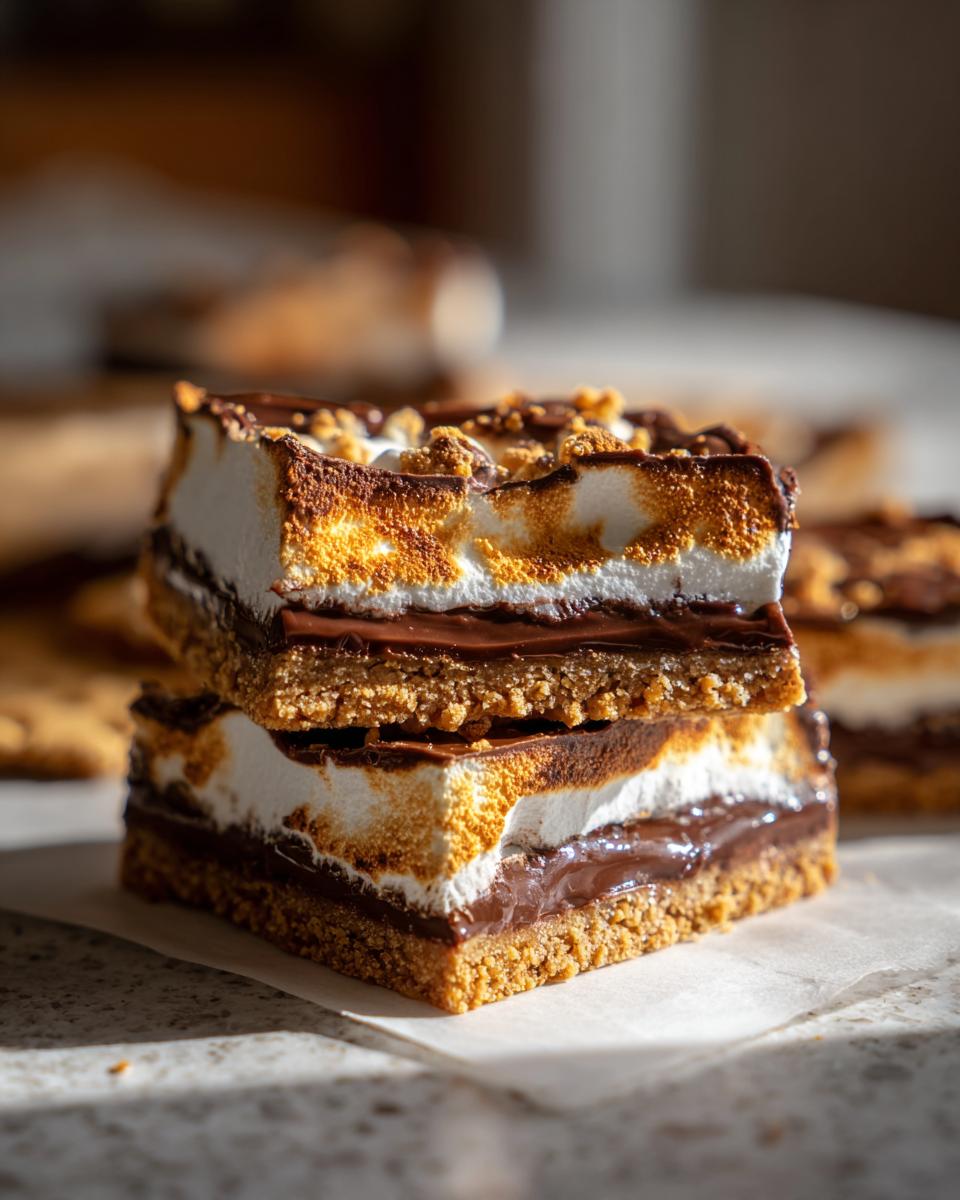
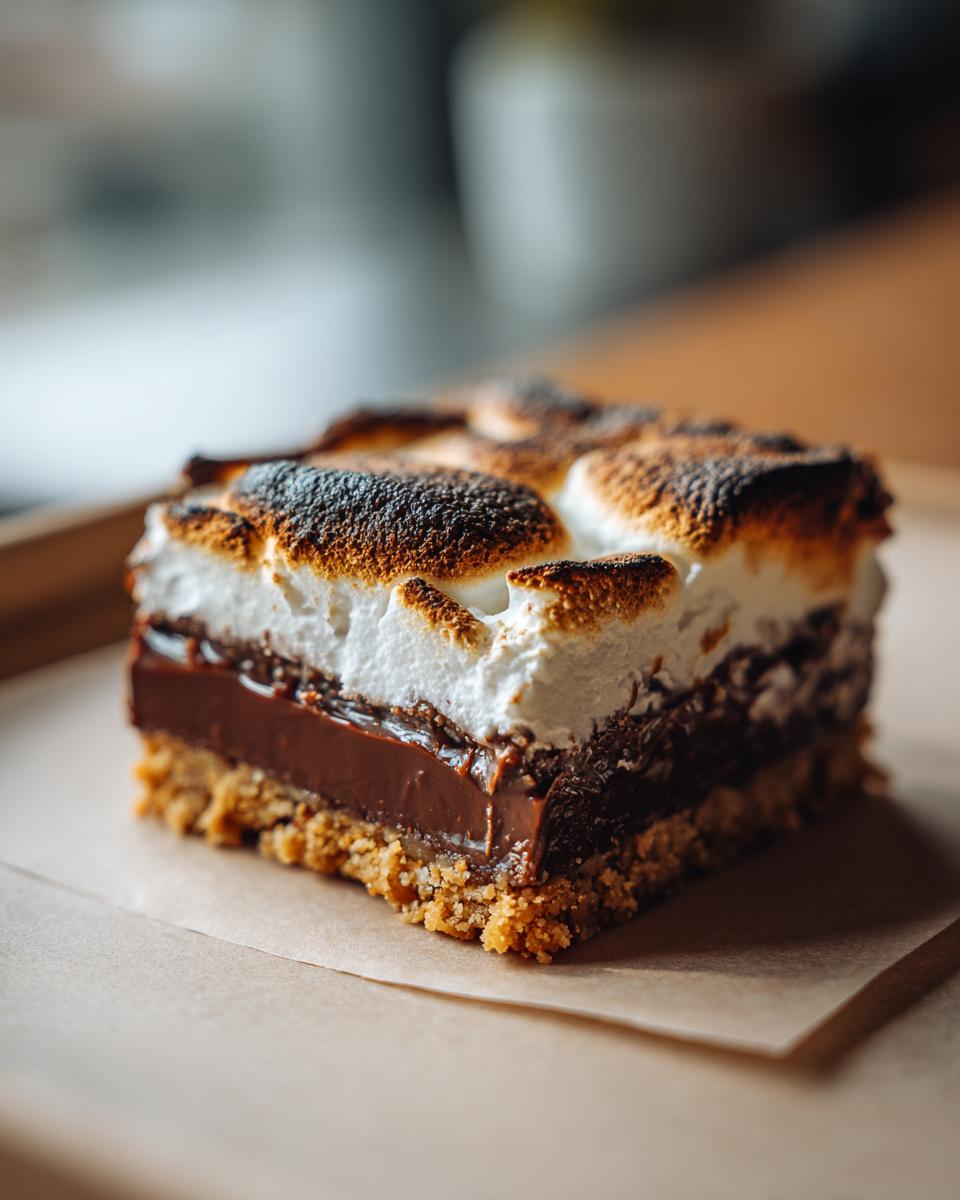
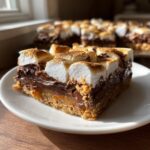
Okay, back into the oven it goes! Bake for another 10 to 12 minutes. The goal here is to get those marshmallows puffed up and just lightly golden. Keep a close eye on them because marshmallows can go from perfectly toasted to burnt really fast – we want that delicious golden color, not black! Once they look beautifully golden, carefully remove the pan from the oven. And this is super important: let the bars cool COMPLETELY in the pan on a wire rack. I know, it’s torture waiting, but it’s the only way to get those clean, perfect slices without all the gooey filling oozing out everywhere. If you’re feeling brave and want that extra-extra gooey, slightly broiled effect, you can pop them under the broiler for just the last minute or two, but seriously, watch them like a hawk!
Tips for Perfectly Gooey S’mores Bars
Okay, listen up, because I’ve made these S’mores Bars more times than I can count, and I’ve learned a few tricks to make them absolutely perfect. If you’re after that signature ooey-gooey texture, this is where the magic happens! First off, don’t skimp on the graham cracker crumbs. Make sure they’re crushed finely – no big chunks! This helps create a cohesive crust that holds everything together.
And speaking of the crust, pressing it down firmly is key. If it’s too loose, your bars will just fall apart. When it comes to the chocolate, using good quality chips or even chopped chocolate bars makes a world of difference; it just melts better. For the marshmallows, trust me on the little trick of tossing them with that extra bit of sugar before spreading. It helps them caramelize just right without burning too fast on top. And PLEASE, let them cool completely before cutting. I know it’s the hardest step, but it’s crucial for that clean slice and that gloriously gooey center. For more chocolatey goodness, check out my tips for decadent brownies or my super moist chocolate zucchini bread – they all share that love for rich, melty chocolate!
Ingredient Notes and Substitutions for S’mores Bars
You know, sometimes life throws you a curveball, and you might not have exactly what the recipe calls for. No worries! I’ve tinkered with these S’mores Bars enough to know a few tricks. For the graham crackers, if you can’t find them, you can absolutely use digestive biscuits or even vanilla wafers. Just crush them up the same way. The flavor will be a little different, but still delicious! And for the chocolate chips, feel free to swap them out for milk chocolate if that’s your jam, or even chopped-up candy bars like Hershey’s or Ghirardelli – that’s what makes it your own!
Storage and Reheating Instructions for Baked S’mores Squares
Got leftovers? Lucky you! To keep these amazing Baked S’mores Squares tasting just as fresh and gooey as the day you made them, store them in an airtight container at room temperature. They’re best enjoyed within 2-3 days, but honestly, they usually disappear much faster! If you live somewhere super warm, you might want to pop them in the fridge, but let them come back to room temp before eating for the best texture.
Need a little reheat? You can pop a square (or two, I won’t judge!) in the microwave for about 10-15 seconds, just enough to warm up that gooey marshmallow and melty chocolate. It’s like a mini s’mores encore! For more tasty treats that store beautifully, check out my recipe for chocolate chip banana bread – it’s another great one for making ahead!
Frequently Asked Questions About S’mores Bars
Can I make S’mores Bars ahead of time?
Oh yeah, you totally can! These S’mores Bars do great when made a day in advance. Just let them cool completely, then store them in an airtight container at room temperature. They’re actually even better the next day when the flavors have melded together!
What is the best way to cut S’mores Bars?
Here’s my trick for clean cuts: use a sharp knife, and after each cut, wipe the knife clean with a damp paper towel. This gets rid of any sticky marshmallow or chocolate bits that can make a mess. For super clean slices, you can even chill them in the fridge for a bit before cutting!
Are there gluten-free options for S’mores Bars?
Absolutely! If you need a gluten-free treat, just swap out the regular graham crackers for your favorite gluten-free graham crackers. The rest of the recipe works beautifully and you’ll still get that amazing ooey-gooey goodness!
Estimated Nutritional Information for S’mores Bars
Now, let’s chat about the good stuff – what you’re actually putting into that happy belly! These numbers are just estimates, of course, ’cause every kitchen and every ingredient can be a *little* different. Things like the brand of chocolate chips or even how you measure things can tweak it. But generally, you’re looking at around 250 calories per bar, packed with about 14g of fat (with 8g being the saturated kind), 30g of carbs, and a good dose of sugar (around 25g). Remember, these are estimates, but they give you a good idea!
Share Your Indoor S’mores Dessert Creations!
Alright bakers, I’ve shared my secrets, and now I can’t wait to see what you create! Did these S’mores Bars bring back those campfire memories for you? Did they disappear in a flash at your last get-together? I’d absolutely LOVE to hear all about it! Please drop a comment below with your experience, or even better, give this recipe a star rating. And if you share a pic of your amazing gooey bars on social media, be sure to tag us – we love seeing your kitchen creations come to life! For more baking inspiration or if you just want to say hi, check out our About page or reach out!
PrintS’mores Bars
Enjoy the classic campfire treat in an easy-to-make bar form. These s’mores bars feature a graham cracker base, a rich chocolate layer, and gooey marshmallows, perfect for any occasion.
- Prep Time: 15 min
- Cook Time: 25 min
- Total Time: 40 min
- Yield: 24 bars 1x
- Category: Dessert
- Method: Baking
- Cuisine: American
- Diet: Vegetarian
Ingredients
- 1 cup (2 sticks) unsalted butter, melted
- 2 cups graham cracker crumbs (about 14 full graham crackers)
- 1 1/2 cups granulated sugar
- 1 teaspoon vanilla extract
- 1/2 teaspoon salt
- 2 cups semi-sweet chocolate chips
- 2 cups mini marshmallows
Instructions
- Preheat your oven to 350°F (175°C). Grease and flour a 9×13 inch baking pan.
- In a medium bowl, combine the melted butter, graham cracker crumbs, 1 cup of the granulated sugar, vanilla extract, and salt. Mix until well combined.
- Press the graham cracker mixture evenly into the bottom of the prepared baking pan to form the crust.
- Bake the crust for 10 minutes. Remove from oven.
- Sprinkle the chocolate chips evenly over the warm crust.
- In a separate bowl, combine the mini marshmallows with the remaining 1/2 cup of granulated sugar.
- Spread the marshmallow mixture evenly over the chocolate chips.
- Return the pan to the oven and bake for an additional 10-12 minutes, or until the marshmallows are puffed and lightly golden. Watch carefully to prevent burning.
- Let the bars cool completely in the pan on a wire rack before cutting into squares.
Notes
- For an extra gooey center, you can broil the bars for the last 1-2 minutes of baking, watching very closely to prevent burning.
- If you don’t have mini marshmallows, you can use larger marshmallows cut in half.
- Ensure your graham cracker crumbs are fine for an even crust.
Nutrition
- Serving Size: 1 bar
- Calories: 250
- Sugar: 25g
- Sodium: 100mg
- Fat: 14g
- Saturated Fat: 8g
- Unsaturated Fat: 6g
- Trans Fat: 0g
- Carbohydrates: 30g
- Fiber: 1g
- Protein: 2g
- Cholesterol: 30mg