
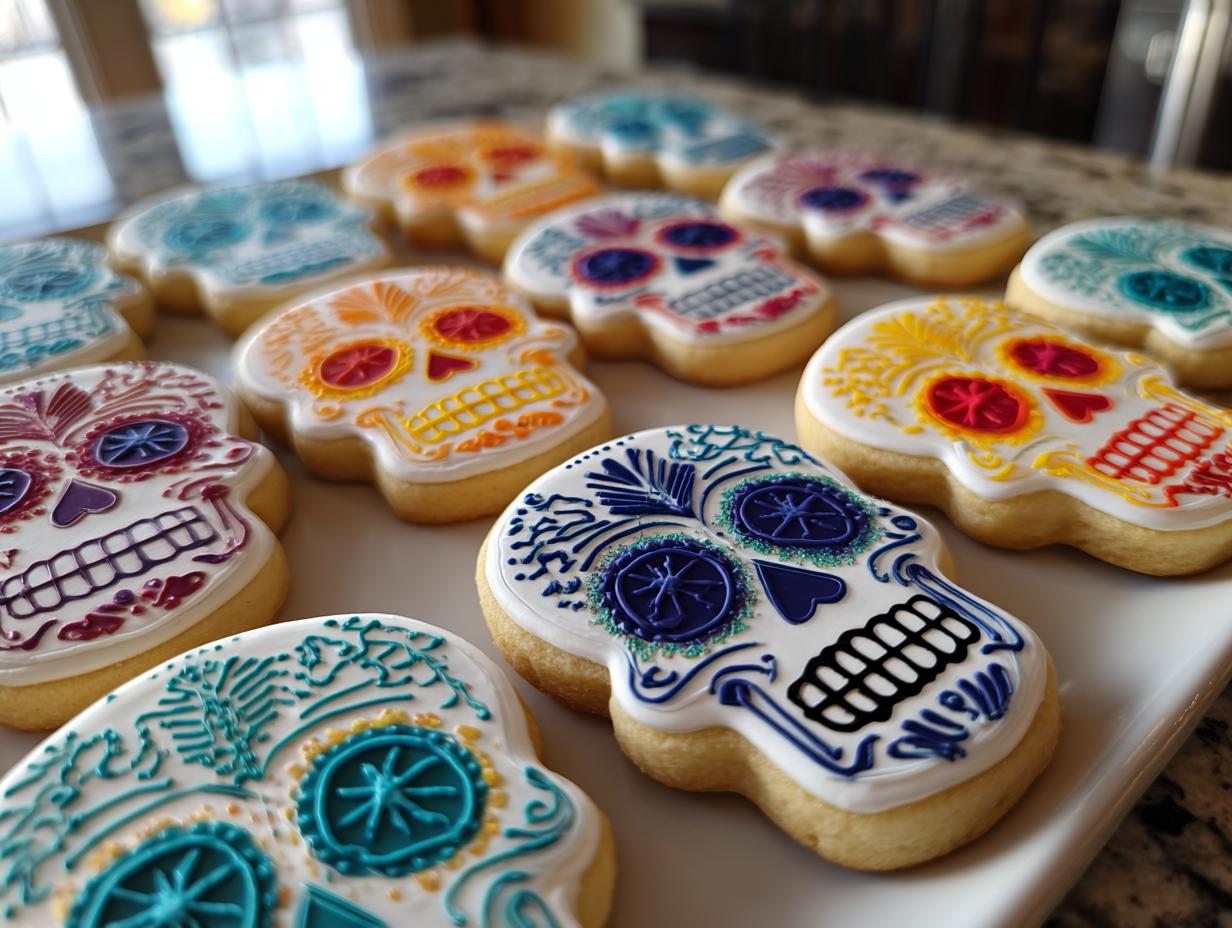
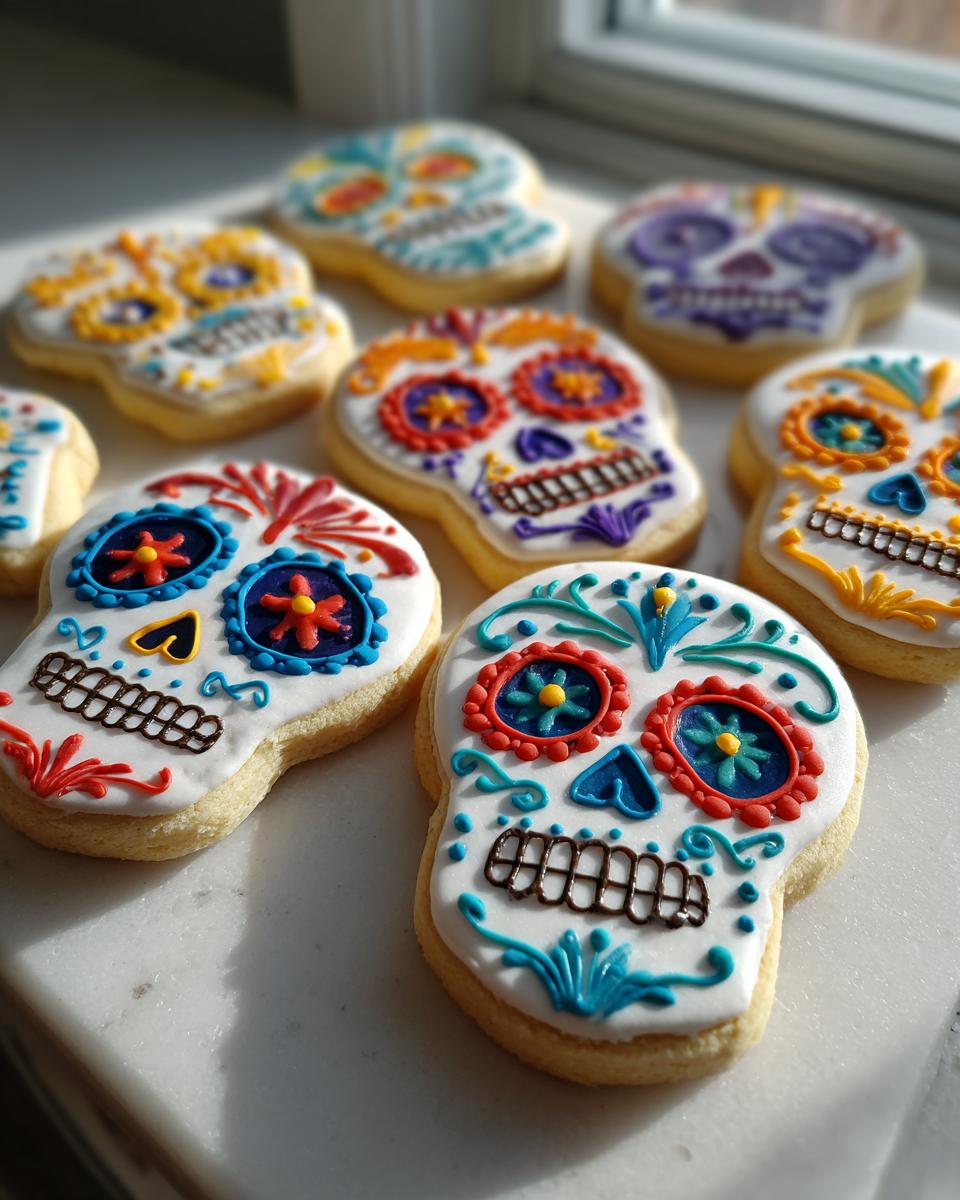
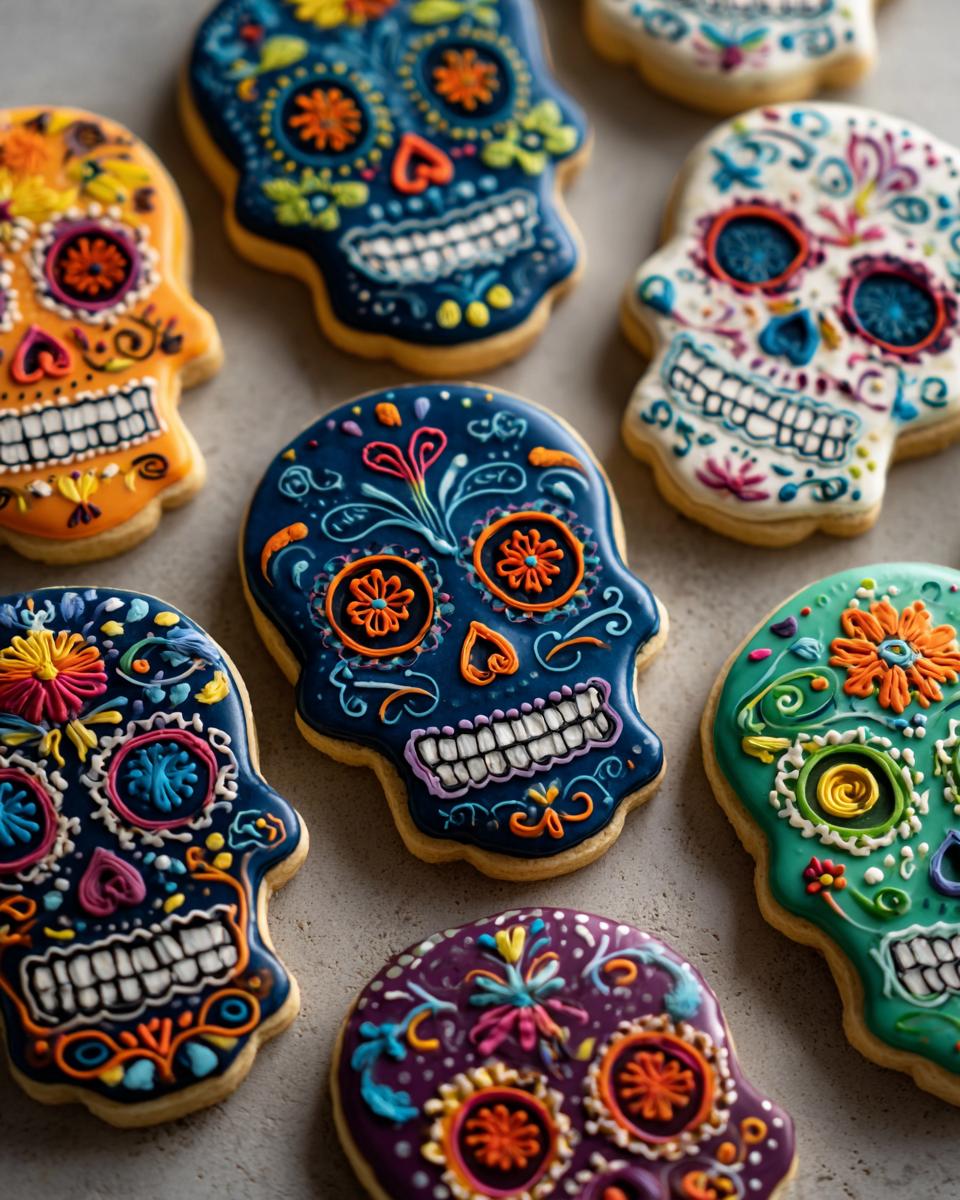
Dia de los Muertos is such a beautiful time for remembering and celebrating our loved ones, and what better way to honor them than with a sweet, edible tribute? That’s exactly why I’m so thrilled to share my recipe for these vibrant Sugar Skull Cookies with you! They’re not just cookies; they’re little works of art, perfect for bringing color and sweetness to your celebrations. When I developed this recipe, I wanted to capture that feeling of home and connection that my grandmother’s baking always gave me, just like our ‘Tested and Perfected’ promise at Bliss Batter means you can always count on delicious results. These aren’t just for eating; they’re a way to share stories and create new memories.
- Why You'll Love These Sugar Skull Cookies
- Ingredients for Day of Dead Decorated Cookies
- Essential Equipment for Royal Icing Skulls
- How to Make Sugar Skull Cookies: Step-by-Step
- Tips for Success with Sugar Skull Cookies
- Ingredient Notes and Substitutions
- Storage and Reheating Instructions
- Frequently Asked Questions about Sugar Skull Cookies
- Nutritional Information for Sugar Skull Cookies
- Share Your Sugar Skull Creations!
Why You’ll Love These Sugar Skull Cookies
Get ready to fall in love with these vibrant cookies! Here’s why they’re a must-make for your Dia de los Muertos celebrations:
- Visually Stunning: They’re so bright and colorful, just like real sugar skulls!
- Culturally Rich: A beautiful, edible way to honor tradition and memory.
- Super Fun to Decorate: Unleash your inner artist with royal icing – perfect for kids and adults alike!
- Deliciously Crisp: A classic buttery cookie that tastes as good as it looks.
Ingredients for Day of Dead Decorated Cookies
Alright, bakers, let’s gather our goodies! For these festive Day of Dead decorated cookies, you’ll need a few things for the cookie base and then some magic for the icing. Don’t worry, these are all pretty standard pantry items.
For the Sugar Cookies:
- 2 1/2 cups all-purpose flour (I always find spooning it in and leveling works best!)
- 1 teaspoon baking powder (This gives a little lift!)
- 1/2 teaspoon salt (Balances everything out)
- 1 cup (2 sticks) unsalted butter, softened (Super important for creaming, so make sure it’s nice and soft!)
- 1 1/2 cups granulated sugar (For that classic cookie sweetness)
- 2 large eggs (Room temperature is ideal here)
- 1 teaspoon vanilla extract (The smell alone is heavenly!)
For the Royal Icing:
- 4 cups powdered sugar (Also known as confectioners’ sugar)
- 2 tablespoons meringue powder (This is key for that nice, stiff icing)
- 1/4 cup water (This is the starting point, we might need a tiny bit more!)
- Food coloring (Grab all the bright, happy colors you can find – pinks, blues, yellows, greens are perfect!)
Essential Equipment for Royal Icing Skulls
Okay, to make these super fun royal icing skulls, you won’t need a whole professional kitchen, but a few key players will make your life so much easier! You’ll definitely want a good skull-shaped cookie cutter – it sets the whole vibe. Two mixing bowls are handy, one for dry stuff and one for the wet. A sturdy stand mixer or a reliable hand mixer is a lifesaver for creaming that butter and sugar! And of course, piping bags and small round tips are a must for all those colorful details. Oh, and parchment paper is your best friend for easy cleanup!
How to Make Sugar Skull Cookies: Step-by-Step
Alright, let’s get down to the fun part – making these amazing Sugar Skull Cookies! It’s a process, but trust me, it’s so worth it. We’ll tackle the cookie dough first, then get them baked up, whip on some glorious icing, and finally, let your creative spirit shine as you decorate! If you love spending time in the kitchen creating something special, make sure you check out my chocolate chip banana bread or my gooey homemade cinnamon rolls too!
Preparing the Sugar Cookie Dough
First things first, let’s make our cookie canvas! In a big bowl, get that softened butter and sugar creamed together until it’s nice and fluffy – think pale yellow and airy. Then, beat in those eggs, one at a time, and stir in the vanilla. Now, slowly add in your flour mixture – just mix until it’s combined, no overdoing it! We want tender cookies, not tough ones. Pop the dough into two flat discs, wrap them up tight in plastic wrap, and let them chill out in the fridge for at least an hour. This makes them way easier to roll out and cut!
Baking the Perfect Mexican Sugar Skull Treat Base
Okay, dough is chilled, oven is preheated to 350°F (175°C), and your baking sheets are lined with parchment paper (my favorite!). On a lightly floured surface, roll out one disc of dough to about 1/4-inch thick. Get your fun skull cookie cutter and press firmly to cut out those shapes. Give them a little space on the baking sheets, maybe 2 inches apart. Bake for about 8-10 minutes. You’re looking for the edges to be just barely golden. Let them cool on the sheet for a few minutes before carefully transferring them to a wire rack to cool down completely. Patience here is key – you don’t want melty icing!
Crafting Vibrant Royal Icing for Skull Decorations
Now for the seriously fun part – the icing! In a bowl, whisk together the powdered sugar and meringue powder really well. Start adding the water, just a little splash at a time, and beat it until you get nice, stiff peaks. It should hold its shape! If it’s too thick, add a *tiny* bit more water; if it’s too thin, sprinkle in a bit more powdered sugar. Once it’s perfect, divide it up into small bowls and bring out your food coloring! Mix those colors in until you get those super vibrant hues that make these royal icing skulls so cheerful.
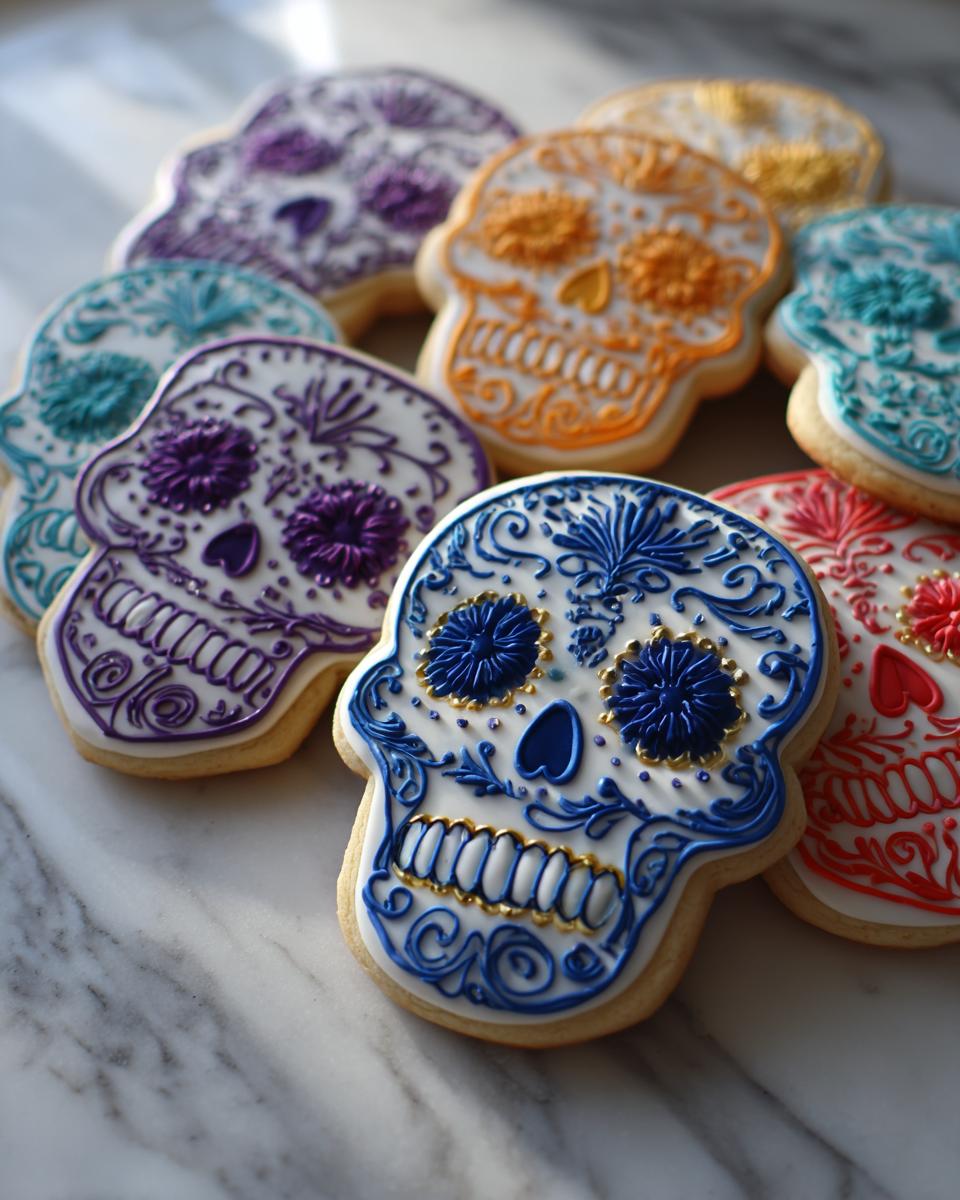
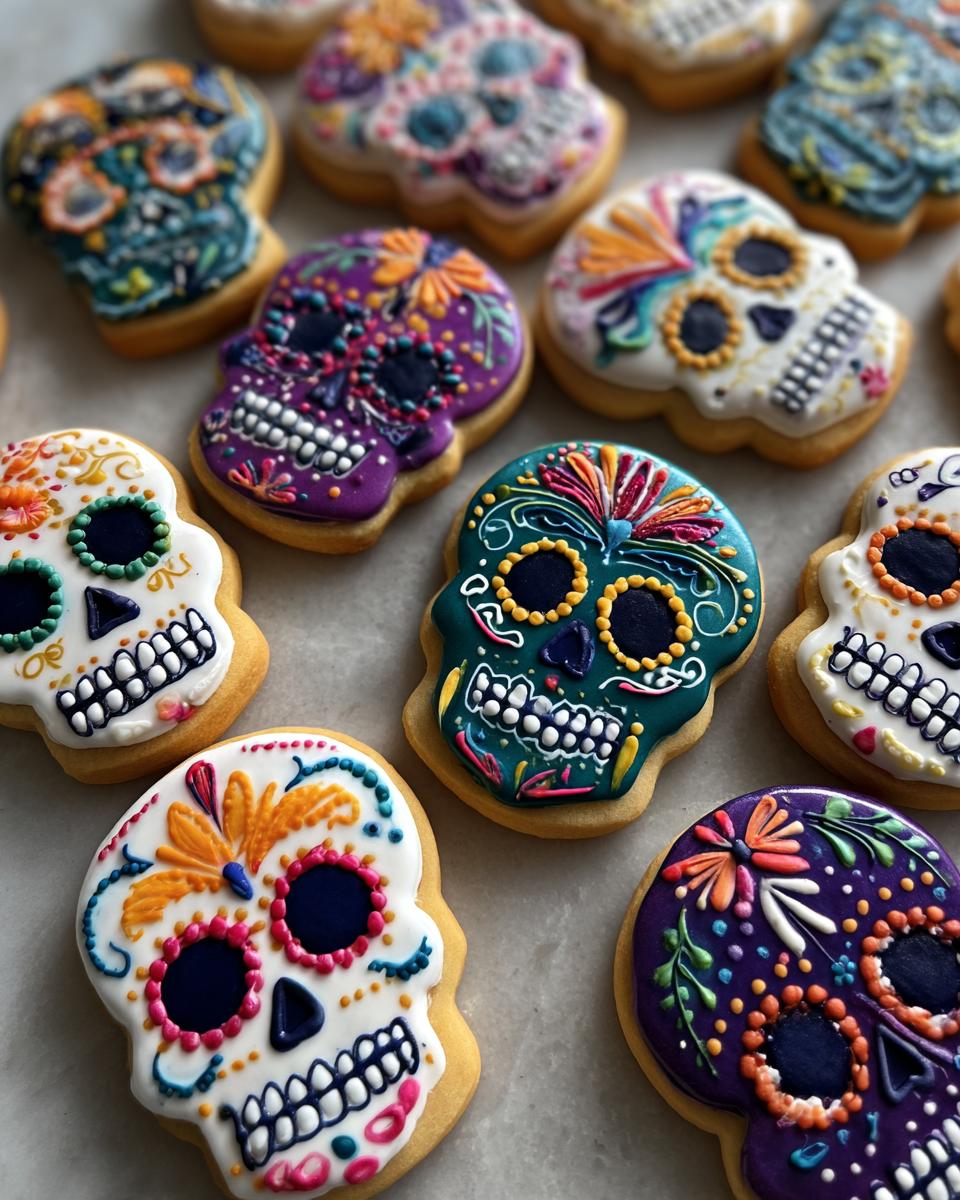
Decorating Your Colorful Skull Biscuits
Time to bring these colorful skull biscuits to life! Spoon your beautifully colored icing into piping bags fitted with small round tips. You can outline your cookie first and then fill it in, or just go wild with swirls, dots, and flowers right away! Think about what makes you happy – traditional patterns, quirky designs, whatever feels right. Add those little details like eyes and flower centers. Once they’re all decorated, let them sit out to dry completely. This usually takes a couple of hours, maybe longer if it’s humid. They need to be rock hard before you even think about stacking them!
Tips for Success with Sugar Skull Cookies
Alright, I’ve made a LOT of these Sugar Skull Cookies, and I’ve learned a few tricks along the way to make sure yours turn out absolutely perfect, just like my tried-and-true 7 Layer Dip or Spinach Artichoke Dip recipes! Keep that dough nice and cold – it’s the secret to clean cuts. And for the icing, remember the consistency is key. You want it thick enough to hold its shape but fluid enough to pipe without clogging. Don’t fear the extra food coloring; brighter is better for Dia de los Muertos!
Ingredient Notes and Substitutions
Just a few things to chat about regarding our ingredients for these Sugar Skull Cookies. If you can’t find meringue powder, don’t sweat it! You can actually make a quick substitute with equal parts cornstarch and powdered sugar (about 1 tablespoon of each for every tablespoon of meringue powder) or even use pasteurized egg whites. And while granulated sugar is traditional for crisp cookies, a touch of superfine sugar can give you an even finer texture if you have it!
Storage and Reheating Instructions
Once your beautiful Sugar Skull Cookies are all decorated and the icing has dried completely – and seriously, give it a good few hours, maybe even overnight if it’s humid – it’s time to store them! The best way to keep these crisp little lovelies fresh is in an airtight container at room temperature. I like to layer them between sheets of parchment paper so the decorations don’t smudge. They’re typically great for about a week this way. And goodness, don’t even think about reheating them; that would totally ruin our pretty icing! Just like my easy peach cobbler, these are best enjoyed fresh!
Frequently Asked Questions about Sugar Skull Cookies
Got questions about these fun Sugar Skull Cookies? I’ve got answers! You know, just like my apple crisp recipe is a classic, these cookies have their own little quirks.
Can I use a different type of icing for my Sugar Skull Cookies?
While you *can* use buttercream, royal icing is definitely the star for these Sugar Skull Cookies! It dries nice and hard, perfect for all those intricate details and vibrant colors kids love to play with.
How long does it take for the royal icing to dry completely?
Patience is your friend here! For the icing to get totally dry and hard, give it at least 2-3 hours in a dry environment. Humidity can slow things down, so plan accordingly!
Are these cookies suitable for children to decorate?
Absolutely! These are beyond perfect for kids. When decorating these Day of Dead decorated cookies, they can let their imagination run wild with all the colors – it’s a fantastic activity for families.
Nutritional Information for Sugar Skull Cookies
Just a little heads-up: this nutrition info for our Sugar Skull Cookies is an estimate, you know? It can totally change depending on exactly how you decorate them and the brands you use. But generally, one cookie is about 250 calories, with around 12g of fat and 35g of carbs. Gotta love a sweet treat!
Share Your Sugar Skull Creations!
I just can’t wait to see what you all whip up! Seriously, share your amazing Sugar Skull Cookies with me! Drop a comment below, tag me on social media, or leave a rating – I love seeing your beautiful, colorful creations inspired by our story and maybe even ask questions through our contact page. Let’s fill the internet with these happy tributes!
PrintSugar Skull Cookies for Dia de los Muertos

Decorate vibrant sugar skull cookies with royal icing to celebrate Dia de los Muertos, honoring loved ones with edible art.
- Prep Time: 30 min
- Cook Time: 10 min
- Total Time: 40 min
- Yield: 24 cookies 1x
- Category: Dessert
- Method: Baking
- Cuisine: Mexican-inspired
- Diet: Vegetarian
Ingredients
- 2 1/2 cups all-purpose flour
- 1 teaspoon baking powder
- 1/2 teaspoon salt
- 1 cup (2 sticks) unsalted butter, softened
- 1 1/2 cups granulated sugar
- 2 large eggs
- 1 teaspoon vanilla extract
- For the Royal Icing:
- 4 cups powdered sugar
- 2 tablespoons meringue powder
- 1/4 cup water (plus more as needed)
- Food coloring (various bright colors)
Instructions
- In a medium bowl, whisk together flour, baking powder, and salt.
- In a large bowl, cream together softened butter and granulated sugar until light and fluffy.
- Beat in eggs one at a time, then stir in vanilla extract.
- Gradually add the dry ingredients to the wet ingredients, mixing until just combined.
- Divide dough into two discs, wrap in plastic wrap, and refrigerate for at least 1 hour.
- Preheat oven to 350°F (175°C). Line baking sheets with parchment paper.
- On a lightly floured surface, roll out one disc of dough to 1/4-inch thickness. Cut out skull shapes using a cookie cutter.
- Place cookies on prepared baking sheets, about 2 inches apart.
- Bake for 8-10 minutes, or until edges are lightly golden. Let cool on baking sheets for a few minutes before transferring to a wire rack to cool completely.
- To make the royal icing: In a bowl, combine powdered sugar and meringue powder. Add water gradually, beating until smooth and stiff peaks form. Divide icing into small bowls and tint with food coloring.
- Transfer icing to piping bags fitted with small round tips.
- Decorate cooled cookies with colorful icing, creating patterns, flowers, and details. Let icing dry completely, about 2-3 hours.
Notes
- For a crispier cookie, bake for an additional 1-2 minutes.
- If icing is too thick, add water a teaspoon at a time. If too thin, add more powdered sugar.
- Allow icing to dry thoroughly before stacking or storing cookies.
Nutrition
- Serving Size: 1 cookie
- Calories: 250
- Sugar: 25g
- Sodium: 50mg
- Fat: 12g
- Saturated Fat: 7g
- Unsaturated Fat: 5g
- Trans Fat: 0g
- Carbohydrates: 35g
- Fiber: 1g
- Protein: 2g
- Cholesterol: 30mg