

Are you having one of those days when you absolutely need something sweet, something rich, but you just can’t deal with a fussy recipe? Trust me, I get it! That’s why I want to share the absolute easiest chocolate treat that has saved my evening mood more times than I can count: my simple, foolproof 3-ingredient chocolate fudge. Seriously, it’s almost criminal how easy this is, and the flavor is pure decadent magic. When I first developed this here in the Bliss Batter kitchen, I was determined to create something approachable for everyone. Claire Sterling is all about making sure you can step into your kitchen and feel successful, and this recipe proves you don’t need complicated steps or old-school candy thermometers to get that perfect, soft, melt-in-your-mouth texture. It’s the quick fix you’ve been waiting for!
- Why This 3-Ingredient Chocolate Fudge is Your New Go-To Treat
- Essential Ingredients for Rich Chocolate Fudge
- Step-by-Step Instructions for Easy Fudge
- Tips for Perfecting Your Homemade Fudge
- Storage and Keeping Your Fudge Fresh
- Serving Suggestions for This Simple Fudge
- Frequently Asked Questions About 3-Ingredient Fudge
- Understanding the Nutrition in Your Homemade Fudge
- Share Your Easy Fudge Creations
Why This 3-Ingredient Chocolate Fudge is Your New Go-To Treat
Honestly, I keep this recipe card tucked away for emergencies because it takes almost no effort, but delivers maximum payoff. If you’re looking for simple, rich flavor without the stress, you’ve hit the jackpot. I love this because it lets me skip the messy stovetop cooking and all those confusing candy-making techniques. You deserve a treat that smiles back at you!
- It requires just three main ingredients—you probably have them right now!
- There is zero need to cook it over the stove; we keep it simple with the microwave.
- The resulting flavor is intensely chocolatey, creamy, and utterly satisfying.
- It fits perfectly into our collection of easy dessert recipes because it’s so forgiving.
The Simplicity of Making Perfect Fudge
That’s the whole point! If you’ve ever been intimidated by traditional fudge that requires precise temperature checking, forget all about those worries here. This is completely no-bake. We aren’t dealing with boiling sugar or tempering chocolate; we are just melting things until they merge beautifully. It’s foolproof, so even if you’re having a chaotic day, you can whip up this dreamy chocolate fudge in minutes.
Essential Ingredients for Rich Chocolate Fudge
When a recipe relies on so few ingredients, you know they have to pull their weight! I always make sure my pantry is stocked for this because it comes together so fast. Don’t try to substitute the condensed milk; that’s the magic binder that gives us that specific, creamy texture we’re looking for in this easy chocolate treat. Here is exactly what you’ll need for the best results:
- 1 (14 ounce) can sweetened condensed milk
- 2 cups semi-sweet chocolate chips
- 1 teaspoon vanilla extract
Ingredient Notes and Substitutions for Your Fudge
The beauty of keeping it to three ingredients is the flexibility you have if you want to mix things up! If you’re in the mood for something different—maybe peanut butter swirl or a lighter chocolate—you can substitute the semi-sweet chips for peanut butter chips or even white chocolate chips. All these work beautifully when melted down with the milk. Just remember, these little swaps change the profile, but the technique for your creamy treat stays exactly the same!
Step-by-Step Instructions for Easy Fudge
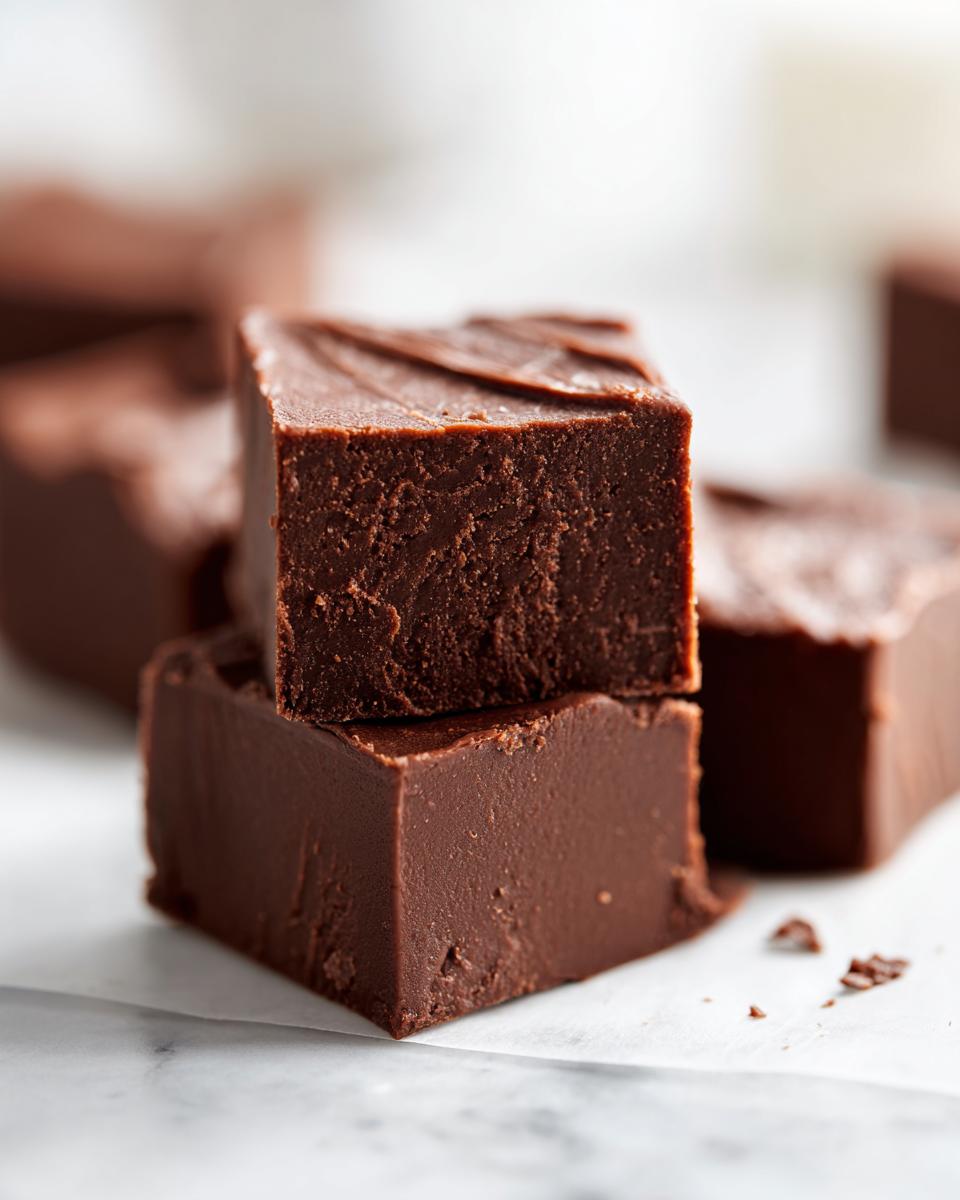
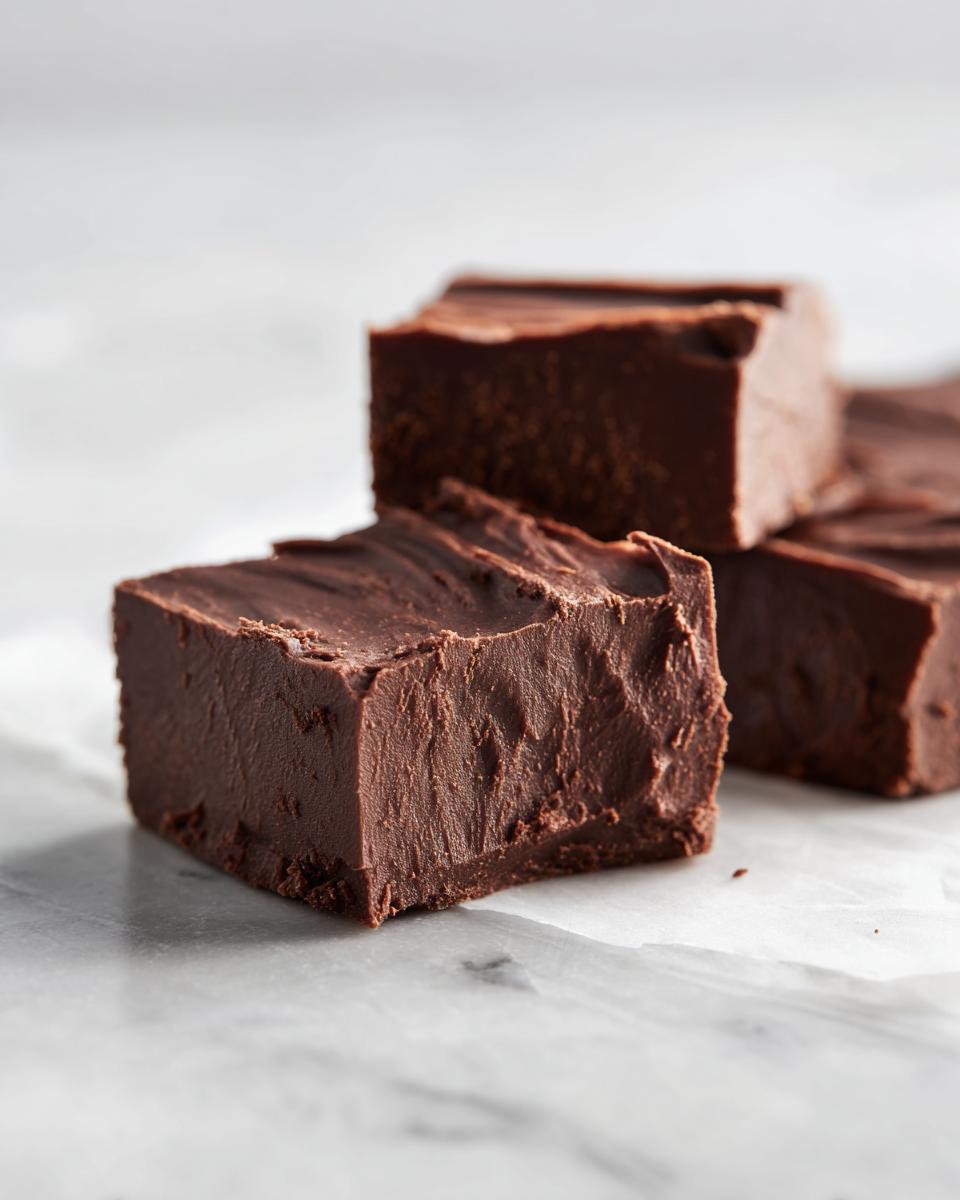
Okay, let’s get this chocolate fudge made! The best part is that this entire active process takes about 15 minutes total—maybe 10 for prep and only about 5 minutes for the actual microwaving bits. First things first, you have to get your pan ready. I always line an 8×8 inch pan with parchment paper, but make sure you leave an overhang on two sides. That overhang is your handle later when you need to lift the whole slab out—do not skip this step!
Next, combine your sweetened condensed milk and the chocolate chips right in a microwave-safe bowl. Now comes the part where you need to pay attention! You don’t want to blast this on high power, or you risk seizing your chocolate. We are microwaving this on medium power for bursts of 30 seconds. After every 30 seconds, you must pull it out and stir it really well, even if it still looks chunky. Keep doing that until it’s magically glossy and totally smooth. Once it’s all combined, stir in that teaspoon of vanilla extract—it really brightens up the chocolate flavor.
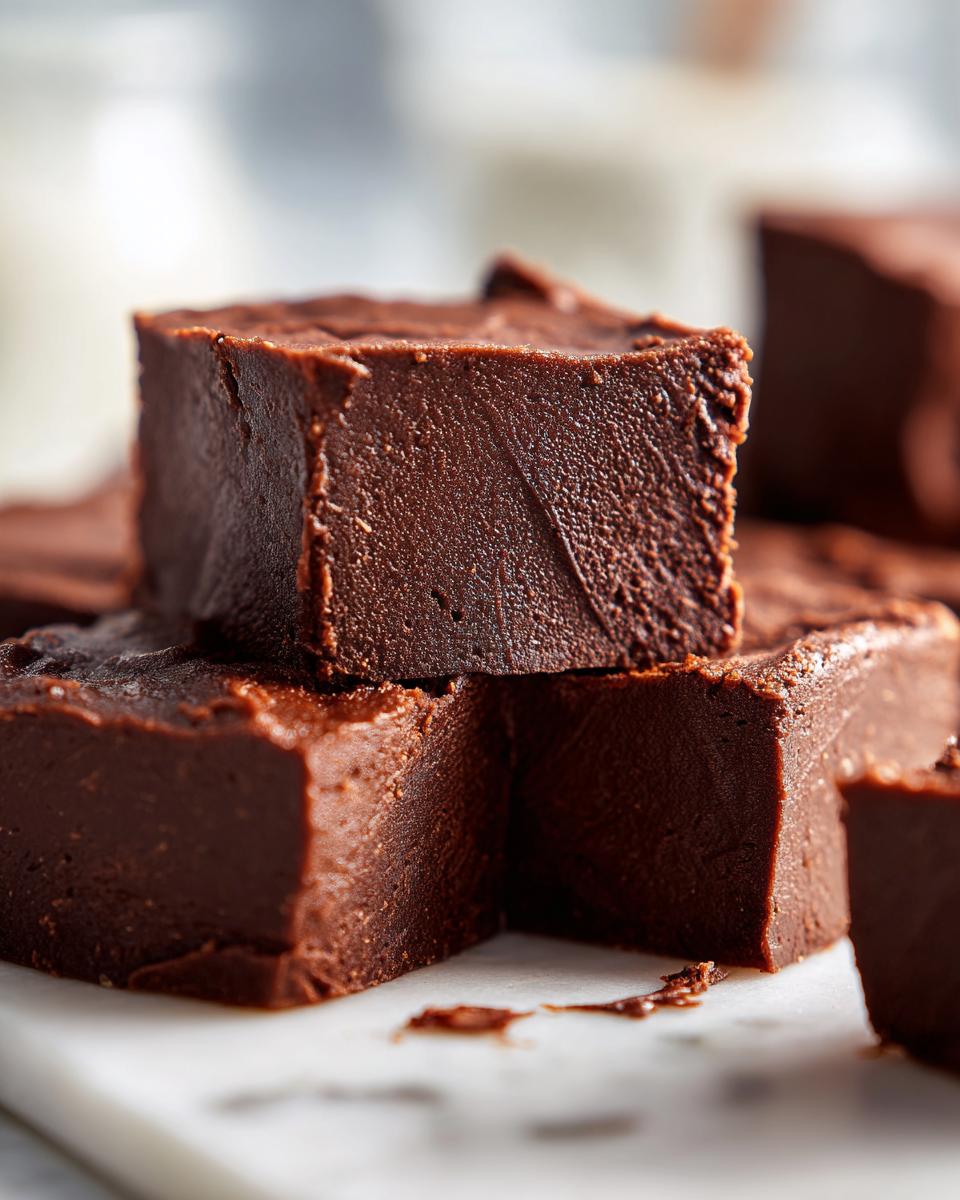
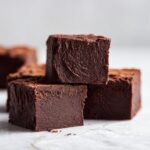
Pour that glorious mixture into the prepared pan and spread it out evenly. Then, it goes straight into the fridge to chill for at least two hours. Once it’s firm, just lift it out using those parchment handles and slice it into small squares. You can find even more quick treats, like my famous fudgy chocolate brownies, on the site!
Crucial Tip for Smooth Microwave Fudge
When you’re melting down those chips and the milk, please, please, please use medium power only. If you use high, the edges of the milk start cooking too fast and get grainy while the center is still hard. That’s how you get seizing, and nobody wants stiff, awful chocolate pieces in their creamy treat! Stirring frequently between those short bursts is what ensures that beautifully smooth, uniform texture. It might feel slow, but it’s the secret to perfect no-bake results every single time.
Tips for Perfecting Your Homemade Fudge
Once you pour that lovely, smooth mixture into the pan, it feels almost done, right? I know the anticipation is killing you! But patience is the final ingredient here. You absolutely must let this chill for a full two hours in the refrigerator. If you try to cut it sooner, it will just smear everywhere, and you’ll end up with a bowl of sweet pudding instead of beautiful squares of fudge. Trust me, I’ve made that mistake more times than I care to admit when I’m just craving a taste!
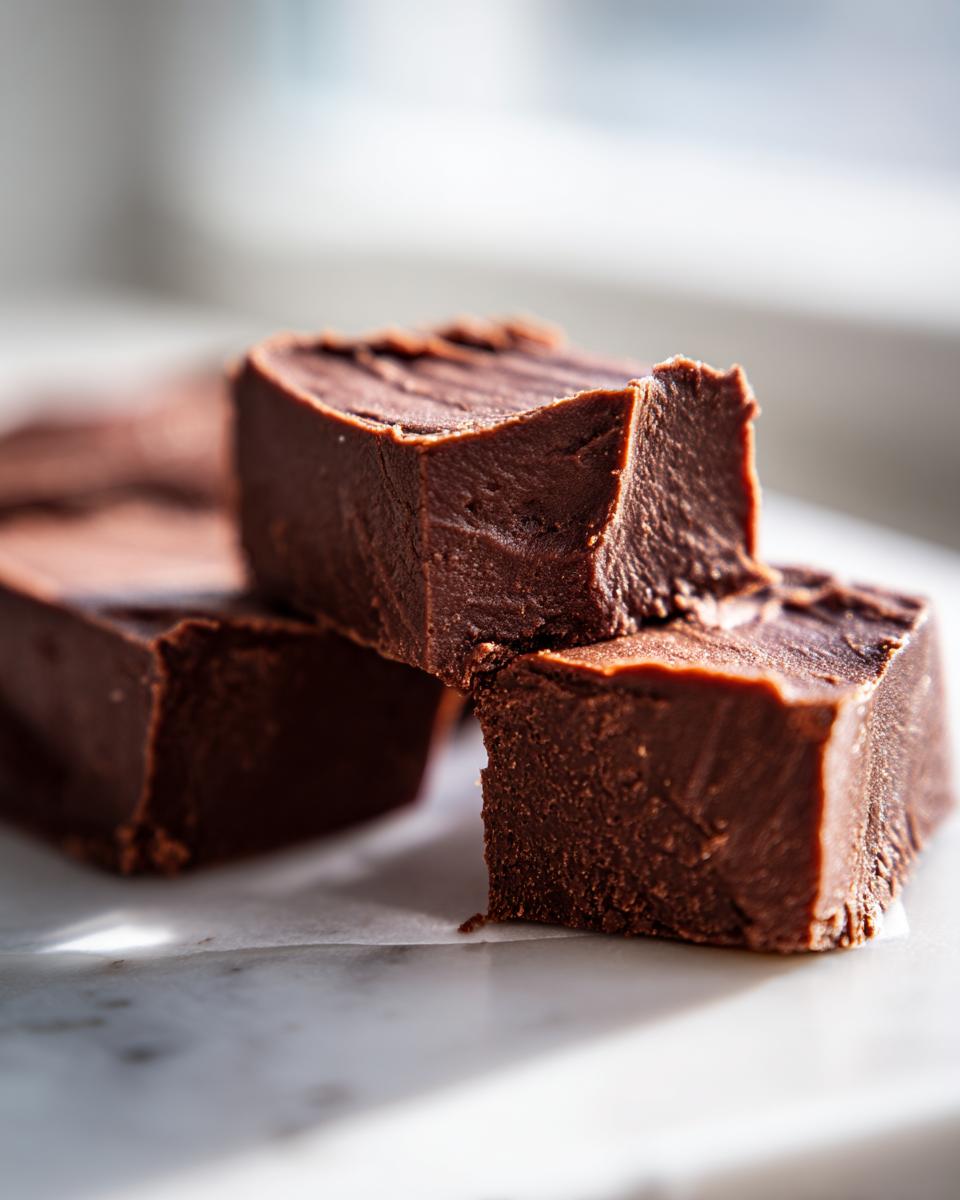
When it comes to slicing, a little trick helps get those gorgeous lines. If you let the fudge hang out at room temperature for maybe five minutes right before using it, it softens just enough to cut neatly. For the cleanest possible cuts on this easy fudge, grab a sharp, long knife and wipe the blade clean between every single slice. If you want to avoid pulling on the edges, check out my full post—I share my favorite trick for getting it perfectly out of the pan!
Remember, a two-hour chill gives you that firm but yielding texture that screams ‘homemade candy.’ It’s worth the short wait!
Storage and Keeping Your Fudge Fresh
Now that you have these beautiful squares of chocolate fudge, the big question is: how do I keep this heavenly treat around? The good news is this simple recipe stores really well! You can totally keep it airtight on the counter at room temperature for about a week. I prefer that way because it stays a little softer.
If you made a huge batch—and you probably will because it’s so addictive—storing it in the refrigerator in an airtight container will definitely make it last longer. Honestly, the cold setting makes it a bit firmer, but it’s perfect for when you need a really solid bite of chocolate!
Serving Suggestions for This Simple Fudge
Now that you’ve mastered the easiest chocolate fudge in the world, how should you eat it? Honestly, popping a square directly from the fridge is perfectly acceptable—that’s what I do when I need a speedy dessert fix! But if you’re feeling fancy, these little squares are incredible alongside a hot drink. They pair amazingly well with my salted caramel latte when things get chilly.
Because they set up so nicely, this simple treat is also perfect for tucking into little gift bags alongside a thank you note. They look way fancier than the five minutes of work they actually took. Enjoy your sweet reward!
Frequently Asked Questions About 3-Ingredient Fudge
I know when I’m trying a new, super simple recipe like this one, I always have a million little questions popping up once the baking—well, maybe *melting*—is done! It’s totally normal to want to nail the texture and look of your finished dessert. I’ve gathered the most common things people ask so you have total confidence when making your batch of easy chocolate confections.
Can I use different types of chocolate chips for this fudge?
Oh, absolutely! That’s one of the joys of making such a simple recipe. If you’re looking for a twist on this classic chocolate fudge, feel free to swap out the semi-sweet for white chocolate chips or even peanut butter chips. They melt down just as smoothly and create a whole new flavor profile for your treat. Just remember that the final color and sweetness will change!
What is the best way to get clean cuts on the fudge?
This is the best question for achieving that bakery look! While chilling for a full two hours is essential, getting those perfect edges takes one extra step. Once the fudge is completely set, take a large, sharp knife and dip it into a glass of very hot water. Wipe the knife completely dry, and then make your cut. Reheat and wipe before every single slice. The hot knife glides right through the cold chocolate creating beautiful, clean squares. That’s the secret to making your homemade candy look professional!
If you need more inspiration for simple desserts that truly shine, check out my main dessert recipes page. And if you want to dive deep into other ways to use condensed milk, folks often reference that great guide over at Kitchen Divas for flavor variations on this kind of fudge!
Understanding the Nutrition in Your Homemade Fudge
Now, listen, I know some of you look at these rich, melt-in-your-mouth squares of homemade candy and wonder about the numbers, right? When I’m focusing on making something simple and delicious, like this easy fudge, the nutrition info goes way down the priority list!
Since this recipe is made with simple pantry staples and varies depending on the exact brand of chocolate chips or condensed milk you grab, I want to be super clear: the numbers listed aren’t gospel truth. Think of the nutritional data here as a friendly estimate, okay? It’s a starting point, not the final verdict, because what you use matters a ton!
Share Your Easy Fudge Creations
That’s it, friends! You’ve conquered the easiest chocolate fudge recipe known to humankind. I truly hope you loved the simplicity and the rich, creamy result. Now, I really want to see what you made! Please hop down to the comments below and let me know what you thought. Did you try a substitution, or did you stick to the classic three ingredients? A rating stars review really helps others feel confident trying this too. Don’t be shy—I love seeing photos of your homemade candy! You can also always check out my About Page if you want to learn more about our baking philosophy here at Bliss Batter!
PrintEasy 3-Ingredient Chocolate Fudge
Make rich, creamy chocolate fudge using only three simple ingredients. This foolproof recipe is quick and perfect for satisfying a sweet craving or making easy homemade candy.
- Prep Time: 10 min
- Cook Time: 5 min
- Total Time: 2 hours 20 min
- Yield: 36 small squares 1x
- Category: Dessert
- Method: No-Bake
- Cuisine: American
- Diet: Vegetarian
Ingredients
- 1 (14 ounce) can sweetened condensed milk
- 2 cups semi-sweet chocolate chips
- 1 teaspoon vanilla extract
Instructions
- Line an 8×8 inch baking pan with parchment paper, leaving an overhang on the sides for easy removal.
- In a microwave-safe bowl, combine the sweetened condensed milk and chocolate chips.
- Microwave on medium power for 30 seconds, then stir. Continue microwaving in 30-second intervals, stirring well after each, until the mixture is completely smooth. This usually takes 1.5 to 2 minutes total.
- Stir in the vanilla extract until fully combined.
- Pour the fudge mixture into the prepared pan and spread evenly.
- Refrigerate for at least 2 hours, or until firm.
- Lift the fudge out of the pan using the parchment paper overhang. Cut into small squares.
Notes
- For a different flavor, substitute peanut butter chips or white chocolate chips for the semi-sweet chips.
- If you are looking into structured eating plans, this recipe is not part of a specific keto meal plan delivery service, but it is a simple treat you can make yourself.
- Store the finished fudge in an airtight container at room temperature for up to one week, or in the refrigerator for longer storage.
Nutrition
- Serving Size: 1 square
- Calories: 105
- Sugar: 14
- Sodium: 25
- Fat: 5
- Saturated Fat: 3
- Unsaturated Fat: 2
- Trans Fat: 0
- Carbohydrates: 15
- Fiber: 0
- Protein: 2
- Cholesterol: 5