

Oh, that feeling when the holidays or a surprise guest pops up, and you realize you completely forgot about dessert! Trust me, I’ve been there. After hosting big corporate events for years, I learned my lesson: sometimes the most spectacular treats are the ones that whisper “easy” instead of screaming “all-day baking project.”
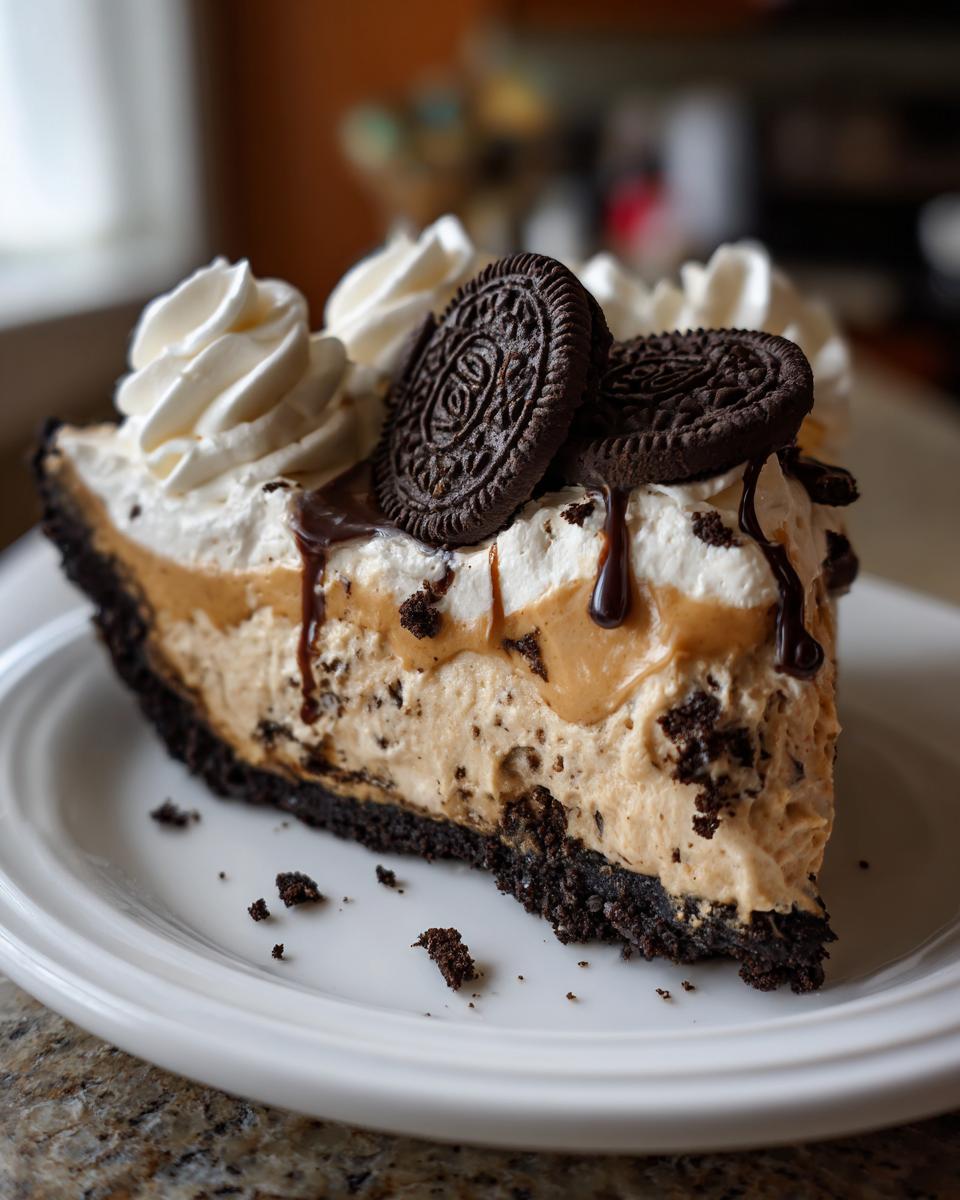
This is why I’m so excited to share my absolute favorite way to end a meal: the Decadent No-Bake Peanut Butter Pie with Oreo Crust. Seriously, this rich, creamy **peanut butter pie** is my secret weapon for crowd-pleasing desserts. It tastes like you slaved away for hours, but the truth is, it comes together faster than brewing a pot of coffee. Forget wrestling with pastry dough or praying your oven bakes evenly; this recipe is pure, straightforward joy, and it sets up so beautifully in the fridge. It’s my go-to when I need something truly satisfying without turning on the heat. You can find more of my favorite simple dessert recipes right here on the blog!
- Why This Decadent No-Bake Peanut Butter Pie is Your New Favorite
- Gathering Ingredients for Your Peanut Butter Pie
- Step-by-Step Instructions for the Easiest Peanut Butter Pie
- Tips for the Best Creamy Peanut Butter Pie Success
- Making Your Peanut Butter Pie Ahead and Storing
- Variations on This Crowd Pleasing Desserts Peanut Butter Pie
- Serving Suggestions for Your Homemade Pie Recipe
- Frequently Asked Questions About Making a Peanut Butter Pie
- Nutrition Estimate for This Peanut Butter Pie
- Share Your Bliss Batter Creations
Why This Decadent No-Bake Peanut Butter Pie is Your New Favorite
If you’re anything like me, you want desserts that impress without stressing you out. That’s exactly what this recipe delivers! It’s one of those magical **no bake desserts** that you can throw together on a Tuesday but still serve proudly at Thanksgiving. It’s truly the best of both worlds. If you need something fast for dinner later, I have a few easy weeknight dinners ideas, but first, pie!
Here’s why this **peanut butter pie** immediately bumped its way to the top of my recipe files:
- It’s one of the simplest **easy dessert recipes** I have! No mixer required for the crust, and the filling whips up in minutes.
- That rich, thick filling texture? It’s unbelievably **creamy peanut butter pie** perfection, just like you dreamed about!
- It’s an amazing **crowd pleasing dessert**—honestly, who doesn’t love peanut butter and chocolate cookies?
- It takes up zero oven space, which is a lifesaver when you’re juggling roasts and side dishes.
Effortless Assembly: A True No Oven Dessert
When I tell you this is a **no oven dessert**, I mean it! The active time is so short, maybe 20 minutes max before it heads to the fridge. This makes it ideal for those spur-of-the-moment cravings or when you need **quick sweet treats** on short notice. The chilling does all the heavy lifting for you, setting up that gorgeous structure!

The Ultimate Creamy Peanut Butter Pie Filling
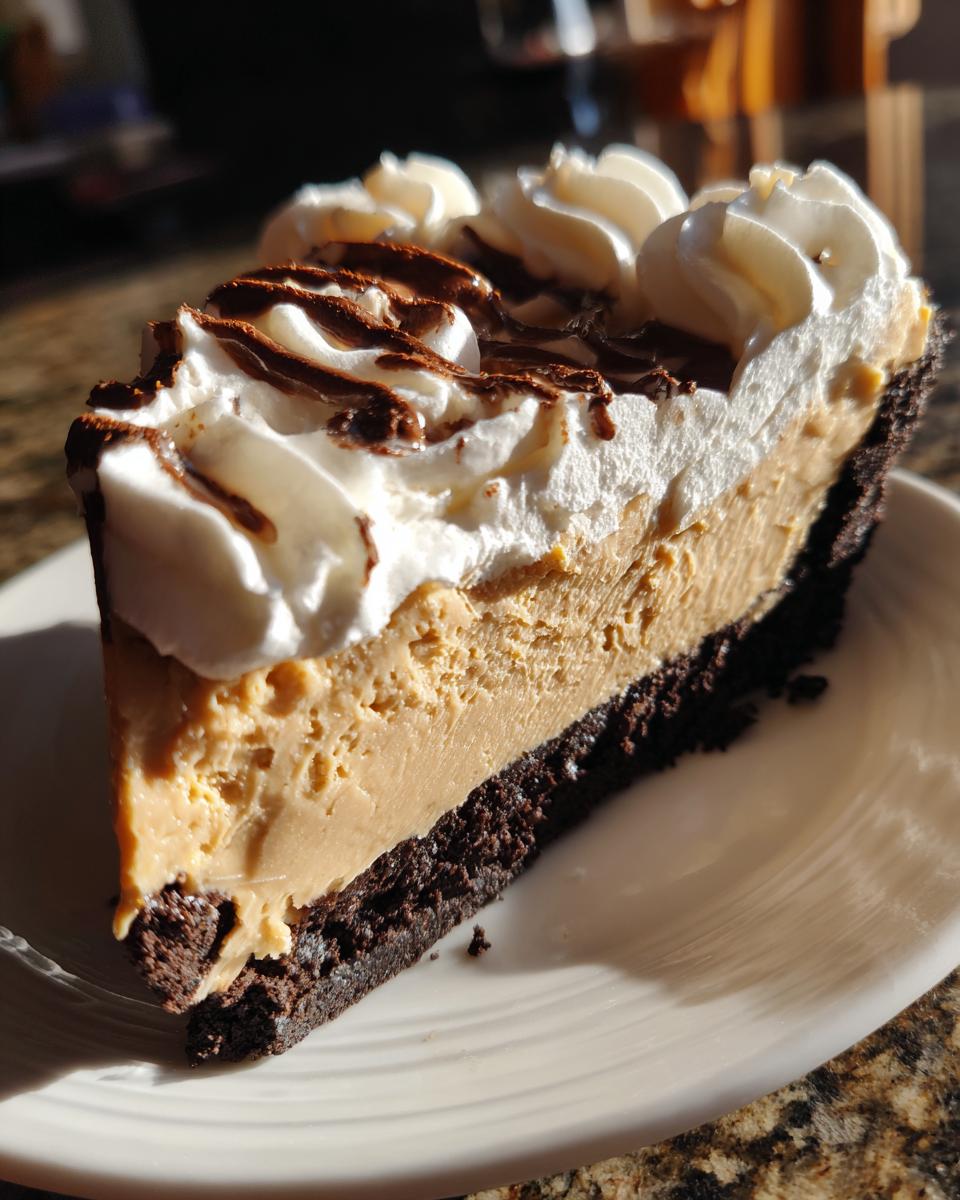
You won’t believe how decadent this looks for something so simple. The secret lies in balancing the tang of the cream cheese with just the right amount of peanut butter and powdered sugar. This creates a **rich peanut butter filling** that is silky smooth, never gritty. It embodies that pure, comforting flavor we all love in a classic **homemade pie recipe**.
Gathering Ingredients for Your Peanut Butter Pie
Alright, let’s talk about what you need to pull off this gorgeous **peanut butter pie**. Remember, at Bliss Batter, we focus on amazing flavor using ingredients you probably already have tucked away. There’s no sense hunting down specialty items when the magic is right here in your pantry! Getting your ingredients ready before you start is half the battle, trust me. When everything is measured and ready, the assembly just flows perfectly.
For this recipe, we are using the full container of thawed whipped topping in the filling, but we’re making a gorgeous, fresh whipped cream crown later on. It makes a huge difference in achieving that *incredible* texture! You can learn more about my baking philosophy over on my About Page.
For the Oreo Crust Pie Base
This crust is pure, chocolatey goodness and sets up rock-solid in the freezer. It’s my favorite crust because it requires zero baking—just mix and chill. Here’s exactly what you need for the base:
- 1 1/2 cups crushed Oreo cookies (That’s about 25 cookies, don’t stress too much about crumb size!)
- 6 tablespoons unsalted butter, melted
For the Rich Peanut Butter Filling
This is where 99% of the magic happens! For this **rich peanut butter filling** to be perfectly smooth and creamy, the temperature of your cheese is everything. Please, please, please make sure your cream cheese is actually soft—I usually leave mine out for at least an hour before I plan to mix. No lumps allowed!
- 1 (8 ounce) package cream cheese, softened
- 1 cup creamy peanut butter (Use the standard kind, not the natural oil-separated type, if you want that perfect structure!)
- 1 1/2 cups powdered sugar
- 1 teaspoon vanilla extract
- 1 (12 ounce) container frozen whipped topping, thawed
For the Fresh Whipped Cream Topping
We are skipping the aerosol can here! Making the topping fresh with heavy cream takes two extra minutes, but the flavor and stability are honestly miles above anything store-bought. It’s the crowning jewel on this **creamy peanut butter pie**.
- 1 cup heavy cream
- 1/4 cup powdered sugar
- 1 teaspoon vanilla extract
- Optional topping: Chocolate syrup or mini peanut butter cups
Step-by-Step Instructions for the Easiest Peanut Butter Pie
Okay, deep breaths! This is where we bring everything together to make the most amazing **peanut butter pie** you’ve ever tasted, and I promise this process is so straightforward it feels like cheating. Since this is a fabulous **no bake dessert**, we rely on good technique and chilling time rather than heat to do the hard work. I documented all these steps meticulously because I want your first time making this to be foolproof. Seriously, this recipe is designed for immediate success, and it makes the perfect **Thanksgiving dessert idea**! If you’re planning more meals for the week, you can always check out my simple lunch recipes later.
Creating and Chilling the Oreo Crust Pie
First things first, we need to secure our chocolatey base! Grab that bowl with your melted butter and crushed Oreos. You want to mix this until it looks evenly dark and crumbly—like wet sand that’s ready to pack down. Don’t leave any dry pockets of crumbs; those will just crumble when you slice it later, and we want structure!
Now, take your 9-inch pie plate and press that mixture in. Use the bottom of a measuring cup or just your clean fingers to really pack it down firmly across the entire bottom and, importantly, up those edges. You’re aiming for a thick, solid wall here. Cold crust equals a better pie! Once it’s nice and snug, pop that whole plate into the freezer. It needs at least 15 minutes in there while we tackle the filling.
Mixing the Creamy Peanut Butter Filling
Time for the star of the show—that unbelievably **rich peanut butter filling**! Grab your electric mixer (or an arm workout with a whisk if you’re feeling brave!) and start with that softened cream cheese. Beat it until it’s totally smooth and no lumps dare show their faces. This is crucial for that **creamy peanut butter pie** texture we adore.
Next, add in your creamy peanut butter, the 1 1/2 cups of powdered sugar, and one teaspoon of vanilla. Mix this until it’s just combined and gloriously thick. Now for the folding part, which requires a gentle touch! Take your thawed whipped topping and very gently fold it into the peanut butter mixture. I mean gently—use a spatula and scoop from the bottom, bringing the lighter topping over the heavier base. Stop folding the second you don’t see any more white streaks. Overmixing here deflates all the air and ruins the airy texture!
Final Assembly and Setting the Peanut Butter Pie
Carefully scoop all that beautiful, light filling into your now-chilled Oreo crust. Use an offset spatula to smooth the top so it looks neat before it goes in the fridge. You can swirl it if you want that rustic look, which is totally fine for a **quick sweet treat**!
Cover the pie loosely with plastic wrap—make sure the wrap isn’t touching the filling, or it will stick! Then, this is the hardest part: you have to wait. It needs a minimum of 4 hours in the refrigerator, but honestly, overnight is even better. This lets the entire **peanut butter pie** firm up so you get those clean, stunning slices.
Preparing the Homemade Topping and Serving
Don’t even think about topping that pie until your guests are walking in the door! This fresh topping is amazing, but it settles if it sits too long. When you’re ready to serve, whip your heavy cream, the remaining 1/4 cup of powdered sugar, and the final teaspoon of vanilla together until you get stiff peaks.
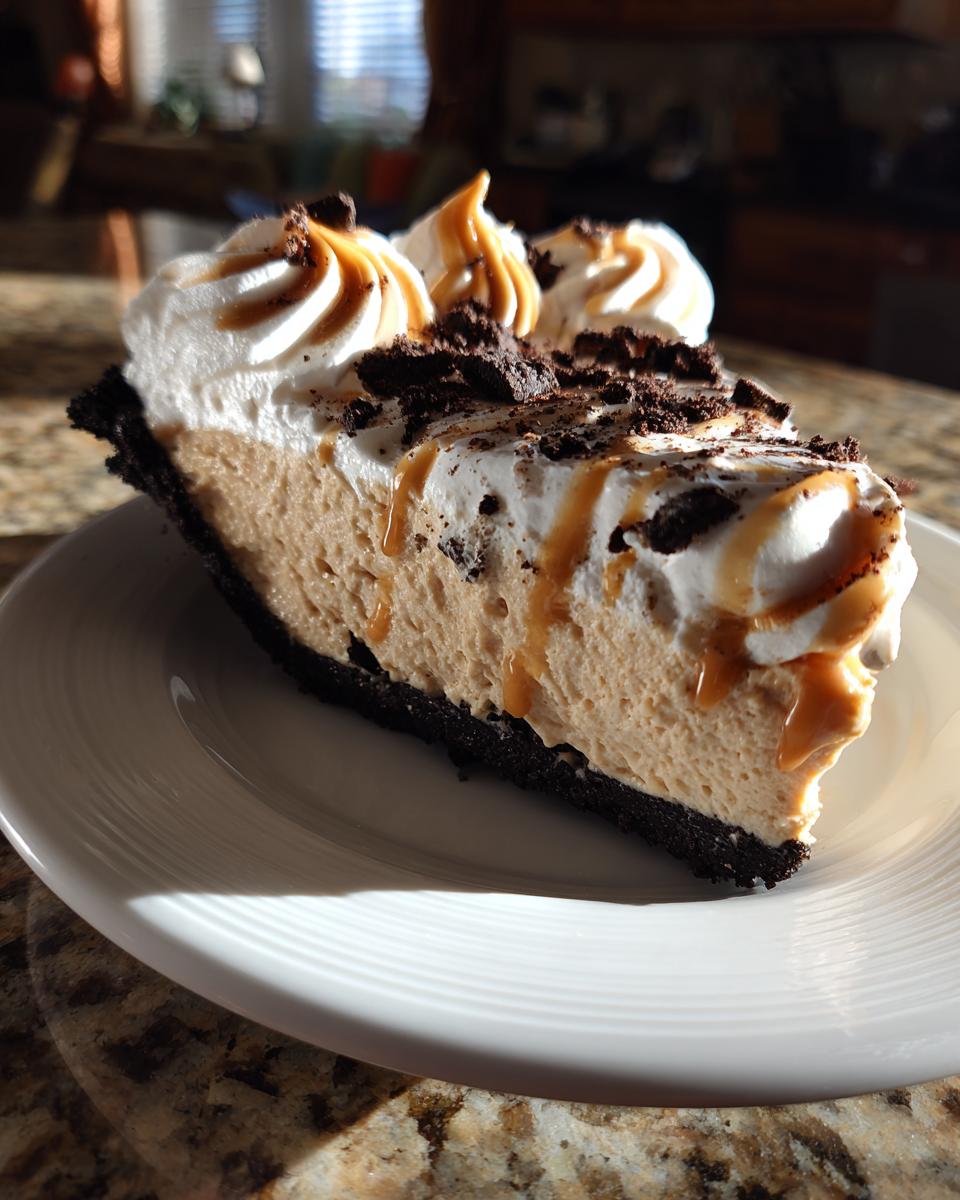
Spread this airy crown lovingly over the chilled pie. If you’re feeling extra decadent, now is the time for that chocolate syrup drizzle or sprinkling those chopped peanut butter cups on top. Slice it up and watch everyone grab seconds of this incredible **homemade pie recipe**!
Tips for the Best Creamy Peanut Butter Pie Success
You know how sometimes a recipe looks perfect on paper but comes out just… okay? That’s usually down to one little temperature slip or a tiny oversight! Because I want you to have the absolute **best peanut butter pie** here, I want to share the little things I learned from making this dozens of times until it was finally perfect. You can check out my breakfast brunch recipes too, but trust me, this pie is worth pausing everything for!
We want that filling to be velvety smooth, not chunky, and we want that crust to hold up like a champion. Don’t worry if you’ve screwed up a no-bake filling before; these tips will guarantee success!
Ingredient Temperature Matters for Smooth Peanut Butter Pie
If there is one non-negotiable step that separates an okay **creamy peanut butter pie** from a spectacular one, it’s the cream cheese temperature. You *must* use room temperature cream cheese, friends. If it’s cold, it will not incorporate beautifully with the thicker peanut butter and powdered sugar.
When the cream cheese is cold, you end up beating it harder and longer, which incorporates way too much air too fast, or worse, you leave little cold chunks floating in your filling. Those chunks never soften while chilling! So, take it out an hour before you start. If you’re in a total rush, cube it up and microwave it for about 10 seconds, but test it gently—it should yield easily to a light poke.
Achieving the Perfect Oreo Crust Pie Texture
We already talked about packing this crust down firmly for that structure, but let’s talk about stability. Since this is a **no bake dessert**, we are relying solely on the melted butter to act as the glue. Make sure that butter is fully coating every single Oreo crumb before you press it into the pan.
If you want to step this up even more—and this is my little secret for keeping the crust from getting soggy as the filling sits—try stirring in about one tablespoon of finely chopped Reese’s peanut butter cups right into your crumb mixture before pressing. It adds a little extra fat stabilization and ensures that you get a little hit of chocolate candy in every slice of your **Oreo crust pie**! It’s a subtle change, but it makes this a truly impressive **homemade pie recipe**.
Making Your Peanut Butter Pie Ahead and Storing
I know that when you’re planning for big events, especially **holiday pie recipes** like Thanksgiving, you need desserts that can play the long game. The beautiful thing about this specific **peanut butter pie** is that it’s designed to be made ahead! In fact, it tastes even better the next day once those flavors have really had a chance to mingle and deepen.
When planning ahead, the biggest question is always the topping, and my rule is firm: do not put the fresh whipped cream on until you are actually ready to serve it. That homemade topping is glorious, but it will start to weep and deflate if it sits on top of the rich filling for too long in the fridge. I think the cream topping is fine sitting for about an hour on the counter before serving, but anything longer and you risk volume loss.
For the pie itself, you can totally make the crust and the filling mix one day before you plan to serve. Just press the crust, chill it for 30 minutes, then dollop in the filling and cover the whole thing tightly with plastic wrap. It needs those minimum four hours to fully set, so making it the day before is actually ideal for the structure of your **creamy peanut butter pie**. If you’re looking for other make-ahead desserts for your gatherings, you might want to check out my recipe for a fantastic pumpkin cheesecake recipe—that one also benefits from an overnight chill!
When you pull it out of the fridge for serving, add your beautiful fresh topping, perhaps a handful of chopped Reese’s cups, slice it up, and enjoy the compliments! This makes hosting so much smoother, which is exactly what a great **homemade pie recipe** should do for you.
Variations on This Crowd Pleasing Desserts Peanut Butter Pie
Part of the fun of baking, even with an amazing recipe like our **peanut butter pie**, is making it perfectly *yours*! Since this is already such a simple recipe, it’s begging for a little creativity. You don’t have to stick strictly to the Oreo situation, though I do love that dark, crumbly base. I love sharing these little tweaks because they make the pie feel new every time you serve it, ensuring it remains one of your go-to **crowd pleasing desserts**.
If you’ve mastered the original, try one of these little flavor boosts the next time you need a **quick sweet treat**! If you love playing baker’s helper, you should definitely take a peek at my recipe for salted caramel brownies—they are another easy win!
Crust Swaps for Your Peanut Butter Pie
Maybe you’re not an Oreo fan, or maybe you just ran out! No problem at all. If you want to pivot to a more classic, buttery base for this **homemade pie recipe**, swapping to a graham cracker crust is super easy. You’ll need about 1 3/4 cups of fine graham cracker crumbs instead of the Oreos.
Here’s the adjustment: graham crackers aren’t quite as sweet as Oreos, so you’ll want to mix your crumbs with 1/4 cup of granulated sugar along with the 6 tablespoons of melted butter we used before. Press that into the pan just the same way and give it a solid chill. It gives the final **peanut butter pie** a slightly lighter color and a familiar, warm flavor that pairs beautifully with the creamy filling!
Adding Chocolate Peanut Butter Dessert Flair
If you want to lean hard into that amazing **chocolate peanut butter dessert** profile, you have a couple of fun options to try. My favorite? Using the Reese’s peanut butter cups as the main topping instead of just a sprinkle. Chop up about 10-12 cups and press them gently into the fresh whipped cream topping right before serving. They look gorgeous scattered across the white top!
Another fun variation involves sneaking chocolate right into the filling. When you are beating the cream cheese and peanut butter mixture, melt down about 1/2 cup of semi-sweet chocolate chips until smooth. Let it cool for just a minute so it’s not piping hot, and then beat it right into your filling mixture. You’ll end up with a stunning swirl of peanut butter and chocolate throughout, creating an extra decadent texture for your **creamy peanut butter pie**!
Serving Suggestions for Your Homemade Pie Recipe
Now that you’ve masterfully created the **best peanut butter pie**—a true testament to your **homemade pie recipe** skills—you might be wondering what exactly to serve alongside it! Since this dessert is incredibly rich, a little bit goes a long way, but the right accompaniment can take the whole experience to the next level. You’ve done the hard work of making the filling creamy and the crust crumbly, so let’s make the serving part just as fun!
I always think about balancing that heavy, salty-sweet profile. Something acidic or light works wonders to cut through the richness. I have some wonderful recipes for drink and cocktail recipes that would be perfect alongside a slice of this beauty!
Here are a few of my favorite ways to present this killer **peanut butter pie**:
- A Tiny Side of Fruit: Don’t go for a big fruit salad; just a small cluster of fresh raspberries or thinly sliced strawberries right next to the slice cuts through the fat beautifully. The tartness is a wonderful contrast.
- A Simple Coffee Pairing: This pie is dense, so it begs for sipping. A strong, freshly brewed cup of dark roast coffee or a nice espresso is truly the traditional way to enjoy a rich slice. It’s sophisticated, simple, and cuts the richness perfectly.
- A Lightly Salted Crunch: If you didn’t already go overboard on the toppings, try serving a slice with a very small pile of pretzel twists or salted nuts on the side. That extra pop of salt makes the peanut butter flavor sing even louder!
- A Drizzle Upgrade: If you served the pie plain, heat up a little salted caramel sauce (or even better, a hot fudge sauce) and just let a tiny pool form beneath the slice. It adds a beautiful gloss and keeps the warmth factor high, making it feel extra special for guests.
If you’re curious about other amazing desserts people are making that stack up against this one, I always like to browse what other talented bakers are up to, like this great pie recipe I saw over at Handle the Heat! But truly, I think you’ll find this no-bake version is the easiest way to win dessert night.
Frequently Asked Questions About Making a Peanut Butter Pie
It’s totally normal to have questions when you’re making someone’s new favorite recipe for the first time! Even though this **peanut butter pie** process is super simple, baking is science, right? A quick question answered now can save a lot of heartache later. Whether you’re worried about wobbles or wondering about swaps, I’ve gathered the things I get asked most often when folks try this **easy dessert recipe**.
If you still can’t find the answer you need, please shoot me a message—I love hearing from you all! You can always reach out via my contact page.
Can I substitute the Oreo crust for a graham cracker crust in this peanut butter pie?
Yes, you absolutely can! We covered this a bit in the variations section, but if you swap to graham crackers, you’ll want to use about 1 3/4 cups of crumbs. The biggest difference is that graham crackers need a little extra help staying rich, so you must add sugar to that mix! Use 1/4 cup of granulated sugar along with the 6 tablespoons of melted butter. The resulting crust is lighter in color and flavor but still delightfully crisp and perfect for holding that **rich peanut butter filling**!
How long does this no bake dessert need to set?
The minimum chilling time for this **no bake dessert** is a solid four hours in the refrigerator. I know, I know—patience is hard when something smells this good! However, that four-hour mark ensures the filling is firm enough to cut beautifully. If you can push it to overnight, please do! The longer it chills, the more stable your slices will be, and the flavor just seems to deepen up overnight, making it an even better **crowd pleasing dessert**.
What kind of peanut butter works best for this rich peanut butter filling?
This is a crucial question for texture enthusiasts! For the creamiest, most stable **rich peanut butter filling**, stick to conventional, creamy peanut butter—the stuff that doesn’t separate (like Jif or Skippy). These contain stabilizers that help the filling set up perfectly alongside the cream cheese and whipped topping. If you use a natural peanut butter where the oil separates easily, your filling might end up too oily or soft, and we definitely don’t want a floppy **peanut butter pie**!
Nutrition Estimate for This Peanut Butter Pie
Okay, let’s talk numbers for a second. Because this **peanut butter pie** is certainly a treat, packed with that creamy filling and that chocolatey crust, I want to be transparent about what’s in a slice. Please remember, this is just an estimate based on the ingredients listed, and you know how much brand choice matters!
Using the full recipe and dividing it into 8 generous slices—which is what I usually get when I cut a slice for a holiday gathering—here’s the snapshot. We follow the same philosophy here as we do with our privacy rules: be upfront about what we’re sharing! This summary is based on the recipe provided and assumes standard commercially available ingredients were used.
- Serving Size: 1 slice
- Calories: 450
- Sugar: 35g
- Fat: 30g
- Saturated Fat: 12g
- Carbohydrates: 40g
- Protein: 8g
See? It’s definitely a perfectly portioned slice of heaven! It’s rich, yes, but you only need a small piece to feel completely satisfied. This usually means one **homemade pie recipe** can stretch nicely across a big crowd, perfect for when you are looking for those amazing **Thanksgiving dessert ideas** without overindulging!
Share Your Bliss Batter Creations
I’ve poured my heart into making this recipe for you, and now the best part arrives: seeing you bake it! If you made this Decadent **No-Bake Peanut Butter Pie**, I absolutely need to know how it went. Did everyone ask for seconds? Was the Oreo crust perfect and crisp? Don’t keep that deliciousness to yourself!
We believe so much in making memories together here at Bliss Batter. When you finish that final drizzle of chocolate and serve your masterpiece, please take a picture! Tag me on social media so I can cheer you on. It genuinely makes my day to see your beautiful bakes!
And while you’re hovering around the comments section, I’d love to know: what are your tried-and-true **holiday pie recipes**? Are you a traditionalist, or do you like to sneak in a trendy **no bake dessert** like this one during the big feasts? I’m always looking for inspiration for what to bake next!
If you loved this super **easy dessert recipe**, please consider leaving it a rating below—five stars sets the bar high, but honestly, this **peanut butter pie** deserves it! Your feedback helps other bakers find confidence in the kitchen. You can read more about our site standards over on the Terms of Use page, but most importantly: let’s celebrate that amazing **creamy peanut butter pie** you just whipped up!
PrintDecadent No-Bake Peanut Butter Pie with Oreo Crust

Create this rich, creamy peanut butter pie using a simple Oreo crust. This no-bake dessert is easy to assemble and perfect for any gathering.
- Prep Time: 20 min
- Cook Time: 0 min
- Total Time: 4 hr 20 min
- Yield: 8 servings 1x
- Category: Dessert
- Method: No-Bake
- Cuisine: American
- Diet: Vegetarian
Ingredients
- 1 1/2 cups crushed Oreo cookies (about 25 cookies)
- 6 tablespoons unsalted butter, melted
- 1 (8 ounce) package cream cheese, softened
- 1 cup creamy peanut butter
- 1 1/2 cups powdered sugar
- 1 teaspoon vanilla extract
- 1 (12 ounce) container frozen whipped topping, thawed
- 1 cup heavy cream
- 1/4 cup powdered sugar
- 1 teaspoon vanilla extract
- Optional topping: Chocolate syrup or mini peanut butter cups
Instructions
- Prepare the crust: Mix the crushed Oreo cookies and melted butter in a bowl until the crumbs are evenly moistened. Press this mixture firmly into the bottom and up the sides of a 9-inch pie plate. Place the crust in the freezer while you prepare the filling.
- Make the filling: In a large bowl, beat the softened cream cheese until smooth. Add the peanut butter, 1 1/2 cups of powdered sugar, and 1 teaspoon of vanilla extract. Beat until the mixture is fully combined and creamy.
- Fold in the whipped topping: Gently fold the thawed whipped topping into the peanut butter mixture until no streaks remain. Do not overmix.
- Fill the crust: Spoon the peanut butter filling evenly into the chilled Oreo crust. Smooth the top with a spatula.
- Chill the pie: Cover the pie loosely with plastic wrap and refrigerate for at least 4 hours, or until the filling is firm.
- Prepare the topping: Just before serving, beat the heavy cream, 1/4 cup of powdered sugar, and 1 teaspoon of vanilla extract in a separate bowl until stiff peaks form.
- Top and serve: Spread or pipe the fresh whipped cream over the chilled pie. Drizzle with chocolate syrup or sprinkle with chopped peanut butter cups, if desired. Slice and serve immediately.
Notes
- For the easiest crust, pulse the Oreo cookies in a food processor until fine crumbs form.
- Use room temperature cream cheese to prevent lumps in the filling.
- If you want a richer topping, you can use a stabilized whipped cream recipe instead of simple whipped cream.
- This pie tastes best when served cold directly from the refrigerator.
Nutrition
- Serving Size: 1 slice
- Calories: 450
- Sugar: 35
- Sodium: 300
- Fat: 30
- Saturated Fat: 12
- Unsaturated Fat: 18
- Trans Fat: 0.5
- Carbohydrates: 40
- Fiber: 1
- Protein: 8
- Cholesterol: 45