
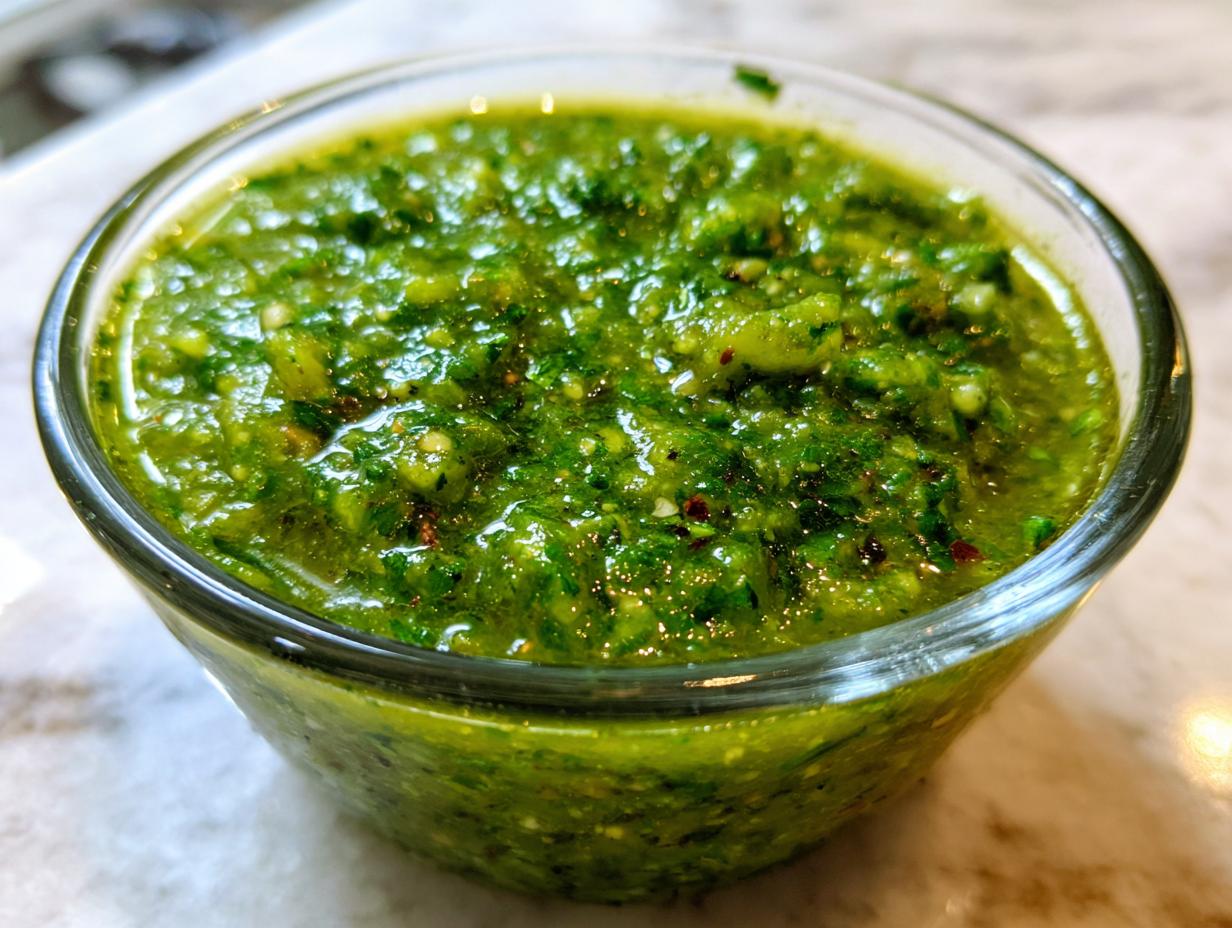
I love a quick, zesty salsa verde dumped together right before taco night, don’t get me wrong! But if you’ve ever tasted that incredibly deep, almost savory tang that only comes from patience, you know the difference. We’re diving into tradition today with my recipe for fermented green salsa. Forget the blender magic for a moment! This is about letting nature do the work, which results in a truly probiotic tomatillo salsa verde that’s bursting with complex flavor. It takes a little longer—we’re talking days, not minutes—but trust me, this slow-food method creates a condiment that’s miles beyond anything you can mix up in five minutes. It’s like going from listening to a simple melody to hearing a full orchestra!
- Why You Will Love This Fermented Green Salsa Recipe
- Gathering Ingredients for Your Probiotic Tomatillo Salsa Verde Recipe
- Step-by-Step: How to Ferment Green Salsa
- Achieving the Perfect Flavor Profile of Fermented Green Salsa
- Expert Tips for Successful Culturing Green Salsa at Home
- Storing and Reheating Your Homemade Fermented Salsa Verde
- Serving Suggestions for Tangy Fermented Chili Sauce
- Frequently Asked Questions About Fermented Green Salsa
- Next Steps After Making Your Fermented Green Salsa
Why You Will Love This Fermented Green Salsa Recipe
I think you’re going to find this whole process so rewarding. It’s not just about making great food; it’s about understanding how food transforms!
- The Flavor Upgrade: Fermentation builds an incredible, complex tanginess that you just can’t fake with vinegar. It’s seriously addictive.
- Hello, Probiotics! This delicious homemade fermented salsa verde is packed with beneficial cultures, making it great for your gut health.
- It’s Truly Hands-Off: Once you set up your jar, it just sits there doing its magic. It’s the perfect ancient method green salsa when you don’t have time to cook.
- You Control the Tang: You decide exactly how long to culture green salsa at home, meaning you get the perfect sourness every single time.
Gathering Ingredients for Your Probiotic Tomatillo Salsa Verde Recipe
Okay, before we get to the fun part—the bubbling!—we need the right players in the game. When you’re culturing green salsa at home, the quality of your ingredients really shines through because we aren’t masking anything with acid or heat. The salt is honestly the most critical element here for getting that proper lactic acid fermentation going strong.
Essential Ingredients for Fermented Green Salsa
You’ll need to source a few things, but don’t worry, nothing too exotic here. The most important thing I can tell you right now is about that salt! Skip the iodized stuff. Iodine can actually mess with the good bacteria we are trying to grow.
- 2 lbs fresh tomatillos, husked and rinsed
- 3-4 jalapeño peppers (adjust to heat preference)
- 1-2 serrano peppers (optional, for extra heat)
- 1 medium white onion, quartered
- 4 cloves garlic, peeled
- 1/2 cup fresh cilantro leaves
- 2 tablespoons non-iodized salt (kosher or sea salt) — This is your best friend for successful fermentation!
- Filtered water, as needed
Step-by-Step: How to Ferment Green Salsa
This is where the magic starts turning into actual food! Learning how to ferment green salsa is honestly easier than you think, but precision matters for safety and flavor. We start by adding a little heat not to cook the ingredients, but to deepen that beautiful tomatillo flavor. Once they look blistered and smoky, we move fast!
Preparing the Vegetables and Creating the Brine for Fermented Green Salsa
First, char your tomatillos and chili peppers until black spots pop up. I love this step; it stops the salsa from tasting too bright and gives it that incredible complexity right from the start. Next, toss those charred goodies into your food processor with the onion, garlic, and cilantro. Pulse it—and I mean *pulse* it! We want texture here, not baby food. Transfer everything to your clean jar.
Now for the brine. Remember that non-iodized salt we talked about? This is where we use the best salt ratio for salsa fermentation: dissolve 2 tablespoons of salt into 1 cup of filtered water. Stir until it’s totally clear. Pour that brine over your vegetables in the jar. You must make sure everything is completely covered by liquid. If it isn’t, top it off with a little plain filtered water. Use a fermenting weight or even a small Ziploc bag filled with a bit of the brine placed right on top. Everything has to stay below the surface!
The Culturing Process: Monitoring Your Slow-Fermented Salsa Verde
Cover your jar loosely—we need those fermentation gases to escape, so no airtight sealing yet! Place it somewhere cool and dark, maybe 65-70°F. If you’re lucky, you’ll start seeing the first signs of salsa verde bubbling within a few days. That bubbling is the happy noise of lactobacillus doing its job, creating your wonderful probiotic tomatillo salsa recipe.
After about a week, maybe sooner depending on your kitchen temperature, it’s time to sneak a taste! This is the fun part of making a slow-fermented salsa verde. You’ll be checking it daily until it tastes perfectly tangy for your liking. We only finish the process in the blender later, so don’t blend yet! If you’re looking for more ideas on what you can make when you’re done brining, check out my favorite guacamole recipe while you wait for the bubbles!
Achieving the Perfect Flavor Profile of Fermented Green Salsa
The best part of this whole endeavor is watching the flavor *change*. When you first seal that jar, it might taste a little sharp, almost like really strong fresh salsa. But hang in there! As those little bacteria munch and make that natural fermentation salsa, the flavor literally deepens. It moves from sharp to this wonderfully complex, rounded tang. This is exactly how you end up with that incredible deep flavor salsa recipe everyone talks about.
I usually start poking at mine after about seven days. Remember, there’s no official deadline here; we stop when it tastes perfect to *you*. If you love huge, mouth-puckering sourness, you might let it go for 16 days! Most people find their sweet spot right around day 10 or 12. That’s when you get that amazing, sharp but mellow tangy fermented chili sauce finish.
Once it hits that ‘Wow, that’s perfect’ mark, immediately put the lid on tight and stick the whole thing in the fridge. That cold temperature slams the brakes on the whole fermenting process. You can store it for months, and the flavor just matures gently in there. It’s so much better than rushing things! If you’re on the fence about what to make next after your salsa is done, these chili cheese fries are calling your name!
Expert Tips for Successful Culturing Green Salsa at Home
Look, I know fermentation can feel intimidating at first because you’re basically trusting invisible organisms to do their job, right? Don’t panic! The key to successful culturing green salsa at home is just a few simple rules. If you nail these few points, you are golden. Cleanliness is crucial—make sure your jar is spotless and that you aren’t introducing any weird bacteria right at the start.
And seriously, I can’t stress this enough: non-iodized salt. Iodine is designed to kill bacteria, which is the exact opposite of what we are trying to encourage here! Kosher or plain sea salt is what you need to make sure those good guys thrive. If you follow those two steps, you’ve already won 80% of the battle when making your natural fermentation salsa.
Troubleshooting Common Fermented Green Salsa Issues
Sometimes things go a little sideways, and that’s okay! It happens even when I make my famous fried pickles. The main worries are usually a lack of action or seeing something fuzzy on top.
No Bubbling After Five Days: If you aren’t seeing any bubbling, it usually means the temperature is too cold, or your salt-to-water ratio was slightly off. First, check your submersion! Are ALL the solids under the brine? If they are, but still no bubbles, try moving the jar somewhere a tiny bit warmer just temporarily. But never add more salt once it starts! If you see nothing after a full week, it’s probably best to start over with a fresh batch of brine, ensuring you’ve used the right salt this time.
What About Mold? This is the big scare for everyone. If you see anything fuzzy—green, black, pink, or furry—you have to toss that batch. Safety first, always! But don’t confuse that with Kahm yeast. Kahm yeast often looks like a thin, white, almost powdery film floating on the surface. It’s harmless! If you see that, just carefully skim it off the top with a clean spoon, make sure your weight is holding everything down, and keep watching it. It means you’re on the right track to a tangy finished product!
Storing and Reheating Your Homemade Fermented Salsa Verde
The moment that salsa hits that perfect punch of sourness, we need to stop the whole process! Don’t worry about reheating this one, honestly. You want it cold and crisp. Just seal that jar up nice and tight—no airlocks needed now—and tuck it right into the fridge. That cold temperature slows down those active bacteria right down to a crawl.
That’s how you get your homemade fermented salsa verde to last for months and months! The flavor might deepen just a little bit more over time, but it stays safe and delicious in the refrigerator. It’s amazing how much longer this lasts compared to a fresh salsa.
Serving Suggestions for Tangy Fermented Chili Sauce
Now that you have this incredible, complex, tangy fermented chili sauce, you might just be thinking chips and dip, but please don’t stop there! This salsa has a punch that deserves to be showcased in ways a simple bowl of tortilla chips just can’t manage. Because of that deep, slow-fermented flavor, it cuts through richness beautifully.
Forget putting it on basic scrambled eggs; try it drizzled over perfectly fried eggs alongside crispy home fries. It is absolutely divine dolloped right onto grilled corn slathered with queso fresco. Speaking of queso, if you’ve made yourself a batch of gooey homemade queso dip, this salsa cuts through that richness like a dream!

My absolute favorite way to use this is to thin it out just a touch with some lime juice and use it as a marinade for pork shoulder before slow-cooking. The acidity and the funk from the lacto-fermentation tenderize the meat while building layers of flavor that just sing. Trust me; once you taste your natural fermentation salsa like this, you’ll start adding it everywhere!
Frequently Asked Questions About Fermented Green Salsa
How long do I need to ferment green salsa before it tastes done?
That’s the beauty of this natural fermentation salsa! It really depends on how tangy you like it. Generally, you need at least seven days to see real flavor development, but for that wonderful, deep flavor that characterizes a proper slow-fermented salsa verde, I suggest giving it between 10 and 14 days at room temperature. Start tasting around day seven!
Is it safe to use iodized salt when making homemade fermented salsa verde?
Oh, please don’t! You really shouldn’t use iodized salt. When you are culturing green salsa at home, you need those good bacteria to do their job, and iodine is designed to kill bacteria—the bad guys *and* the good ones! Always stick to non-iodized salt, like kosher or sea salt, to maintain a healthy fermentation environment.
What should I do if I see lots of white foam but no bubbles?
If you see white foam on the top but aren’t getting that active salsa verde bubbling, don’t worry too much yet! This is often just slightly harmless Kahm yeast. Since you are focused on making a probiotic tomatillo salsa recipe, you want the bubbles, but if you just have white stuff, gently skim it off the top with a clean spoon. If you have fuzzy mold after a week, though, that batch unfortunately needs to be tossed.
Can I blend the salsa before the fermentation time is up?
No, no, no! Resist the urge! Blending it breaks down the cell structure of the vegetables too much, which can actually introduce too much oxygen and slow down or stop the successful how to ferment green salsa process. You need to let the vegetables stay somewhat whole under the brine. Blend only once you’ve decided on the final tanginess and are ready to refrigerate it.
Next Steps After Making Your Fermented Green Salsa
Whew! You’ve done the slow, patient work creating this beautiful, tangy jar of flavor. Now that you’ve conquered this ancient method green salsa, I’d truly love to hear about it! Did you think the flavor change was dramatic? Pop over to my About page and let me know in the comments how your ferment went and what you paired it with first!
PrintSlow-Fermented Green Tomatillo Salsa Verde Recipe
Learn how to make a deeply flavorful, tangy, and probiotic tomatillo salsa verde using natural fermentation. This recipe guides you through the safe culturing process for a complex flavor profile.
- Prep Time: 25 min
- Cook Time: 10 min
- Total Time: 35 min (plus 7-14 days fermentation)
- Yield: About 4 cups 1x
- Category: Condiment
- Method: Natural Fermentation
- Cuisine: Mexican-Inspired
- Diet: Vegan
Ingredients
- 2 lbs fresh tomatillos, husked and rinsed
- 3–4 jalapeño peppers (adjust to heat preference)
- 1–2 serrano peppers (optional, for extra heat)
- 1 medium white onion, quartered
- 4 cloves garlic, peeled
- 1/2 cup fresh cilantro leaves
- 2 tablespoons non-iodized salt (kosher or sea salt)
- Filtered water, as needed
Instructions
- Prepare the vegetables: Lightly char the tomatillos, jalapeños, and serranos under a broiler or directly over a gas flame until skins are blistered. This adds depth.
- Place the charred vegetables, onion quarters, garlic, and cilantro into a food processor. Pulse until roughly chopped. Do not over-process; you want some texture.
- Transfer the vegetable mixture to a clean glass jar (at least 1-quart size).
- Create the brine: In a separate bowl, dissolve the 2 tablespoons of non-iodized salt into 1 cup of filtered water. Stir until fully dissolved. This is the best salt ratio for salsa fermentation.
- Pour the brine over the vegetable mixture in the jar. Add more filtered water if necessary to fully submerge the vegetables. Leave at least 1.5 inches of headspace at the top of the jar.
- Use a fermenting weight or a small, clean plastic bag filled with a little brine to keep all solids submerged beneath the liquid surface. This prevents mold growth.
- Cover the jar loosely with an airlock lid or a standard lid placed loosely on top to allow gases to escape.
- Place the jar in a cool, dark place (ideally 65-70°F or 18-21°C).
- Monitor daily: You should see bubbling within 2-5 days. This indicates active fermentation. If no bubbling occurs after 5 days, check that the vegetables are fully submerged.
- Taste test: After 7 days, begin tasting daily. The salsa will become tangier and more complex as it ferments.
- When the flavor reaches your desired level of tanginess (usually between 7 and 14 days for a slow-fermented salsa verde), remove the weight and seal the jar tightly.
- Transfer the finished salsa to the refrigerator to halt fermentation. The salsa will keep for several months in the fridge.
Notes
- Always use non-iodized salt; iodine can inhibit the growth of beneficial lactobacillus bacteria.
- If you see white, harmless Kahm yeast on the surface, simply skim it off. If you see fuzzy mold (green, black, or pink), discard the batch for safety.
- For a smoother texture, blend the fermented mixture briefly before refrigerating.
- This natural fermentation salsa develops a deep flavor profile unlike quick, fresh versions.
Nutrition
- Serving Size: 1/4 cup
- Calories: 30
- Sugar: 2
- Sodium: 350
- Fat: 0
- Saturated Fat: 0
- Unsaturated Fat: 0
- Trans Fat: 0
- Carbohydrates: 6
- Fiber: 1
- Protein: 1
- Cholesterol: 0