
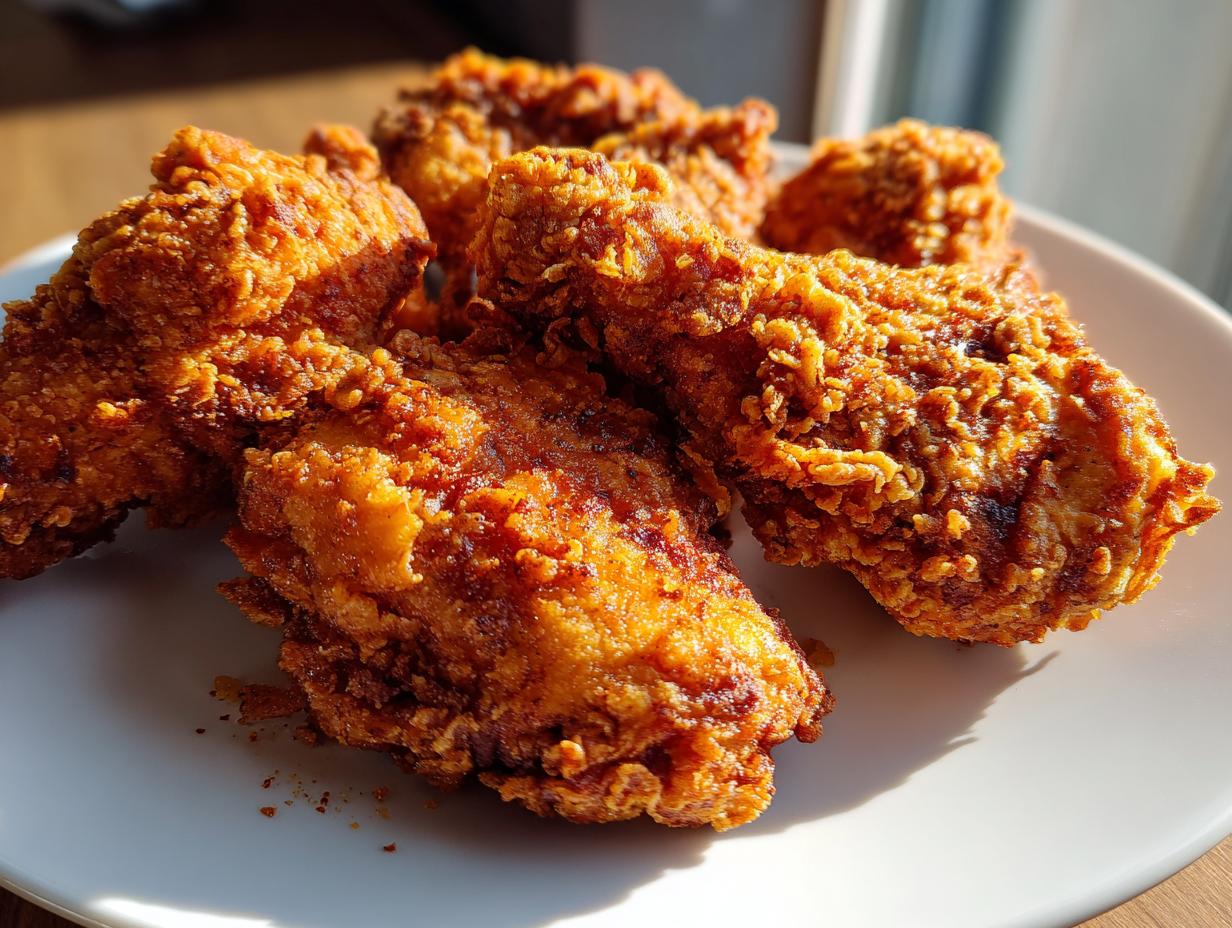
Oh, that sound! That glorious, crackly, unmistakable crunch of perfectly fried chicken – it’s like music to my ears, isn’t it? And when you bite into it, and it’s not just crispy but unbelievably juicy inside, with all those warm, savory spices singing? Pure bliss! I’m Claire, and I’ve spent countless hours in my kitchen trying to capture that magic. Honestly, for the longest time, making truly amazing fried chicken at home felt like a bit of a culinary Everest. I remember one Sunday, trying to get that restaurant-worthy crispiness and juicy flavor, and ending up with… well, let’s just say it wasn’t my finest hour. But that’s the beauty of cooking, right? You learn, you tweak, and you finally nail it. And today, I’m so excited to share my secrets with you. Get ready to make fried chicken that will have everyone asking for seconds, guaranteed!
- Why You'll Love This Crispy Southern Fried Chicken
- Gather Your Ingredients for Perfect Fried Chicken
- Essential Equipment for Making Fried Chicken
- Step-by-Step Guide to Crispy Buttermilk Fried Chicken
- Tips for the Ultimate Fried Chicken Experience
- Ingredient Notes and Substitutions
- Serving Suggestions for Your Fried Chicken Feast
- Storage and Reheating Your Fried Chicken
- Frequently Asked Questions About Fried Chicken
- Estimated Nutritional Information
- Share Your Perfectly Fried Chicken Creations!
Why You’ll Love This Crispy Southern Fried Chicken
Okay, so why is this recipe for fried chicken going to be your new go-to? Let me count the ways!
- That Amazing Crunch: We’re talking serious, shatter-in-your-mouth crispiness that lasts.
- Juicy Perfection Inside: No dry chicken here, folks! The buttermilk soak works wonders.
- Authentic Southern Flavor: It’s got all those classic spices that just taste like home.
- Easier Than You Think: Deep frying might sound scary, but we’ll walk through it step-by-step.
- Pure Homemade Joy: Trust me, the satisfaction of biting into chicken *you* made this perfectly is incredible. It beats takeout any day!
Gather Your Ingredients for Perfect Fried Chicken
Alright, let’s get our ducks (or rather, chickens!) in a row. Here’s what you’ll need to make this glorious fried chicken:
- About 3 pounds of chicken pieces – I like bone-in, skin-on for the most flavor and juiciness.
- 2 cups of creamy buttermilk.
- 1 tablespoon of your favorite hot sauce (it adds just a little kick!).
- 2 cups of all-purpose flour, for our crispy coating.
- 1 tablespoon of salt.
- 1 teaspoon of freshly ground black pepper.
- 1 teaspoon paprika.
- 1/2 teaspoon garlic powder.
- 1/2 teaspoon onion powder.
- Plenty of vegetable oil for frying – have about 2-3 inches ready in your pot.
Essential Equipment for Making Fried Chicken
Before we get our hands dirty (well, floured up!), let’s make sure you have the right gear. Having these on hand makes the whole process of making fried chicken so much smoother:
- A sturdy, heavy-bottomed pot or Dutch oven is key for even heating and safe frying.
- A wire rack set over a baking sheet is your best friend for letting that beautiful crust drain and stay crispy.
- Shallow dishes or pans are perfect for holding your seasoned flour and that tempting buttermilk marinade.
- A reliable meat thermometer is a lifesaver for making sure your chicken is cooked through perfectly every time.
Step-by-Step Guide to Crispy Buttermilk Fried Chicken
Alright, let’s get down to business! Making truly amazing fried chicken at home is all about a few key steps, and don’t you worry, we’ll take it slow and steady. Trust me, the results are so worth it! If you love other fried goodies, you might also want to check out these fried mac and cheese bites or our crispy fried pickles!
Marinating the Chicken for Juiciness
This first step is super important for that tender, juicy chicken we’re dreaming of. Pop your chicken pieces into a big bowl and pour over that creamy buttermilk and the hot sauce. Give it a good stir to make sure every single piece is coated. Then, cover it up and let it hang out in the fridge for at least 4 hours, but honestly, overnight is where the magic really happens. The buttermilk is like a secret tenderizer, and the hot sauce just adds a little wink of flavor without making it spicy. For more buttermilk goodness, don’t forget our buttermilk biscuits!
Preparing the Seasoned Flour Dredge
While your chicken is getting all happy in its marinade, let’s mix up the coating. Grab a shallow dish and whisk together the flour, salt, pepper, paprika, garlic powder, and onion powder. Make sure they’re all friends and evenly combined. This is where all those delicious savory notes come from, so don’t skimp!
Dredging for Maximum Crispiness
Now for the fun part: coating the chicken! Take your marinated chicken pieces out, letting any extra buttermilk drip off for just a second. Then, give each piece a good roll and press into that seasoned flour. You really want to press it on there to make sure it sticks well. Once they’re all floured up, lay them out on a wire rack. This lets the air circulate so the coating doesn’t get soggy before it even hits the oil. It’s a small step, but it makes a huge difference! For other crispy favorites, check out our air fryer chicken wings!
Deep Frying Your Fried Chicken to Perfection
Okay, deep breath! Heating the oil is next. Pour your vegetable oil into your heavy-bottomed pot or Dutch oven to about 2-3 inches deep. We want it to come up to 350°F (175°C). This temperature is key for getting that beautiful golden-brown crust without burning the outside before the inside is cooked. Carefully, and I mean *carefully*, lower your floured chicken pieces into the hot oil. Don’t crowd the pot, okay? Fry in batches if you need to. Overcrowding drops the oil temperature, and then you end up with greasy chicken instead of crispy fried chicken. Nobody wants that! You can learn more about the art of deep frying in our guide on how to deep fry chicken.
Ensuring Chicken is Cooked Through
We want our fried chicken perfectly cooked, not just golden on the outside. The best way to know for sure is with a meat thermometer. Stick it into the thickest part of a piece of chicken, avoiding the bone. It should read 165°F (74°C). They should also look beautifully golden brown and feel solid to the touch.
Draining and Resting the Fried Chicken
As each batch comes out of the oil, place it on that waiting wire rack set over a baking sheet. This lets all the extra oil drip away, keeping that incredible crust nice and crisp. Resist the urge to dig in right away! Giving the chicken just a few minutes to rest helps redistribute the juices, making every bite even more delicious. Now your amazing homemade fried chicken is ready to enjoy!
Tips for the Ultimate Fried Chicken Experience
Alright, let’s take this incredible fried chicken to the next level! I’ve learned a few tricks over the years that really make a difference between good fried chicken and *OMG-why-haven’t-I-made-this-before* fried chicken. These little secrets will ensure you get that perfect, shatteringly crisp coating and mouthwateringly juicy inside every single time. Think of it as adding a little extra sparkle to your baking, just like my pumpkin beer bread gets an extra crumbly topping!
Double-Dredging for Extra Crunch
Want that coating to really stick and get super crispy? Try double-dredging! After you’ve coated your chicken in the seasoned flour the first time, dip it quickly back into the buttermilk, let the excess drip off, and then dredge it in the flour mixture *again*. Press the flour on gently. This builds up a thicker, craggier crust that gets unbelievably crunchy when it fries. It takes an extra minute but oh, the payoff!
Maintaining Perfect Oil Temperature
This is seriously the *most* important tip for amazing fried chicken. Your oil needs to stay steady around 350°F (175°C). If it gets too cool, your chicken will soak up oil and become greasy. Too hot, and the outside will burn before the inside is cooked. My trick is to have a thermometer clipped to the side of the pot. You’ll see the temperature dip a bit when you add chicken; just adjust the heat to keep it from dropping too much. It takes a little attention, but it’s the secret to that perfect golden-brown finish.
Ingredient Notes and Substitutions
Let’s chat about some of these ingredients for our awesome fried chicken! Sometimes you might not have exactly what the recipe calls for, and that’s totally okay. For the buttermilk, if you’re in a pinch, you can make a super quick substitute. Just take 2 cups of regular milk (whole milk is best!) and stir in about 2 tablespoons of lemon juice or white vinegar. Let it sit for about 5-10 minutes until it looks a little curdled – voilà, buttermilk-ish! As for hot sauce, use whatever you love! A dash of your favorite adds a little something extra without making the whole batch spicy, but feel free to adjust if you like it hotter. And while all-purpose flour is perfect for that classic dredge, if you’re curious about other options, maybe check out how we use it in our apple pancakes for baking!
Serving Suggestions for Your Fried Chicken Feast
Okay, so you’ve got this incredible, crispy, juicy fried chicken. Now, what do you serve with it to make it a full-blown feast? My absolute favorite way to go is classic Southern comfort food. Imagine a big helping alongside a bowl of my vibrant creamy coleslaw – that tangy crunch is the perfect foil for the rich chicken. And who could forget mashed potatoes? My garlic mashed potatoes are ridiculously creamy and just begging to be drenched in gravy (or chicken drippings!). If you’re feeling something warm and comforting, a simple, delicious tomato soup can be surprisingly good too, especially on a cooler evening. It’s all about those hearty, satisfying pairings!
Storage and Reheating Your Fried Chicken
So, you’ve got some glorious leftovers of this amazing fried chicken? Lucky you! To keep it tasting its best, let it cool down completely to room temperature first. Then, pop it into an airtight container or wrap it really well in plastic wrap and then foil. Storing it in the fridge this way should keep it pretty tasty for about 3-4 days. Now, about reheating – this is key to getting back some of that fantastic crispiness. The oven is usually your best bet here. A moderate oven, maybe around 375°F (190°C), for about 10-15 minutes should do the trick. You want to give it enough time to heat through and crisp up again without drying it out completely. Avoid the microwave if you can; it tends to make fried chicken a bit soggy, and we definitely don’t want that!
Frequently Asked Questions About Fried Chicken
Got questions flying around your head about making the best fried chicken? I totally get it! It can seem a little daunting, but trust me, you’ve got this. Here are a few things people often ask:
How to Get Crispy Fried Chicken Skin?
Crispy skin is the holy grail, right? For that amazing crunch, make sure your oil is at the perfect temperature (around 350°F/175°C). Also, don’t overcook it! Draining your fried chicken properly on a wire rack after frying is crucial too; it lets that steam escape and keeps the skin crackly.
Is Buttermilk Necessary for Fried Chicken?
While buttermilk is my absolute favorite for tenderizing and adding that subtle tang, it’s not the *only* way! You can totally use regular milk with a splash of vinegar or lemon juice, like I mentioned in the substitutions section. It won’t be quite the same, but it still works wonders for getting that delicious fried chicken!
Can I Make Fried Chicken Healthier?
Traditional deep-fried chicken is definitely an indulgence, and that’s okay! It’s a treat for a reason. If you’re looking for a lighter option, you can absolutely try baking it or using an air fryer. Our air fryer chicken wings recipe is a great place to start for that crispy texture with less oil. Sometimes, though, you just need that classic deep-fried goodness, and this recipe delivers it perfectly! And if you’re curious about other ways to cook chicken, check out my tips for a delicious roast chicken with vegetables.
Estimated Nutritional Information
Just a heads-up, these numbers are estimates, and they can wave a little depending on exactly how you make it. But for a serving of this glorious fried chicken, you’re generally looking at around 500 calories. You’ll get about 30g of fat, 30g of protein, and 25g of carbs, with around 800mg of sodium. Happy indulging!
Share Your Perfectly Fried Chicken Creations!
Alright, now it’s your turn to shine! I would absolutely *love* to see your perfectly crispy, juicy fried chicken creations. Did yours turn out golden brown and amazing? Did your family gobble it up? Please leave a comment below and tell me all about it! And if you snagged any drool-worthy photos, tag us on social media. Your success stories totally make my day and help others feel confident giving this recipe a whirl. For more from our kitchen, you can always learn more about us or get in touch!
PrintCrispy Southern Fried Chicken

Learn how to make perfectly crispy, juicy Southern fried chicken at home. This recipe focuses on a buttermilk marinade and a seasoned flour dredge for that classic golden-brown crunch.
- Prep Time: 20 min
- Cook Time: 30 min
- Total Time: 4 hr 50 min
- Yield: 6 servings 1x
- Category: Main Course
- Method: Deep Frying
- Cuisine: Southern
- Diet: Vegetarian
Ingredients
- 3 pounds chicken pieces (bone-in, skin-on)
- 2 cups buttermilk
- 1 tablespoon hot sauce
- 2 cups all-purpose flour
- 1 tablespoon salt
- 1 teaspoon black pepper
- 1 teaspoon paprika
- 1/2 teaspoon garlic powder
- 1/2 teaspoon onion powder
- Vegetable oil for frying
Instructions
- Place chicken pieces in a large bowl. Pour buttermilk and hot sauce over chicken. Ensure all pieces are coated. Cover and refrigerate for at least 4 hours, or preferably overnight.
- In a shallow dish, whisk together flour, salt, pepper, paprika, garlic powder, and onion powder.
- Remove chicken from buttermilk, letting excess drip off. Dredge each piece thoroughly in the seasoned flour mixture, pressing to ensure a good coating. Place coated chicken on a wire rack.
- Heat about 2-3 inches of vegetable oil in a large, heavy-bottomed pot or Dutch oven to 350°F (175°C).
- Carefully add chicken pieces to the hot oil, being careful not to overcrowd the pot. Fry in batches if necessary.
- Fry chicken for about 6-8 minutes per side, or until golden brown and cooked through. The internal temperature should reach 165°F (74°C).
- Remove chicken from oil and place on a clean wire rack set over a baking sheet to drain.
- Serve hot.
Notes
- For an extra crispy coating, you can double-dredge the chicken: dip it back into the buttermilk and then into the flour mixture again.
- Maintain a consistent oil temperature for even cooking and crispiness.
- Using a thermometer is the best way to ensure your oil is at the correct temperature.
Nutrition
- Serving Size: 1 piece
- Calories: 500
- Sugar: 2g
- Sodium: 800mg
- Fat: 30g
- Saturated Fat: 8g
- Unsaturated Fat: 22g
- Trans Fat: 0g
- Carbohydrates: 25g
- Fiber: 1g
- Protein: 30g
- Cholesterol: 150mg