
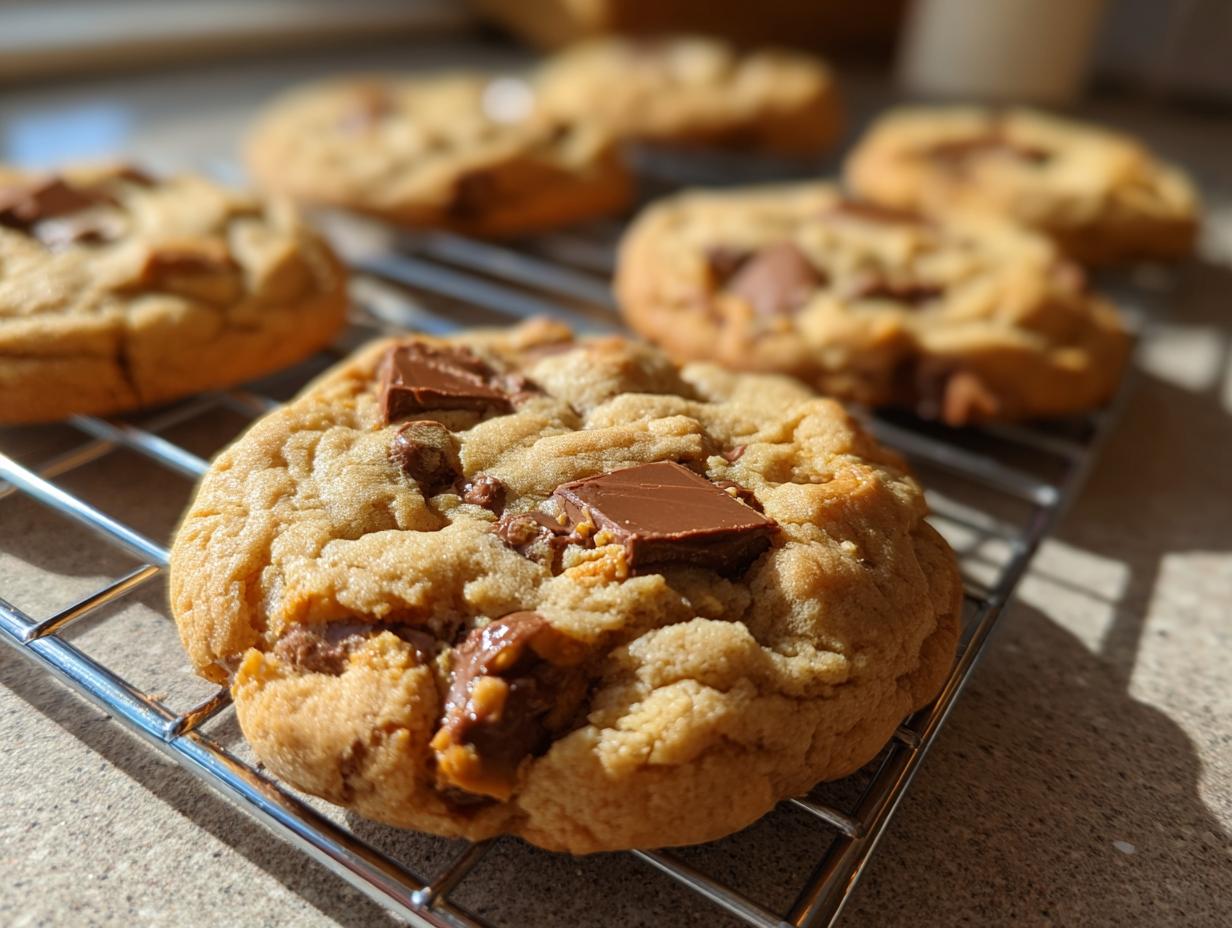
Okay, so the Halloween candy haul is in, and you’ve got a mountain of chocolates, caramels, and colorful bits just begging for a second life, right? I totally get it! That slightly sad feeling of candy overload is something I know all too well. But guess what? We can turn those leftover treasures into something absolutely magical! Forget about those uneaten goodies languishing in the pantry. We’re diving headfirst into making the *best* Halloween Candy Cookies. It’s like a treasure hunt in your own kitchen, where each bite delivers a surprise. Just like Claire started Bliss Batter from her grandmother’s kitchen, these recipes come straight from the heart, tested and perfected, turning everyday moments into delicious memories.
- Why You'll Love These Halloween Candy Cookies
- Ingredients for Your Halloween Candy Cookies
- Essential Equipment for Making Halloween Candy Cookies
- How to Prepare Your Halloween Candy Cookies
- Tips for Perfect Halloween Candy Cookies
- Ingredient Notes and Substitutions
- Storing Your Halloween Candy Cookies
- Frequently Asked Questions about Halloween Candy Cookies
- Estimated Nutritional Information
- Share Your Halloween Candy Cookie Creations!
Why You’ll Love These Halloween Candy Cookies
Seriously, what’s not to adore about these cookies? You get to:
- Use up all that leftover Halloween candy – no waste here!
- Whip up a batch of incredibly chewy, gooey, melt-in-your-mouth magic with hardly any effort.
- Enjoy the amazing aroma of warm cookies and melted chocolate filling your home.
- Create a fantastic treat that everyone will be asking you for the recipe for.
Ingredients for Your Halloween Candy Cookies
Alright, let’s talk about what you’ll need to make these irresistible Halloween Candy Cookies. It’s pretty straightforward stuff, mostly pantry staples, plus all those fun candy bits!
- 1 cup (which is 2 sticks, by the way) of unsalted butter, make sure it’s nice and softened, not melted!
- 3/4 cup of regular granulated sugar
- 3/4 cup of packed brown sugar – I love the depth it gives!
- 2 large eggs – these are our binders
- 1 teaspoon of good old vanilla extract for that warm hug of flavor
- 2 1/4 cups of all-purpose flour – don’t scoop it directly from the bag, spoon and level it instead!
- 1 teaspoon of baking soda to give them a little lift
- 1/2 teaspoon of salt to balance all that sweetness
- And the star of the show: 2 cups of chopped Halloween candy bars. Think Twix, Milky Way, Snickers – whatever your heart desires!
- Optional, but totally fun: 1 cup of extra candy pieces just for pressing on top!
Essential Equipment for Making Halloween Candy Cookies
You don’t need a fancy setup for these treats! Just grab a good mixing bowl, maybe a stand mixer if you have one (but your trusty wooden spoon works just fine!), a couple of trusty baking sheets, and some parchment paper. Oh, and a wire rack is super handy for letting them cool perfectly. Easy peasy!
How to Prepare Your Halloween Candy Cookies
Alright, let’s get our hands a little messy and dive into making these amazing Halloween Candy Cookies! It’s a pretty straightforward process, and honestly, the most fun part is folding in all those yummy candy bits. Just follow along, and soon your kitchen will smell like pure happiness.
Prepping the Dough for Halloween Candy Cookies
First things first, preheat your oven to 375°F (that’s 190°C for my metric friends!). While it’s heating up, line a couple of baking sheets with parchment paper – this makes cleanup a breeze, trust me. Now, in a big bowl, grab your softened butter, granulated sugar, and that lovely packed brown sugar. Cream ’em together until they’re light and fluffy. Think dreamy clouds! Then, beat in those eggs one at a time, followed by the vanilla extract. Don’t overdo it, just mix ’em in!
Incorporating Your Candy Mix-Ins
In a separate bowl, give your flour, baking soda, and salt a quick whisk together. Now, gradually add this dry mixture to your butter and sugar concoction. Mix it all up until it’s *just* combined. Seriously, don’t go crazy overmixing here! The key is to gently fold in those 2 cups of chopped candy bars. This is where the magic really starts to happen. You want to see those candy chunks distributed throughout the dough.

Shaping and Baking Your Halloween Candy Cookies
If your dough feels a bit too soft to handle comfortably, don’t sweat it! Just pop the whole bowl in the fridge for about 30 minutes. This little chill makes the dough easier to work with and stops your Halloween Candy Cookies from spreading into sad, flat puddles. Once it’s ready, drop rounded tablespoons of dough onto your prepared baking sheets, giving them maybe 2 inches of space. If you’re feeling fancy, now’s the time to press a few extra candy pieces on top for that extra wow factor. Slide them into the oven and bake for 9 to 12 minutes. You’re looking for edges that are nicely golden brown, but the centers should still look a little soft – they’ll firm up as they cool!
Cooling and Finishing Your Treats
Once they’re out of the oven, let those beauties hang out on the baking sheets for a few minutes. This little rest period is important; it helps them set up. After that, carefully move them over to a wire rack to cool completely. Rushing this part means potentially crumbly cookies, and nobody wants that!
Tips for Perfect Halloween Candy Cookies
Okay, making these Halloween Candy Cookies sounds super easy, and it totally is! But between you and me, a few little tricks can make them go from great to absolutely spectacular. We want gooey, chewy, and perfectly shaped cookies, right? So, let’s chat about how to get there! You know, if you love cookies but don’t have candy lying around, my classic chocolate chip cookie recipe is always a winner too!
Chopping Candies for Halloween Candy Cookies
For those harder candies, like nougat-filled bars or even some really thick chocolate pieces, there’s a secret: freeze ’em first! Pop them in the freezer for maybe 30 minutes until they’re nice and firm. Then, grab a sharp knife and chop them up. This way, they cut cleanly without smearing, giving you lovely little pockets of candy throughout your Halloween Candy Cookies.
Preventing Spread in Your Halloween Candy Cookies
The biggest bummer with cookies is when they spread out into one giant cookie sheet! Want to avoid that? If your dough feels a bit soft and melty, which can happen, especially if your kitchen is warm, definitely pop it in the fridge for about 30 minutes before scooping. Chilling the dough changes the butter’s consistency, making it firmer and helping your Halloween Candy Cookies keep their shape beautifully.
Ingredient Notes and Substitutions
So, about these ingredients for your Halloween Candy Cookies! While the recipe is pretty forgiving, a few notes can really elevate your cookie game. Butter is king here, giving us that perfect rich flavor and texture. If you absolutely had to, you *could* use a good quality margarine, but trust me, real butter makes a world of difference. And for the candy? That’s where the real fun comes in! Any candy bar that you love works, but try to stick to ones that have distinct layers or textures. Think about breaking up M&M’s, Snickers, or even those fun-sized Reese’s cups. Just no hard candies that could break a tooth, okay?
Storing Your Halloween Candy Cookies
Got leftovers? Lucky you! To keep these wonderful Halloween Candy Cookies tasting as amazing as they did fresh out of the oven, store them in an airtight container at room temperature. They’ll stay perfectly chewy and delicious for about 3 days. Trust me, though, they probably won’t last that long!
Frequently Asked Questions about Halloween Candy Cookies
Got questions about these yummy Halloween Candy Cookies? I’ve got answers! Baking with leftovers is always fun, and a little clarity goes a long way.
Can I use any type of candy for these Halloween Candy Cookies?
Pretty much! Stick to candies that have chocolate, caramel, or nougat. Very hard candies might be tough for some folks, and super soft, gooey ones might melt a bit too much, but experiment and see what you love!
How do I prevent my Halloween Candy Cookies from spreading too much?
The easiest trick is to chill the dough! If it feels soft before you scoop, pop it in the fridge for about 30 minutes. This makes the butter firm up, and your Halloween Candy Cookies will hold their shape much better.
Are these cookies suitable for a bake sale?
Oh, absolutely! They look so colorful and inviting with all the candy chunks. Just make sure they’re fully cooled before packing them up, and they’ll transport like a dream and sell out fast!
Estimated Nutritional Information
Now, I have to tell you, these Halloween Candy Cookies are a delightful indulgence, and like most good things, they come with a bit of richness! The numbers below are just estimates, so they can vary quite a bit depending on the exact candies you use and how generous you are with the dough balls. But it gives you a general idea of what you’re working with per cookie – enjoy responsibly!
Share Your Halloween Candy Cookie Creations!
Did you whip up a batch of these incredible Halloween Candy Cookies? I’d absolutely LOVE to hear how they turned out! Drop a comment below with your favorite candy mix-ins, or rate the recipe so other bakers know how amazing it is. Don’t forget to share your colorful cookie creations with me on social media – seeing your bakes makes my day!
PrintHalloween Candy Cookies

Transform leftover Halloween candy into delicious cookies with this easy recipe, featuring gooey caramel, chocolate, and crunchy candy pieces.
- Prep Time: 20 min
- Cook Time: 12 min
- Total Time: 32 min
- Yield: 24 cookies 1x
- Category: Dessert
- Method: Baking
- Cuisine: American
- Diet: Vegetarian
Ingredients
- 1 cup (2 sticks) unsalted butter, softened
- 3/4 cup granulated sugar
- 3/4 cup packed brown sugar
- 2 large eggs
- 1 teaspoon vanilla extract
- 2 1/4 cups all-purpose flour
- 1 teaspoon baking soda
- 1/2 teaspoon salt
- 2 cups chopped Halloween candy bars (e.g., Twix, Milky Way, Snickers, M&Ms)
- 1 cup additional candy pieces for topping (optional)
Instructions
- Preheat your oven to 375°F (190°C). Line baking sheets with parchment paper.
- In a large bowl, cream together the softened butter, granulated sugar, and brown sugar until light and fluffy.
- Beat in the eggs one at a time, then stir in the vanilla extract.
- In a separate bowl, whisk together the flour, baking soda, and salt.
- Gradually add the dry ingredients to the wet ingredients, mixing until just combined. Do not overmix.
- Gently fold in the 2 cups of chopped candy bars.
- If the dough seems too soft, chill it for 30 minutes to prevent excessive spreading.
- Drop rounded tablespoons of dough onto the prepared baking sheets, about 2 inches apart.
- If desired, press a few additional candy pieces onto the top of each dough ball for decoration.
- Bake for 9-12 minutes, or until the edges are golden brown and the centers are still slightly soft.
- Let the cookies cool on the baking sheets for a few minutes before transferring them to a wire rack to cool completely.
Notes
- To easily chop harder candies, place them in the freezer for about 30 minutes before cutting them with a sharp knife.
- For chewier cookies, slightly underbake them. For crispier cookies, bake a minute or two longer.
- Store cooled cookies in an airtight container at room temperature for up to 3 days.
Nutrition
- Serving Size: 1 cookie
- Calories: 250
- Sugar: 25g
- Sodium: 100mg
- Fat: 14g
- Saturated Fat: 8g
- Unsaturated Fat: 6g
- Trans Fat: 0g
- Carbohydrates: 30g
- Fiber: 1g
- Protein: 3g
- Cholesterol: 40mg