
Remember last winter when everyone was buzzing about those magical little spheres that melted into decadent hot cocoa? Yep, I’m talking about hot chocolate bombs! Watching them “explode” in a mug of hot milk, releasing a cascade of cocoa and marshmallows, is just pure, unadulterated delight. It’s one of those trends that just feels so heartwarming, right? Here at Bliss Batter, we’re all about capturing that feeling of home and joy, and these DIY delights totally fit the bill. It’s amazing what you can create with a little bit of chocolate and a whole lot of love – just like my grandma used to do, filling her kitchen with comforting treats. Making these edible surprises at home is so much fun, and they turn out to be the most thoughtful gifts or the ultimate snow-day indulgence.
- Why You'll Love Making Hot Chocolate Bombs
- Gather Your Ingredients for Hot Chocolate Bombs
- Essential Equipment for Creating Chocolate Cocoa Spheres
- Step-by-Step Guide to Making Hot Chocolate Bombs
- Tips for Success with Your Hot Chocolate Bombs
- Ingredient Notes and Substitution Ideas
- Serving Your Hot Chocolate Bombs
- Frequently Asked Questions About Hot Chocolate Bombs
- Estimated Nutritional Information
Why You’ll Love Making Hot Chocolate Bombs
Seriously, who doesn’t love watching chocolate melt away to reveal a yummy surprise inside? It’s like a little party in your mug! These are super approachable, even if you’re new to chocolate work, and you’ll master them in no time. They make the most thoughtful and adorable DIY gifts, perfect for the holidays, birthdays, or just because. Plus, you can totally customize them with your favorite hot chocolate mix, marshmallows, sprinkles, or even a pinch of cinnamon. Whip these up for a cozy get-together or a snow day, and watch everyone’s faces light up!
Gather Your Ingredients for Hot Chocolate Bombs
Alright, let’s get our goodies together for these totally fun hot chocolate bombs! You’ll need about 12 ounces of really good quality chocolate – I love using milk, semi-sweet, or even dark, chopped up nice and fine. For the inside magic, grab your favorite hot chocolate mix (about half a cup) and a quarter cup of those cute little mini marshmallows. If you’re feeling fancy, some sprinkles, crushed peppermint candy, or even edible glitter totally up the ante. And for decorating later, a little bit of white chocolate for drizzling is always a good idea!
Essential Equipment for Creating Chocolate Cocoa Spheres
You don’t need a whole professional setup for these! The main stars are some good silicone sphere molds – I like the ones that make about 1.5 to 2-inch diameter halves. You’ll also want a small pastry brush for getting that chocolate coating nice and even inside the molds. And grab a microwave-safe bowl for melting your chocolate, plus a clean plate that you can warm up for sealing those little beauties together.
Step-by-Step Guide to Making Hot Chocolate Bombs
Alright, let’s dive into the fun part – actually making these amazing hot chocolate bombs! Don’t worry, it’s way easier than it looks, and the payoff is HUGE. Just follow these steps, and you’ll have little chocolate spheres of joy ready in no time. It’s amazing how your kitchen can transform into a little chocolatier’s workshop!
Melting Your Chocolate for Perfect Hot Chocolate Bombs
First things first, we need to get that chocolate all melty and smooth. Pop your chopped chocolate into a microwave-safe bowl. Zap it in the microwave in 30-second bursts, stirring really well in between each burst. Keep going until it’s totally smooth and glossy. If you prefer, you can totally use a double boiler method too. The key here is good quality chocolate – it makes all the difference for nice, sturdy shells that actually shine! I find that better chocolate also prevents those annoying white streaks that can sometimes happen.
Coating the Molds for Shiny Chocolate Cocoa Spheres
Once your chocolate is perfectly melted, it’s time to coat those silicone molds. Grab your sphere mold and spoon about 1 to 2 tablespoons of chocolate into each little half-sphere. Now, grab a pastry brush – this is your best friend! Use it to paint the chocolate all around the inside of the mold, making sure you get every nook and cranny and build up a nice, even layer. Pop the mold into the fridge for about 10-15 minutes until it’s firm to the touch. Crucially, we need a second coat! So, give each sphere another thin layer of chocolate, paying extra attention to the rim, and then chill them again until they’re rock solid. This double-dipping is what gives you those beautiful, sturdy chocolate shells.
Filling and Sealing Your Homemade Marshmallow Cocoa Bombs
Okay, moment of truth! Gently pop those perfect chocolate shells out of the mold. Now, take about half of them and fill them up! Spoon in your hot chocolate mix, those mini marshmallows, and anything else you fancy – sprinkles, crushed peppermint, you name it. For sealing, grab a clean, dry plate and pop it in the microwave for maybe 15-20 seconds until it’s just warm. Take an empty chocolate half and carefully place its rim onto the warm plate for just a few seconds. This will ever-so-slightly melt the edge. Then, quickly grab a filled half and press it onto the warmed, empty half, giving it a gentle little twist to seal them up tight. Try to work fast so you don’t melt the shells too much! It’s like a little puzzle, but so satisfying when they click together perfectly. You can find a similar method for getting things to stick together perfectly in my Chocolate Zucchini Bread recipe – patience is key!
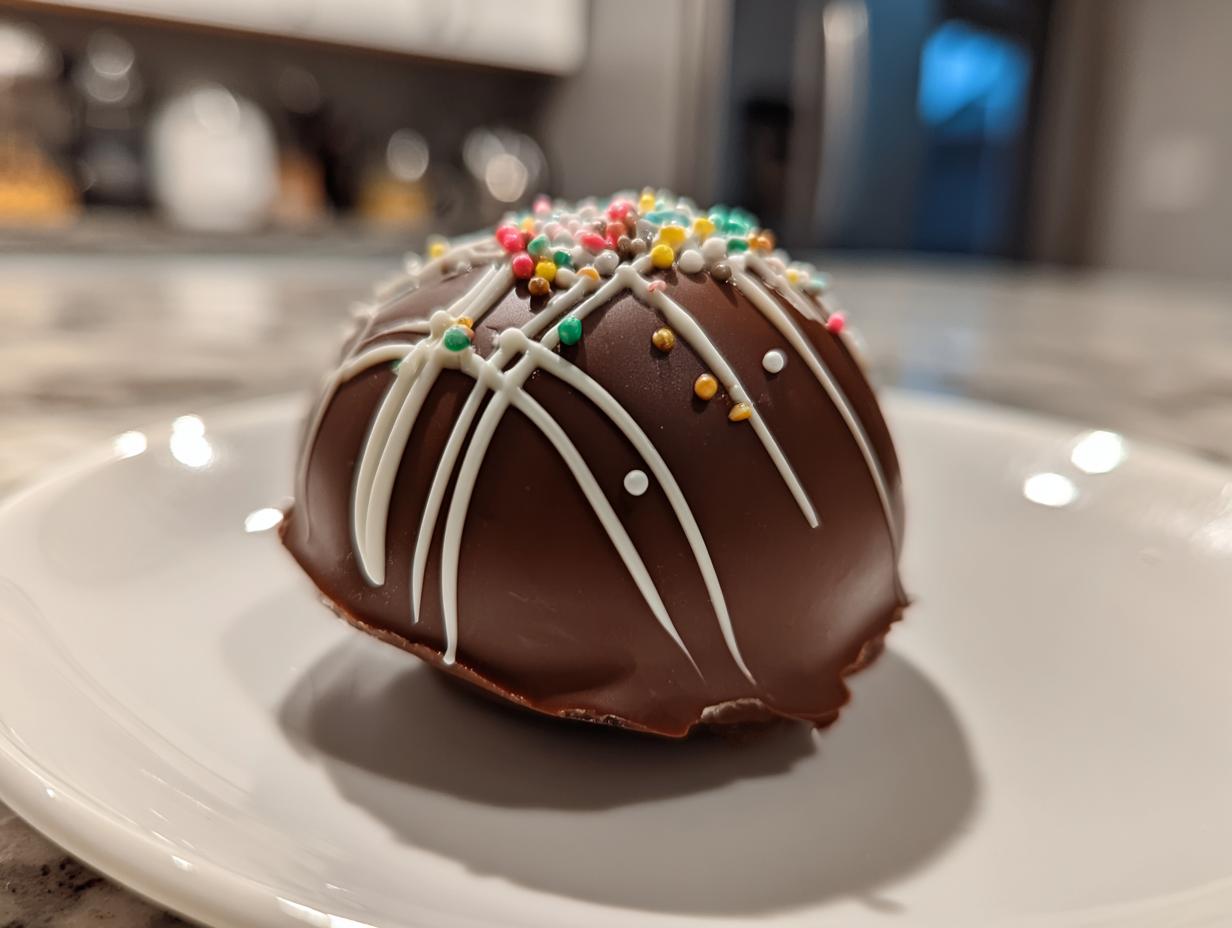
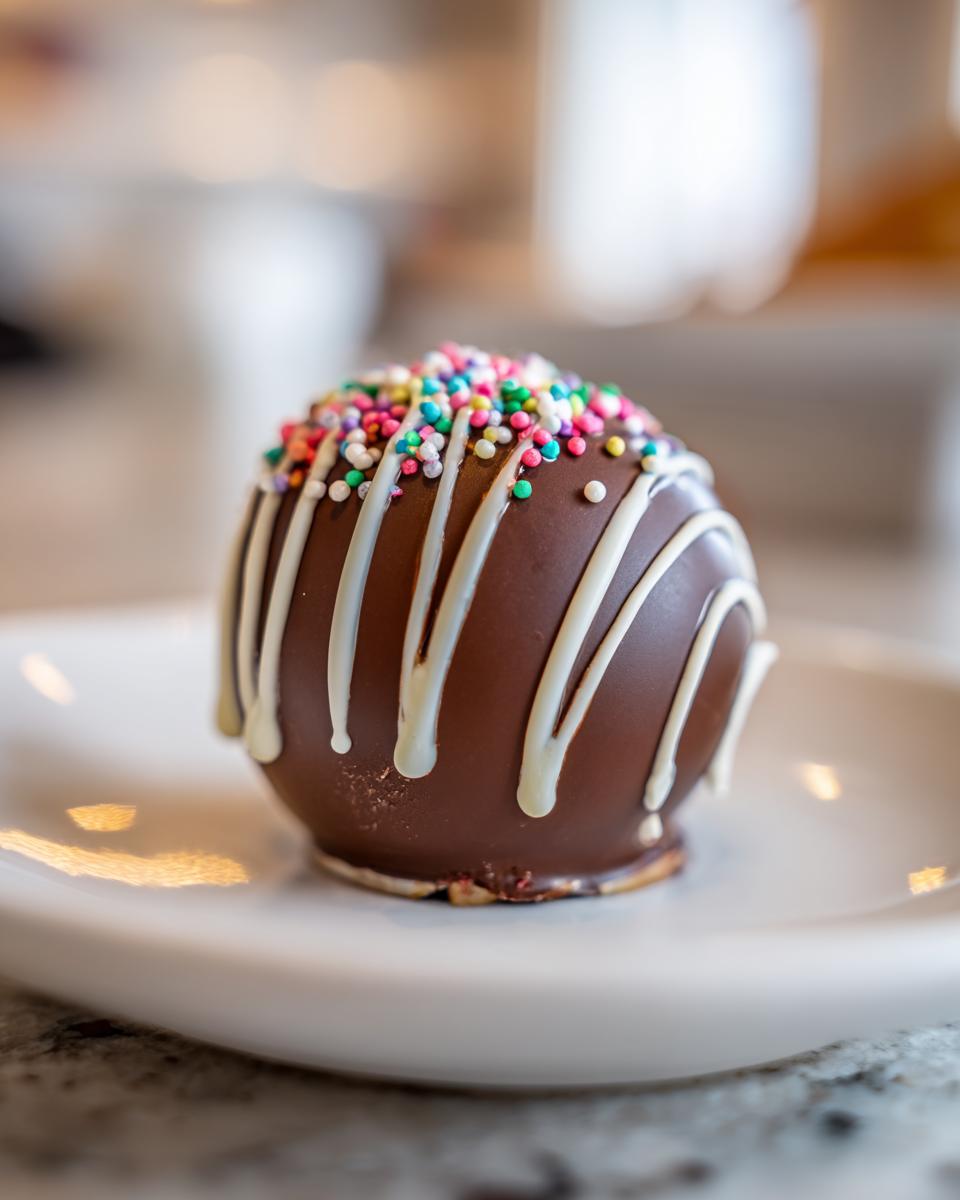
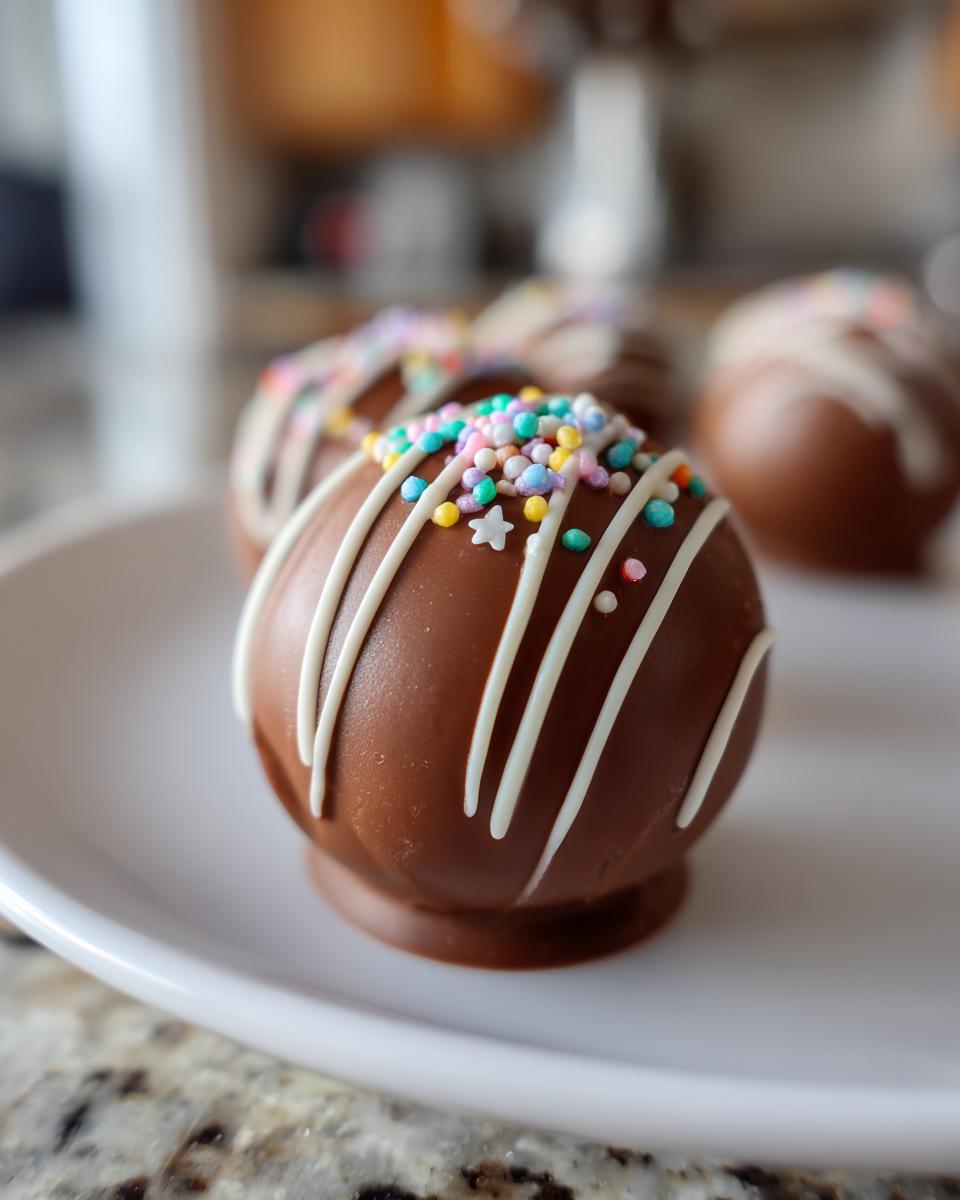
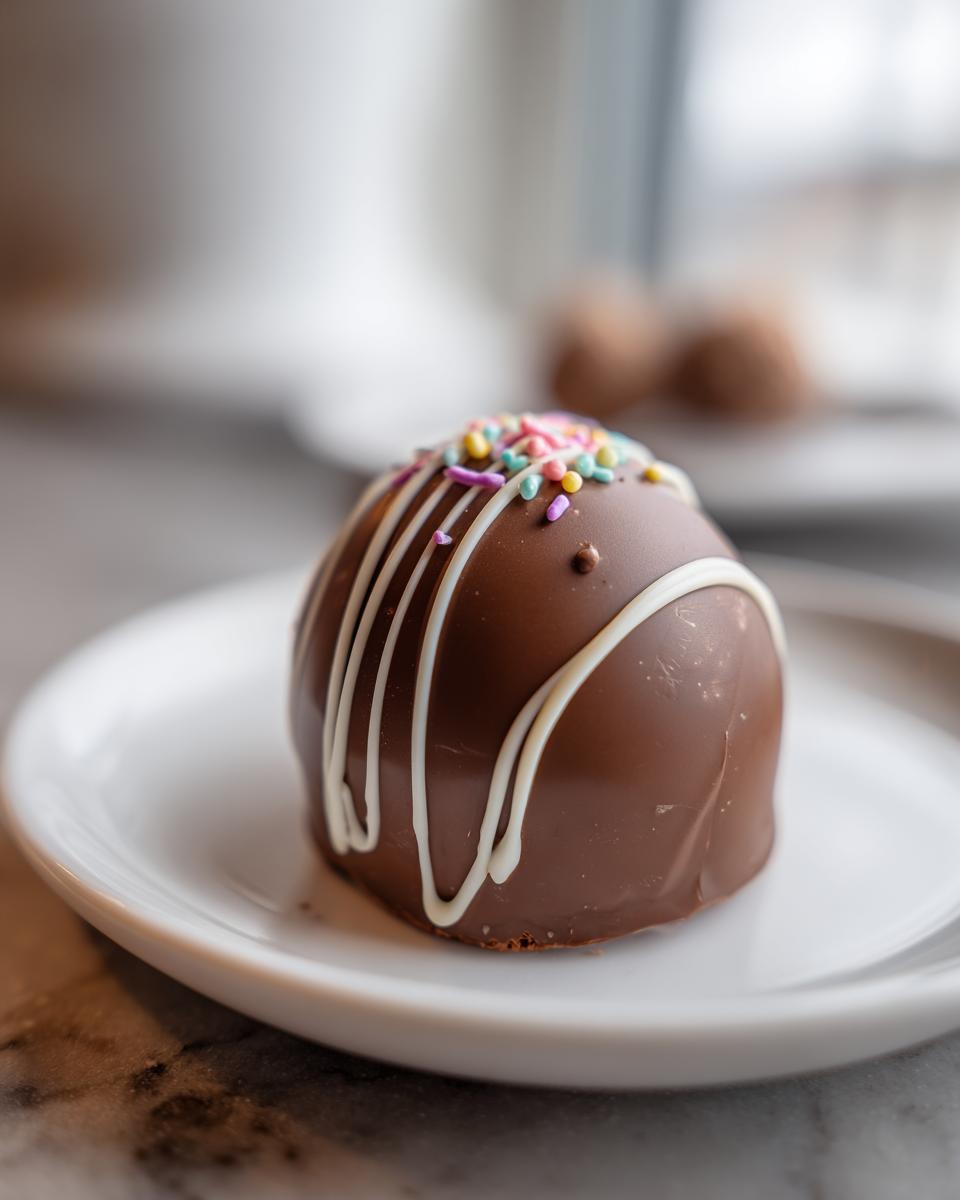
Decorating Your Trendy Hot Chocolate Balls (Optional)
Want to make them extra special? Go for it! You can totally jazz up your hot chocolate bombs. Melt a little bit of white chocolate and drizzle it all over the sealed bombs. Then, sprinkle on some more festive sprinkles, a dusting of edible glitter, or even crushed candy canes. It’s like adding the perfect finishing touch to your edible art – a little bit of sparkle makes them feel super fancy and fun. If you like, you can check out my Halloween Candy Bark for more fun decorative ideas!

Tips for Success with Your Hot Chocolate Bombs
Okay, so you’ve got this whole recipe down, but let’s chat about a few little secrets to make sure your hot chocolate bombs turn out absolutely perfect every single time. You know, like how I learned with my lasagna tips – sometimes it’s the little things! First off, please, please use good quality chocolate. It really does make a difference; it melts better, it’s shinier, and your shells will be way sturdier. If your chocolate seems *too* thick when you’re coating the molds, you can always stir in a tiny bit of coconut oil or vegetable oil to thin it out a smidge. Also, pay attention to your kitchen temperature! If it’s super hot, your chocolate might melt faster than you can work, so maybe crank the AC or work quickly. When you’re sealing those halves, remember that warm plate trick works wonders, but you don’t want it *hot*, just gently warm. We’re just kissing the edge of the chocolate hello, not giving it a full hug!
Ingredient Notes and Substitution Ideas
Let’s talk chocolate! While I adore good quality milk or semi-sweet for these hot chocolate bombs, feel free to experiment! Dark chocolate lovers, you’ll be happy. If you’re looking for an easier melt that holds its shape really well, almond bark or compound chocolate is a good choice, though it doesn’t have quite the same rich flavor. For the inside, if you can’t find mini marshmallows, just chop up regular ones! And for dairy-free folks, try using a good dairy-free chocolate and a plant-based hot cocoa mix. You could even add a tiny pinch of cinnamon or chili powder to the mix for a little zing!
Serving Your Hot Chocolate Bombs
Alright, the moment you’ve been waiting for! To serve your homemade hot chocolate bombs, just pop one right into your favorite mug. Pour about 8 to 10 ounces of warm (not boiling!) milk over it. Then, just watch the magic happen! The chocolate shell melts away, the marshmallows burst out, and you’re left with the most decadent cup of hot cocoa ever. It’s such a fun experience, kind of like making a warm, delicious cocktail, and way more exciting than just making regular cocoa!
Frequently Asked Questions About Hot Chocolate Bombs
Got questions about making these fun hot chocolate bombs? I totally get it! There are a few little things that can make a big difference, so let’s clear them up. You’ll be a pro at making these DIY hot cocoa bombs in no time!
Can I use candy melts instead of real chocolate?
Oh yeah, you absolutely can! Candy melts are super easy to work with and hold their shape really well, which is great for consistent results. They’re a good choice if you’re a bit nervous about tempering chocolate or just want something super straightforward. Just know that the flavor won’t be quite as rich or complex as using good quality baking chocolate, but they still make for really pretty and delicious chocolate cocoa spheres!
How should I store my homemade marshmallow cocoa bombs?
Your beautiful homemade marshmallow cocoa bombs are best stored in a cool, dry place, but NOT the fridge! If they get too cold, you might get condensation on them, which is a no-go for delicate chocolate. I like to keep mine in an airtight container at room temperature. They should be good for at least a week or two, though honestly, mine rarely last that long because we gobble them up!
What size molds are best for trendy hot chocolate balls?
For that perfect, satisfying “explosion” when you drop them in milk, I really recommend using molds that make about 1.5 to 2-inch diameter half-spheres. This size is just right – it’s not too tiny, and it’s not so huge that it takes forever to melt. It makes for a really fun reveal when you pour that hot milk over them! You can find these silicone molds pretty easily online or at craft stores, and they make creating those uniform trendy hot chocolate balls a breeze.
Can I make hot chocolate bombs ahead of time for gifts?
Definitely! These are fantastic to make ahead, which is why they’re such popular DIY gifts. Just make sure you store them properly in an airtight container in a cool, dry spot, and they’ll be perfect and ready to go whenever you need them. They really do make the sweetest, most impressive homemade presents!
Estimated Nutritional Information
Now, let’s talk about what goes into each of these little chocolate delights! Keep in mind these numbers are just an estimate, because what you put inside can change things up a bit. For one of these amazing hot chocolate bombs, you’re looking at roughly 250 calories. You’ll get about 15g of fat (with 9g being saturated), 30g of carbs (with 2g fiber and 25g sugar), and around 4g of protein. There’s also a bit of sodium, about 50mg. So, enjoy this little treat – it’s pure magic in a mug!
PrintDIY Hot Chocolate Bombs

Create fun, exploding hot chocolate bombs filled with cocoa and marshmallows for a delightful treat or gift.
- Prep Time: 30 min
- Cook Time: 15 min
- Total Time: 45 min
- Yield: 6 bombs 1x
- Category: Dessert
- Method: Molding
- Cuisine: American
- Diet: Vegetarian
Ingredients
- 12 oz good quality chocolate (milk, semi-sweet, or dark), chopped
- 1/2 cup hot chocolate mix
- 1/4 cup mini marshmallows
- Optional: sprinkles, crushed peppermint, edible glitter
- Optional: white chocolate for drizzling
Instructions
- Melt the chocolate: Place chopped chocolate in a microwave-safe bowl. Microwave in 30-second intervals, stirring between each, until smooth and fully melted. Alternatively, use a double boiler.
- Coat the molds: Pour about 1-2 tablespoons of melted chocolate into each half of a silicone sphere mold (1.5 to 2-inch diameter). Use a pastry brush to evenly coat the inside of each mold cavity, ensuring no gaps. Place the mold in the refrigerator for about 10-15 minutes, or until the chocolate is firm. Apply a second coat of chocolate to each cavity, focusing on the rim, and chill again until firm.
- Fill the bombs: Gently remove the chocolate spheres from the mold. Fill half of the spheres with hot chocolate mix, mini marshmallows, and any other desired fillings like sprinkles or crushed peppermint.
- Seal the bombs: Warm a clean, dry plate by placing it in a microwave for about 15-20 seconds. Take an empty chocolate half-sphere and place its rim onto the warm plate for a few seconds to slightly melt the edge. Immediately place a filled half-sphere on top, pressing gently to seal them together. Repeat with remaining bombs.
- Decorate (Optional): Drizzle with melted white chocolate and add sprinkles or edible glitter for extra flair.
- Serve: Place one hot chocolate bomb in a mug. Pour 8-10 oz of hot milk over it and watch it melt and release the marshmallows. Stir well and enjoy your rich hot cocoa.
Notes
- Use good quality chocolate for best results; it will be sturdier and shinier.
- Ensure your silicone molds are clean and dry before coating with chocolate.
- Work relatively quickly when sealing the bombs to prevent the chocolate from melting too much.
- These make excellent gifts for holidays or special occasions.
- For a different flavor, try adding a pinch of cinnamon or chili powder to the hot chocolate mix.
Nutrition
- Serving Size: 1 bomb
- Calories: 250
- Sugar: 25g
- Sodium: 50mg
- Fat: 15g
- Saturated Fat: 9g
- Unsaturated Fat: 6g
- Trans Fat: 0g
- Carbohydrates: 30g
- Fiber: 2g
- Protein: 4g
- Cholesterol: 15mg