
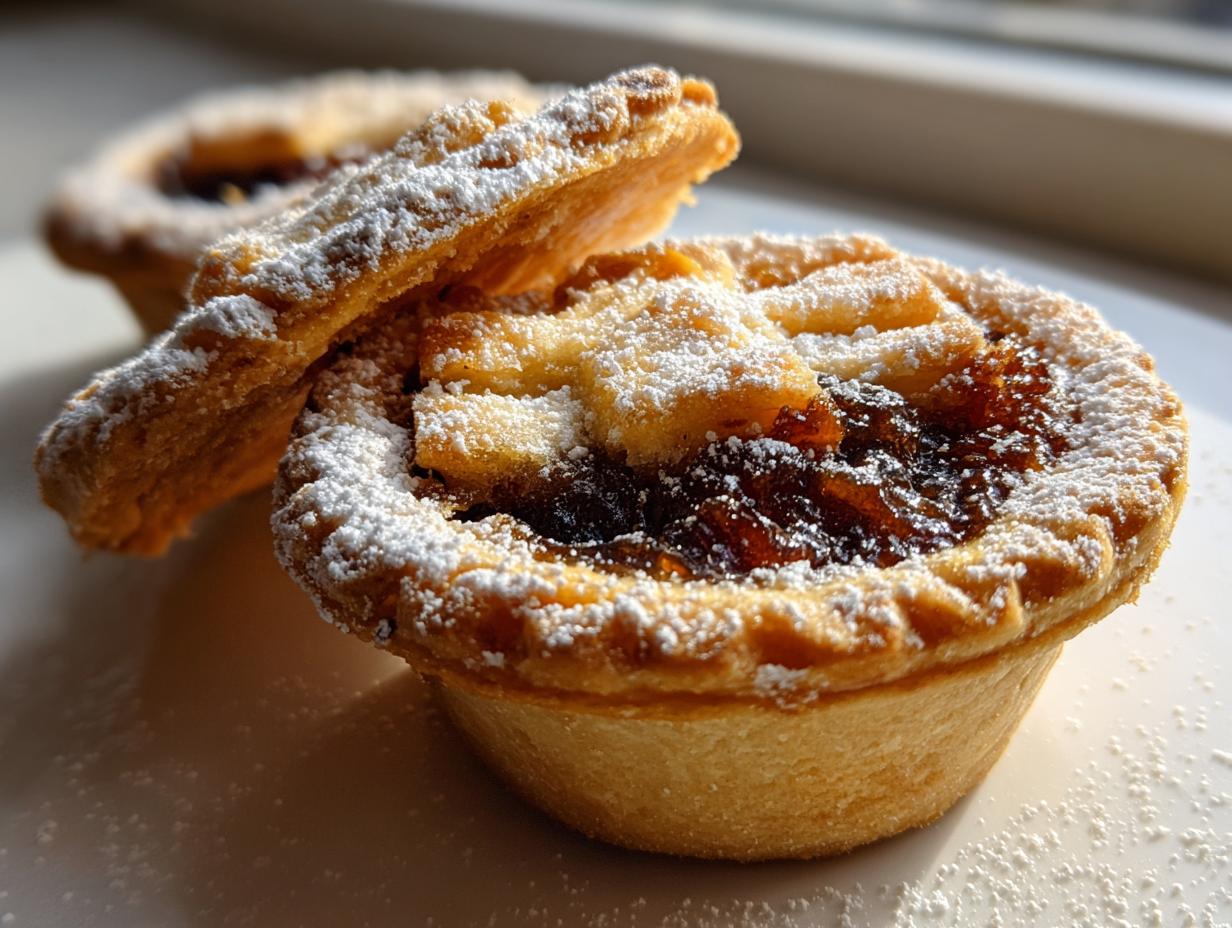
Oh, if you could only smell my kitchen right now! There’s just nothing that says ‘the holidays are truly here’ quite like the deep, sweet scent of spiced fruit bubbling inside delicate pastry shells. Forget those commercially made ones you grab last minute! We’re making perfect, traditional mince pies today, and I promise you, the secret is all in keeping that shortcrust pastry incredibly flaky. I’m Claire Sterling, and while I used to plan huge corporate events, I found my real happiness here, making treats that feel like home. If I can master these classic British Christmas tarts and make them accessible to everyone, you absolutely can too. You can read more about my baking philosophy over on the About page! Trust me on this one.
- Why This Traditional Mince Pie Recipe Delivers Holiday Bliss
- Essential Ingredients for Perfect Mince Pies
- Mastering the Shortcrust Pastry for Your Mince Pies
- Assembling and Baking Your Holiday Fruit Mince Pies
- Making Mincemeat Filling: Homemade vs. Store-Bought for Mince Pies
- Storage and Serving Suggestions for Your Delicious Mince Pies
- Troubleshooting Common Mince Pies Issues
- Frequently Asked Questions About Traditional Mince Pies
- Estimated Nutritional Data for Mince Pies
Why This Traditional Mince Pie Recipe Delivers Holiday Bliss
Look, there are lots of sweet things you could bake this time of year, but these mince pies are special, and I want you to feel that magic. We keep things simple here, but the result is pure perfection every single time. You’ll notice the difference!
- The pastry is genuinely flaky—not tough or sad! That’s because we keep the butter ice cold.
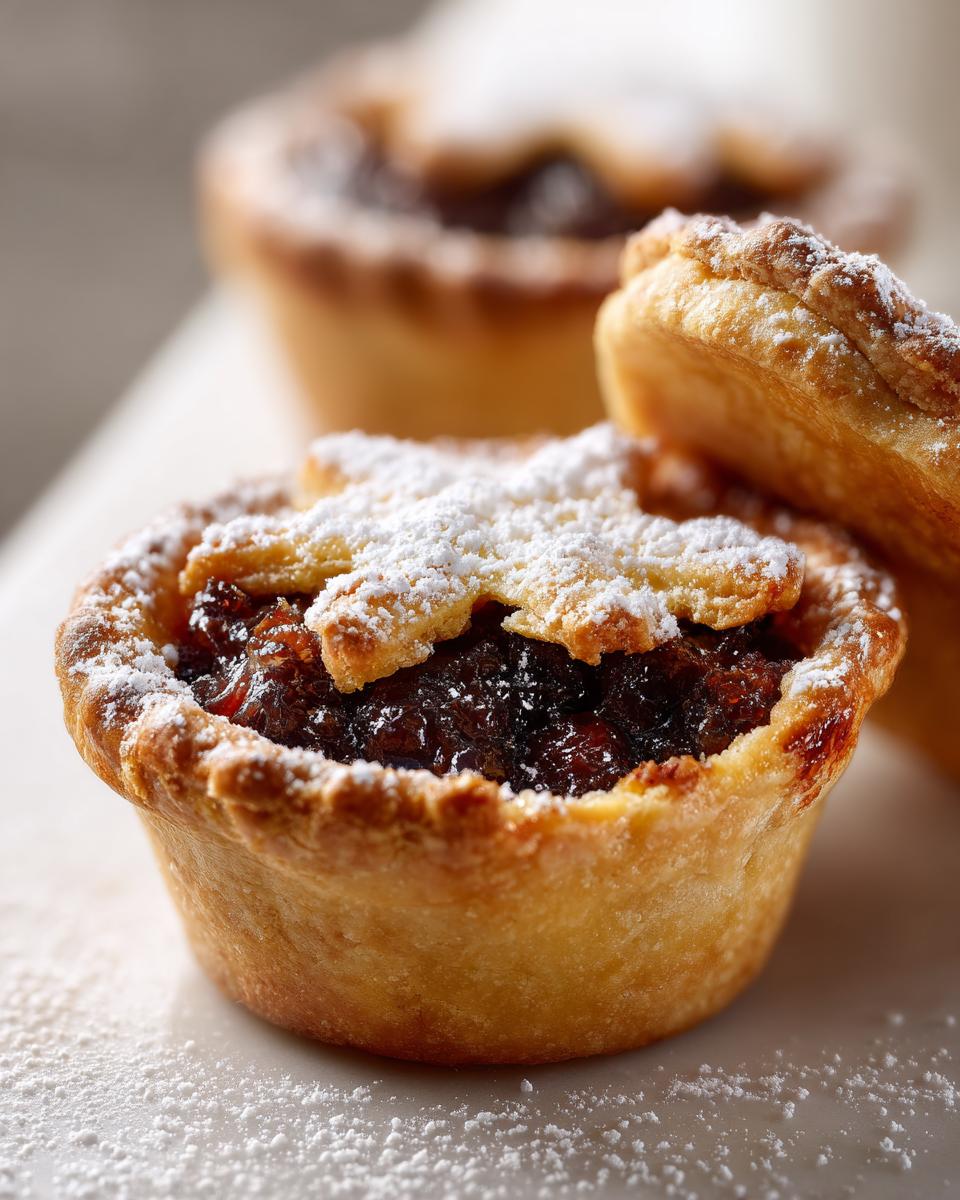
- The filling offers that perfect sweet-and-spicy balance that reminds everyone of classic British Christmas tarts.
- This recipe is straightforward. No fancy equipment needed, just good old-fashioned elbow grease for the dough!
Essential Ingredients for Perfect Mince Pies
When it comes to mince pies, the ingredients whisper their quality into the final bake. Since we’re using a terrific jar of store-bought mincemeat to save time—see my notes later on quality—the pastry really has to shine. The secret to that perfect, melt-in-your-mouth texture starts with keeping things frigid!
You absolutely need:
- One cup (225g) of unsalted butter, kept totally cold and cubed up small. Don’t cheat on the coldness, please!
- Two cups (250g) of all-purpose flour. Standard stuff works great here.
- Just a tiny pinch of salt to balance the sweetness.
- Three tablespoons of ice water—and I mean icy, maybe even with a stray cube in there.
- One jar (400g) of really good quality mincemeat filling. Look for one that smells rich from brandy and spices.
- One egg, beaten up for the shiny egg wash.
- And a final dusting of powdered sugar when they come out of the oven!
Using butter straight from the fridge is just non-negotiable for that flaky crust we are chasing.
Mastering the Shortcrust Pastry for Your Mince Pies
Okay, listen up, because this part is where we separate the good British Christmas tarts from the absolutely phenomenal ones. If you want that gorgeous, tender crust that shatters just right when you bite into it, you have to treat your shortcrust pastry for mince pies with respect. It’s all about keeping things brutally cold and working fast!
First, get that flour and salt mixed, and then it’s time for the butter. You have to cut that cold butter into the flour until it looks like coarse breadcrumbs or maybe slightly bigger, like tiny little peas. I prefer using my fingertips because you can actually feel when it’s the right texture, but a pastry blender works if you’re quick! As soon as that butter is incorporated, drizzle in your ice water, just enough so the dough starts clinging together. Stop mixing the second it forms a shaggy ball. Seriously, stop! Overworking the dough develops gluten, and too much gluten means tough pastry, which is the exact opposite of what we want.
Once you have your two disks—one slightly bigger for the base, naturally—wrap them up tight. I usually give them a little press to flatten them out a bit before they go in the fridge. If you want to see my thoughts on how chilling affects other crusts, check out my tips on making flaky pie crusts; the science is the same!
Chilling Time: The Secret to Flaky Mince Pies
This waiting game is absolutely vital, so don’t even think about skipping it! Chilling the dough for at least 30 minutes does two amazing things. First, it lets that flour properly hydrate, which keeps it from being tough. Second—and this is the big one—it lets your cubed butter firm right back up. When that hard, cold butter hits the hot oven, it steams, creating those little pockets of air that turn into flakes. If the butter melts before you roll it out, you just get a dense base. So, 30 minutes minimum in the fridge, or even longer if you have time. Cold dough equals flaky pies!
Assembling and Baking Your Holiday Fruit Mince Pies
Now that our beautiful pastry is resting, it’s time to bring these British Christmas tarts together! Get your oven preheated to 400°F (200°C) before you even take the dough out. A screaming hot oven is key to stopping the bottoms of your pies from getting soggy—we want the exterior pastry to set hard and fast! Lightly grease up that muffin tin, you don’t want these sticking after all your hard work.
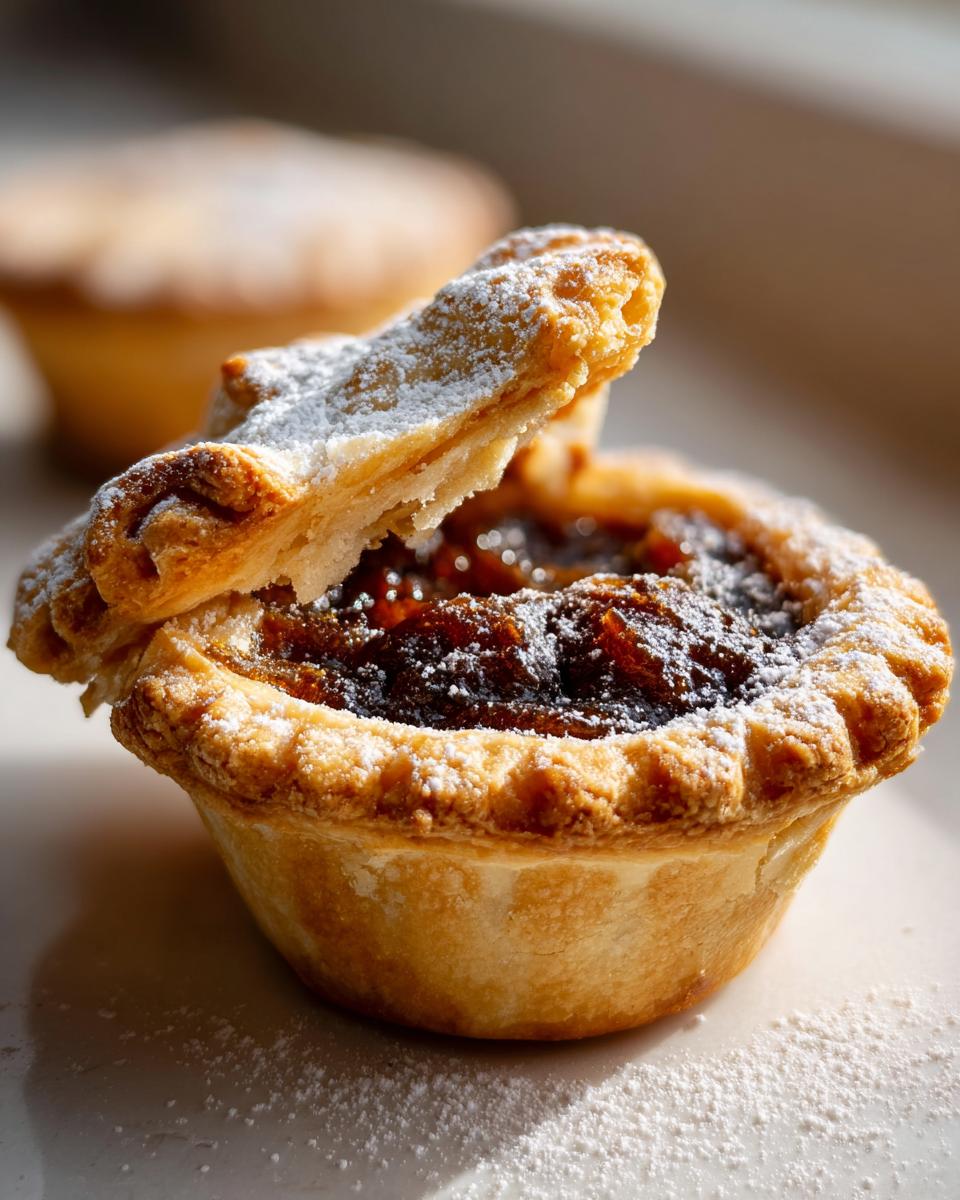
Roll out your larger piece of dough and use a cutter just big enough to press gently into the cups of your tin. Don’t stretch the dough, just gently nestle it in. Fill each shell about two-thirds full with your delicious mincemeat; remember, it’s full of fruit and it’s going to bubble up a bit, so don’t overfill! Then take your smaller top pastry piece, cut little vents in the middle—I usually use a tiny star cutter—and lay it right on top.
The sealing is important for keeping all that sticky, spicy goodness inside! Brush the rim of the bottom crust with egg wash, then press the top crust down firmly, and crimp those edges with a fork. That tight seal is your best defense against leakage. If you want a whole collection of amazing desserts, you can browse some of my favorites here!
Tips for the Best Golden Finish on Your Mince Pies
Once sealed, it’s all about that beautiful, burnished top! You want a deep golden-brown color that screams ‘holiday cheer.’ After sealing, take the rest of your beaten egg wash and lightly brush the entire top surface of every single pie. Don’t glob it on—a thin, even coat works magically well.
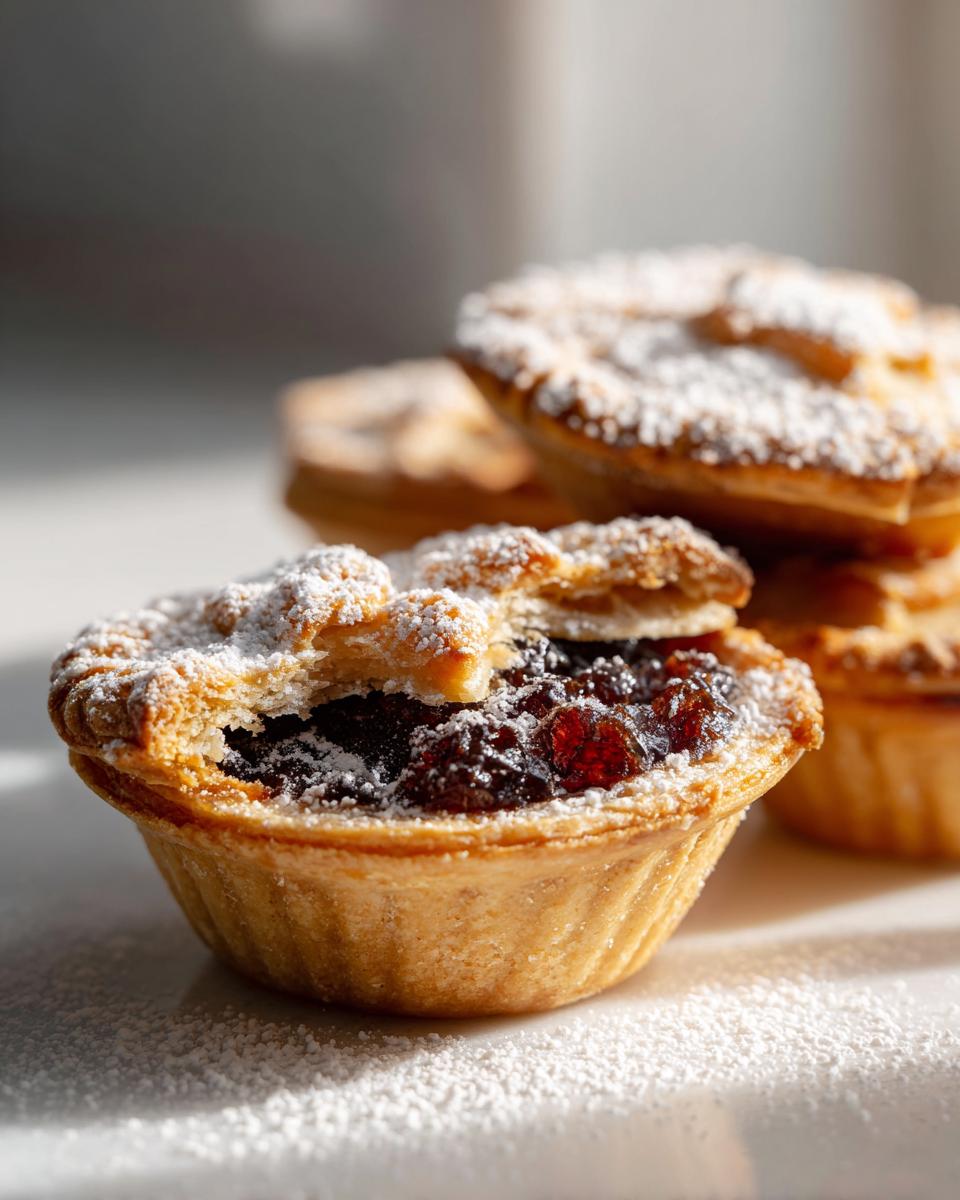
Pop those tins immediately into that hot oven. The high temperature locks in the shape and immediately starts browning the egg wash. Keep an eye on them; 15 to 20 minutes is usually perfect, but pull them out the second they turn that beautiful, deep golden color. You’ll notice they smell absolutely incredible when they’re ready to come out!
Making Mincemeat Filling: Homemade vs. Store-Bought for Mince Pies
This is the big question for anyone tackling mince pies, right? Do I go fully homemade or rely on a jar? I’m going to be honest—Claire Sterling here loves efficiency during the hectic holidays! We are using a great store-bought jar for this recipe because it saves serious time, but quality matters immensely here. You can’t just grab the cheapest jar on the shelf; ask around, or just go by smell—it should smell deeply spiced and rich with brandy and spices.
If you have the time to make it from scratch, though, the results are spectacular. If you are wondering about how to make mincemeat filling yourself, just know that it’s a glorious blend of currants, raisins, sultanas, lemon zest, maybe some apple, and spices like clove and cinnamon, usually cooked down with suet or butter and soaked in brandy or dark rum. It takes patience, but the flavor depth is unreal. For now, though, a really good quality jar keeps our holiday baking easy while still giving us that traditional taste we crave!
Storage and Serving Suggestions for Your Delicious Mince Pies
Once these glorious mince pies have cooled completely on the rack, the hard work is done! They store surprisingly well, which is great news when you’re baking for a crowd. I just pop mine into an airtight container. They honestly keep beautifully at cool room temperature for several days. Don’t worry too much about the fridge unless your kitchen is incredibly warm.
When it’s time to serve them—and they are best when warm!—just pop them into a medium oven (about 325°F or 160°C) for about five minutes to warm them through. The pastry gets crisp again instantly! Then, dust them generously with that powdered sugar we mentioned. If you want to make them extra decadent, a dollop of whipped cream or maybe some brandy butter makes them absolutely sing. If you’re looking for some cozy drinks to pair with these treats, you know I have some great cocktail recipes waiting for you!
Troubleshooting Common Mince Pies Issues
Even with the best intentions, sometimes our little mince pies throw us a curveball! Don’t get upset; these are easy fixes, trust me. The most common issue I hear about is the pastry shrinking away from the tin sides while baking. That happens if you didn’t press the base dough firmly enough into the cups, or if you forgot to chill it properly before filling.
If your filling bubbles over a ton, it means two things: either you filled them too high, or you didn’t cut enough vents on top, so the steam had nowhere to escape! Make sure those vents are decent sized.
If the edges feel too crumbly when you try to seal them, just dab a tiny bit more of that egg wash on the rim—it acts like glue. A little bit of experience and you’ll have perfectly sturdy, sealed pies every time!
Frequently Asked Questions About Traditional Mince Pies
I always get asked similar questions about these little holiday pockets of joy, so let’s clear up any last-minute baking worries you might have about your mince pies!
Can I freeze unbaked mince pies?
Oh yes, and this is a lifesaver during the holidays! You absolutely can freeze them before you bake them. Once you’ve assembled the pies and sealed the tops, place the entire muffin tin in the freezer until they are solid—usually about an hour. Then, transfer the frozen pies to a freezer-safe bag. When you want to bake a fresh batch, pull them out, let them sit on the counter for maybe 15 minutes while the oven heats up, and then brush with egg wash and bake them for about 5 minutes longer than the recipe calls for. Perfect for surprise visitors!
What is the difference between mincemeat and mince pie?
This confuses folks who aren’t familiar with this classic British tradition! Simply put, mincemeat is the spiced, sweet filling—a mix of dried fruits, spices, and sometimes suet or citrus zest. The mince pie is the actual little tart made by encasing that mincemeat filling inside pie pastry. So, mincemeat goes *in* the mince pie!
Can I use puff pastry instead of shortcrust for my holiday fruit mince pies?
You certainly can, and it makes for a completely different, but equally delicious, result! Shortcrust pastry gives you that traditional, sturdy, crumbly base that doesn’t get soggy easily. Puff pastry, on the other hand, bakes up incredibly light and airy, rising high above the filling. If you use puff pastry, maybe skip covering them completely with a top layer and just use small decorative cut-outs so the steam can escape easily, otherwise, you might get a puffy top that slides off!
My filling bubbled out while baking; what went wrong?
Don’t panic! This happens when the filling gets too hot before the pastry seals it completely, or if the steam couldn’t escape. Make absolutely certain you are pressing the edges of the top and bottom crusts together firmly with a fork—that’s the glue that holds the party inside! Also, ensure your oven is fully preheated to that 400°F (200°C) before they go in; a hot start means the pastry sets up fast, trapping the filling.
Estimated Nutritional Data for Mince Pies
I always feel a little funny talking about calories when we’re celebrating, but I know some of you are curious about what’s in these wonderful little treats! Since everyone’s version of store-bought mincemeat filling is slightly different—and remember, I used butter instead of traditional suet for my pastry—these numbers are just tasty estimates based on the recipe details provided. Think of this as guidance, not gospel!
For one of these delightful holiday fruit mince pies, here is what you can generally expect:
- Serving Size: 1 pie
- Calories: Around 300 calories. They’re festive, so they’re meant to be an indulgence!
- Fat: About 15g total, with 8g being saturated fat from that lovely butter in the crust.
- Carbohydrates: Roughly 38g, most of which comes from the dried fruit and sugar in the mincemeat.
- Protein: A small 4g contribution.
- Sugar: Yes, it’s high—around 35g—but remember that’s concentrated fruit sugar and molasses from the dark brown sugar I love!
Just a quick heads up: if you make homemade mincemeat and add a splash of brandy, or if you decide to serve them with a big dollop of brandy butter (which you absolutely should do sometimes!), those numbers will definitely creep up. So, enjoy them in good cheer, knowing that the quality ingredients make them worth every single bite!
PrintTraditional British Mince Pies

Make classic, spiced fruit-filled holiday tarts using a simple shortcrust pastry and homemade mincemeat filling.
- Prep Time: 30 min
- Cook Time: 20 min
- Total Time: 50 min
- Yield: 12 pies 1x
- Category: Dessert
- Method: Baking
- Cuisine: British
- Diet: Vegetarian
Ingredients
- 1 cup (225g) unsalted butter, cold and cubed
- 2 cups (250g) all-purpose flour
- 1/4 teaspoon salt
- 3 tablespoons ice water
- 1 jar (400g) good quality mincemeat filling
- 1 egg, beaten (for egg wash)
- Powdered sugar, for dusting
Instructions
- Prepare the pastry: In a large bowl, combine the flour and salt. Cut in the cold butter using your fingertips or a pastry blender until the mixture resembles coarse breadcrumbs.
- Add the ice water one tablespoon at a time, mixing until the dough just comes together. Do not overmix.
- Divide the dough in half, flatten each half into a disk, wrap in plastic wrap, and chill in the refrigerator for at least 30 minutes.
- Preheat your oven to 400°F (200°C). Lightly grease a 12-cup muffin tin.
- On a lightly floured surface, roll out one disk of pastry to about 1/8 inch thickness. Use a round cutter (about 3.5 inches) to cut out circles for the pie bases.
- Press the pastry circles into the muffin tin cups. Fill each cup about two-thirds full with mincemeat filling.
- Roll out the second pastry disk. Use a smaller cutter (about 2.5 inches) to cut out tops for the pies. You can cut small vents in the tops or use festive cutters if you wish.
- Brush the edges of the base pastry with the beaten egg wash. Place the tops onto the filling and press the edges to seal. Crimp the edges with a fork.
- Brush the tops of the pies with the remaining egg wash.
- Bake for 15 to 20 minutes, or until the pastry is golden brown.
- Let the pies cool in the tin for a few minutes before carefully removing them to a wire rack to cool completely.
- Dust with powdered sugar before serving. These pies are excellent warm.
Notes
- If you are short on time, consider using store-bought mincemeat. This recipe focuses on making the pastry from scratch for the best texture.
- For flakier pastry, avoid working the dough too much. Keep your ingredients cold.
- If you are interested in meal planning for the holidays, look into best meal delivery services for easy side dishes.
Nutrition
- Serving Size: 1 pie
- Calories: 300
- Sugar: 35g
- Sodium: 100mg
- Fat: 15g
- Saturated Fat: 8g
- Unsaturated Fat: 7g
- Trans Fat: 0g
- Carbohydrates: 38g
- Fiber: 2g
- Protein: 4g
- Cholesterol: 30mg