
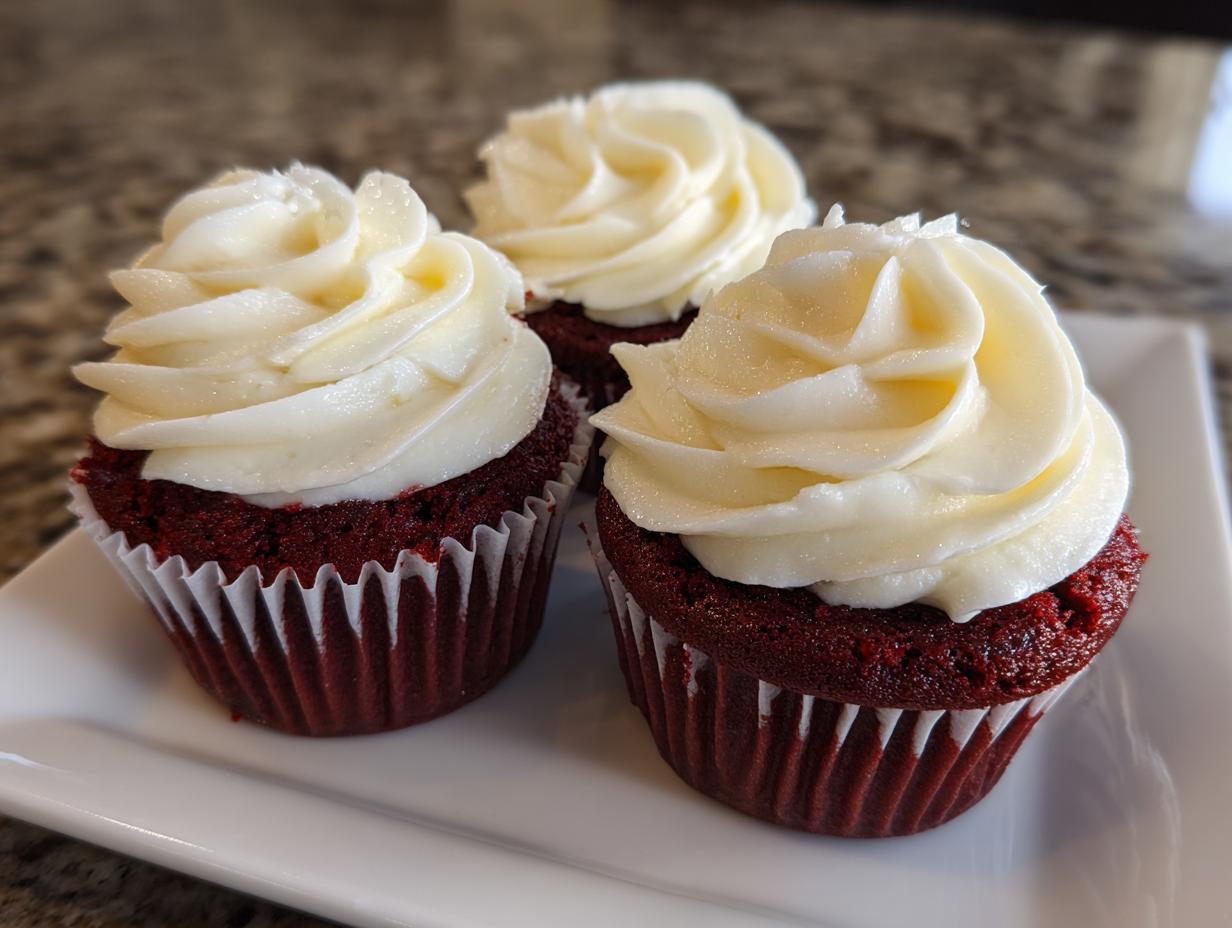
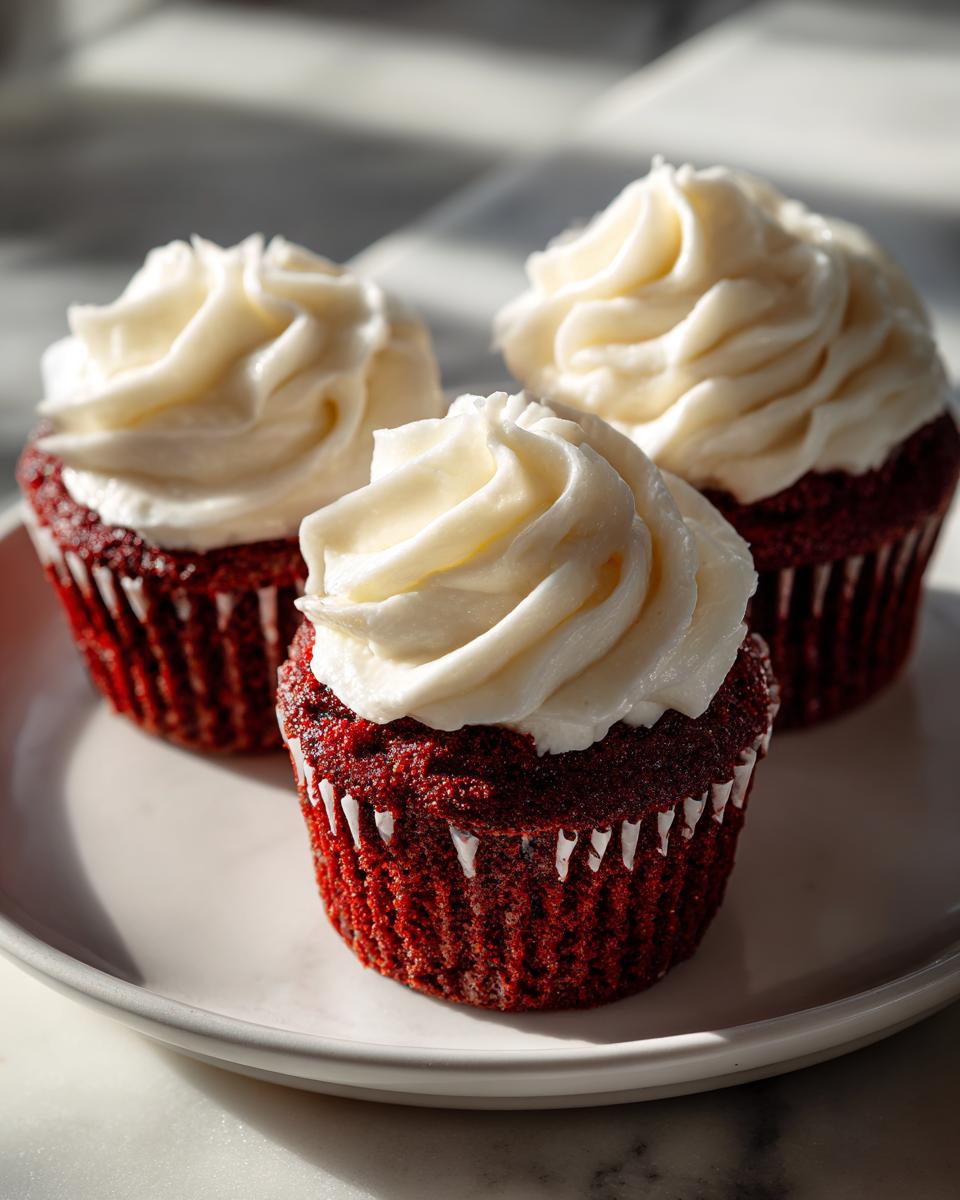
Oh, that moment when you bite into the most perfect, vibrant red velvet cupcakes—it’s pure magic, isn’t it? That soft, tender crumb combined with that sharp, tangy cream cheese frosting is just unbeatable. I know a lot of people look at these beautiful desserts and think they are too complicated for a home baker. Well, that’s exactly why I developed what I call the Most Moist, Classic red velvet cupcakes recipe. My whole mission here at Bliss Batter, created by me, Claire Sterling, is to strip away the scary parts of baking classics so you can whip up something truly bakery-style right in your own kitchen. If you want to know more about why I started this whole baking philosophy, you can read all about it on our About Page! Trust me, these are so easy, you’ll wonder why you waited so long to try them.
- Why This is Your Ultimate red velvet cupcakes Recipe
- Gathering Ingredients for Classic red velvet cupcakes
- Step-by-Step Instructions for Easy red velvet cupcakes
- Expert Tips for Bakery Style cupcakes Success
- Storage and Reheating Instructions for red velvet cupcakes
- Variations on the Classic red velvet recipe
- Serving Suggestions for Your Homemade red velvet cupcakes
- Frequently Asked Questions about red velvet cupcakes
- Sharing Your red velvet cupcakes Creations
Why This is Your Ultimate red velvet cupcakes Recipe
So, why should you ditch every other recipe you’ve seen and make mine for your next batch of red velvet cupcakes? It really boils down to texture and color—the two biggest hurdles people face! This recipe is totally beginner-friendly, and it delivers that show-stopping, bakery-style look without demanding hours in the kitchen. I promise, these are so easy, you’ll wonder why you waited so long to try them. For more easy winners, check out my ultimate cupcake recipe roundup!
- It yields incredibly moist cupcake recipe results, every single time.
- It produces that iconic, vibrant red color you’re after.
- The process is nearly foolproof because we control the moisture perfectly.
Achieving That Velvety Texture Cupcakes Crave
The secret sauce here is the buttermilk, folks! When the buttermilk reacts with the vinegar and baking soda, it creates the absolute softest, most tender structure. But here’s my expert tip: you absolutely cannot overmix once you add the flour. Stop mixing the second you see the streaks disappear. Overmixing develops gluten, and gluten makes beautiful red velvet cupcakes tough instead of velvety. We want soft, not chewy!
The Secret to Vibrant red velvet cupcakes Coloring
If you’ve ever ended up with pink-ish, pale cupcakes, I know why! Liquid food coloring is mostly water, and too much of it thins out your batter, which ruins the tender crumb. For a truly vibrant red dessert that screams celebration, you have to use a good quality gel food coloring. You only need a teaspoon or so, and those concentrated pigments give you that deep, gorgeous hue without affecting the crucial balance of wet and dry ingredients in this classic red velvet recipe.
Gathering Ingredients for Classic red velvet cupcakes
Okay, let’s talk supplies! Getting these red velvet cupcakes right starts right here, with the ingredients. The quality matters, especially when we’re aiming for that famous moist cupcake recipe texture. I’ve broken down exactly what you need below, separating the magic for the cake from the beautiful topping. Pay close attention to the state of the butter—it’s key for both!
For the Moist Cupcake Batter
For the actual cake, we need that classic Southern tang, so getting the buttermilk and vinegar is non-negotiable. They work together to make these easy red velvet cupcakes tender!
- 1 1/2 cups all-purpose flour
- 1 teaspoon baking soda
- 1 teaspoon unsweetened cocoa powder
- 1/2 teaspoon salt
- 1 cup granulated sugar
- 1/2 cup unsalted butter, softened (Remember, soft, not melty!)
- 2 large eggs
- 1 teaspoon vanilla extract
- 1 cup buttermilk
- 1 tablespoon white vinegar
- 1 teaspoon gel red food coloring (I can’t stress this enough—go for the high quality gel!)
For the Tangy Cream Cheese Frosting Recipe
This is the topping everyone waits for. For the smoothest possible whipped cream cheese topping, make sure both your cream cheese and the butter listed here are at true room temperature. No lumps allowed!
- 8 ounces cream cheese, softened
- 1/2 cup unsalted butter, softened
- 3 cups powdered sugar, sifted (Sifting keeps it from getting grainy!)
- 1 teaspoon vanilla extract
- 1/4 teaspoon salt
Step-by-Step Instructions for Easy red velvet cupcakes
I broke this down into three small parts because following steps in chunks is just easier when you’re baking. This is where the magic happens! We’ll start with the batter, get them baking, and then whip up that glorious topping. Don’t panic about the alternating—it’s simpler than it sounds! Remember, every step here is designed to help you create those perfect, tender red velvet cake layers.
Preparing the Red Velvet Cake Base
First things first: Preheat your oven to 350°F (175°C) and get those paper liners into your 12-cup tin. Easy start! Next, mix your dry things—flour, baking soda, cocoa, and salt—in one bowl. In your big mixer bowl, cream that softened butter and sugar until they are fluffy and pale. Then add your eggs one by one, mixing well after each addition, followed by the vanilla. Now for the liquids: whisk your buttermilk, vinegar, and that vibrant gel coloring together well until the color is totally uniform. Here comes the crucial part for that velvety texture cupcakes crave: you need to alternate adding the dry mix and the buttermilk mix into the butter mixture. Start and end with the dry ingredients. Mix on low, just until things come together. Seriously, stop mixing as soon as the streaks vanish!
Baking and Cooling Your red velvet cupcakes
Fill those liners about two-thirds full—this gives you the perfect dome! They only need about 18 to 20 minutes at 350°F. You’ll know they are done when a toothpick comes out clean. Don’t touch them for the first five minutes after they leave the oven! That slight rest in the pan helps them firm up just enough. Then, gently move them to a wire rack to cool completely. This waiting time is torture, I know, but if you frost them warm, that beautiful cream cheese frosting recipe will melt right off!
Making the Whipped Cream Cheese Topping
While those babies are chilling out, let’s make the frosting. Beat your room-temperature cream cheese and butter until they are super smooth—we’re aiming for that light and fluffy texture here. Then, slowly add that sifted powdered sugar. After it’s all incorporated, turn the mixer up high and beat it for another minute or two until it looks airy and gorgeous. Stir in the vanilla and salt, and that’s it! Your perfect, tangy, whipped cream cheese topping is ready for piping onto your completely cool homemade red velvet treats.
Expert Tips for Bakery Style cupcakes Success
You’ve put in the work, and now you deserve those glorious bakery style cupcakes! I’ve learned a few things over the years testing this recipe that really take it from good to unbelievable. Honestly, it’s the small details that pastry chefs obsess over, and I want you to have that same success, minus the stress!
First, let’s talk color again. If you want that deep, rich red that just pops, you have to use gel dye. Liquid coloring is a texture killer! I also seriously recommend using Dutch process cocoa powder if you can find it; it adds a smoother, less acidic chocolate note that complements the red beautifully. You can see my favorite vanilla tips over on my guide for moist vanilla cupcakes, but these principles apply here too!
When making the frosting, patience during the creaming stage is key for that professional, fluffy swirl. Don’t rush beating the cream cheese and butter together until they are genuinely paddle-soft. Finally, although the recipe is quick, letting the finished, frosted cupcakes chill for about fifteen minutes before serving makes the frosting set up perfectly. It just gives that final product a cleaner look and a firmer bite!
Storage and Reheating Instructions for red velvet cupcakes
Okay, you’ve made the most amazing red velvet cupcakes, and now you have leftovers (if you’re lucky!). Since we topped these beauties with that gorgeous, homemade cream cheese frosting, we absolutely have to talk about storage. Unlike buttercream, cream cheese frosting really prefers the cold. You can’t just leave these beauties sitting on the counter for days!
My best advice is to pop them into an airtight container and keep them in the refrigerator. They should stay perfectly fine for about three to four days this way. Don’t stack them too tightly, or the frosting might smoosh! If you’re making them for a party tomorrow, chilling them overnight works great.
But here’s the real trick for flavor, especially since the cake itself is so wonderfully moist: bring them out of the fridge about 30 minutes before you plan to eat them. Nothing tastes sadder than cold cake and hard frosting! Letting them warm up slightly lets the butter in the frosting get soft again and brings out all those subtle chocolate and vanilla notes in the cake. A little patience here makes the texture divine!
Variations on the Classic red velvet recipe
Even though this classic red velvet recipe is just about perfect as it is—hello, moisture!—I always love knowing how to switch things up for different holidays or just when I’m feeling adventurous. These little tweaks are super simple, so they won’t mess up your easy red velvet cupcakes timeline at all. It’s all about adding little sparks of joy!
For an extra layer of depth in the cake itself, try adding a teaspoon of instant espresso powder when you mix your dry ingredients. I know, it sounds weird, but trust me! It doesn’t make them taste like coffee; it just deepens that subtle cocoa flavor. It transforms them into these beautifully rich, almost dark chocolatey bites, while still looking perfectly red velvet on the outside.
If you’re making these for Valentine’s Day cupcakes or maybe another big celebration, you can easily turn them into festive treats. Once the cupcakes are cooled and you’ve frosted them, just grab some festive sprinkles—I love the little red or pink nonpareils—and gently press them around the base of the frosting swirl. It looks so professional without any extra effort!
Now, for the truly decadent option! If you happen to have some of my fantastic cheesecake batter already made, you can pipe a tiny dollop of that right into the center of the cupcake well after you fill the liner two-thirds full, but *before* you bake them. That little surprise creates a creamy, baked-in pocket that feels just utterly luxurious. Just be mindful—that extra moisture might bump your baking time up by a minute or two, so keep an eye on that toothpick test!
Serving Suggestions for Your Homemade red velvet cupcakes
You’ve conquered the mixing, nailed the color, and perfected that tangy cream cheese frosting—now it’s time to serve these beauties! It’s so satisfying to watch people take that first bite. You want to pair these rich, slightly acidic red velvet cupcakes with something that cleanses the palate but still feels cozy, right? They are the true star of any dessert table.
Since the cake has that lovely hint of cocoa and the frosting is rich, a simple, slightly warm beverage often works best. My absolute favorite pairing lately isn’t a harsh coffee, but actually a homemade salted caramel latte. The hint of salt and the creamy sweetness of the caramel balance the slight tanginess of the cream cheese perfectly. It’s just an elegant combination!
If you’re serving these wonderful homemade red velvet treats alongside other desserts, keep them paired with lighter flavors. Maybe a bowl of fresh raspberries or strawberries on the side—the brightness of the berries plays really well against the deep red cake. Avoid serving them directly next to a heavy chocolate dessert, or the subtle cocoa notes in the velvet cake might get lost.
For a true Southern-style spread, consider serving them after a savory meal. They are rich enough to feel indulgent but light enough (thanks to that buttermilk!) that they don’t weigh everyone down. Honestly, these moist cupcake recipe stars rarely need any encouragement—they disappear all on their own!
Frequently Asked Questions about red velvet cupcakes
I totally get it; when you’re trying an amazing new recipe, you always have a few burning questions before you even start measuring! That’s totally normal, and I want you to feel 100% confident walking into your kitchen. I pulled some of the most common things people ask about making these easy red velvet cupcakes. If you have a question about achieving that perfect southern style cupcakes flavor, chances are it’s covered here!
Can I use liquid food coloring instead of gel for these red velvet cupcakes?
You certainly can, but I have to warn you—it’s a little risky here! The reason I push for gel food coloring is because it’s so concentrated. You get that brilliant, deep color without adding extra liquid to your batter. If you use liquid coloring, because it’s mostly water, you’d have to add way more to get the same shade, and that extra liquid thins out the batter, messing with the delicate balance we created with the buttermilk. If the gel just isn’t available, go ahead and use the liquid, but start with just barely half of what you think you need and slowly add droplets until you hit the color payoff you want. You’re aiming for vibrant, not soupy!
What makes this recipe the best red velvet cupcakes?
For me, the title of best red velvet cupcakes comes down to two things we focused on heavily! First, the buttermilk and vinegar combo is what creates that slight acidity that reacts with the baking soda, giving you that impossibly soft, tender bite that just melts in your mouth. That’s the buttermilk doing its job! Second, the creaming method. We spend solid time beating that butter and sugar until it looks pale and fluffy. Those little air bubbles we create way back at the start are what give the cake a beautiful lift and that sought-after, finely textured crumb. It’s a labor of love upfront, but wow, the pay-off!
Can I make these red velvet cupcakes ahead of time?
Yes, you absolutely can! If you want to get ahead, you can bake the cupcake base and store them completely unfrosted in an airtight container at room temperature for up to two days. They stay wonderfully moist! Just don’t frost them until you’re ready to serve, because the cream cheese frosting really doesn’t love sitting out.
If you bake them a day ahead and frost them that night, you’ll need to refrigerate them. That’s fine! Just remember my golden rule: always let the frosted cupcakes sit out on the counter for about 30 minutes before you serve them. Taking the chill off makes the frosting perfectly creamy and brings the cake flavor right back to life. You can find more storage tips on my favorite buttermilk recipe guide, as the rules are similar!
Sharing Your red velvet cupcakes Creations
Now that you’ve baked the most tender, gorgeously colored red velvet cupcakes, I want to see them! Seriously, there is no greater joy for me, Claire, than knowing someone successfully recreated one of my family-loved recipes and brought a little happiness into their home. Did you get that perfect swirl on the cream cheese frosting? Was the color vibrant enough for your special occasion, maybe even for Valentine’s Day?
Please don’t be shy! Snap a photo and tag us on social media so I can see your beautiful work. Every time I see one of your bakes, it reminds me why I started Bliss Batter—to help cooks just like you conquer those classic recipes!
And if you loved how easy and moist these turned out, please leave a rating and a quick comment right here on the page. Your feedback truly helps other beginners feel confident grabbing their mixing bowls! If you need to reach out about a specific challenge or just want to share a personal story about baking, don’t hesitate to use my contact form. Happy baking, everyone!
PrintMost Moist Red Velvet Cupcakes with Tangy Cream Cheese Frosting
Create bakery-style red velvet cupcakes that are incredibly moist and tender. This beginner-friendly recipe uses buttermilk for the best texture and is topped with a classic, tangy cream cheese frosting.
- Prep Time: 25 min
- Cook Time: 20 min
- Total Time: 45 min
- Yield: 12 servings 1x
- Category: Dessert
- Method: Baking
- Cuisine: American
- Diet: Vegetarian
Ingredients
- 1 1/2 cups all-purpose flour
- 1 teaspoon baking soda
- 1 teaspoon unsweetened cocoa powder
- 1/2 teaspoon salt
- 1 cup granulated sugar
- 1/2 cup unsalted butter, softened
- 2 large eggs
- 1 teaspoon vanilla extract
- 1 cup buttermilk
- 1 tablespoon white vinegar
- 1 teaspoon gel red food coloring (high quality recommended)
- 8 ounces cream cheese, softened
- 1/2 cup unsalted butter, softened
- 3 cups powdered sugar, sifted
- 1 teaspoon vanilla extract
- 1/4 teaspoon salt
Instructions
- Preheat your oven to 350°F (175°C). Line a 12-cup muffin tin with paper liners.
- In a medium bowl, whisk together the flour, baking soda, cocoa powder, and salt. Set this dry mixture aside.
- In a large bowl, cream together the 1/2 cup softened butter and granulated sugar until light and fluffy. Beat in the eggs one at a time, mixing well after each addition. Stir in the vanilla extract.
- In a small bowl, whisk together the buttermilk, white vinegar, and red food coloring until the color is uniform. This is your secret to a vibrant hue.
- Alternate adding the dry ingredients and the buttermilk mixture to the butter mixture, beginning and ending with the dry ingredients (three additions of dry, two of wet). Mix only until just combined; do not overmix to keep the texture velvety.
- Fill each cupcake liner about two-thirds full.
- Bake for 18 to 20 minutes, or until a toothpick inserted into the center comes out clean. Let the cupcakes cool in the pan for 5 minutes before transferring them to a wire rack to cool completely.
- To make the cream cheese frosting, beat the softened cream cheese and 1/2 cup softened butter together until smooth.
- Gradually add the sifted powdered sugar, beating until fully incorporated. Mix in the vanilla extract and salt. Beat on medium-high speed until the frosting is light and fluffy.
- Once the cupcakes are completely cool, pipe or spread the tangy cream cheese frosting on top.
Notes
- For the most vibrant red color, use a high-quality gel food coloring instead of liquid drops.
- Buttermilk reacts with the baking soda and cocoa to create the classic tender crumb. Do not skip it.
- To achieve bakery-style height, ensure your butter and cream cheese for the frosting are at true room temperature.
- Chill the finished cupcakes for 15 minutes before serving if you prefer a firmer frosting.
Nutrition
- Serving Size: 1 cupcake
- Calories: 380
- Sugar: 40g
- Sodium: 250mg
- Fat: 20g
- Saturated Fat: 12g
- Unsaturated Fat: 8g
- Trans Fat: 0.5g
- Carbohydrates: 50g
- Fiber: 1g
- Protein: 4g
- Cholesterol: 65mg