
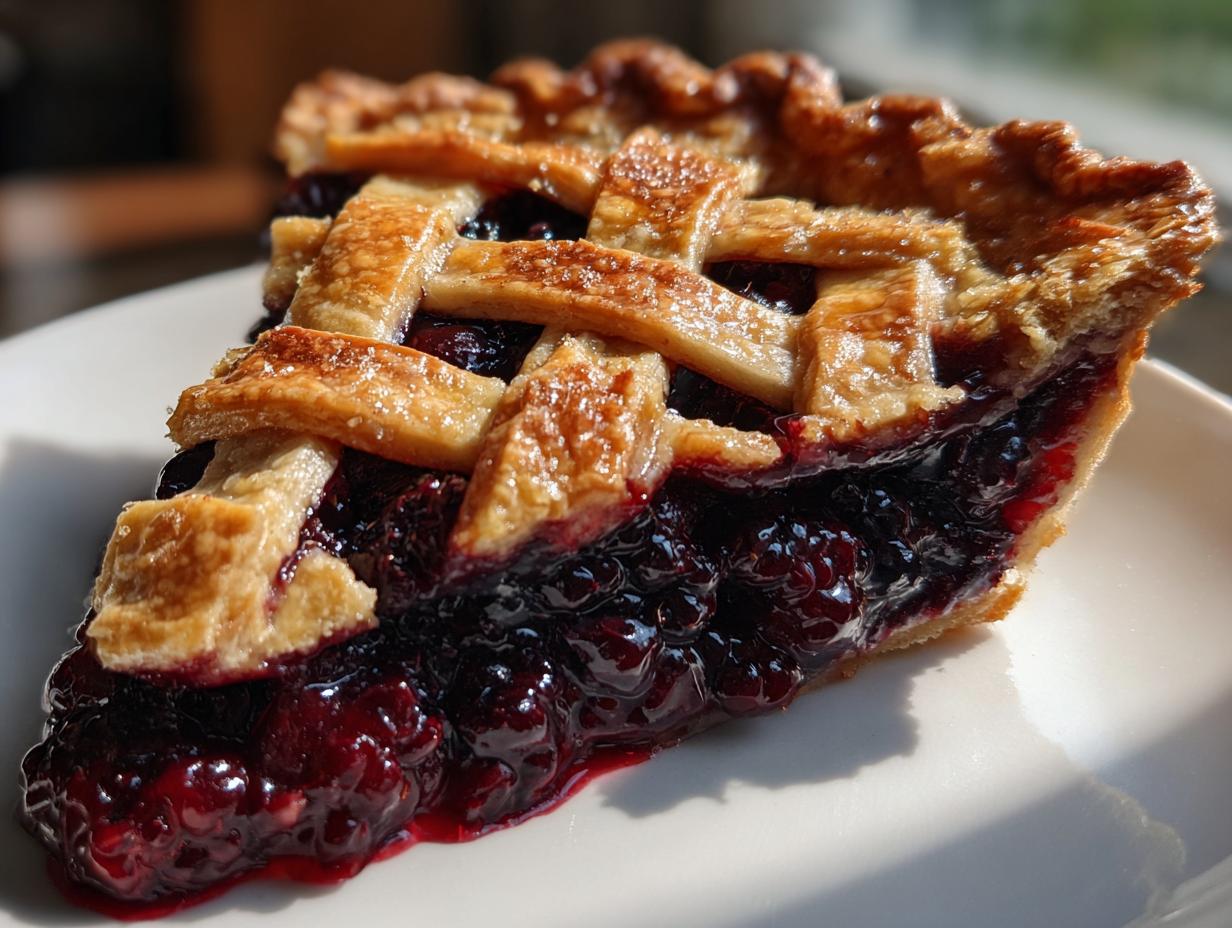
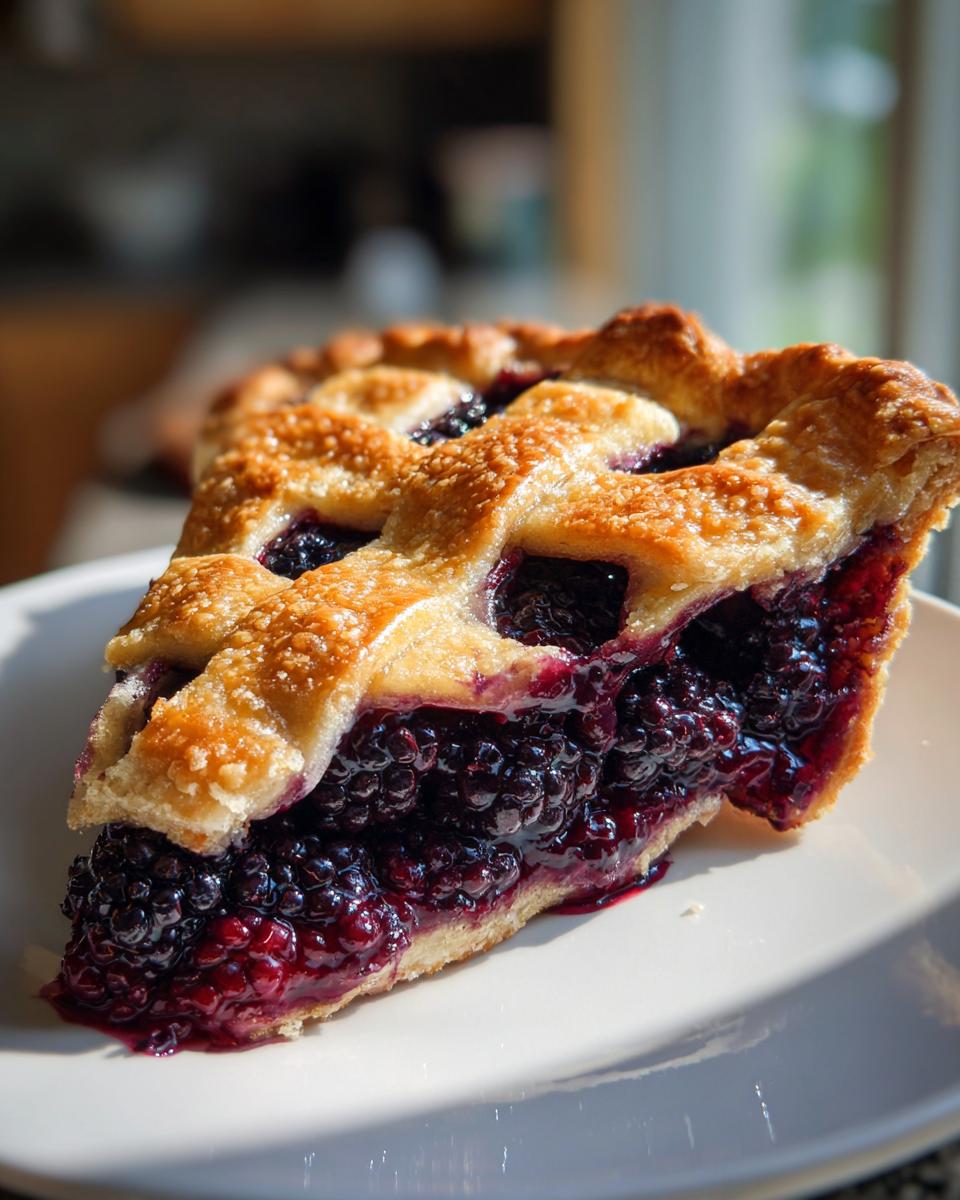
There is truly nothing that screams summer baking and pure comfort quite like a picture-perfect slice of fruit pie cooling on the counter. I’ve chased that perfect slice—the one with the buttery crust that shatters just right, holding a gorgeous, thick filling that doesn’t leak everywhere—for years. That’s why I dedicated so much time to perfecting this blackberry pie recipe. It’s not just a dessert for me; mastering this classic recipe felt like conquering a piece of baking history! I love showing everyone how to make a superior flaky pie crust tutorial because it’s the foundation of everything delicious. Trust me, by the end of this, you’ll have that foolproof crust and a juicy berry filling that absolutely refuses to be runny. This is the Homemade Blackberry Pie you’ve been looking for.
- Why This Homemade Blackberry Pie Recipe Works Every Time
- Gathering Ingredients for Your Blackberry Pie
- Step-by-Step Instructions: Making the Perfect Blackberry Pie
- Baking and Cooling Your Blackberry Pie Recipe
- Tips for Success with Fresh Blackberries and Pie Baking
- Serving Suggestions for this Classic Summer Dessert
- Storage and Reheating Instructions for Leftover Blackberry Pie
- Frequently Asked Questions about Your Blackberry Pie Recipe
- A Note on Nutrition for This American Classic Dessert
- A Note on Nutrition for This American Classic Dessert
Why This Homemade Blackberry Pie Recipe Works Every Time
If you’ve ever been burned by a beautiful-looking pie that turned out soupy or had a crust like cardboard, I know the feeling. We’ve all been there! This Blackberry Pie Recipe is different because I obsessed over fixing those exact problems. I’m sharing all my tried-and-true methods so you can confidently make a Classic Summer Dessert that truly tastes like heaven.
Here are the promises I make to you with this recipe:
- It’s the Best Blackberry Dessert because it uses real butter for unbeatable flavor and texture.
- It holds together better than any pie you’ve made before.
Achieving the Perfect Flaky Pie Crust Tutorial
This is where the magic starts, and honestly, the biggest secret behind great baking is temperature! We use an all-butter crust because there’s just no substitute for that rich flavor. The key here is keeping everything—the butter, the water, even your mixing bowl—as cold as possible. These tiny bits of cold butter steam in the oven, creating those glorious layers. That’s the heart of all my Buttery Pie Crust Secrets.
The Secret to Juicy Blackberry Filling and No Soggy Bottom Pie Hack
Running into a soggy bottom is the absolute worst feeling, right? That’s why we lean heavily on cornstarch here. It’s the undisputed champion for thickening fruit fillings beautifully. We toss the berries in just enough cornstarch to absorb those juices as they heat up, which is essential for a perfect Blackberry Pie. And don’t skip the cooling time—that’s step number two for that No Soggy Bottom Pie Hack!
If you want to see how I make the crust for my pumpkin pie, you can check out the method here, but remember, the all-butter one is my absolute favorite for juicy fruit fillings!
Gathering Ingredients for Your Blackberry Pie
Okay, now that we’ve talked about *why* this Blackberry Pie Recipe is going to be the best you’ve ever made, let’s talk about gathering our supplies! For any great baking project, especially a showstopper like this Homemade Blackberry Pie, quality ingredients make all the difference in flavor. I’ve listed everything out here precisely, so you can make sure you have everything ready before you even start mixing dough or thinking about that beautiful lattice top.
This recipe works great whether you’re using berries picked right off the bush or grabbing a bag from the freezer aisle. My favorite part is always making sure the crust ingredients are perfect because that’s where the flakiness comes from!
Ingredients for the All Butter Pie Crust
Remember, for this crust, cold isn’t just a suggestion; it’s the law! If you’re using real, high-quality, unsalted butter, you are already halfway to a success story. High-quality butter truly shines through when you’re making something simple like this dough.
- 2 1/2 cups all-purpose flour
- 1 teaspoon salt
- 1 cup (2 sticks) unsalted butter, very cold and cut into 1/2-inch cubes—I mean rock hard cold!
- 1/2 cup ice water, plus more if needed (keep the rest in the freezer right up until you add it!)
If you want to master another simple, yet phenomenal baked good, my buttermilk biscuits are here when you’re ready for another challenge!
Ingredients for How to Make Blackberry Pie Filling
This section is all about creating that rich, thick interior that tastes like pure summer sunshine. The combination of sugar and cornstarch is what saves us from soupiness!
- 6 cups fresh or frozen blackberries (If using frozen, do not thaw them! Just toss them straight in with the other ingredients.)
- 1 1/2 cups granulated sugar (Taste your berries first! If they are super sweet, you can dial this back to 1 1/4 cups.)
- 1/4 cup cornstarch (This is your security blanket for a thick filling.)
- 1 tablespoon lemon juice (This brightens up the deep berry flavor.)
- 1/2 teaspoon ground cinnamon
And don’t forget the finishing touches for that gorgeous, golden sheen: an egg beaten with a teaspoon of water for the egg wash, and a sprinkle of coarse sugar for texture on top of your Blackberry Pie!
Step-by-Step Instructions: Making the Perfect Blackberry Pie
This is where the real fun begins! If you’ve ever felt intimidated by making a pie from scratch, let me show you. We’re aiming for that beautiful, Old Fashioned Blackberry Pie look, the kind that sits proudly on the table. Remember, baking is about making mistakes feel like happy accidents. But with these steps, we’re minimizing the accidents and maximizing the glory!
We’re going to tackle the dough first because it needs that essential chill time to become beautifully flaky. If you happen to have some homemade apple butter cooling, you can check out my slow cooker recipe right here while your dough rests!
Crafting the Flaky Pie Crust Tutorial: Mixing and Chilling
Take that cold flour and salt mixture and get your butter in there. I use a pastry blender because I like the control, but honestly, using your fingertips works too! The trick is this: stop mixing when you still see pieces of butter about the size of small peas or maybe a lima bean. Seriously, those chunks are what steam open the crust layers. Don’t overwork it trying to make it look perfectly uniform!
Now, the water. Add it so slowly—like you’re trying not to wake a sleeping baby. Mix it just until the dough barely holds together when you squeeze a handful. If it’s too dry, add maybe a teaspoon more of ice water. Once it’s ready, gently pat each half into a thick disk. Wrap them up tight and send them straight to the fridge for that minimum one hour. Don’t rush this chilling step, seriously. The colder the dough, the flakier the crust!
Assembling the Berry Pie with Lattice Top
While that dough chills, mix up your filling—just gently toss those berries with the sugar, cornstarch, lemon, and cinnamon. That cornstarch, as we discussed, is your best friend for a thick filling!
Once chilled, pull out one disk and roll it into a circle about 12 inches wide. Don’t make it too thin—we want substance! Gently ease that into your 9-inch pie plate. Trim the bottom overhang to about an inch. Now, for the lattice! Cut the second disk into even strips, maybe about 3/4 inch wide. This is where you decide if you want a perfect, woven lattice, or if you’re going for a more delightful, Rustic Berry Pie look.
Weave those strips over the filling, alternating: over, under, over, under. Once woven, trim the top strips to match the bottom overhang. Pinch the top and bottom dough edges together firmly and crimp them however you like them—a simple fork press works great. Remember to brush this whole beautiful top with your egg wash and sprinkle on that coarse sugar for a lovely sparkle and crunch before it goes into the fridge one last time!
Baking and Cooling Your Blackberry Pie Recipe
Alright, our beautiful Blackberry Pie is assembled, it’s chilled, and it’s patiently waiting for its moment in the oven! This part feels dramatic because we are transforming soft dough and fruit into a golden, bubbling masterpiece. You’ll want to grab a baking sheet before you even think about sliding this pie in. Trust me on this one—even the best-sealed pie decides to weep juice when it gets hot, and that sheet will save your oven rack from a sticky, burnt mess.
We start hot! Preheat your oven to 400°F (200°C). This initial blast of heat is what shocks the butter in the crust, giving us that fantastic puff and flakiness right away. Slide the pie onto that preheated baking sheet and bake it at 400°F for about 20 minutes. Watch it closely!
Once that crust has started to get some lovely color, it’s time to lower the heat. Reduce the oven temperature down to 375°F (190°C). Now, we let it cook slowly so the filling has time to thicken properly. Continue baking for another 35 to 45 minutes. If you notice the edges of your beautiful lattice work getting dark brown too fast—and they might, because sugar loves to brown—just take some aluminum foil and loosely tent the edges. Don’t seal it tight, just enough to slow the browning.
How do you know when it’s done? You need to see the filling bubbling thickly in the center openings of your lattice. If it’s thin and runny looking, it needs more time for that cornstarch to activate. If you’re interested in making some cinnamon rolls while you wait, I shared my favorite recipe for Cinnamon Monkey Bread—though be warned, the smell might make the wait for the pie even harder!
Now, here is the hardest but most crucial instruction you will receive all day: YOU MUST LET IT COOL! I know, I know. It smells absolutely incredible, and all you want to do is slice into that warm, gooey center. But if you cut into it before it has cooled for a minimum of three to four hours, that gorgeous, set filling will run out all over your plate, making a puddle instead of a perfect slice. That cooling time is non-negotiable because it allows the cornstarch to fully set up the juices. Patience makes perfect for this Blackberry Pie Recipe. Once it’s cool, serve it up—maybe with a scoop of vanilla ice cream—and enjoy the best Homemade Blackberry Pie you’ve ever made!
Tips for Success with Fresh Blackberries and Pie Baking
I know we just tackled the baking part, but since this is an all-butter, double-crust pie—it deserves a few extra little secrets I’ve picked up over the years. When you’re dealing with fresh fruit, especially juicy ones like blackberries, you need to be mindful of temperature and timing. These little things separate a good pie from a truly spectacular one that makes everyone ask for the recipe. It’s all about respecting the ingredients, you know?
If you’ve got some cinnamon chai spice cookies cooling while your pie bakes, go grab one, but pay attention! I want your next pie to be flawless!
Here are a few quick things I always remember when making this classic:
- Keep That Dough Cold, Cold, Cold: I can’t stress this enough. If you notice your dough getting warm or sticky while you’re rolling it out for the lattice, stop immediately. Put the pieces back in the fridge for 15 minutes. Warm, greasy butter melts into the flour instead of steaming open, and that’s how you lose your flakiness.
- Don’t Thaw Frozen Berries: If you are lucky enough to use berries from the freezer, throw them in frozen! If you thaw them first, they release all their juices right into the bowl, and then you’d have to compensate with even more cornstarch, which can sometimes give the filling a slightly cloudy look. Straight from the freezer into the sugar mixture works wonders.
- Baking Sheet or Pizza Stone: Remember how I told you to put the pie on a baking sheet? If you have a pizza stone, preheat that in the oven while it warms up too! Sliding the pie onto that hot stone (still on its baking sheet, of course) helps conduct heat right up into the bottom crust. That’s another layer in our defense against the dreaded soggy bottom.
- Foil is Your Friend for Edges: Watch those crust edges closely, especially when you drop the temperature down to 375°F. If you see them turning deep golden brown before the filling is bubbling furiously, just snip a piece of foil into strips and drape them lightly over the edges. It protects the beauty you created while letting the center finish cooking through.
Remember, every time you bake, you learn something new. If something goes a little wonky, don’t fret! Maybe you’ll need an extra sprinkle of sugar next time, or maybe you’ll switch up your spice blend. If you want to try a totally different flavor pairing, I have a delicious Chai Spice Cookies recipe where we play with warm spices—you might even want to steal a bit of that cinnamon flavor for your next fruit pie!
Serving Suggestions for this Classic Summer Dessert
When your Blackberry Pie Recipe finally comes out of that long, patient cooling session, it’s time for the best part—serving it! Honestly, this pie is absolutely spectacular all on its own, warm or room temperature. It’s such a showstopper that you don’t really *need* much else, but why deny yourself a little extra indulgence?
This pie just radiates that Classic Summer Dessert feeling, doesn’t it? But if you ask me, the best way to complete this slice of berry heaven is by adding something cold and creamy to contrast that warm spice and sharp fruit.
Here are my favorite ways to serve up a slice of this Homemade Blackberry Pie:
- The Absolute Classic: You simply cannot go wrong with a big scoop of high-quality vanilla bean ice cream melting right into those juicy warm crevices. It’s pure Comfort Food Pie bliss.
- Simple but Elegant: Sometimes, just a dollop of fresh, unsweetened whipped cream does the trick. It cuts through the richness of that all-butter crust perfectly without competing with the berries.
- For the Coffee Lovers: This is a little indulgence for the adults! If you happen to be whipping up a batch of my Salted Caramel Latte, bring a cup right alongside your pie. The salty, caramelly notes are shockingly delicious next to the tart blackberries.
- A Little Extra Zing: A tiny drizzle of good quality heavy cream (straight from the carton is fine!) over a room-temperature slice highlights the sweetness without drowning the crust.
Whatever way you choose, make sure you have a good knife and plate ready. I promise you, once you slice it open, the aroma alone will have everyone gathered around waiting for their turn!
Storage and Reheating Instructions for Leftover Blackberry Pie
Oh, leftovers! If you manage to have any of this glorious Blackberry Pie Recipe left over, you need to know how to treat it right. We put a lot of love into that flaky crust, and we absolutely do not want to ruin it with improper storage. Generally speaking, if you left it on the counter for just a few hours after it cooled down completely, it’s probably fine, especially if it’s a sealed pie.
But for genuine longevity, you need cool temperatures. Think of it like leaving out butter—it tastes better when cool, not greasy!
Here’s how I handle saving slices of this wonderful creation for the next day:
- Counter Stash (Short Term): If you know you’re going to devour it within the next 12 hours, you can leave the pie loosely covered on the counter. Make sure it’s in a spot where it won’t get too warm.
- Fridge Time (Long Term): If you have more than a day’s worth of pie left, you absolutely should refrigerate it. Place the pie dish in the fridge, ideally covered loosely with plastic wrap or placed under a large cake dome. This keeps the fruit filling safely set and prevents it from breaking down too quickly.
How to Revive That Flaky Crust Texture
The challenge with refrigerating any fruit pie is that the crust soaks up fridge moisture and loses its crispness. Nobody wants a slightly limp crust on their perfect Homemade Blackberry Pie! So, reheating is essential to bring back that fresh-from-the-oven glory.
Do not stick a slice in the microwave! That will just steam-cook the crust and make it tough. We want to revive the butter, not melt it into submission.
My go-to method for reheating a slice is simple:
- Preheat your oven (or a toaster oven, which is sometimes easier!) to about 350°F (175°C).
- Place the slice directly on a small baking sheet or a piece of foil.
- Bake for about 10 to 12 minutes. You are just warming it through and letting the bottom crust dry out just enough to be crisp again.
If you’re enjoying this pie on a chilly night, you might want to pair it with something warm, like my amazing Pumpkin Beer Bread—it’s dense and comforting, a great contrast to the bright berries!
If you happen to be freezing large portions for later, make sure to wrap the wedges tightly in plastic wrap followed by a layer of foil. They freeze beautifully for up to three months. When you reheat them from frozen, just add an extra 10-15 minutes to the oven time. Enjoy those fantastic leftovers!
Frequently Asked Questions about Your Blackberry Pie Recipe
I get so many questions about this Blackberry Pie Recipe once folks start baking it, and that’s fantastic! It means you’re getting comfortable in the kitchen, and that’s what Bliss Batter is all about. I gathered the most common queries right here to make sure you’re totally confident before you even preheat the oven. Getting these little details right is what turns a simple fruit pie into an American Classic Dessert!
Can I use frozen berries in this blackberry pie filling?
Absolutely, yes! This is such a big question, especially when berries are out of season or you just bought a huge bag. The secret here when making How to Make Blackberry Pie Filling is simple: do not thaw them! If you thaw them first, they release all their water right into the bowl, and you’ll end up with almost soup instead of filling. Just measure them out frozen, toss them right into the sugar and cornstarch mixture, and go straight to assembling the pie. The oven will handle the rest! It’s a great way to use berries year-round.
What is the best sugar substitute for this easy fruit pie recipe?
That’s a great question for anyone trying to manage sugar intake while still wanting that sweet-tart flavor. I usually stick to granulated sugar because I know exactly how it interacts with the cornstarch to set up the filling perfectly. If you substitute with something like stevia or monk fruit, you might find that you need a little extra binder, as those substitutes don’t always draw the moisture out of the fruit the same way sugar does. If you try a substitute, I’d start by using just 1 cup of the substitute sugar and maybe increasing the cornstarch by one extra tablespoon. Just be aware that it might change the final texture a tiny bit, but you can still make a wonderful, Easy Fruit Pie Recipe!
How can I make a crumble topping instead of a lattice?
Oh, the Blackberry Crumble alternative! If you aren’t feeling the weaving of a lattice top, or maybe you just really love that crunchy buttery texture, a crumble is a fantastic swap. For the topping, you just mix: 1 cup of flour, 1/2 cup of packed brown sugar, 1/2 cup of cold butter cut into small pieces, and a pinch of cinnamon (you can use the same spices as the filling!). Use your fingers or a fork to cut the butter in until you get coarse, large crumbs. Scatter that mixture evenly over your filling instead of the lattice strips. It bakes up beautifully golden and crisp, and gives you a wonderful texture contrast!
I use a similar technique when I make my apple cider cocktails to get that perfect spiced rim. You can find that recipe right here if you need another delicious autumn treat to pair with your pie!
If you want to see someone else tackle a delicious version of this classic, check out this recipe from a fellow baker!
A Note on Nutrition for This American Classic Dessert
I always like to give a little snapshot of what you’re looking at nutritionally, even though when we’re deep into baking a Homemade Blackberry Pie, we’re really focusing on happiness, not macros! Remember, these numbers are just estimates, and they can change wildly depending on how much sugar you use or what kind of butter you pick. This is for sharing that beautiful American Classic Dessert with friends!
- Serving Size: 1 slice
- Calories: 410
- Sugar: 35g
- Sodium: 250mg
- Fat: 22g
- Saturated Fat: 14g
- Carbohydrates: 54g
- Protein: 5g
Baking should always feel like a treat, not a task. If you are looking for lighter ideas for drinks to have alongside your dessert, I’ve got a fantastic Hot Toddy recipe that warms you right up!
PrintClassic Homemade Blackberry Pie with Foolproof Flaky Lattice Crust

Create the perfect American classic with this recipe for homemade blackberry pie. You will learn the secrets to an all-butter, flaky double crust and how to achieve a perfectly set, juicy berry filling every time. This recipe guarantees a showstopper dessert with no soggy bottom.
- Prep Time: 45 min
- Cook Time: 65 min
- Total Time: 110 min
- Yield: 8 servings 1x
- Category: Dessert
- Method: Baking
- Cuisine: American
- Diet: Vegetarian
Ingredients
- 2 1/2 cups all-purpose flour
- 1 teaspoon salt
- 1 cup (2 sticks) unsalted butter, very cold and cut into 1/2-inch cubes
- 1/2 cup ice water, plus more if needed
- 6 cups fresh or frozen blackberries (do not thaw if frozen)
- 1 1/2 cups granulated sugar (adjust based on berry sweetness)
- 1/4 cup cornstarch (for thickening the filling)
- 1 tablespoon lemon juice
- 1/2 teaspoon ground cinnamon
- 1 large egg, beaten with 1 teaspoon water (for egg wash)
- 1 tablespoon coarse sugar (for sprinkling)
Instructions
- Prepare the Flaky Pie Crust: In a large bowl, whisk together the flour and salt. Cut in the cold butter using a pastry blender or your fingertips until the mixture resembles coarse crumbs with some pea-sized pieces of butter remaining.
- Gradually add the ice water, one tablespoon at a time, mixing gently until the dough just comes together. Do not overmix. Divide the dough in half, flatten each half into a disk, wrap in plastic wrap, and chill for at least 1 hour.
- Prepare the Filling: In a separate bowl, gently combine the blackberries, granulated sugar, cornstarch, lemon juice, and cinnamon. Toss lightly until the berries are evenly coated. The cornstarch is your key to avoiding a runny filling.
- Assemble the Bottom Crust: On a lightly floured surface, roll out one disk of dough into a 12-inch circle. Carefully transfer the dough to a 9-inch pie plate. Trim the edges, leaving a 1-inch overhang. Place the pie plate in the refrigerator while you prepare the top crust.
- Assemble the Top Crust (Lattice): Roll out the second disk of dough. Cut the dough into even strips, about 3/4 inch wide. Weave the strips over the filling in a lattice pattern. Trim the strips and crimp the top and bottom crust edges together to seal.
- Chill and Bake: Brush the lattice top evenly with the egg wash and sprinkle with coarse sugar. Chill the assembled pie for 15 minutes before baking. Preheat your oven to 400°F (200°C).
- Bake the Pie: Place the pie on a baking sheet (to catch any drips). Bake at 400°F for 20 minutes. Reduce the oven temperature to 375°F (190°C) and continue baking for another 35 to 45 minutes, or until the crust is golden brown and the filling is bubbling thickly. If the edges brown too quickly, cover them loosely with foil.
- Cool Completely: This step is crucial for a set filling. Let the blackberry pie cool on a wire rack for at least 3 to 4 hours before slicing. This allows the cornstarch to fully set the juices.
Notes
- For the flakiest crust, keep your butter and water as cold as possible. Do not let the butter melt.
- If you use frozen berries, do not thaw them first; add them directly to the filling mixture.
- Serve this classic summer dessert warm with a scoop of vanilla ice cream for the ultimate comfort food experience.
Nutrition
- Serving Size: 1 slice
- Calories: 410
- Sugar: 35g
- Sodium: 250mg
- Fat: 22g
- Saturated Fat: 14g
- Unsaturated Fat: 8g
- Trans Fat: 0.5g
- Carbohydrates: 54g
- Fiber: 4g
- Protein: 5g
- Cholesterol: 55mg