
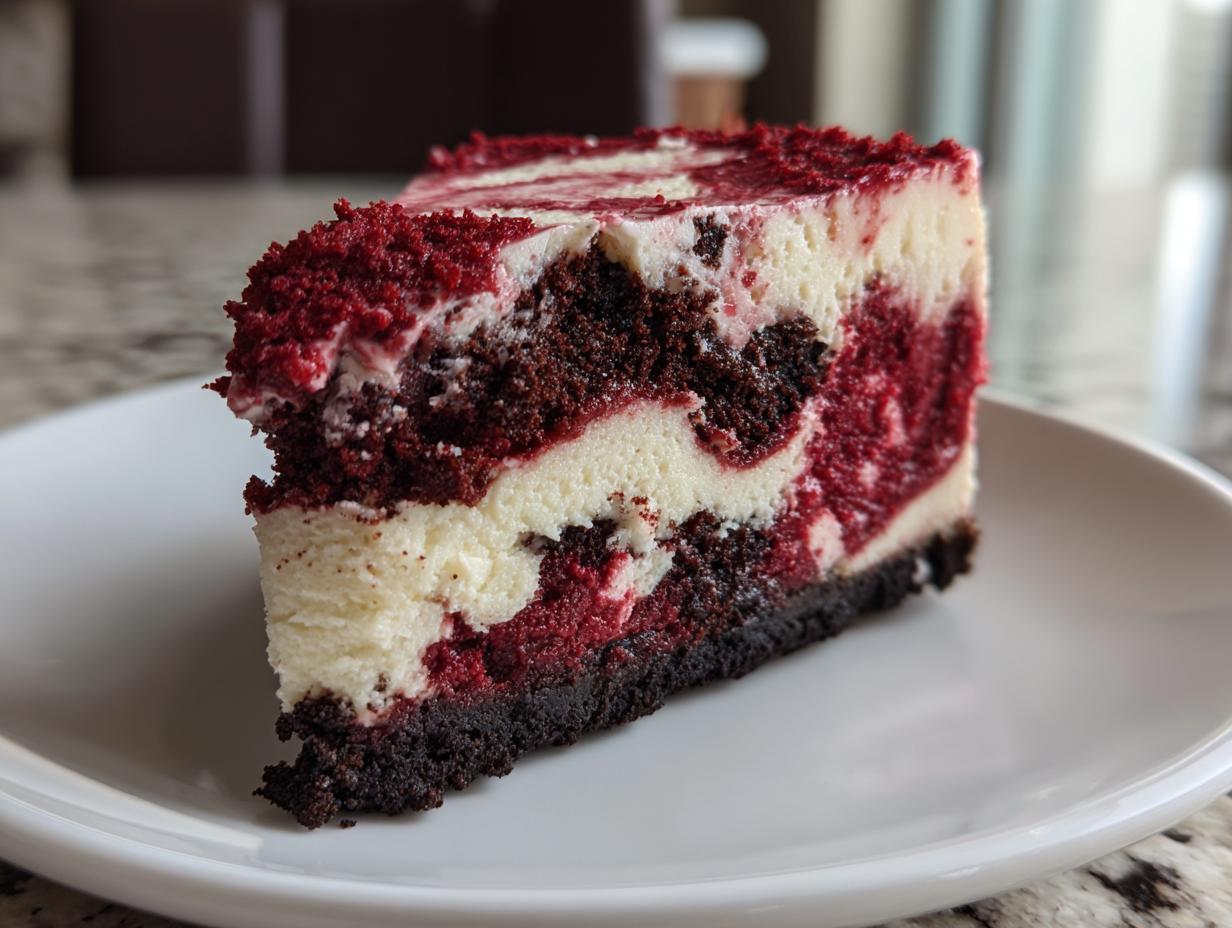
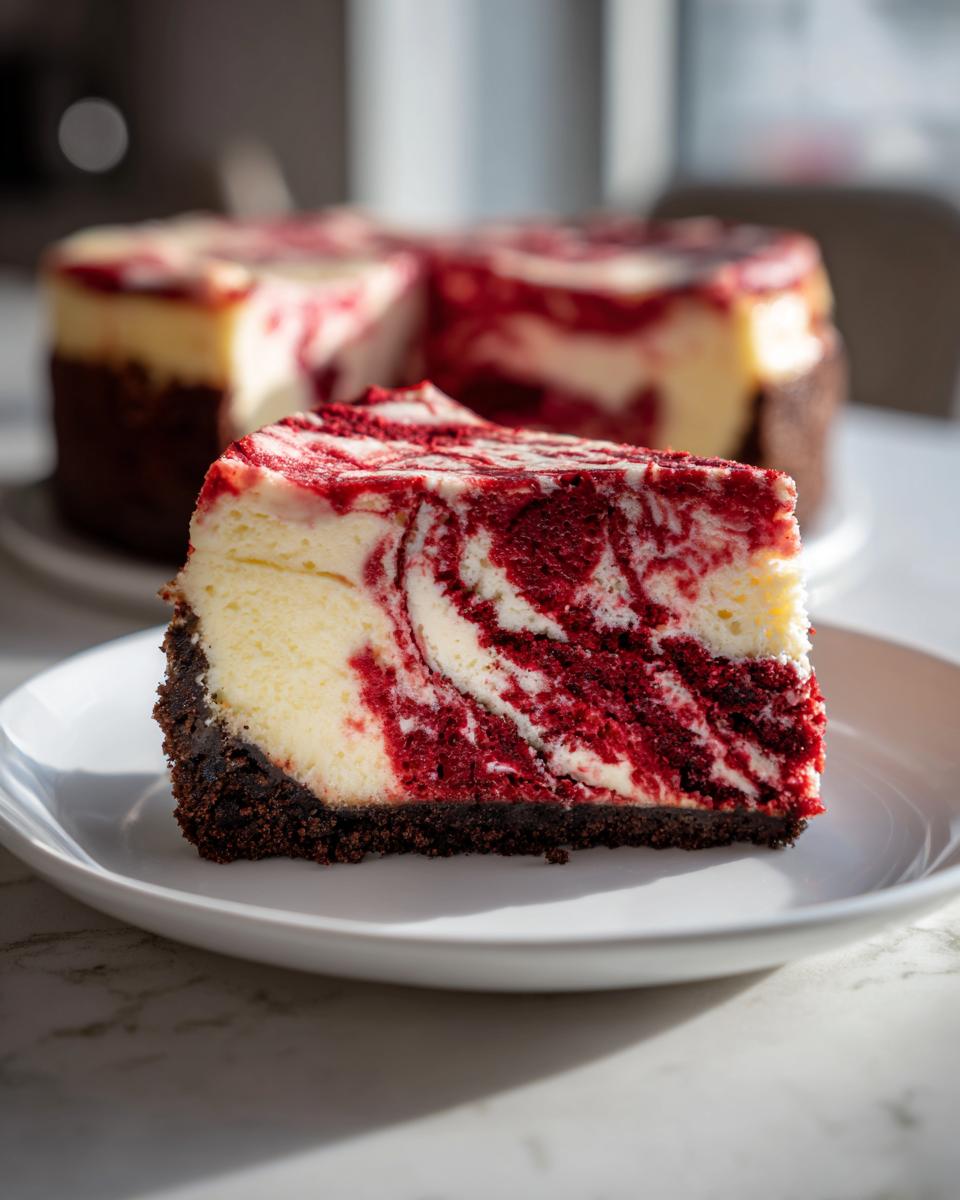
When I think about baking something that just screams ‘special occasion,’ it almost always involves a layer of impossibly rich cream cheese, and that’s why I know you need this recipe today: the Ultimate Creamy Red Velvet Cheesecake with Oreo Crust. Seriously, creating the best red velvet cheesecake recipe isn’t just about chocolate and buttermilk; it’s about creating magic. If you want to know more about my baking philosophy, check out my story here!
Here at Bliss Batter, my whole goal is getting you to feel that rush of joy when you pull something truly impressive out of your oven. Planning big parties used to stress me out, but baking became my peace, and sharing these foolproof, showstopping creations is what I live for. This layered beauty is proof you can make a gourmet cheesecake at home that will absolutely wow everyone!
- Why This is the Best Red Velvet Cheesecake Recipe You Will Ever Make
- Gathering Ingredients for Your Ultimate Red Velvet Cheesecake
- Step-by-Step Guide: How to Make Red Velvet Cheesecake
- Tips for Success Making Your Red Velvet Cheesecake
- Variations on the Classic Red Velvet Cheesecake
- Serving Suggestions for Your Festive Red Velvet Cheesecake
- Storage and Reheating Instructions for Red Velvet Cheesecake
- Frequently Asked Questions About Red Velvet Cheesecake
- Share Your Showstopping Red Velvet Cheesecake Creations
Why This is the Best Red Velvet Cheesecake Recipe You Will Ever Make
I’ve tested so many variations over the years, trying to get that perfect balance of tart cheesecake against the deep cocoa notes of red velvet. Trust me, this recipe is *it*. It stands out because it’s the ultimate showstopper. You get that gorgeous, deep red color, a rich Oreo crust that adds amazing texture, and the filling is just impossibly creamy. If you’re looking for the very best red velvet cheesecake recipe that tastes like it came straight from a bakery, you’ve found your winner!
This specific combination of layers provides that creamy cheesecake dessert experience everyone dreams about. We perfected the ratios of sour cream to eggs through a ton of messy trial runs so you don’t have to! If you loved my deep dive on the classic New York style, you’ll appreciate the testing that went into making this creamy cheesecake dessert perfect for the holidays.
Achieving True Creaminess in Your Red Velvet Cheesecake
Okay, the number one secret to that ultra-creamy texture you crave? Ingredients must be fully room temperature! Get your cream cheese, eggs, and sour cream out at least an hour before you start mixing. Also, when you’re adding the eggs into that cheesecake base, beat them in one at a time, and stop mixing the second they disappear. Overmixing develops air pockets, and those air pockets lead to cracks, not creaminess. You want smooth, not fluffy!
Gathering Ingredients for Your Ultimate Red Velvet Cheesecake
Alright, let’s talk supply run! Making a showstopper like this means we need to be precise with our ingredients, but don’t worry, most of this stuff is pantry-friendly. We’re breaking this down into four simple groups so you can shop smart. This decadent layered dessert relies on perfectly prepped items, so make sure you check the temperature requirements before you even turn on the mixer!
If you want to nail the flavor profile, make sure you have fresh items ready. This recipe is based on rigorous testing of every component to ensure that gourmet cheesecake experience you are looking for. For more tips on ensuring deliciousness in every bake, you can check out my guide on the best chocolate chip cookies!
Here’s what you need:
- For the Oreo Crust: 1 1/2 cups crushed Oreo cookies and 1/4 cup unsalted butter, melted.
- For the Cheesecake Filling: 24 ounces cream cheese (softened!), 1 1/2 cups granulated sugar, 1/4 cup all-purpose flour, 1 teaspoon vanilla extract, 1/2 teaspoon salt, 4 large eggs (room temp!), 1 cup sour cream (room temp!), 1 tablespoon white vinegar, and 1 teaspoon red food coloring (gel preferred!).
- For the Red Velvet Batter Swirl: 1 tablespoon unsweetened cocoa powder, 1 teaspoon baking soda, 1/2 cup buttermilk, 1/2 cup vegetable oil, 1 teaspoon white vinegar, 1 teaspoon vanilla extract, 1 teaspoon red food coloring, 2 tablespoons all-purpose flour, and 1 large egg.
- For the Topping: 1/2 cup powdered sugar and 2 tablespoons heavy cream.
Ingredient Notes and Substitution Guidance
A quick word on color: If you can grab a gel food coloring, please do! It gives you that intensely rich, vibrant red velvet color without adding excess liquid, which could mess with our perfect cheesecake ratios. And yes, that Oreo crust means whole cookies—crumbs *and* cream filling included! Don’t waste time scraping that filling out. Also, for the red velvet part, make sure you are using good quality, unsweetened cocoa powder; it really deepens that classic, slightly bitter chocolate flavor that balances the sweetness here.
—
Step-by-Step Guide: How to Make Red Velvet Cheesecake
This is where the magic happens! We are layering, swirling, and bathing this beauty to perfection. Don’t let the number of steps scare you; it just means we are being very intentional about creating a showstopping dessert tutorial. Remember that slow and steady wins this race, especially when it comes to baking delicate cheesecakes!
- First things first: Preheat your oven to 350°F (175°C). You need to wrap the outside of your 9-inch springform pan very tightly with heavy-duty aluminum foil. I usually do two or three layers just to be safe—we want zero water leaks!
- Time for the crust: Mix those Oreo crumbs and melted butter really well. Press that mixture firmly and evenly into the bottom of your foil-wrapped pan. Pop that in the oven for just 10 minutes. Let it cool down a little while you handle the main event.
- Now, seriously drop that heat down to 325°F (160°C). This is crucial for a good bake.
- Next, we make the main cheesecake layer! Beat the softened cream cheese, sugar, flour, vanilla, salt, and your red food coloring until it’s creamy smooth. Then, introduce your eggs one by one—mix just until combined after each egg. Finally, gently mix in the sour cream and vinegar. Remember what I said? Don’t overmix this!
- In a separate bowl, we pull together the red velvet batter. Whisk the cocoa powder, baking soda, buttermilk, oil, vinegar, vanilla, *more* red coloring, flour, and the last egg. Whisk it until it’s just combined. It’ll look a little different from the main layer, and that’s perfect!
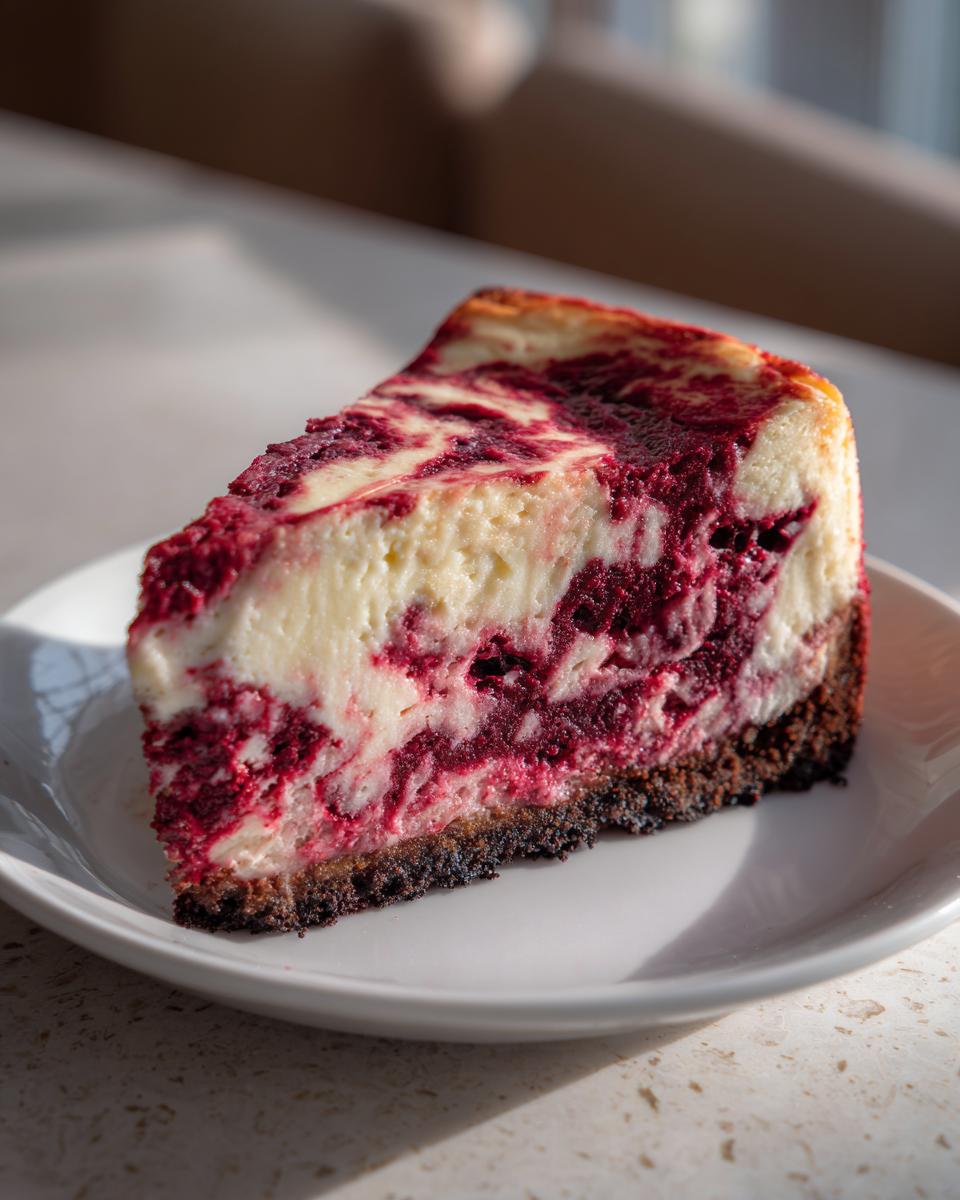
- Time to assemble! Pour about half of the cheesecake batter over that cooled crust. Then, gently spoon about half of the red velvet batter right over the top. Repeat the process with the remaining batters, alternating them to start that swirl effect. Then, take a knife and gently run it through the layers once or twice to marry those colors slightly. This is how we get that amazing red velvet cake and cheesecake combination!
- Get ready for the water bath, which is key to a perfectly creamy cheesecake dessert. Place your foil-wrapped springform pan inside a larger roasting pan *before* you add the water! Carefully pour hot water into the roasting pan until it comes about halfway up the sides of the springform pan.
- Bake this beauty for about 60 to 75 minutes. You’re looking for the edges to be set firm, but the very center should still have a tiny wiggle to it—like Jell-O!
- Here’s the secret to zero cracks: Turn your oven off completely! Prop the oven door open just a crack—maybe slide a wooden spoon in there—and leave the cheesecake inside the cooling oven for a full hour. This gradual cool-down process is non-negotiable for a crack-free, impressive homemade baked good!
- Finally, take it out of the water bath and pull off the foil. Let it cool completely on a rack (yes, still messy, still beautiful). Then, that final, non-negotiable step: chill it in the fridge for at least 6 hours, but honestly, overnight is when this red velvet cheesecake truly shines.
- When you’re ready to serve, mix up that topping until it’s fluffy and spread it gently over the top. You can find the recipe for the Ultimate Creamy Red Velvet Cheesecake steps right here!
Preparing the Oreo Crust and Prepping the Pan
Remember that foil we wrapped around the outside of the pan? That’s because cheesecakes demand a water bath—or *bain-marie*—to bake evenly without drying out or cracking. The steam from the hot water surrounding the pan keeps the temperature gentle and consistent around the edges, which is what guarantees that smooth texture you’re after. When you place the foil-wrapped springform into the roasting pan, make sure you have boiling hot water ready to pour in, as that helps the environment heat up quickly in the oven. It’s messy, but totally worth the fuss!
Assembling the Red Velvet Cheesecake Layers and Swirl
I know it can be tempting, but please, do not over-swirl! When you alternate pouring the two batters—the main cheesecake batter and the deeper red velvet component—you are creating visual drama naturally. If you grab a knife and mix it around eight or nine times, you’ll just end up with a brownish-pink mess. We want distinct layers that just barely kiss each other. Think gentle figure-eights when you swirl; this helps keep that beautiful color distinction that makes this such a showstopper dessert for parties.
Baking and Cooling for a Crack-Free Red Velvet Cheesecake
This is my biggest piece of advice for making any creamy cheesecake dessert: respect the cooling process! Taking a piping hot cheesecake straight from a 325° oven into the cool air of your kitchen is a recipe for disaster (hello, huge crack!). That’s why we turn the oven off and let it sit inside for an hour. The drastic temperature change causes the structure to seize up too fast. By lowering the heat slowly, you allow the proteins and fats to set gently. When you finally take it out, let it finish cooling on the counter before you even think about covering and chilling it. Patience here means a flawless presentation!
Tips for Success Making Your Red Velvet Cheesecake
I want you to feel so confident serving this—it really is one of those impressive homemade baked goods that tastes better than anything store-bought. My notes section in the recipe card is full of years of trial and error, so stick to them! Always use room temperature ingredients for the filling; if your cream cheese is cold, you’ll end up with lumps no matter how long you beat it for. That is the #1 reason folks think they can’t make a perfect cheesecake.
Also, remember to be gentle! We want richness, not airiness. Overbeating the batter—especially once those eggs go in—introduces too much air, and that air escapes during baking, leading to sinking or cracking. Keep your mixer speed low during the mixing phases, and you’ll be rewarded with a dense, velvety texture. Don’t forget to check out my tips for pumpkin cheesecake success too, because those rules about temp and slow cooling apply there as well!
Variations on the Classic Red Velvet Cheesecake
While this standard recipe is my absolute favorite, and maybe the best ever cheesecake filling formula I’ve landed on, I know you creative bakers love to twist things up! You can absolutely ditch the Oreo crust if you prefer. Sometimes I use a simple graham cracker crust, or even crushed shortbread cookies if I’m feeling fancy. If you’re craving an alternate texture, look into making a no bake red velvet cheesecake adaptation by swapping the eggs/baking soda for gelatin and whipping cream topping—though I have to say, the baked version is far superior for that decadent layered dessert feel.
We already put a little red velvet batter into the main cheesecake layer for a swirl, but if you want even *more* cake flavor, try making this as a full red velvet cake and cheesecake combination by baking a thin round of red velvet cake as the base instead of the crust. That’s definitely for a day when you have extra time, but if you try it, tag me! If you want to see another incredible but different baked treat, I share all my secrets for salted caramel brownies, which are surprisingly easy.
Here’s a fun little twist: If you want to amplify that swirl, reserve about a quarter cup of plain cheesecake batter and mix it with a few drops of white vinegar and a tablespoon of milk. Then, pour that over the top *after* you’ve done the main swirl and run the knife gently one last time. This creates little pockets of bright white that really make the red pop, just like you see in some of those gorgeous photos over at bakery style cheesecake recipes!
Serving Suggestions for Your Festive Red Velvet Cheesecake
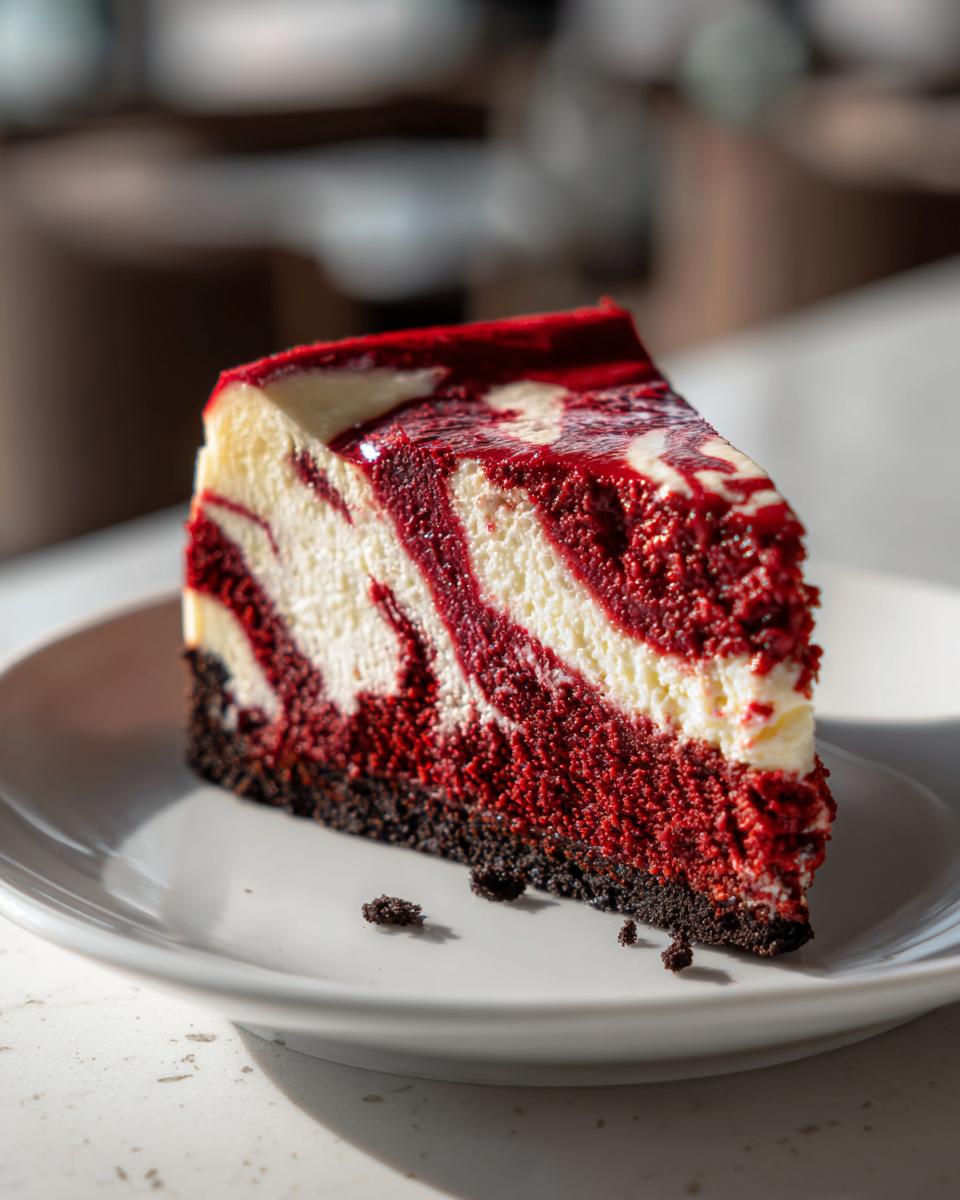
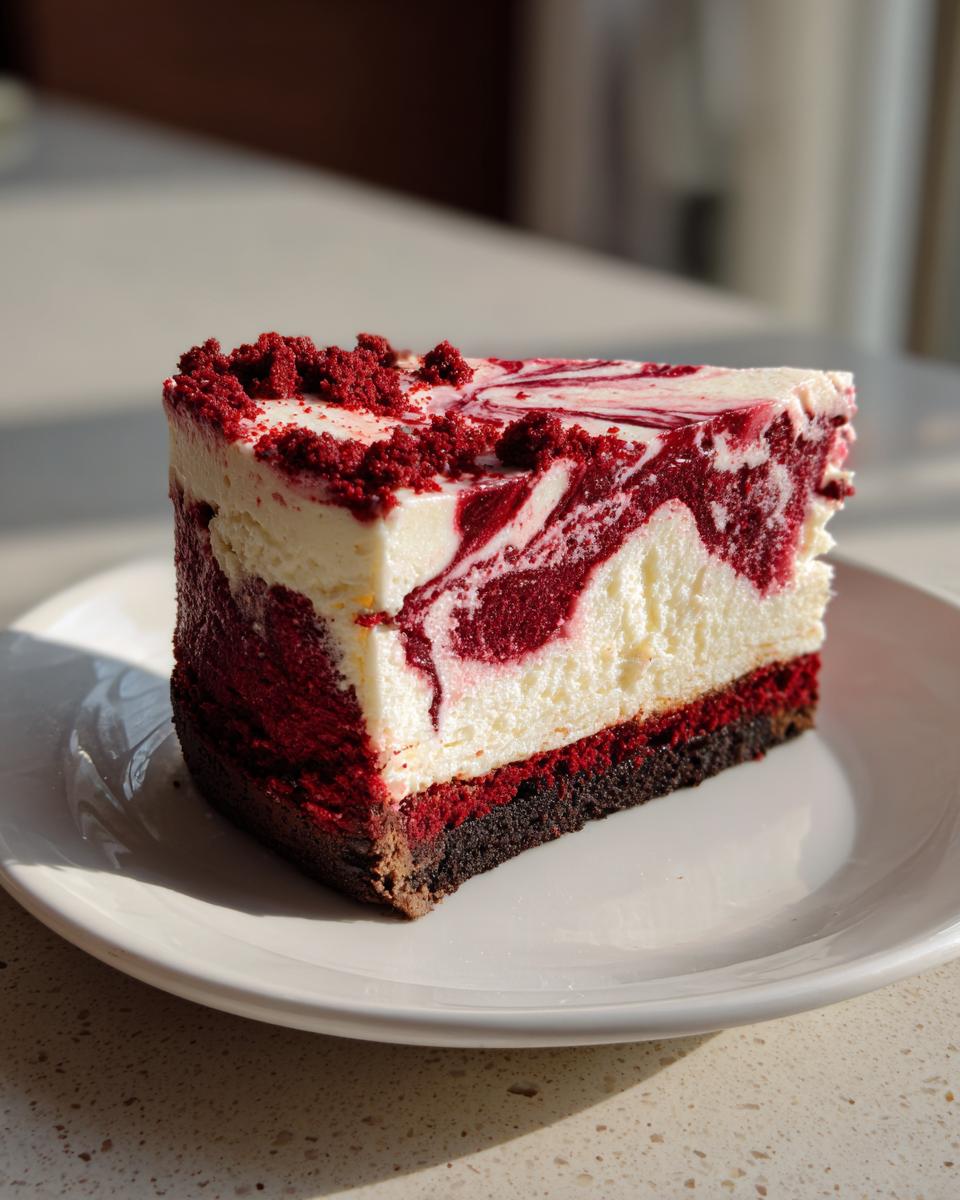
This dessert is already a star, so it doesn’t need much dressing up, which is great when you’re hosting a lot of people! Since this is such a beautiful festive dessert for parties, keep the garnish simple to let that color pop. My go-to is just the light dusting of powdered sugar mixed with heavy cream for that soft, cloud-like topping we prepared.
For holidays—especially Christmas or Valentine’s Day—I love to arrange thin slivers of dark chocolate around the edge. The bitterness of the dark chocolate plays so nicely against the sweet, creamy filling. It pairs wonderfully with coffee, of course, but if you are looking for a contrasting light sip, try serving it alongside a tart, sparkling drink, like my favorite apple cider cocktail. It cuts through the richness perfectly!
Storage and Reheating Instructions for Red Velvet Cheesecake
The great news is that after all that hard work making a truly creamy cheesecake dessert, it keeps beautifully! Once set in the fridge, wrap the entire cheesecake tightly—plastic wrap, then aluminum foil—and it will last safely for about 4 to 5 days. Chilling deepens the flavor of the red velvet cheesecake, so don’t rush the refrigeration time!
Can you freeze it? Absolutely! If you need to prep ahead for a big event, freeze it whole (unfrosted, of course). Just ensure it’s wrapped incredibly well to protect it from freezer burn. Thaw it slowly in the refrigerator overnight. Never try to speed up thawing a cheesecake in the microwave; that will totally ruin the texture we worked so hard to achieve. This is one of those glorious treats that’s even better on day two, just like the best cinnamon monkey bread!
Frequently Asked Questions About Red Velvet Cheesecake
I know new bakers often have questions when tackling something this impressive, and I totally get it! We want every bake to be a success, especially when it involves this much effort for a truly decadent layered dessert. I’ve gathered the most common worries I hear from folks attempting this gorgeous bake.
Can I make this a Red Velvet Cheesecake without an Oreo crust?
Oh, absolutely you can! The Oreo crust is just my favorite way to get that perfect salty-sweet crunch that contrasts the filling so nicely, but it’s not mandatory! If Oreos aren’t your thing, you can easily make an amazing crust using plain graham crackers—just measure out about 1 3/4 cups of crumbs and use the same amount of melted butter. Vanilla wafer crumbs also work wonderfully if you want something a little lighter. It’s all about making this recipe your own!
How do I get the vibrant red color in my red velvet cheesecake?
This is a common question, and the answer is color concentration! Don’t rely on those little bottles of liquid food coloring; they just add too much water to your carefully balanced batter. You really need to invest in a good quality *gel* food coloring. Gel colors are super concentrated, so a small amount gives you that jaw-dropping, deep red hue without diluting your batter. Also, make sure the small bit of cocoa powder you use in the red velvet portion is definitely unsweetened, as that helps the red color stand out more vibrantly. If you are looking for more tips on how to make cheesecake at home with great results, check out this resource!
What is the best way to slice this decadent layered dessert cleanly?
This is the moment of truth after all that chilling time! You don’t want to ruin the presentation by having the filling drag or smear when you cut it. My go-to method for a clean slice is the hot-and-dry knife trick. Grab a tall glass of very hot water, dip your sharpest knife blade in until it’s steaming, wipe it completely dry, and then make one smooth cut. Wipe the knife clean again and reheat it in the water before the next slice. Do this every single time, and you’ll get perfect wedges every time. For another fantastic recipe idea, check out these tips for amazing results over at baking guides!
I hope those answers help you jump into baking this weekend! If something else pops up, feel free to browse my posts on easy weeknight dinners for totally different inspiration, and don’t hesitate to reach out if you have more questions!
Share Your Showstopping Red Velvet Cheesecake Creations
Now that you’ve braved the water bath and chilled your masterpiece, I just have to see it! Sharing your success is honestly the best part of my job. If you loved making this red velvet cheesecake, seriously, give the recipe a five-star rating—it helps other bakers find it, too! Leave a comment telling me how your swirls turned out or which holiday you served it for. You can always reach out directly on my contact page if you have any last-minute questions!
Step-by-Step Guide: How to Make Red Velvet Cheesecake
This is where the magic happens! We are layering, swirling, and bathing this beauty to perfection. Don’t let the number of steps scare you; it just means we are being very intentional about creating a showstopping dessert tutorial. Remember that slow and steady wins this race, especially when it comes to baking delicate cheesecakes!
- First things first: Preheat your oven to 350°F (175°C). You need to wrap the outside of your 9-inch springform pan very tightly with heavy-duty aluminum foil. I usually do two or three layers just to be safe—we want zero water leaks!
- Time for the crust: Mix those Oreo crumbs and melted butter really well. Press that mixture firmly and evenly into the bottom of your foil-wrapped pan. Pop that in the oven for just 10 minutes. Let it cool down a little while you handle the main event.
- Now, seriously drop that heat down to 325°F (160°C). This is crucial for a good bake.
- Next, we make the main cheesecake layer! Beat the softened cream cheese, sugar, flour, vanilla, salt, and your red food coloring until it’s creamy smooth. Then, introduce your eggs one by one—mix just until combined after each egg. Finally, gently mix in the sour cream and vinegar. Remember what I said? Don’t overmix this!
- In a separate bowl, we pull together the red velvet batter. Whisk the cocoa powder, baking soda, buttermilk, oil, vinegar, vanilla, *more* red coloring, flour, and the last egg. Whisk it until it’s just combined. It’ll look a little different from the main layer, and that’s perfect!
- Time to assemble! Pour about half of the cheesecake batter over that cooled crust. Then, gently spoon about half of the red velvet batter right over the top. Repeat the process with the remaining batters, alternating them to start that swirl effect. Then, take a knife and gently run it through the layers once or twice to marry those colors slightly. This is how we get that amazing red velvet cake and cheesecake combination!
- Get ready for the water bath, which is key to a perfectly creamy cheesecake dessert. Place your foil-wrapped springform pan inside a larger roasting pan *before* you add the water! Carefully pour hot water into the roasting pan until it comes about halfway up the sides of the springform pan.
- Bake this beauty for about 60 to 75 minutes. You’re looking for the edges to be set firm, but the very center should still have a slight jiggle to it—like Jell-O!
- Here’s the secret to zero cracks: Turn your oven off completely! Prop the oven door open just a crack—maybe slide a wooden spoon in there—and leave the cheesecake inside the cooling oven for a full hour. This gradual cool-down process is non-negotiable for a crack-free, impressive homemade baked good! If you want more tips on rich fillings, check out my guide on creamy baked cheesecake with crust.
- Finally, take it out of the water bath and pull off the foil. Let it cool completely on a rack (yes, still messy, still beautiful). Then, that final, non-negotiable step: chill it in the fridge for at least 6 hours, but honestly, overnight is when this red velvet cheesecake truly shines.
- When you’re ready to serve, mix up that topping until it’s fluffy and spread it gently over the top. You can find the recipe for the Ultimate Creamy Red Velvet Cheesecake steps right here!
Preparing the Oreo Crust and Prepping the Pan
Remember that foil we wrapped around the outside of the pan? That’s because cheesecakes demand a water bath—or *bain-marie*—to bake evenly without drying out or cracking. The steam from the hot water surrounding the pan keeps the temperature gentle and consistent around the edges, which is what guarantees that smooth texture you’re after. When you place the foil-wrapped springform into the roasting pan, make sure you have boiling hot water ready to pour in, as that helps the environment heat up quickly in the oven. It’s messy, but totally worth the fuss!
Assembling the Red Velvet Cheesecake Layers and Swirl
I know it can be tempting, but please, do not over-swirl! When you alternate pouring the two batters—the main cheesecake batter and the deeper red velvet component—you are creating visual drama naturally. If you grab a knife and mix it around eight or nine times, you’ll just end up with a brownish-pink mess. We want distinct layers that just barely kiss each other. Think gentle figure-eights when you swirl; this helps keep that beautiful color distinction that makes this such a showstopper dessert for parties.
Baking and Cooling for a Crack-Free Red Velvet Cheesecake
This is my biggest piece of advice for making any creamy cheesecake dessert: respect the cooling process! Taking a piping hot cheesecake straight from a 325° oven into the cool air of your kitchen is a recipe for disaster (hello, huge crack!). That’s why we turn the oven off and let it sit inside for an hour. The drastic temperature change causes the structure to seize up too fast. By lowering the heat slowly, you allow the proteins and fats to set gently. When you finally take it out, let it finish cooling on the counter before you even think about covering and chilling it. Patience here means a flawless presentation!
Tips for Success Making Your Red Velvet Cheesecake
I want you to feel so confident serving this—it really is one of those impressive homemade baked goods that tastes better than anything store-bought. My notes section in the recipe card is full of years of trial and error, so stick to them! Always use room temperature ingredients for the filling; if your cream cheese is cold, you’ll end up with lumps no matter how long you beat it for. That is the #1 reason folks think they can’t make a perfect cheesecake.
Also, remember to be gentle! We want richness, not airiness. Overbeating the batter—especially once those eggs go in—introduces too much air, and that air escapes during baking, leading to sinking or cracking. Keep your mixer speed low during the mixing phases, and you’ll be rewarded with a dense, velvety texture. Don’t forget to check out my tips for pumpkin cheesecake success too, because those rules about temp and slow cooling apply there as well!
Variations on the Classic Red Velvet Cheesecake
While this standard recipe is my absolute favorite, and maybe the best ever cheesecake filling formula I’ve landed on, I know you creative bakers love to twist things up! You can absolutely ditch the Oreo crust if you prefer. Sometimes I use a simple graham cracker crust, or even crushed shortbread cookies if I’m feeling fancy. If you’re craving an alternate texture, look into making a no bake red velvet cheesecake adaptation by swapping the eggs/baking soda for gelatin and whipping cream topping—though I have to say, the baked version is far superior for that decadent layered dessert feel.
We already put a little red velvet batter into the main cheesecake layer for a swirl, but if you want even *more* cake flavor, try making this as a full red velvet cake and cheesecake combination by baking a thin round of red velvet cake as the base instead of the crust. That’s definitely for a day when you have extra time, but if you try it, tag me! If you want to see another incredible but different baked treat, I share all my secrets for salted caramel brownies, which are surprisingly easy.
Here’s a fun little twist: If you want to amplify that swirl, reserve about a quarter cup of plain cheesecake batter and mix it with a few drops of white vinegar and a tablespoon of milk. Then, pour that over the top *after* you’ve done the main swirl and run the knife gently one last time. This creates little pockets of bright white that really make the red pop, just like you see in some of those gorgeous photos over at bakery style cheesecake recipes!
Serving Suggestions for Your Festive Red Velvet Cheesecake
This dessert is already a star, so it doesn’t need much dressing up, which is great when you’re hosting a lot of people! Since this is such a beautiful festive dessert for parties, keep the garnish simple to let that color pop. My go-to is just the light dusting of powdered sugar mixed with heavy cream for that soft, cloud-like topping we prepared.
For holidays—especially Christmas or Valentine’s Day—I love to arrange thin slivers of dark chocolate around the edge. The bitterness of the dark chocolate plays so nicely against the sweet, creamy filling. It pairs wonderfully with coffee, of course, but if you are looking for a contrasting light sip, try serving it alongside a tart, sparkling drink, like my favorite apple cider cocktail. It cuts through the richness perfectly!
Storage and Reheating Instructions for Red Velvet Cheesecake
The great news is that after all that hard work making a truly creamy cheesecake dessert, it keeps beautifully! Once set in the fridge, wrap the entire cheesecake tightly—plastic wrap, then aluminum foil—and it will last safely for about 4 to 5 days. Chilling deepens the flavor of the red velvet cheesecake, so don’t rush the refrigeration time!
Can you freeze it? Absolutely! If you need to prep ahead for a big event, freeze it whole (unfrosted, of course). Just ensure it’s wrapped incredibly well to protect it from freezer burn. Thaw it slowly in the refrigerator overnight. Never try to speed up thawing a cheesecake in the microwave; that will totally ruin the texture we worked so hard to achieve. This is one of those glorious treats that’s even better on day two, just like the best cinnamon monkey bread!
Frequently Asked Questions About Red Velvet Cheesecake
I know new bakers often have questions when tackling something this impressive, and I totally get it! We want every bake to be a success, especially when it involves this much effort for a truly decadent layered dessert. I’ve gathered the most common worries I hear from folks attempting this gorgeous bake.
Can I make this a Red Velvet Cheesecake without an Oreo crust?
Oh, absolutely you can! The Oreo crust is just my favorite way to get that perfect salty-sweet crunch that contrasts the filling so nicely, but it’s not mandatory! If Oreos aren’t your thing, you can easily make an amazing crust using plain graham crackers—just measure out about 1 3/4 cups of crumbs and use the same amount of melted butter. Vanilla wafer crumbs also work wonderfully if you want something a little lighter. It’s all about making this recipe your own!
How do I get the vibrant red color in my red velvet cheesecake?
This is a common question, and the answer is color concentration! Don’t rely on those little bottles of liquid food coloring; they just add too much water to your carefully balanced batter. You really need to invest in a good quality *gel* food coloring. Gel colors are super concentrated, so a small amount gives you that jaw-dropping, deep red hue without diluting your batter. Also, make sure the small bit of cocoa powder you use in the red velvet portion is definitely unsweetened, as that helps the red color stand out more vibrantly. If you are looking for more tips on how to make cheesecake at home with great results, check out this resource!
What is the best way to slice this decadent layered dessert cleanly?
This is the moment of truth after all that chilling time! You don’t want to ruin the presentation by having the filling drag or smear when you cut it. My go-to method for a clean slice is the hot-and-dry knife trick. Grab a tall glass of very hot water, dip your sharpest knife blade in until it’s steaming, wipe it completely dry, and then make one smooth cut. Wipe the knife clean again and reheat it in the water before the next slice. Do this every single time, and you’ll get perfect wedges every time. For another fantastic recipe idea, check out these tips for amazing results over at baking guides!
I hope those answers help you jump into baking this weekend! If something else pops up, feel free to browse my posts on easy weeknight dinners for totally different inspiration, and don’t hesitate to reach out if you have more questions!
Share Your Showstopping Red Velvet Cheesecake Creations
Now that you’ve braved the water bath and chilled your masterpiece, I just have to see it! Sharing your success is honestly the best part of my job. If you loved making this red velvet cheesecake, seriously, give the recipe a five-star rating—it helps other bakers find it, too! Leave a comment telling me how your swirls turned out or which holiday you served it for. You can always reach out directly on my contact page if you have any last-minute questions!
PrintUltimate Creamy Red Velvet Cheesecake with Oreo Crust
Create a showstopping dessert with this recipe for an ultra-creamy Red Velvet Cheesecake. It features a rich Oreo crust and a smooth, decadent filling perfect for holidays or special parties.
- Prep Time: 30 min
- Cook Time: 75 min
- Total Time: 8 hours 45 min
- Yield: 12 servings 1x
- Category: Dessert
- Method: Baking
- Cuisine: American
- Diet: Vegetarian
Ingredients
- 1 1/2 cups crushed Oreo cookies
- 1/4 cup unsalted butter, melted
- 24 ounces cream cheese, softened
- 1 1/2 cups granulated sugar
- 1/4 cup all-purpose flour
- 1 teaspoon vanilla extract
- 1/2 teaspoon salt
- 4 large eggs, room temperature
- 1 cup sour cream, room temperature
- 1 tablespoon white vinegar
- 1 teaspoon red food coloring (gel preferred)
- 1 tablespoon unsweetened cocoa powder
- 1 teaspoon baking soda
- 1/2 cup buttermilk
- 1/2 cup vegetable oil
- 1 teaspoon white vinegar
- 1 teaspoon vanilla extract
- 1 teaspoon red food coloring
- 2 tablespoons all-purpose flour
- 1 large egg
- 1/2 cup powdered sugar (for topping)
- 2 tablespoons heavy cream (for topping)
Instructions
- Preheat your oven to 350°F (175°C). Wrap the outside of a 9-inch springform pan tightly with heavy-duty aluminum foil.
- Prepare the Oreo crust: Mix the crushed Oreos and melted butter. Press the mixture firmly into the bottom of the prepared springform pan. Bake for 10 minutes. Let cool while you prepare the filling.
- Reduce the oven temperature to 325°F (160°C).
- Make the cheesecake layer: In a large bowl, beat the softened cream cheese, granulated sugar, flour, vanilla extract, salt, and 1 teaspoon of red food coloring until smooth. Beat in the eggs one at a time, mixing just until combined after each addition. Mix in the sour cream and 1 tablespoon of white vinegar. Do not overmix.
- Prepare the red velvet batter: In a separate bowl, whisk together the cocoa powder, baking soda, buttermilk, oil, 1 teaspoon of white vinegar, 1 teaspoon of vanilla extract, 1 teaspoon of red food coloring, 2 tablespoons of flour, and 1 egg until just combined.
- Assemble the cheesecake: Pour half of the cheesecake batter over the cooled crust. Gently spoon half of the red velvet batter over the cheesecake layer. Repeat with the remaining batters, alternating layers to create a swirl effect. Use a knife to gently swirl the layers together slightly.
- Bake the cheesecake in a water bath: Place the foil-wrapped springform pan into a larger roasting pan. Carefully pour hot water into the roasting pan until it reaches halfway up the sides of the springform pan.
- Bake for 60 to 75 minutes, or until the edges are set but the center still has a slight jiggle.
- Turn off the oven. Prop the oven door open slightly and let the cheesecake cool inside the oven for 1 hour. This slow cooling prevents cracking.
- Remove the cheesecake from the water bath and foil. Cool completely on a wire rack. Once cool, refrigerate for at least 6 hours, or preferably overnight, before serving.
- Prepare the topping: Beat the powdered sugar and heavy cream until light and fluffy. Spread or pipe over the chilled cheesecake before slicing.
Notes
- Use room temperature ingredients for the cheesecake filling; this helps prevent lumps and ensures a creamy texture.
- Gel food coloring provides a deeper, more vibrant red color than liquid coloring.
- To achieve the best swirl effect, alternate dollops of the two batters rather than pouring them in one continuous stream.
Nutrition
- Serving Size: 1 slice
- Calories: 450
- Sugar: 35g
- Sodium: 320mg
- Fat: 30g
- Saturated Fat: 18g
- Unsaturated Fat: 12g
- Trans Fat: 0.5g
- Carbohydrates: 40g
- Fiber: 1g
- Protein: 8g
- Cholesterol: 110mg