
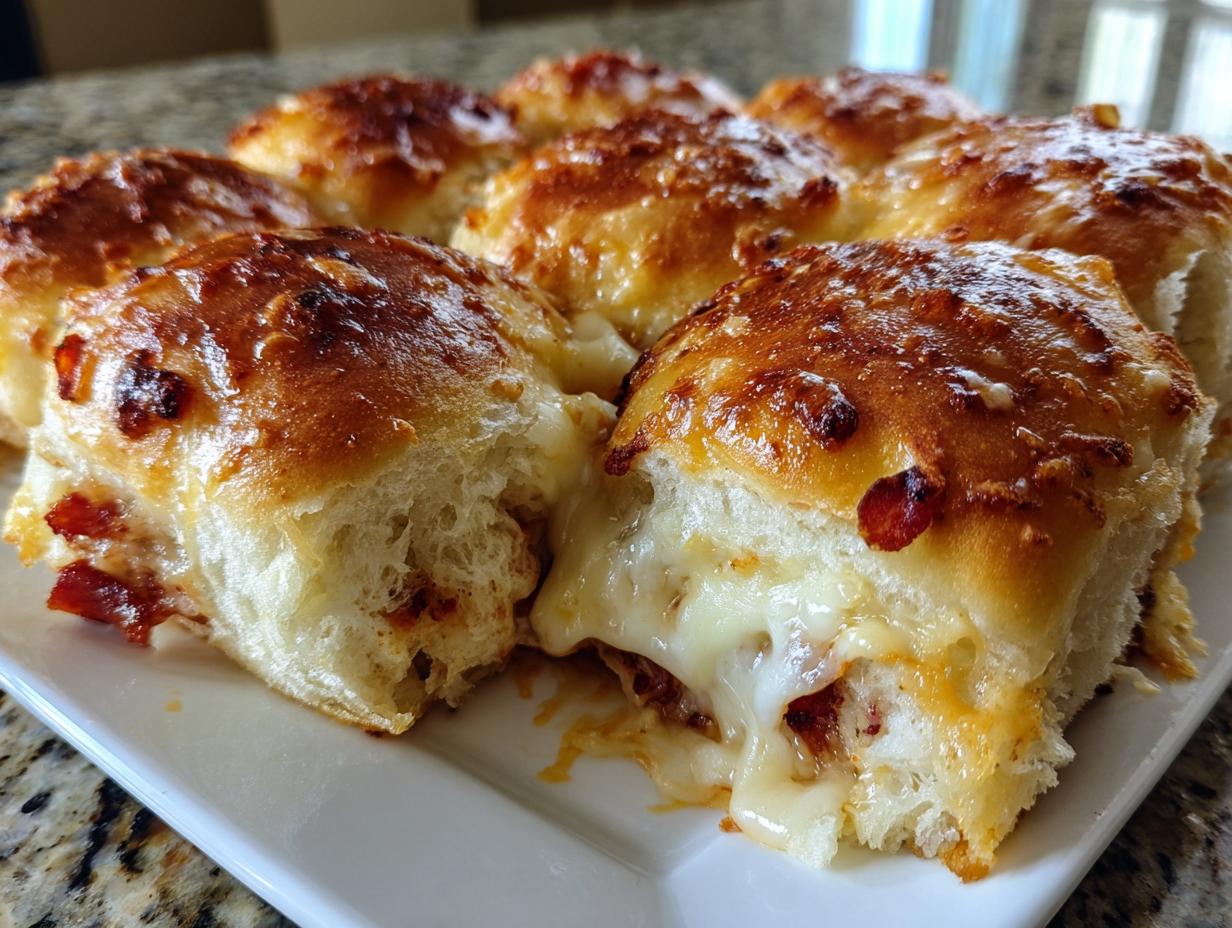
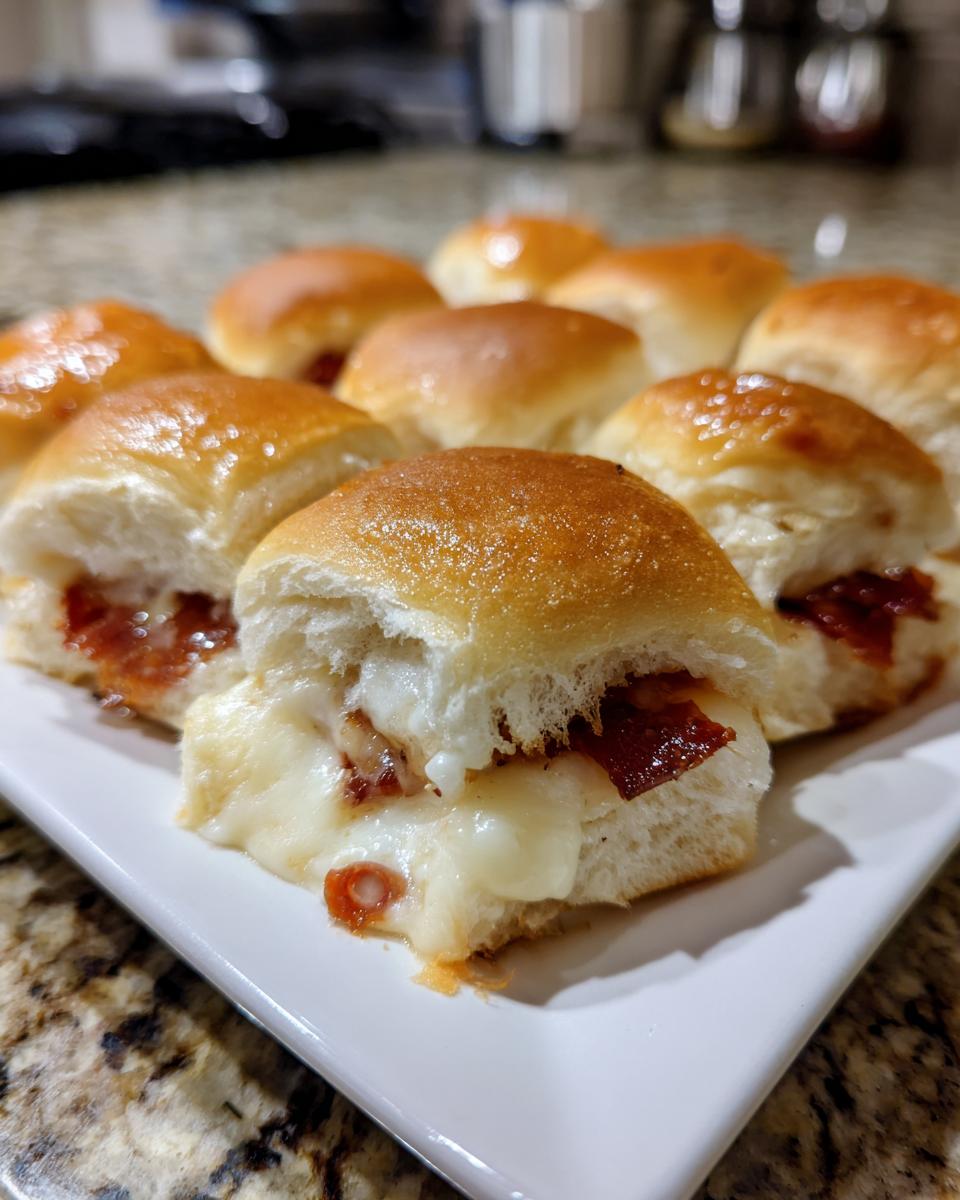
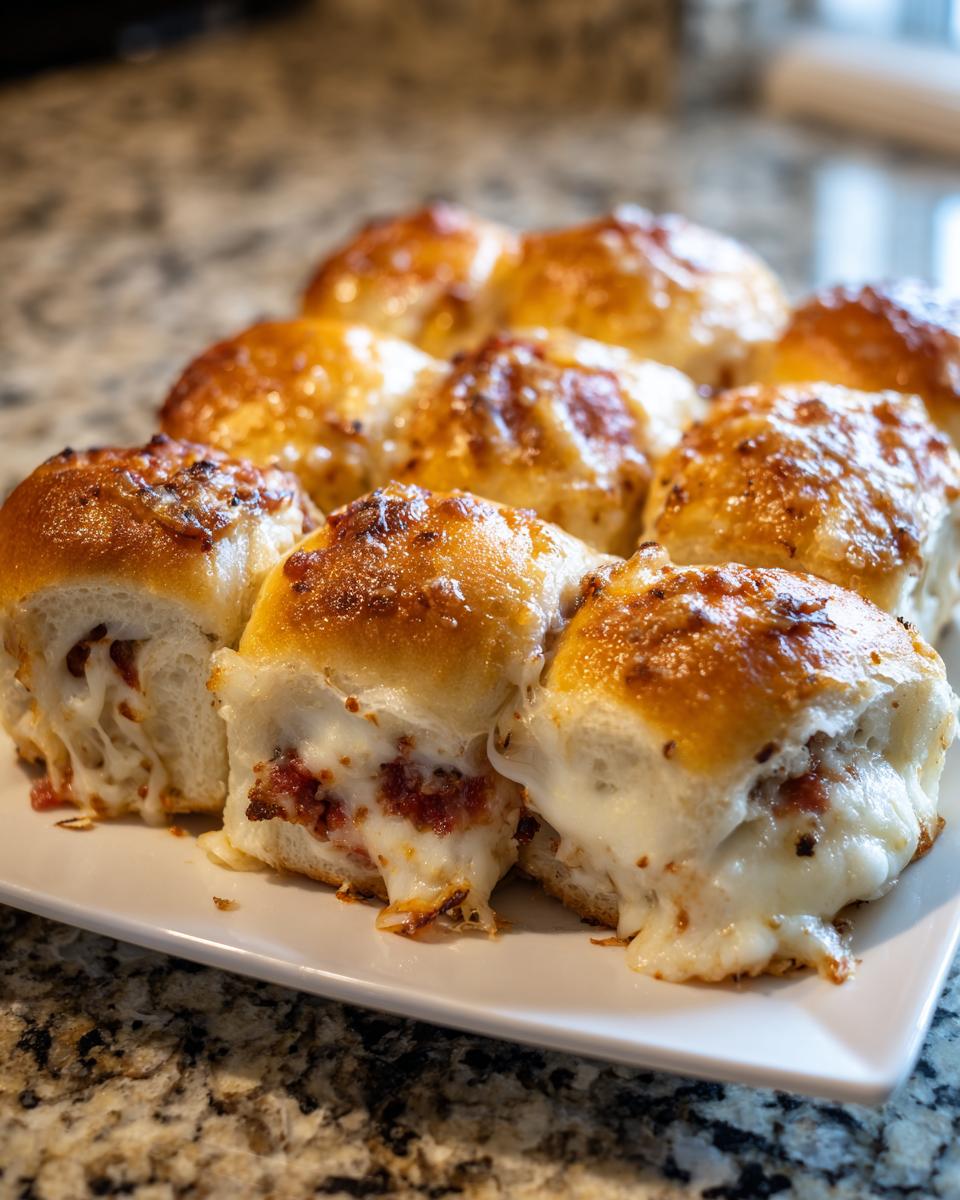
Sometimes, you just need that flavor hug, right? You know, the kind of food that tastes like pure comfort but requires almost zero effort? That’s exactly where these incredible pizza sliders come into my life—and hopefully yours soon! When I was deep in the whirlwind of running my old corporate events business, finding recipes that were fast, shockingly easy, but still looked impressive on a platter felt like searching for a unicorn. Well, I found it! These baked, cheesy, pull-apart sandwiches are my go-to for game day, last-minute appetizers, or when the kids need a fun dinner in under thirty minutes. Trust me, once you pull this pan out of the oven, the whole room will smell like the best part of pizza night. If you want to learn more about my journey from corporate planning to finding that sweet spot of easy, reliable baking, you can check out my story over on the About Page!
- Why You Will Love These Easy Pizza Sliders Recipe
- Gathering Ingredients for Perfect Pizza Sliders
- How to Make Baked Pizza Sliders Step-by-Step
- Tips for Success with Your Pepperoni Pizza Sliders
- Serving Suggestions for Game Day Sliders
- Storage and Reheating Cheesy Slider Sandwiches
- Frequently Asked Questions About Making Pizza Sliders
- Estimated Nutrition for These Family Dinner Sliders
- Share Your Quick Appetizer Idea
- Tips for Success with Your Pepperoni Pizza Sliders
- Serving Suggestions for Game Day Sliders
- Storage and Reheating Cheesy Slider Sandwiches
- Frequently Asked Questions About Making Pizza Sliders
- Estimated Nutrition for These Family Dinner Sliders
- Share Your Quick Appetizer Idea
Why You Will Love These Easy Pizza Sliders Recipe
I’ve developed countless impressive mains over the years, but honestly, sometimes the simplest things bring the most joy. These little sandwiches hit that sweet spot every single time. They are the definition of low-effort, high-reward food that never gets left on the platter at a party.
- They are shockingly fast! We’re talking less than 10 minutes of actual prep time before they head into the oven.
- They are the ultimate crowd-pleaser; kids, teens, and adults go absolutely wild for that gooey, savory center.
- We rely on soft, sweet Hawaiian rolls—no need to fuss with making dough or slicing individual buns. Pure ease!
- The garlic butter topping makes everything taste instantly gourmet, even though it takes literally 30 seconds to whip up.
If you are looking for more fuss-free, fun food for your next gathering, you have to check out my roundup of my favorite Appetizers and Party Snacks!
Gathering Ingredients for Perfect Pizza Sliders
Okay, the beauty of these addictive pizza sliders is that they come together using ingredients you probably already have or can grab in one speedy trip. When I was planning big events, I loved recipes that relied on readily available, good-quality basics. My biggest piece of advice here is about the rolls—don’t skimp on the Hawaiian sweet rolls!
Their slight sweetness is what balances the savory fillings perfectly. If you’ve ever made my Garlic Bread, you know how fantastic those rolls are even before we add cheese!
Here is exactly what you’ll need for a dozen cheesy, saucy bites:
- 1 (12-count) package Hawaiian sweet rolls
- 1 cup pizza sauce or marinara sauce
- 1 cup shredded mozzarella cheese
- 1 cup sliced pepperoni
- 1/2 cup (1 stick) unsalted butter, melted
- 1 teaspoon garlic powder
- 1/2 teaspoon dried Italian seasoning
- 1/4 cup grated Parmesan cheese
If you skip one thing, don’t skip the butter—it’s our foundation for that gorgeous, crisp top!
Ingredient Notes and Substitutions for Your Pizza Sliders
Because we want maximum flavor with minimum fuss, let’s chat about making smart swaps for your hawaiian roll pizza sliders. For the sauce, use a really flavorful marinara. A bland sauce means bland sliders, so choose one with good garlic or basil notes!
If you don’t have pepperoni on hand, ham or cooked, crumbled Italian sausage works beautifully. As for cheese, provolone melts wonderfully alongside the mozzarella if you want an even gooier experience. Just make sure your mozzarella is shredded rather than fresh balls, because those fresh ones release too much water when baked.
Also, if you’re making these for a crowd and need to stretch them, you can easily double the recipe and use a 9×13 pan twice, or use a slightly larger 10×15 catering dish—just keep an eye on those bake times!
How to Make Baked Pizza Sliders Step-by-Step
This is where the magic happens, and honestly, it’s faster than waiting for delivery! We aren’t making dough from scratch today—we are relying on those trusty Hawaiian rolls—which means we can jump right into stacking. Before you do anything else, get that oven warmed up to 350°F (175°C). A cold oven is the enemy of a beautiful, gooey melt!
Once the oven is ready, lightly grease a 9×13 inch baking dish. This step keeps things tidy, and trust me, you don’t want to scrub baked cheese later!
Now for the fun part: slicing the rolls. This is the trickiest physical part, but if you use a long, serrated knife, you can usually slice the entire package horizontally in one go while they are still connected. Place the bottom layer of rolls right into your prepared dish. If they separate a bit, don’t sweat it; they’ll cuddle back together in the oven.
Next, we layer! Sauce goes down first. Here’s my little moment of wisdom: don’t go overboard with the pizza sauce! If you pile it on too thick, you’ll end up with soggy bottoms when you make these baked pizza sliders. Just enough to lightly coat the bread is perfect—think of it as a thin, flavor-packed blanket.
Layer that sauce with the mozzarella, and then top it all off with your pepperoni. Finally, place the top half of the rolls gently over the pepperoni layer. Don’t press down too hard yet!
Preparing the Garlic Butter Slider Topping
If you want to know the secret that takes these from good to MUST-HAVE, it’s this garlic butter topping. It’s what truly makes these pizza sliders irresistible! It’s so simple, but that hint of Italian seasoning with the sharp garlic powder makes the top crust golden and flavorful.
- Grab a small bowl and toss in your stick of melted butter.
- Whisk in the garlic powder and the dried Italian seasoning until they are totally incorporated.
- Once everything is mixed, brush this liquid gold evenly over the entire top surface of the rolls. Make sure you get those little corners!
- Finish by sprinkling that grated Parmesan cheese across the top. It browns up beautifully under the heat.
Baking Instructions for Perfect Pull Apart Pizza Sliders
We use a two-stage baking method here, which is crucial for ensuring everything melts without burning the beautiful garlic butter topping before the cheese is fully melted halfway through. This makes them the easiest pull apart pizza sliders!
- Cover the baking dish loosely with aluminum foil. This traps the steam, helps melt the cheese wonderfully, and softens those rolls just right.
- Bake covered for 15 minutes at 350°F.
- Now, carefully remove the foil. This is important! We need direct heat now to get that golden-brown, slightly crisp exterior on the tops.
- Bake uncovered for another 5 to 7 minutes, just until the cheese is totally molten and the top looks gorgeously golden. Watch closely in this second phase so nothing scorches!
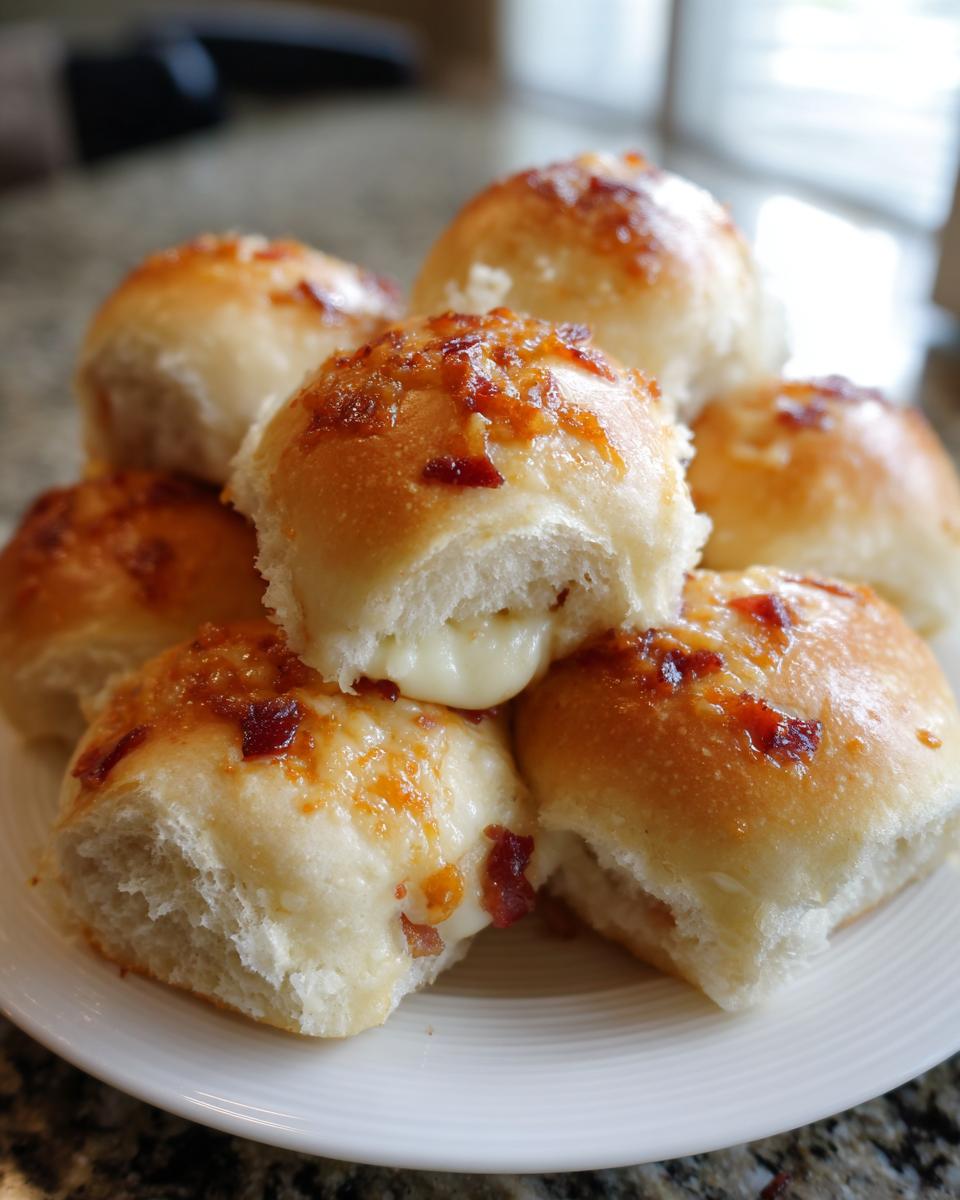
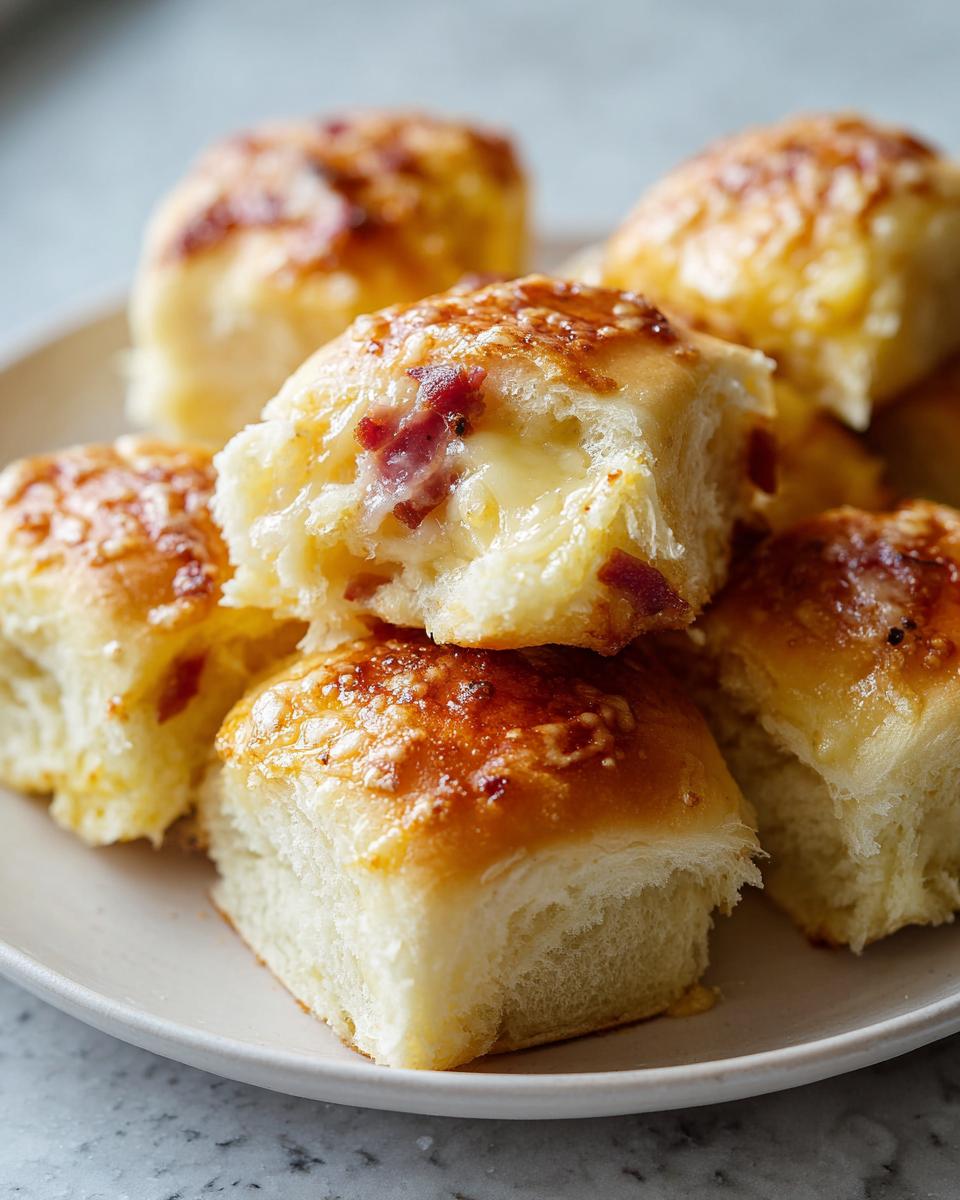
Once they are out, let them sit for five blissful minutes. They are piping hot, and letting them rest helps them set up just enough so they don’t fall apart entirely when you slice them. If you’re curious about making pizza dough completely from scratch sometime—maybe for a weekend project—I have a fantastic Easy Homemade Pizza Dough Recipe for you to try!
Tips for Success with Your Pepperoni Pizza Sliders
I always promise foolproof recipes, right? That means working out those little hiccups so your results are perfect every time. When making these pepperoni pizza sliders, the main enemy is sogginess, followed closely by uneven melting.
First tip: Don’t use canned sliced pepperoni that’s packed in liquid; dry off any pepperoni you use! Those extra oils and moisture will seep down and dampen your bottom rolls.
Second, make sure that butter mixture is evenly distributed across the tops of the rolls before you sprinkle that Parmesan. A bald spot means a less flavorful top piece! The foil during the initial bake is non-negotiable; it steams the interior layers, ensuring every single bite is warm right to the center. It’s all about balancing that gooey middle with a topping that doesn’t burn—easy peasy!
Serving Suggestions for Game Day Sliders
These little bites are powerful enough to be a main course for a quick lunch, but they truly shine when served up as party fuel! Since they are so savory, you want dips that bring either a cool contrast or a deeper tomato punch.
I always serve these alongside a big bowl of marinara sauce on the side for extra dipping action—it’s just essential for dipping those crust edges! If you’re setting up a bigger spread, these pair wonderfully with my recipe for Loaded Nachos for the ultimate comfy feast. Alternatively, nothing beats warm, homemade Queso Dip if you want to turn this into a full cheese-fest!
Storage and Reheating Cheesy Slider Sandwiches
Now, if, by some miracle, you have any leftovers of these cheesy slider sandwiches (which I highly doubt!), here’s how to keep them happy. Store them in an airtight container at room temperature for up to two days. They firm up a bit when they cool, which is totally normal.
When you want to reheat them, please, please avoid the microwave if you can! The microwave will make those sweet rolls spongy and soft in a not-so-good way. Instead, pop them back into a 325°F oven, covered lightly with foil, for about 8 to 10 minutes.
This allows the residual moisture to heat back up gently and re-melts the cheese without turning the bread tough. If you want that little bit of crispness back on top, just take the foil off for the last minute or two. That second-day reheat is pure comfort food magic!
Frequently Asked Questions About Making Pizza Sliders
What’s the easiest way to make this easy pizza sliders recipe if I’m short on time?
Honestly, the key to keeping this an easy pizza sliders recipe is strictly using the pre-sliced Hawaiian rolls. If you’re truly racing the clock, you can use a jarred pizza sauce that you already know you love and make sure your pepperoni is pre-sliced. The garlic butter topping only takes about two minutes to mix!
Can I use different meats or vegetarian options in these family dinner sliders?
Absolutely! These are fantastic family dinner sliders because they are so customizable. You can swap fatty pepperoni for sliced turkey pepperoni or ham. For vegetarian options, skip the meat and perhaps double up on cheese, or add sliced mushrooms that have been sautéed briefly beforehand to remove excess moisture.
Can you freeze pizza sliders?
I wouldn’t recommend freezing them assembled, especially because of the sauce and the delicate rolls. If you want to prep ahead, you can assemble everything except the sauce and the butter topping, wrap the whole unbaked tray tightly, and freeze it. Then, thaw it overnight in the fridge before adding the sauce and butter and baking as directed!
Do I have to use Hawaiian rolls?
While I highly recommend the sweetness they provide, if you absolutely cannot find them, you can use any soft slider bun. Just make sure they are thin-sliced like the King’s Hawaiian ones, as thicker buns will need much longer in the oven to heat through.
Estimated Nutrition for These Family Dinner Sliders
Because we are using wonderful, savory ingredients like pepperoni and that rich butter topping, these are definitely meant for indulgent occasions, game days, or fun weeknight treats! Remember, these nutrition facts are just an estimate, computed based on the ingredients listed above, and can change based on your brand choices (especially your sauce!).
- Serving Size: 1 slider
- Calories: 280
- Fat: 15g
- Carbohydrates: 25g
- Protein: 12g
They clock in with a decent amount of protein thanks to the cheese and meat, which helps make them satisfying for a snack or small meal!
Share Your Quick Appetizer Idea
I truly hope these pizza sliders bring as much easy joy to your house as they do to mine! When you take that first bite—that perfect mix of soft bread, hot sauce, and melted salty cheese—you’ve created one of those little homemade happy moments!
If you make this recipe, please come back and leave a rating and a comment. I absolutely live to hear how you adapted them or how fast they disappeared at your party! Feel free to reach out with any questions over on my Contact Page. Happy baking (or should I say, happy stacking)!
Tips for Success with Your Pepperoni Pizza Sliders
I always promise foolproof recipes, right? That means working out those little hiccups so your results are perfect every time. When making these pepperoni pizza sliders, the main enemy is sogginess, followed closely by uneven melting.
First tip: Don’t use canned sliced pepperoni that’s packed in liquid; dry off any pepperoni you use! Those extra oils and moisture will seep down and dampen your bottom rolls.
Second, make sure that butter mixture is evenly distributed across the tops of the rolls before you sprinkle that Parmesan. A bald spot means a less flavorful top piece! The foil during the initial bake is non-negotiable; it steams the interior layers, ensuring every single bite is warm right to the center. It’s all about balancing that gooey middle with a topping that doesn’t burn—easy peasy!
If you want more of my go-to flavor builders, you absolutely need to check out my recipe for Easy Homemade Garlic Butter; it’s the perfect base for so many things!
Serving Suggestions for Game Day Sliders
These little bites are powerful enough to be a main course for a quick lunch, but they truly shine when served up as party fuel! Since they are so savory, you want dips that bring either a cool contrast or a deeper tomato punch.
I always serve these alongside a big bowl of marinara sauce on the side for extra dipping action—it’s just essential for dipping those crust edges! If you’re setting up a bigger spread, these pair wonderfully with my recipe for Loaded Nachos for the ultimate comfy feast. Alternatively, nothing beats warm, homemade Queso Dip if you want to turn this into a full cheese-fest!
For lighter fare that balances out all that rich cheese, a crisp, vinegar-based veggie tray is always a hit. Think crunchy carrots, celery, and bell peppers. They give everyone a little break before they dive back in for a second round of these phenomenal game day sliders!
Storage and Reheating Cheesy Slider Sandwiches
Now, if, by some miracle, you have any leftovers of these cheesy slider sandwiches (which I highly doubt!), here’s how to keep them happy. Store them in an airtight container at room temperature for up to two days. They firm up a bit when they cool, which is totally normal.
When you want to reheat them, please, please avoid the microwave if you can! The microwave will make those sweet rolls spongy and soft in a not-so-good way. Instead, pop them back into a 325°F oven, covered lightly with foil, for about 8 to 10 minutes.
This allows the residual moisture to heat back up gently and re-melts the cheese without turning the bread tough. If you want that little bit of crispness back on top, just take the foil off for the last minute or two. That second-day reheat is pure comfort food magic!
Frequently Asked Questions About Making Pizza Sliders
I know when I try a new quick recipe, I always have a few little nagging questions hanging around before I commit! Don’t worry, I’ve tucked the answers to the most common things I get asked about this easy pizza sliders recipe right here. I want you to feel totally confident when you head to the kitchen, especially when trying to squeeze a fun meal into a busy schedule. If you’re looking for more ideas that simplify your weeknights, check out my collection of Easy Weeknight Dinners!
Can I use regular dinner rolls instead of Hawaiian rolls?
Yes, you totally can, though they won’t have that signature sweet-and-savory balance that makes these so famous! If you use standard white slider buns or potato rolls, your final pizza sliders will be less sweet. Just make sure your alternative rolls are soft and similar in size so they fit nicely next to each other in the pan. They usually need about 3-5 minutes less baking time than the sweeter ones, so keep an eye on them!
Are these really freezer-friendly for easy family dinners?
That’s a great question for planning ahead for family dinner sliders! I don’t recommend freezing them fully assembled with the sauce, as the sauce can make the rolls soggy during thawing. What I *do* suggest is assembling everything *except* the sauce and the garlic butter glaze. Layer the cheese and pepperoni, wrap the whole raw bundle tightly in plastic wrap and foil, and freeze it! Thaw overnight in the fridge before adding the wet ingredients and baking.
What are some topping swaps for the pepperoni?
Pepperoni is classic, but mixing it up keeps things exciting! You can easily make these incredible by swapping in finely chopped cooked ham, cooked Italian sausage, or even thinly sliced mushrooms that you’ve sautéed first to wick away moisture. For an extra gourmet touch on your party food recipes, try using prosciutto instead of pepperoni!
Can this be made ahead for a party?
For quick appetizer ideas, prep ahead is a lifesaver! You can assemble everything—bottom bun, sauce, cheese, pepperoni, top bun—and brush on the garlic butter topping, but wrap the entire pan tightly and keep it refrigerated for up to 4 hours. Just add that final sprinkle of Parmesan cheese right before it goes into the oven so it doesn’t melt off while chilling. This is perfect for when you need those 20 minute pizza sliders ready right when the guests arrive!
Estimated Nutrition for These Family Dinner Sliders
Because we are using wonderful, savory ingredients like pepperoni and that rich butter topping, these are definitely meant for indulgent occasions, game days, or fun weeknight treats! Remember, these nutrition facts are just an estimate, computed based on the ingredients listed above, and can change based on your brand choices (especially your sauce!).
- Serving Size: 1 slider
- Calories: 280
- Fat: 15g
- Carbohydrates: 25g
- Protein: 12g
They clock in with a decent amount of protein thanks to the cheese and meat, which helps make them satisfying for a snack or small meal!
Share Your Quick Appetizer Idea
I truly hope these pizza sliders bring as much easy joy to your house as they do to mine! When you take that first bite—that perfect mix of soft bread, hot sauce, and melted salty cheese—you’ve created one of those little homemade happy moments! Even though this recipe is super simple, it always feels like a win, whether I’m serving them to my family on a Tuesday or setting them out for a huge game day crowd.
If you make this recipe, please come back and leave a rating and a comment. I absolutely live to hear how you adapted them or how fast they disappeared at your party! It helps me know which things that I create bring the most happiness to you all.
Don’t be shy—snap a picture of your beautiful tray of cheesy delights and tag me on social media! Finding that perfect, reliable quick appetizer idea that everyone devours is a huge accomplishment, and I want to celebrate that with you!
If you ever run into trouble or have a specific question about adapting the recipe, feel free to reach out directly through my Contact Page. I’m always here to help you find your happy place in the kitchen!
Happy Stacking (and eating!),
Claire
PrintEasy Baked Pepperoni Pizza Sliders with Garlic Butter Glaze

Whip up these easy pepperoni pizza sliders using soft Hawaiian rolls. They are cheesy, saucy, and topped with a simple garlic butter glaze, making them the ultimate crowd-pleaser for game day or a quick family dinner.
- Prep Time: 10 min
- Cook Time: 22 min
- Total Time: 32 min
- Yield: 12 sliders 1x
- Category: Appetizer
- Method: Baking
- Cuisine: American
- Diet: Vegetarian
Ingredients
- 1 (12-count) package Hawaiian sweet rolls
- 1 cup pizza sauce or marinara sauce
- 1 cup shredded mozzarella cheese
- 1 cup sliced pepperoni
- 1/2 cup (1 stick) unsalted butter, melted
- 1 teaspoon garlic powder
- 1/2 teaspoon dried Italian seasoning
- 1/4 cup grated Parmesan cheese
Instructions
- Preheat your oven to 350°F (175°C). Lightly grease a 9×13 inch baking dish.
- Carefully slice the entire package of Hawaiian rolls in half horizontally, keeping the rolls connected if possible. Place the bottom half of the rolls in the prepared baking dish.
- Spread the pizza sauce evenly over the bottom layer of rolls.
- Layer the mozzarella cheese over the sauce.
- Arrange the pepperoni slices over the cheese.
- Place the top half of the rolls over the pepperoni layer.
- In a small bowl, whisk together the melted butter, garlic powder, and Italian seasoning to create the garlic butter topping.
- Brush the garlic butter mixture evenly over the top of the rolls.
- Sprinkle the grated Parmesan cheese over the buttered tops.
- Cover the baking dish loosely with aluminum foil.
- Bake for 15 minutes.
- Remove the foil and bake for another 5 to 7 minutes, or until the cheese is completely melted and the tops are lightly golden brown.
- Let the sliders rest for 5 minutes before slicing them into individual portions. Serve warm.
Notes
- For extra flavor, you can add a sprinkle of dried oregano or a dash of garlic salt to the butter mixture.
- If you prefer a crispier top, remove the foil for the last 10 minutes of baking.
- Serve these cheesy slider sandwiches with extra marinara sauce on the side for dipping.
Nutrition
- Serving Size: 1 slider
- Calories: 280
- Sugar: 6
- Sodium: 650
- Fat: 15
- Saturated Fat: 7
- Unsaturated Fat: 8
- Trans Fat: 0
- Carbohydrates: 25
- Fiber: 1
- Protein: 12
- Cholesterol: 35